Essential tips for using reverb on vocals
Reverb is a common audio effect for vocals, but can often cause masking issues. In this article, we discuss how to add vocal reverb while maintaining vocal clarity.
Modern mainstream music centers around the vocal. The best mixes of our times highlight the vocals in standout ways. Don’t believe me? Go to any top-ten list right now and focus on the vocals. Do you hear how distinct they are? How polished are they? How do they cut through the mix? That’s no accident: the mix engineer spent time on that.
Reverb is a powerful audio effect in the vocal mixing process that can bring space, depth, and life into a vocal when used correctly. In this article, we’ll discuss how to get the most out of vocal reverb while avoiding the pitfalls, doing so using the iZotope


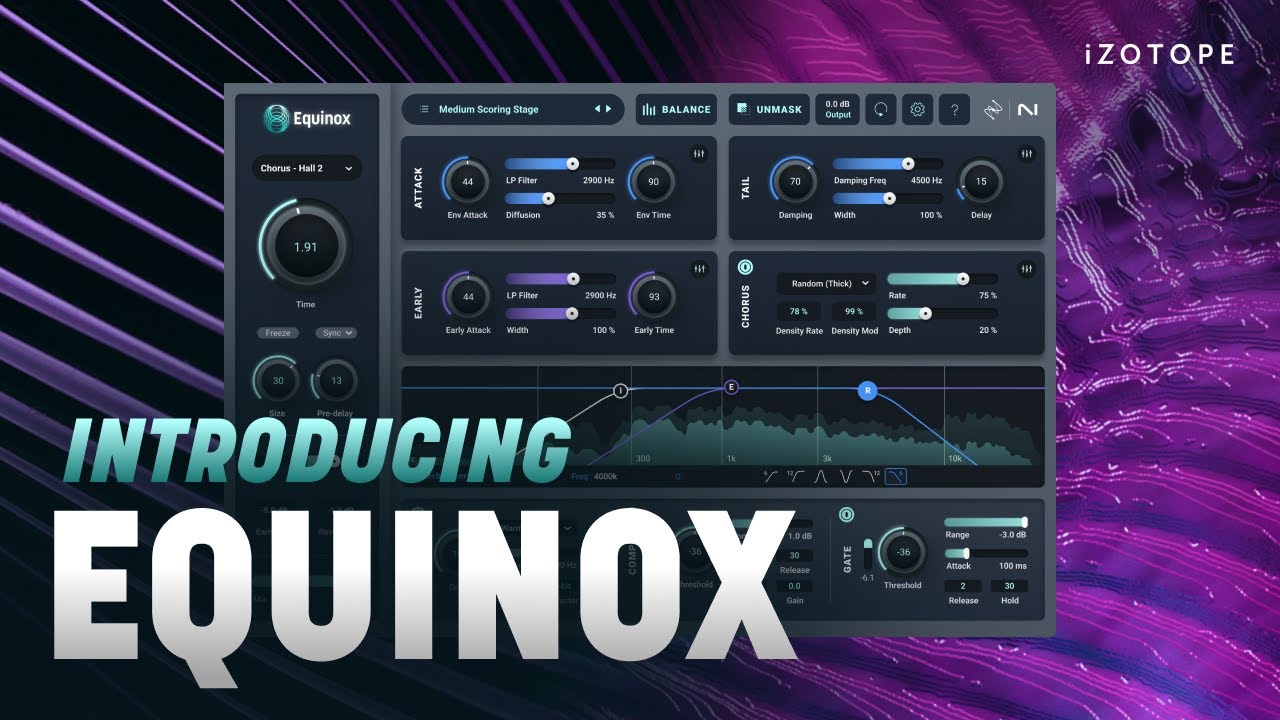
Equinox
Why use vocal reverb?
Vocal reverb adds audible space, distance, and dimension to a vocal. A vocal without reverb sounds like it’s in a void.
It also can add a sense of the dramatic – think of those classic Celene Dion ballads from the 90s; remember how reverberated they were?
Reverb is like an actor’s makeup: it smears a vocal with its reflections, masking subtle imperfections, so that the film might catch the performer in their best light.
It also simulates reflections and resonances our ears expect when hearing sound; it's an acoustic phenomenon that provides cues about the position of sounds in our environment. Let’s listen to a vocal with and without reverb, for context.
Can you hear the difference? More importantly – can you feel the difference?
Do you note how the imperfections in the recording were papered over? There’s a strong room resonance on the word “eight” in the phrase “await eight nights.” The reverb mitigates the need to “RX” the problem out.
Note what happens if I change out the reverb. You just heard a plate. How about a chamber?
Listen to how the vibe shifts just by applying a different reverb. This alone should illustrate what a powerful tool reverb can be in the vocal presentation: Even badly-recorded vocals can take on more colorful qualities with a little help from the right reverb.
How much reverb should you use on vocals?
The amount of reverb on vocals depends largely on genre, how much ambience you want, and whether the reverb is masking other elements in your mix. Keep in mind that reverb pushes vocals further back in the stereo image and introduces sound reflections into the mix that can mask other sounds, including your vocals.
Can you have too much reverb vocals?
If your vocals start losing clarity, sound too distant, or are masking other elements in your mix, then you probably have too much reverb on your vocals.
Try the following techniques to see if your reverb is taking up too much space:
- Try comparing your song to a reference track in your genre. How much reverb is your reference song using in comparison to yours?
- Judge the reverb through speakers, rather than headphones. If you’re setting reverb in headphones, you can often use too heavy of a hand in doing so.
- When in doubt, back off the effect by ten to twenty five percent. This rule of thumb works more often than not – especially when it comes to reverb.
Try using all these techniques at the same time – a/bing against a reference, using speakers, with your reverb volume backed off by ten to twenty percent. That’s a good starting point in tackling this problem.
How to use reverb on vocals
What are the best vocal reverb settings? Typically, you want to set a 100% wet reverb on an aux channel using a reverb type that works for your song, a pre-delay time that allows the dry vocal to cut through, and decay time that aligns with your song's tempo. You then want to raise the level of the reverb aux channel to taste, EQing out frequencies that mask the main vocal. Let's dive into the details:
1. Use reverb on a dedicated reverb channel
While you can add reverb directly on vocals as an insert effect, the recommended method is to add reverb on an aux channel and route the vocals there for mix bus processing. Sending the vocals to an aux channel is the recommended method for adding reverb to vocals because it allows you to process the wet and dry signal separately, giving you greater control of the mix.
Note that people often use a few rounds of EQ, compression, de-essing, and even saturation on vocals. This makes placement of the reverb paramount: putting the effect before or between the others will completely change what happens to the mix.
Observe this vocal with de-breathing, de-essing, compression, eq, and saturation. Finally, we’ve got a plate reverb courtesy of Equinox, used on an auxiliary return, positioned after all of these effects.
Now let’s put the reverb as an insert effect in front of all those effects. We’ll drop the mix of the reverb to 30 percent so we get relatively the same amount of dry signal.
Even though we’re getting a similar level of dry signal, the reverb is brought to the forefront, thanks to the glueing effect of the compression. The reverb also feeds the de-esser and the saturator, tickling those processors in a different way, as the signal is being conditioned by the reverb first. Finally, the de-breathing is far more obvious with reverb used as an insert effect.
There’s also practical considerations: with a reverb slapped directly on the vocal, we have to open the plugin every time we want to adjust the level of the reverb. Use the reverb as an insert, and a simple fader becomes our volume control. A reverb slapped directly on a vocal also precludes the ability to send multiple vocals to the same reverb.
Finally there’s a matter of stems: your client might want you to print stems for future archival use – and they might want those stems without the reverb.
So, sending the vocals to an aux channel is the recommended method for adding reverb, as it allows you to process the wet and dry signal separately, giving you greater control of the mix.
Think of reverb as another signal you’re adding to the mix, almost like another instrument. To add reverb on an aux track, make a new aux/bus track with a 100% wet instance of a reverb like Equinox, and send your dry vocal channel to that bus.
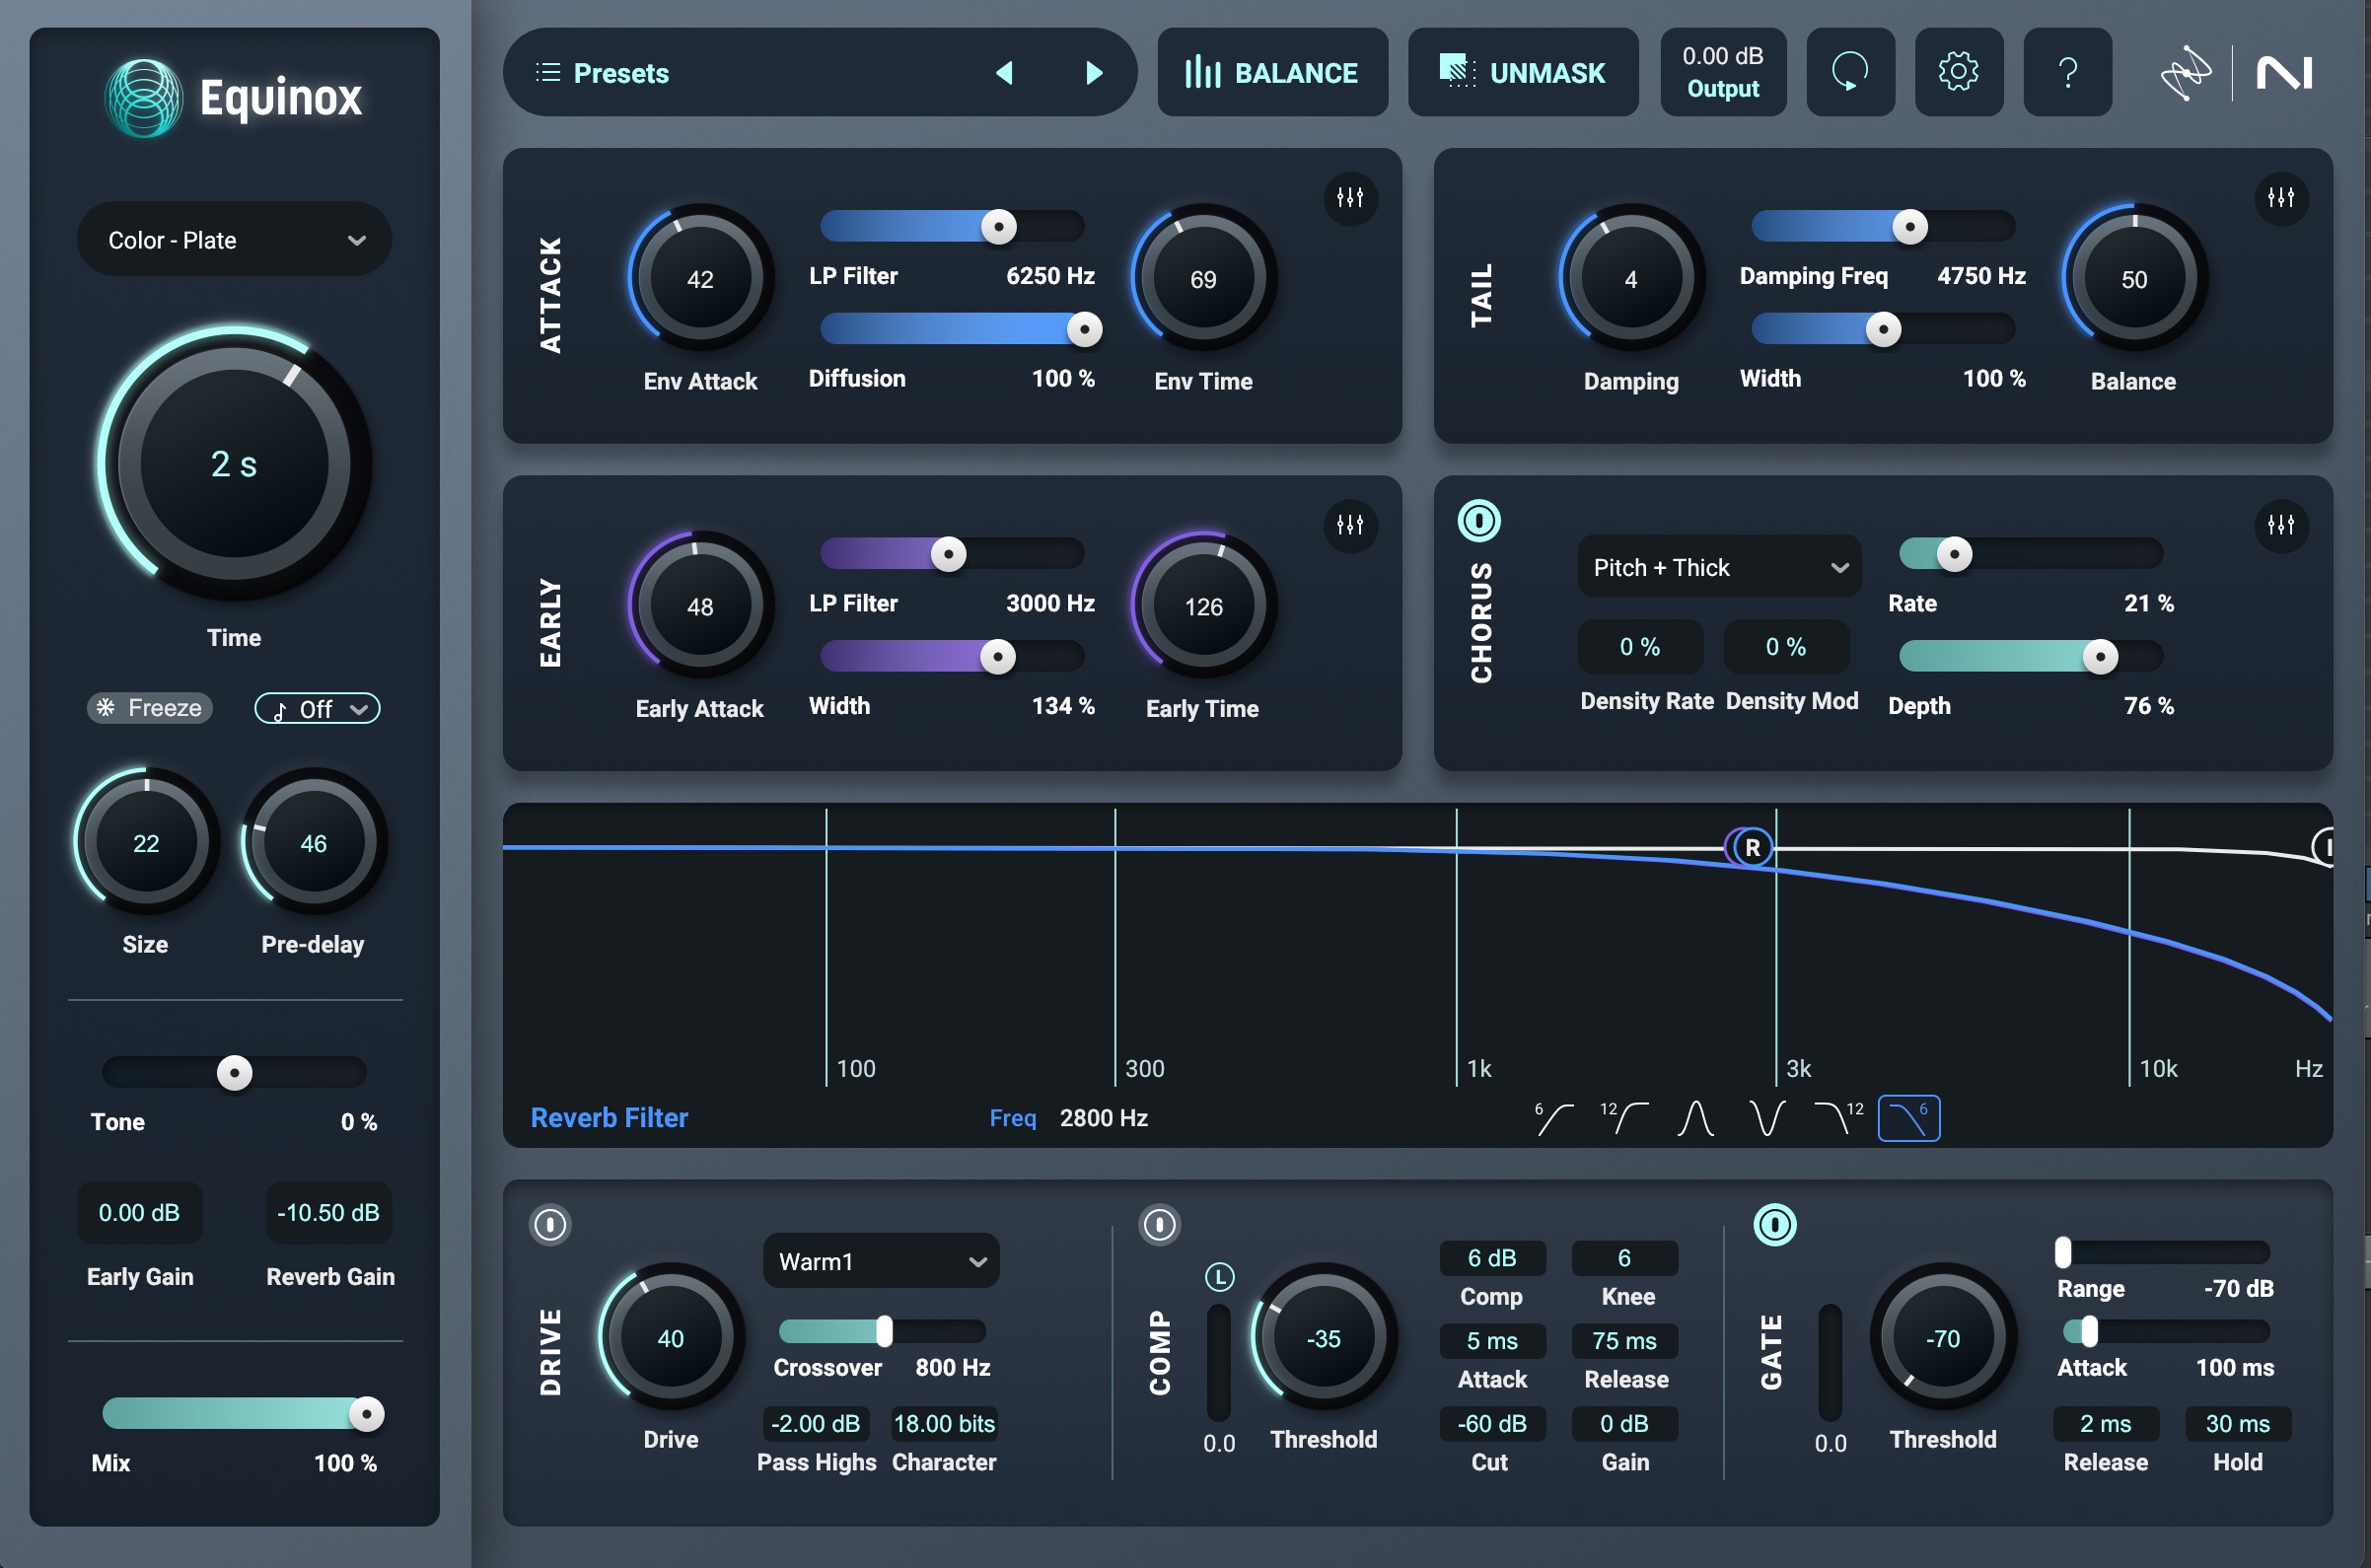
iZotope Equinox, full wet
Utilizing a send and return approach will give you much more level control for balancing, as well as for automating your vocal and its corresponding reverb.
Sometimes we might add reverb directly to the vocal, but again, you should be confident in their mixing abilities before going down this road.
2. Choose a reverb type for vocals that works for the mix
What reverb type is best for vocals? You can use any kind of reverb for vocals, but depending on the intended effect, certain reverb types might work best with the mix and the vibe you're going for.
You’ll get a lot of mileage if you spend some time learning to identify different kinds of reverb by ear. Forging an emotional connection to each kind of reverb will also go a long way to understanding how to use them.
For instance, you could use the brightness of plate reverb to help vocals cut through a busy mix.
A room reverb, on the other hand, can help vocals to sound close and intimate.
If you’re going for big and dreamy, a hall reverb might be your best bet.

Randy's Hall Preset in iZotope Equinox
Let's take a look at some different spaces in Equinox and why you might use them for your vocals.
Plate reverb
Plate reverb is a classic go-to for vocal reverb. Plate reverb is easy to make noticeable in a mix due to its often bright but smooth character with a bit of natural modulation.
The original plate reverb was simply a sheet of metal, hence the term “plate.” Engineers would affix a driver to the plate to pump music through it, and contact mics to pick up the resulting effect. The metallic attack of a plate gives the effect that bit of extra pop.
Equinox has three categories of plates.
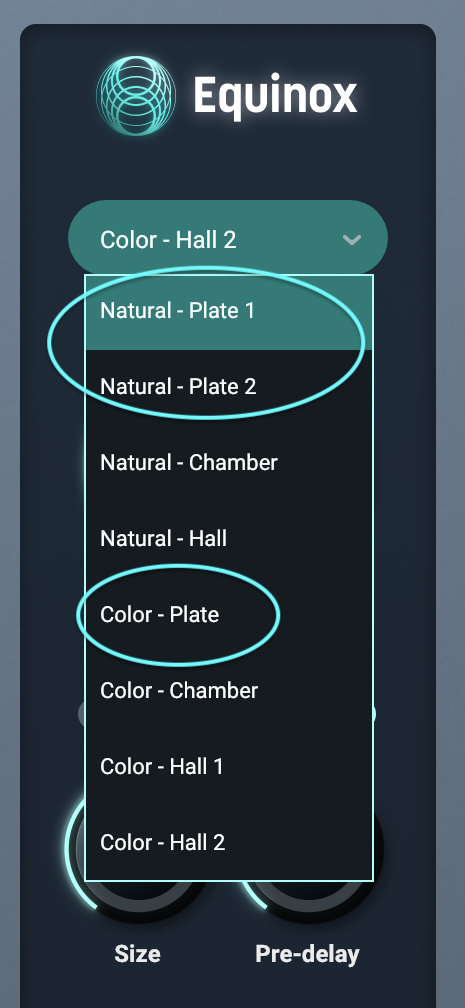
Plate reverbs in iZotope Equinox
Each of these is its own algorithm designed to give you a different tone. Let’s listen to them in their default states.
In terms of genre conventions, plates go hand in hand with both modern and classic recordings. Many of The Weeknd’s hits offer the sound of incredibly brash plates. So do the classics of Frank Sinatra, though these tend to be more rounded in tone.
Hall reverb
Hall reverbs are designed to evoke the feeling of a large concert hall, usually offering a long, smooth decay. Halls are a fantastic choice if you want to make something sound at a distance, dreamy, or epic. In terms of genre, think 90s power ballad.
Equinox offers three distinct hall algorithms. Once again, let's listen.
Chamber reverb
Chamber reverbs get their name from the dedicated reverb chambers found in vintage studios. In fact, some studios – like Capital Records – were known as much for their reverb chambers as their recording stages.
An engineer would place speakers in these chambers, put microphones a fair distance away, and route sound into the speakers. They’d hit play, record the speakers in the room, and that was the reverb.
Equinox offers two distinct Chamber algorithms.
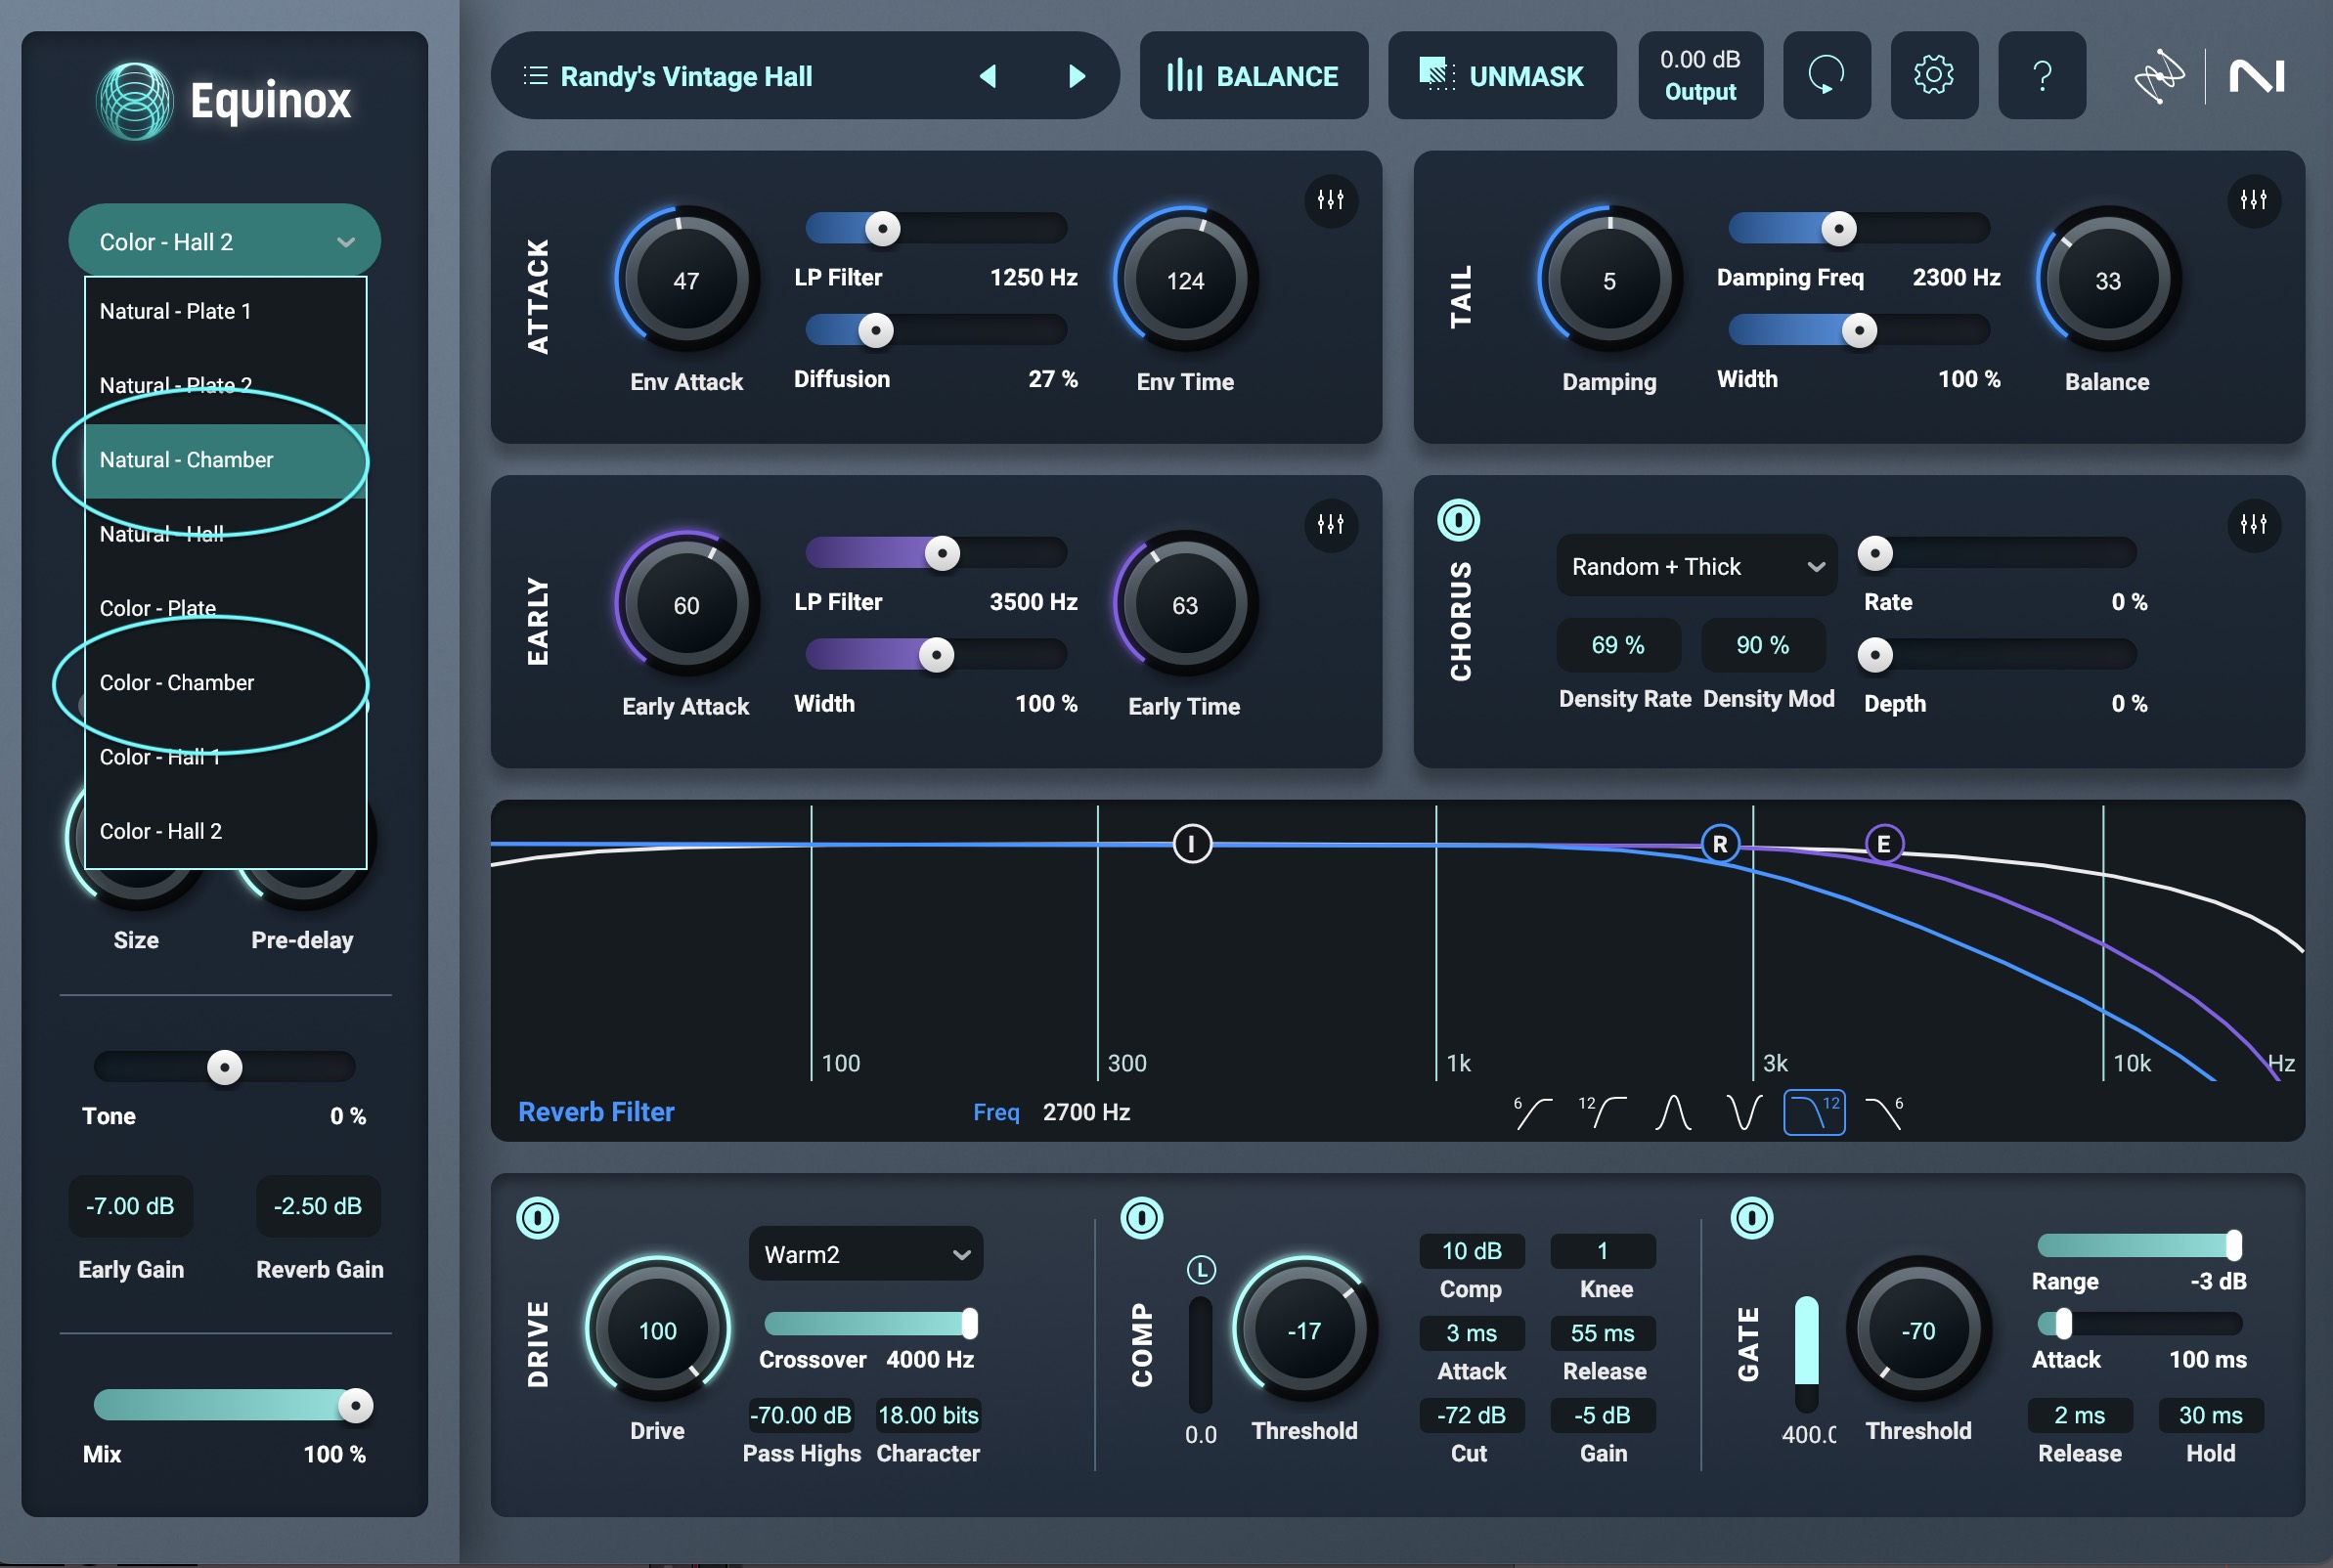
Chamber reverbs in iZotope Equinox
Room reverb
Equinox doesn’t have its own dedicated room reverb algorithm. Instead, it makes its rooms by modifying size, decay and other parameters from the algorithms provided. It’s a pretty convincing room sound. Let’s check out.
If you’re looking for rooms inside of Equinox, I’d start by exploring the presets and giving those a shot.
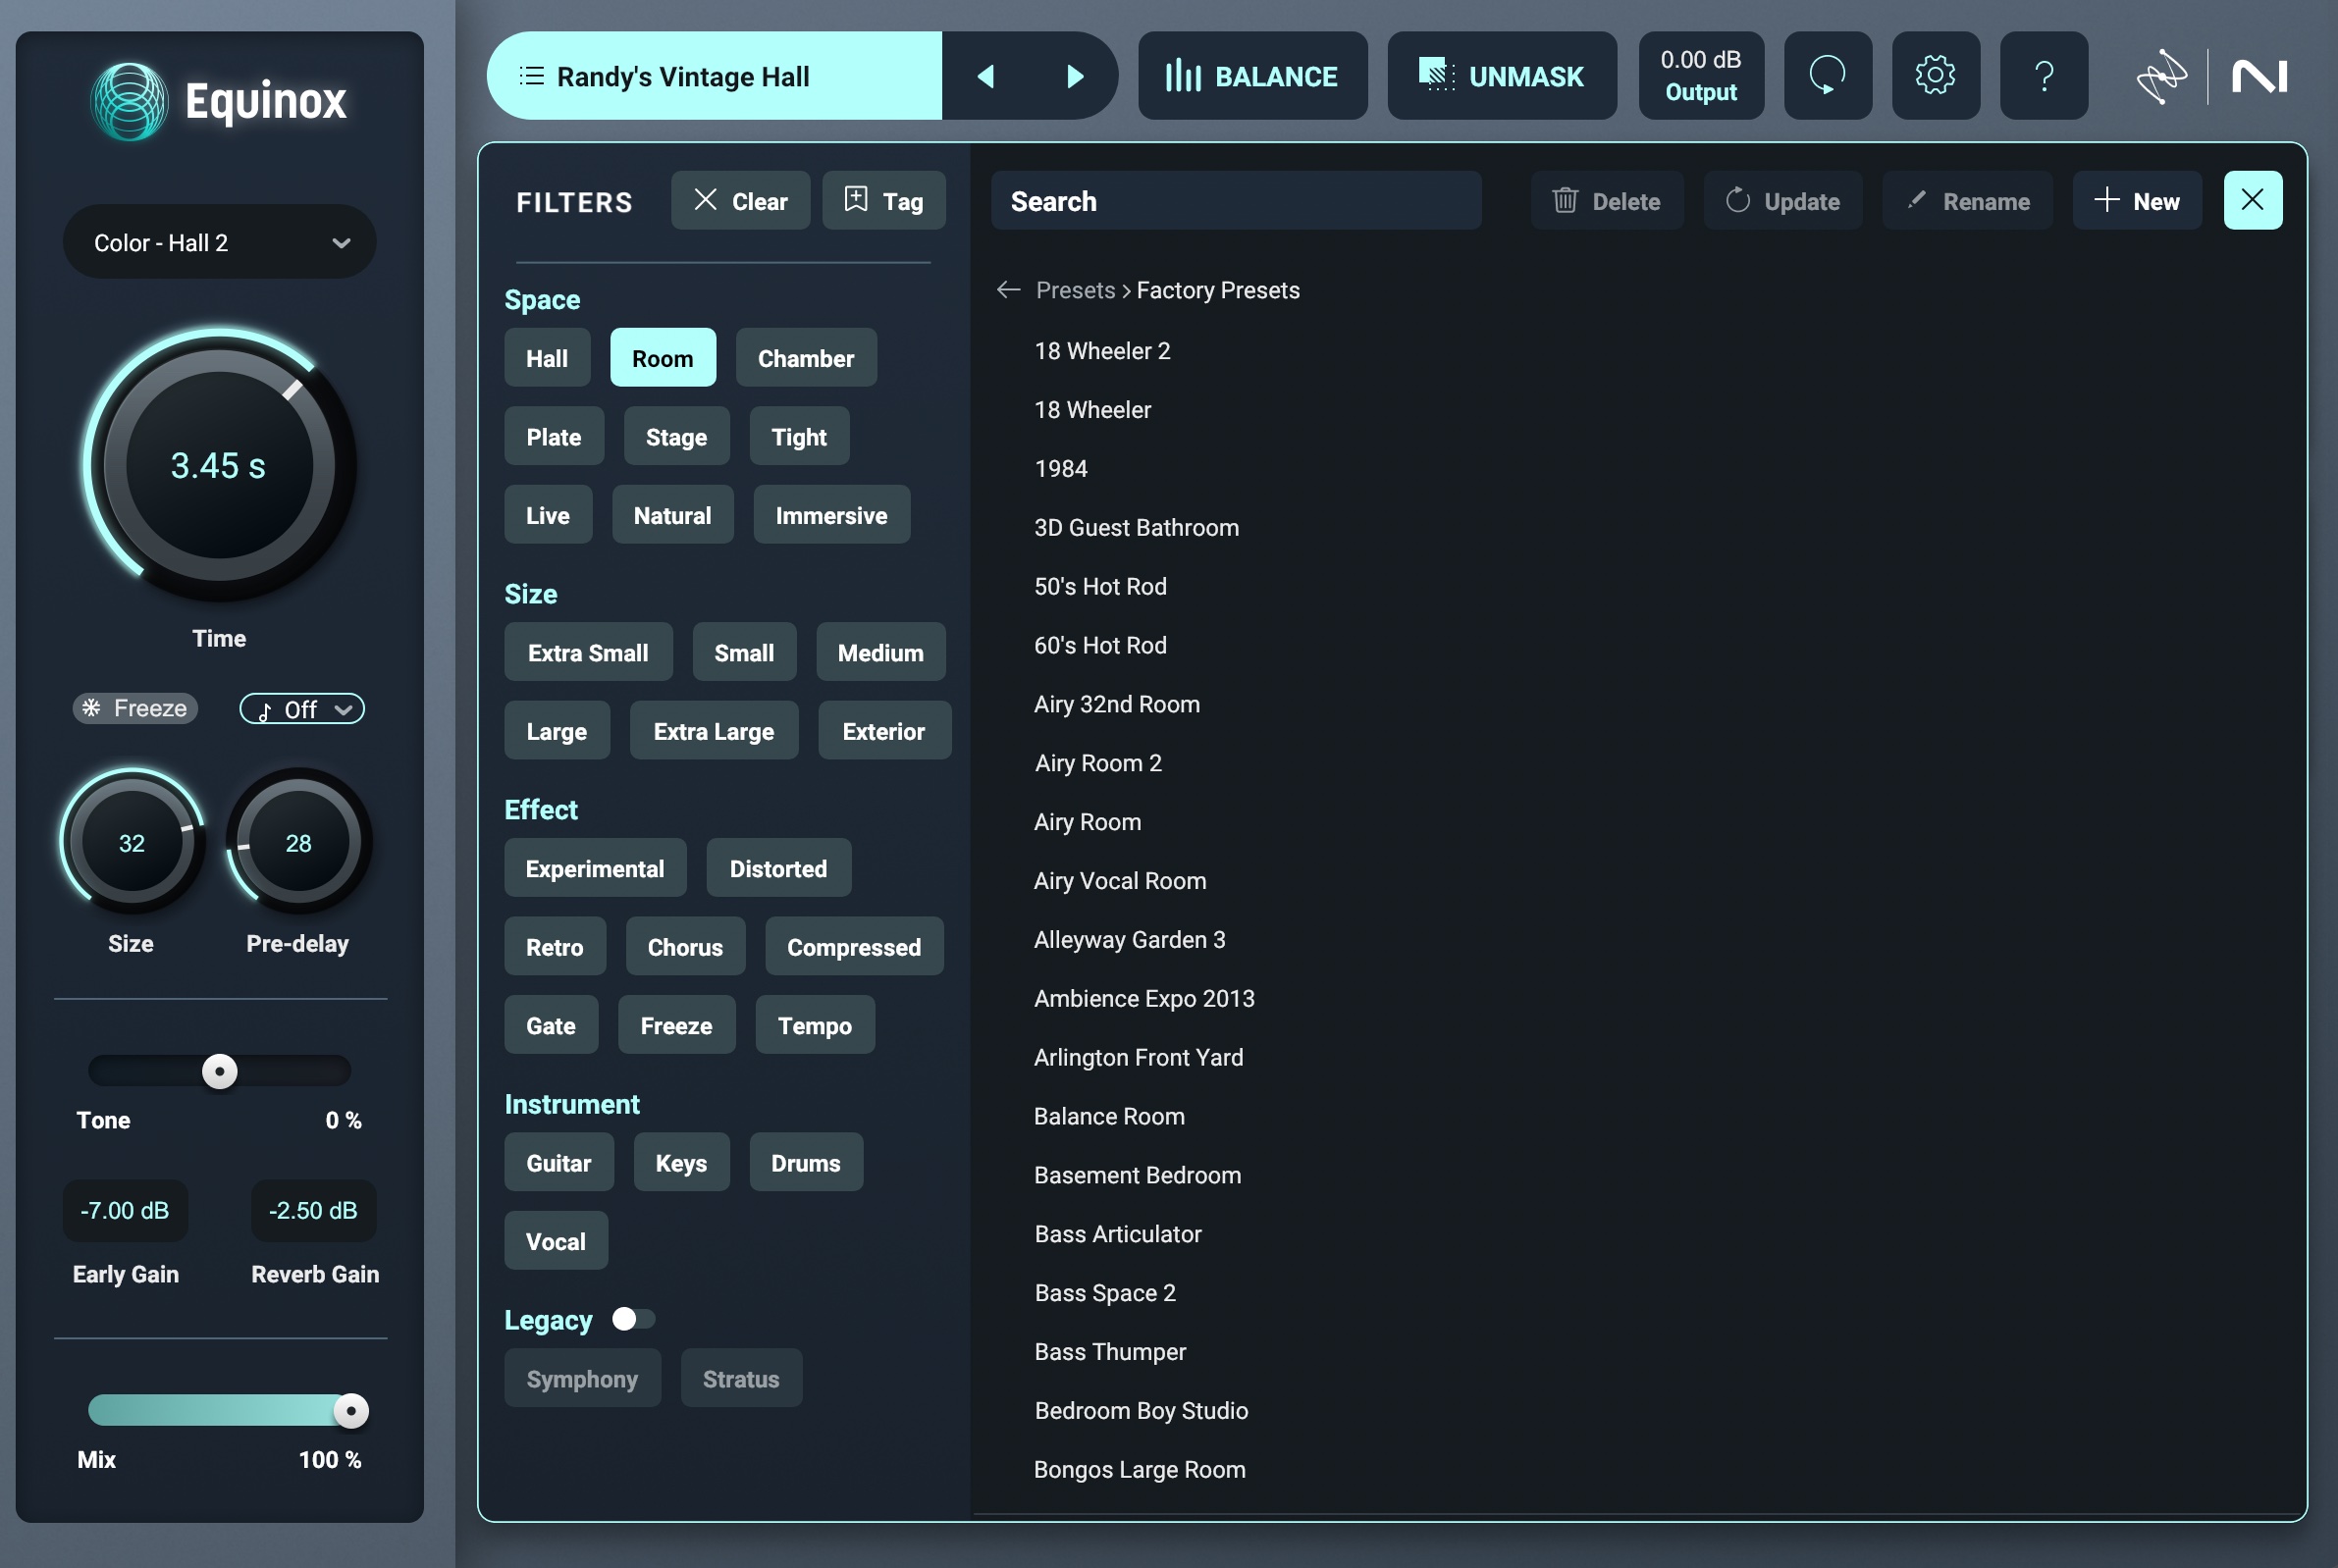
Room presets in iZotope Equinox
They’re arranged alphabetically, and as you can see, this screenshot only gets us to the Bs.
Spring, classic digital reverbs, and other examples
As you dive into the history of reverbs, you’ll find many kinds that don’t fit the mold of physical space. For instance, early digital reverbs are often prized, since they have their own iconic flair.
You can draw a direct line from Equinox to Lexicon through Michael Carnes, a lead at Lexicon and the developer of the algorithms behind Equinox. But you won’t find the exact crunchiness of classic digital reverbs in Equinox’s genetic makeup; its lineage is more pristine and clean.
This is where Native Instruments enters the chat. Between Guitar Rig 7 Pro, the RC 24, and the RC 48, you’ll find a lot of classic sounds. Plugin Alliance also has you covered with entries such as the Bettermaker BM60.
Classic spring sounds – such as the tanks found in guitar amplifiers – can be accessed in Guitar Rig as well.
How many reverbs do you need on a vocal?
Reverb is meant to create the effect of physical space. Minimizing the number of reverb spaces will give you a more natural sound, as the acoustic effects of multiple spaces would not occur simultaneously in the real world.
If otherworldliness is what you’re looking for, feel free to experiment with as many reverbs as you think best – just remember not to let them cloud your mix!
3. Adjust the reverb to taste
Whatever reverb you use, you must adjust it to your material. Here are some controls to keep in mind.
Time and Size
The length of your vocal reverb is the most noticeable characteristic. In equinox, you can tweak length with Time and Size controls, and you ought to spend time making sure these fit your production.
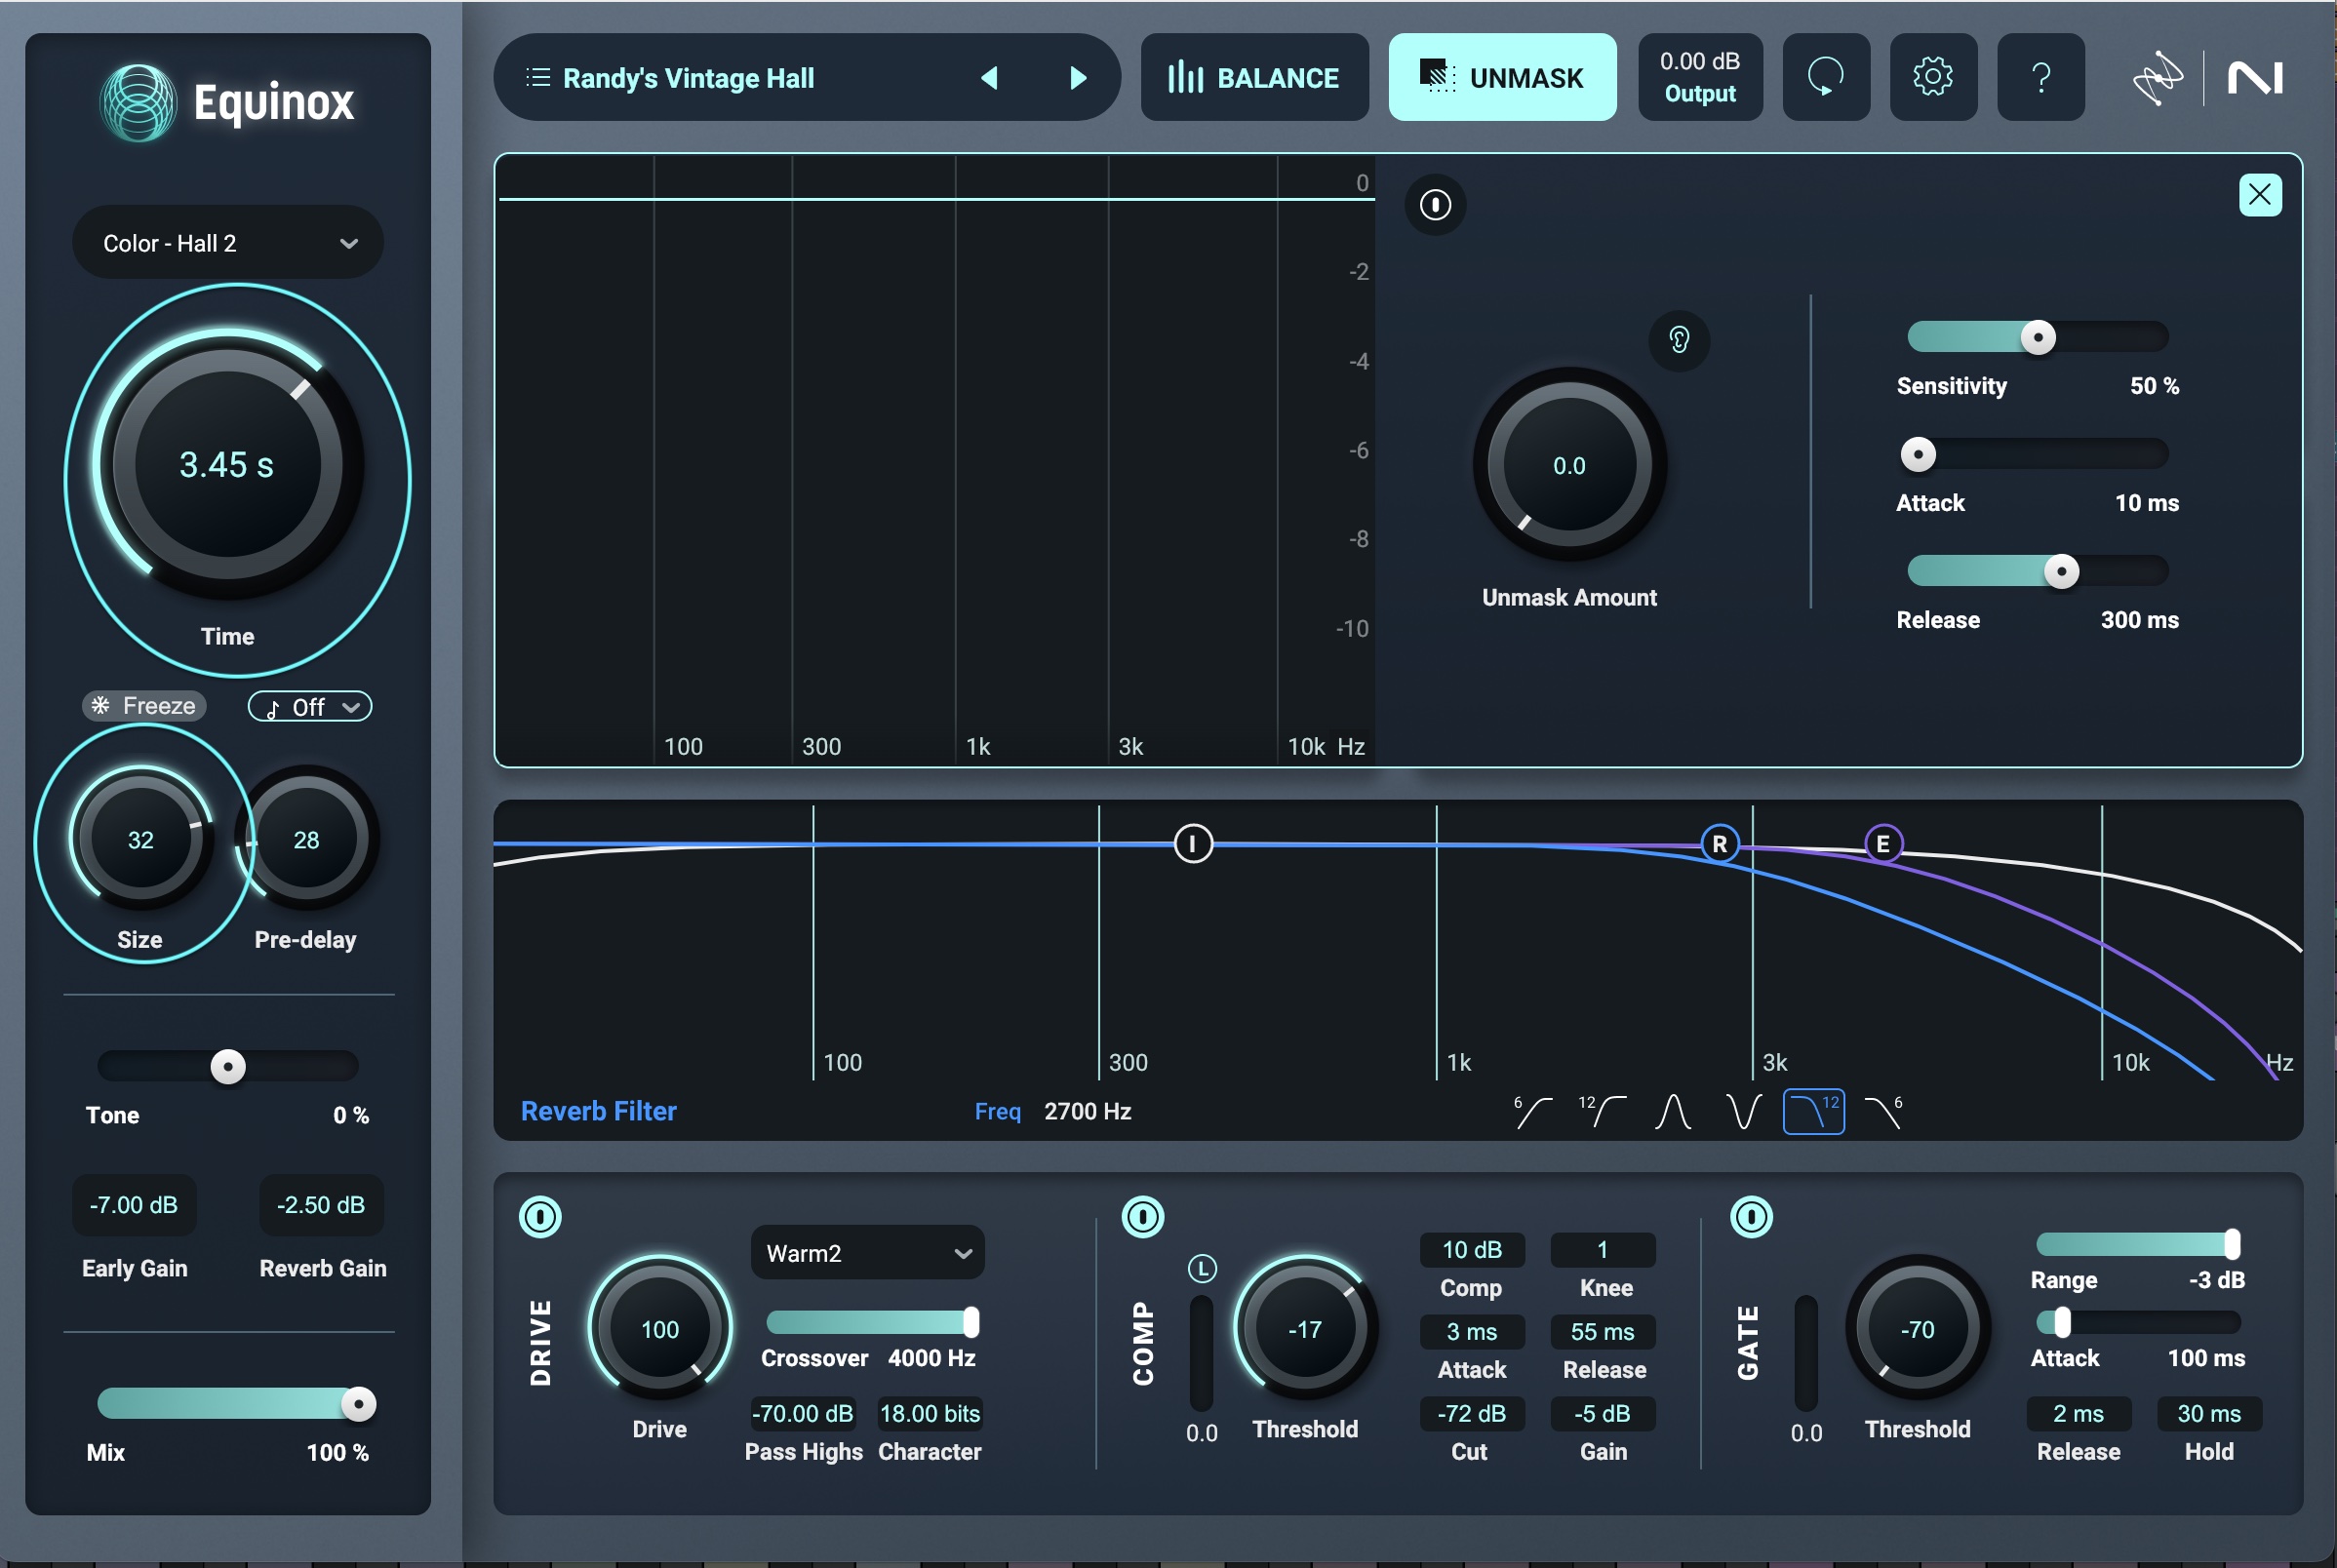
Time controls in iZotope Equinox
Longer reverb decay times will be more atmospheric and create the perception of a larger space, while shorter decay times will create the perception of a smaller room. In Equinox, the Size and Time knobs scale with each other. The larger the size, the more room on the dial for longer times.
Do keep in mind that if the vocal reverb lingers for too long, it can build up and cause vocals to feel less prominent in the mix.
Reverb pre-delay
You can somewhat counter a longer reverb time with a longer pre-delay. Reverb pre-delay is simply a dedicated pad of time put between the dry signal and the reverberated signal. The longer the pre-delay, the more the vocal will stand out in front of the reverb, which can help distinguish things more.
Advanced reverb controls
Equinox has a whole breadth of controls under the hood that would be tedious to explain in an article about vocal-verb processing. To learn more about these controls, I’d recommend perusing some of the many videos iZotope has on the subject of its flagship algorithmic reverb.
4. Shape the vocal reverb signal as needed
As mentioned previously, reverb should be treated as its own instrument, since the effect adds frequency content that can potentially mask other sounds. Vocal reverb actually tends to get in the way of the vocal itself.
To help counter this effect, Equinox borrows technology from the iZotope Aurora reverb.
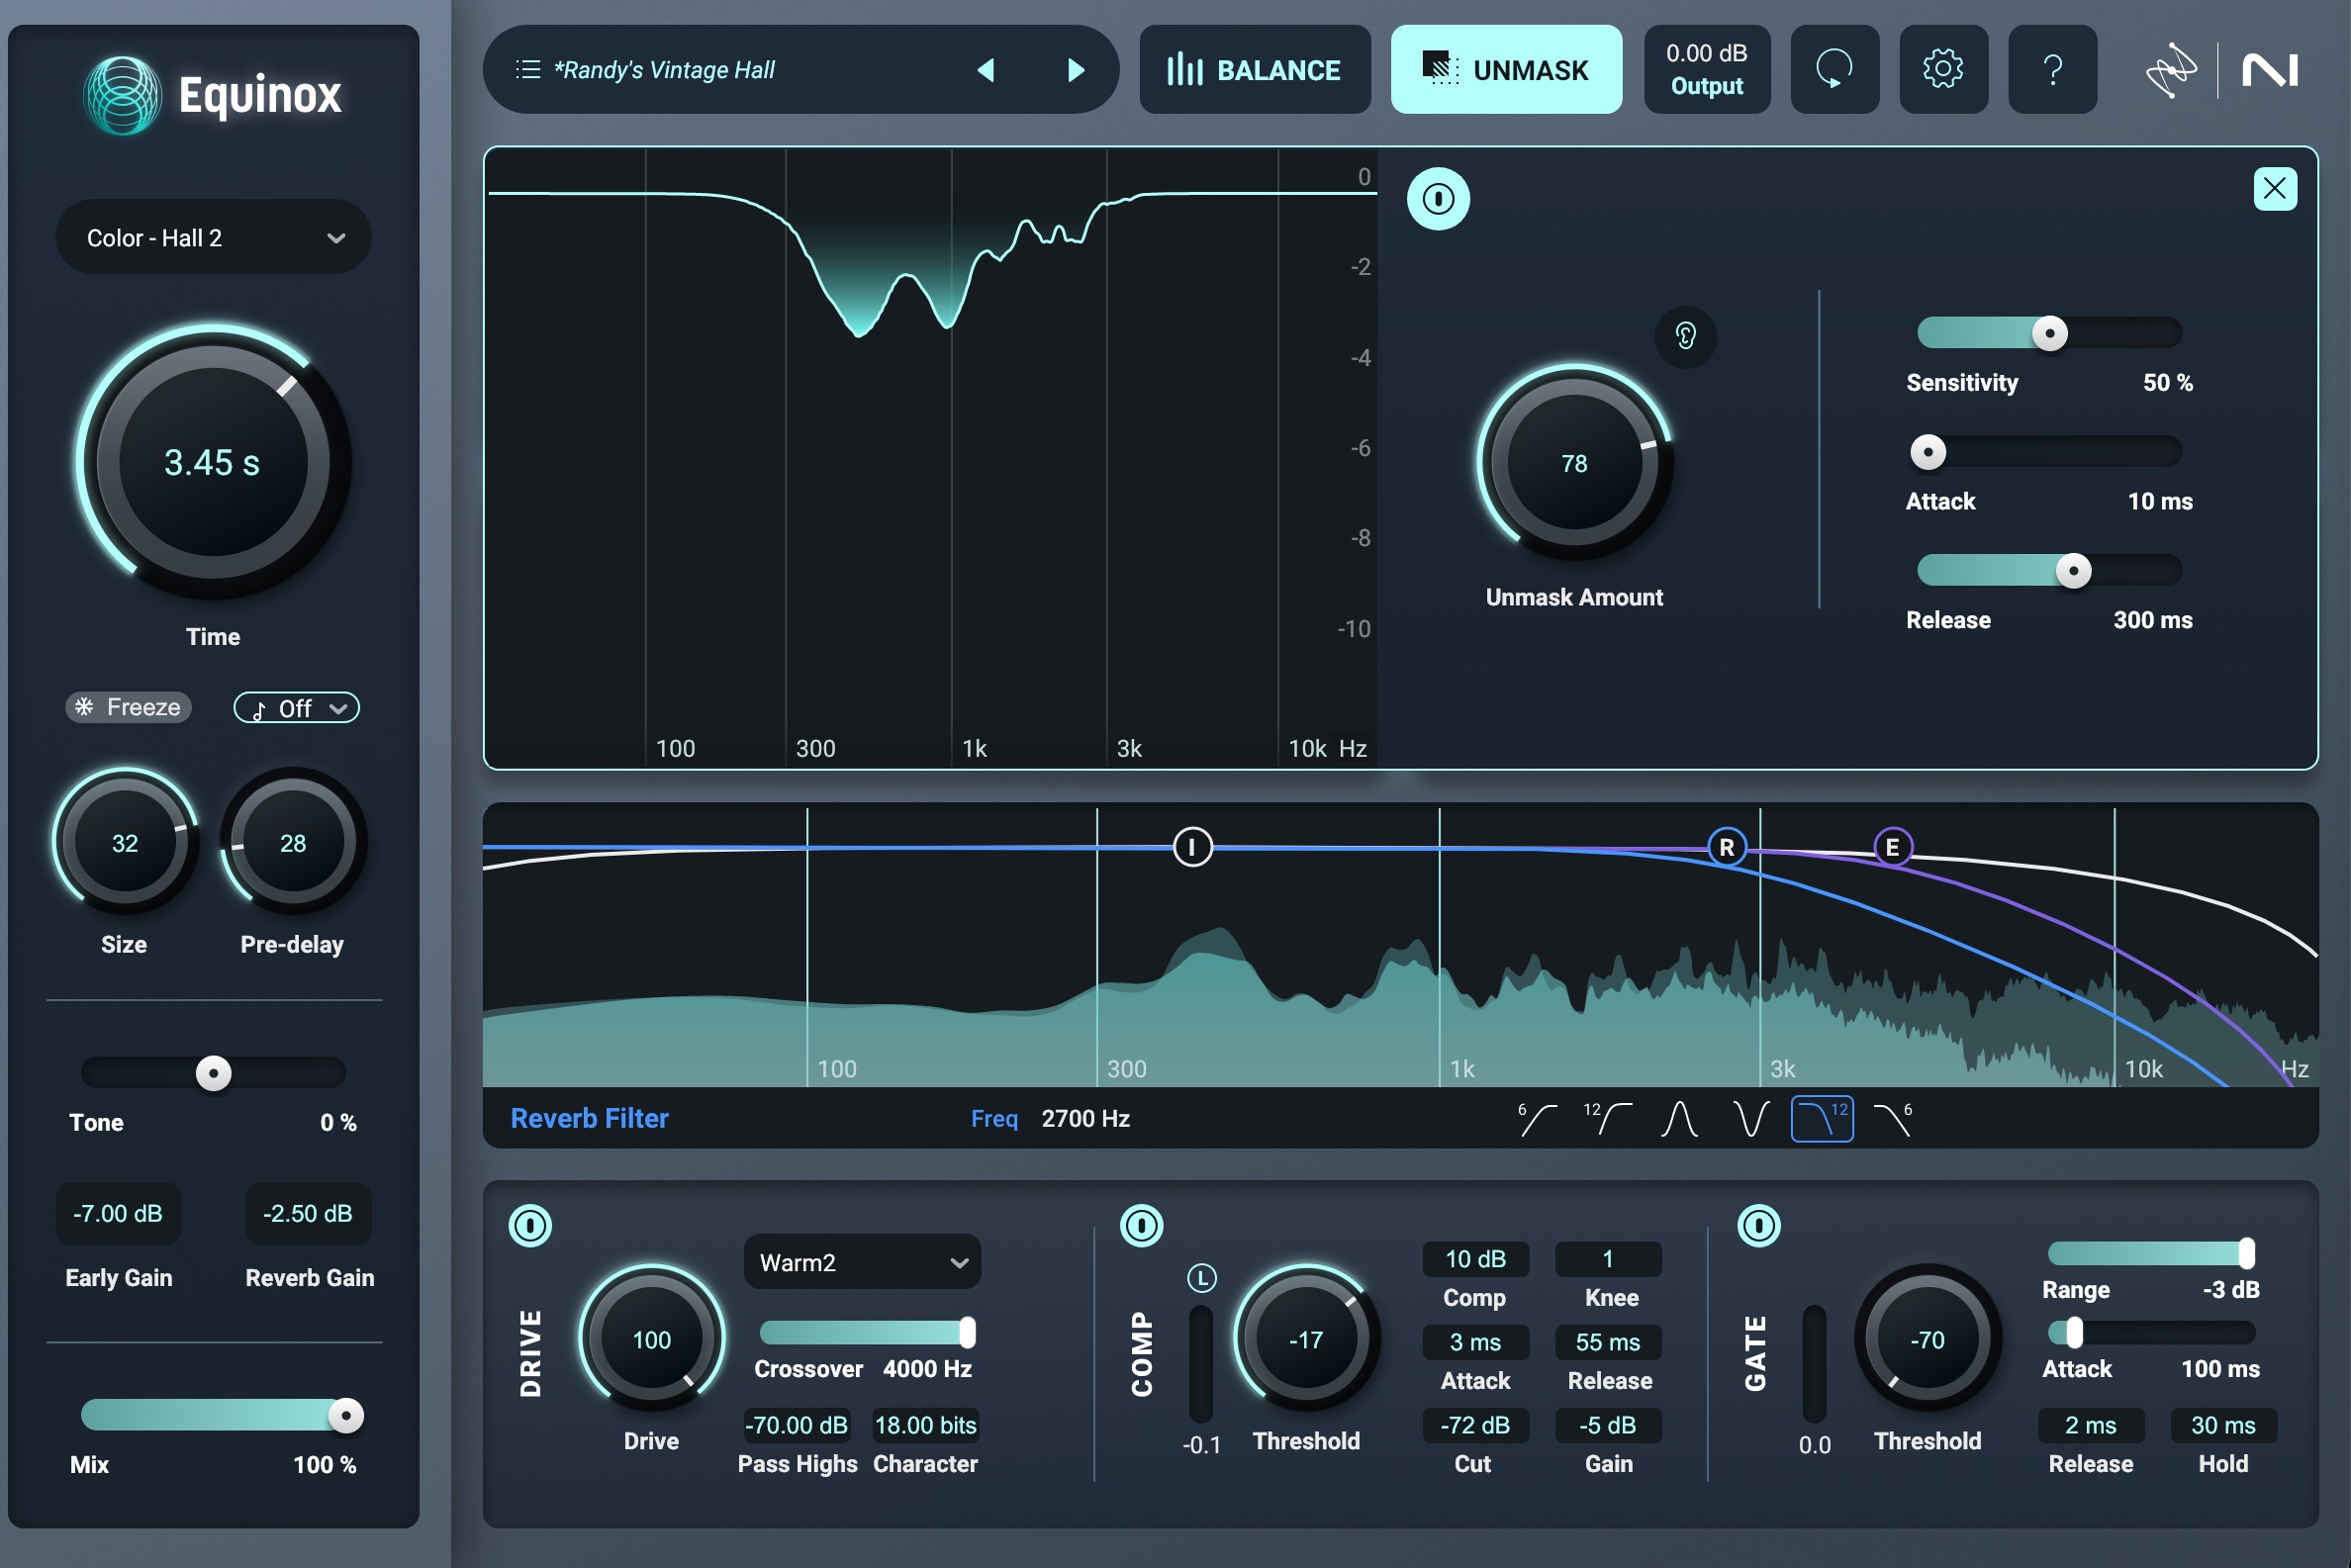
Unmask feature in iZotope Equinox
Just as Aurora and Cascadia offer spectral unmasking, so does Equinox. It will automatically tuck the vocal reverb down so it won’t get in the way of the original source. This is quite useful in dense mixes.
5. Slot your reverb in the stereo field
Whether you use mono or stereo reverb on vocals depends on how much space you want the vocals to take up, and where you want them positioned in the mix.
Use a mono reverb on vocals if you want them to be upfront and focused. But if you want the vocals to sound large or like they're in the background, use a stereo reverb.
In the case of Equinox, width controls are provided for both the early reflections of the reverb and the tails themselves.
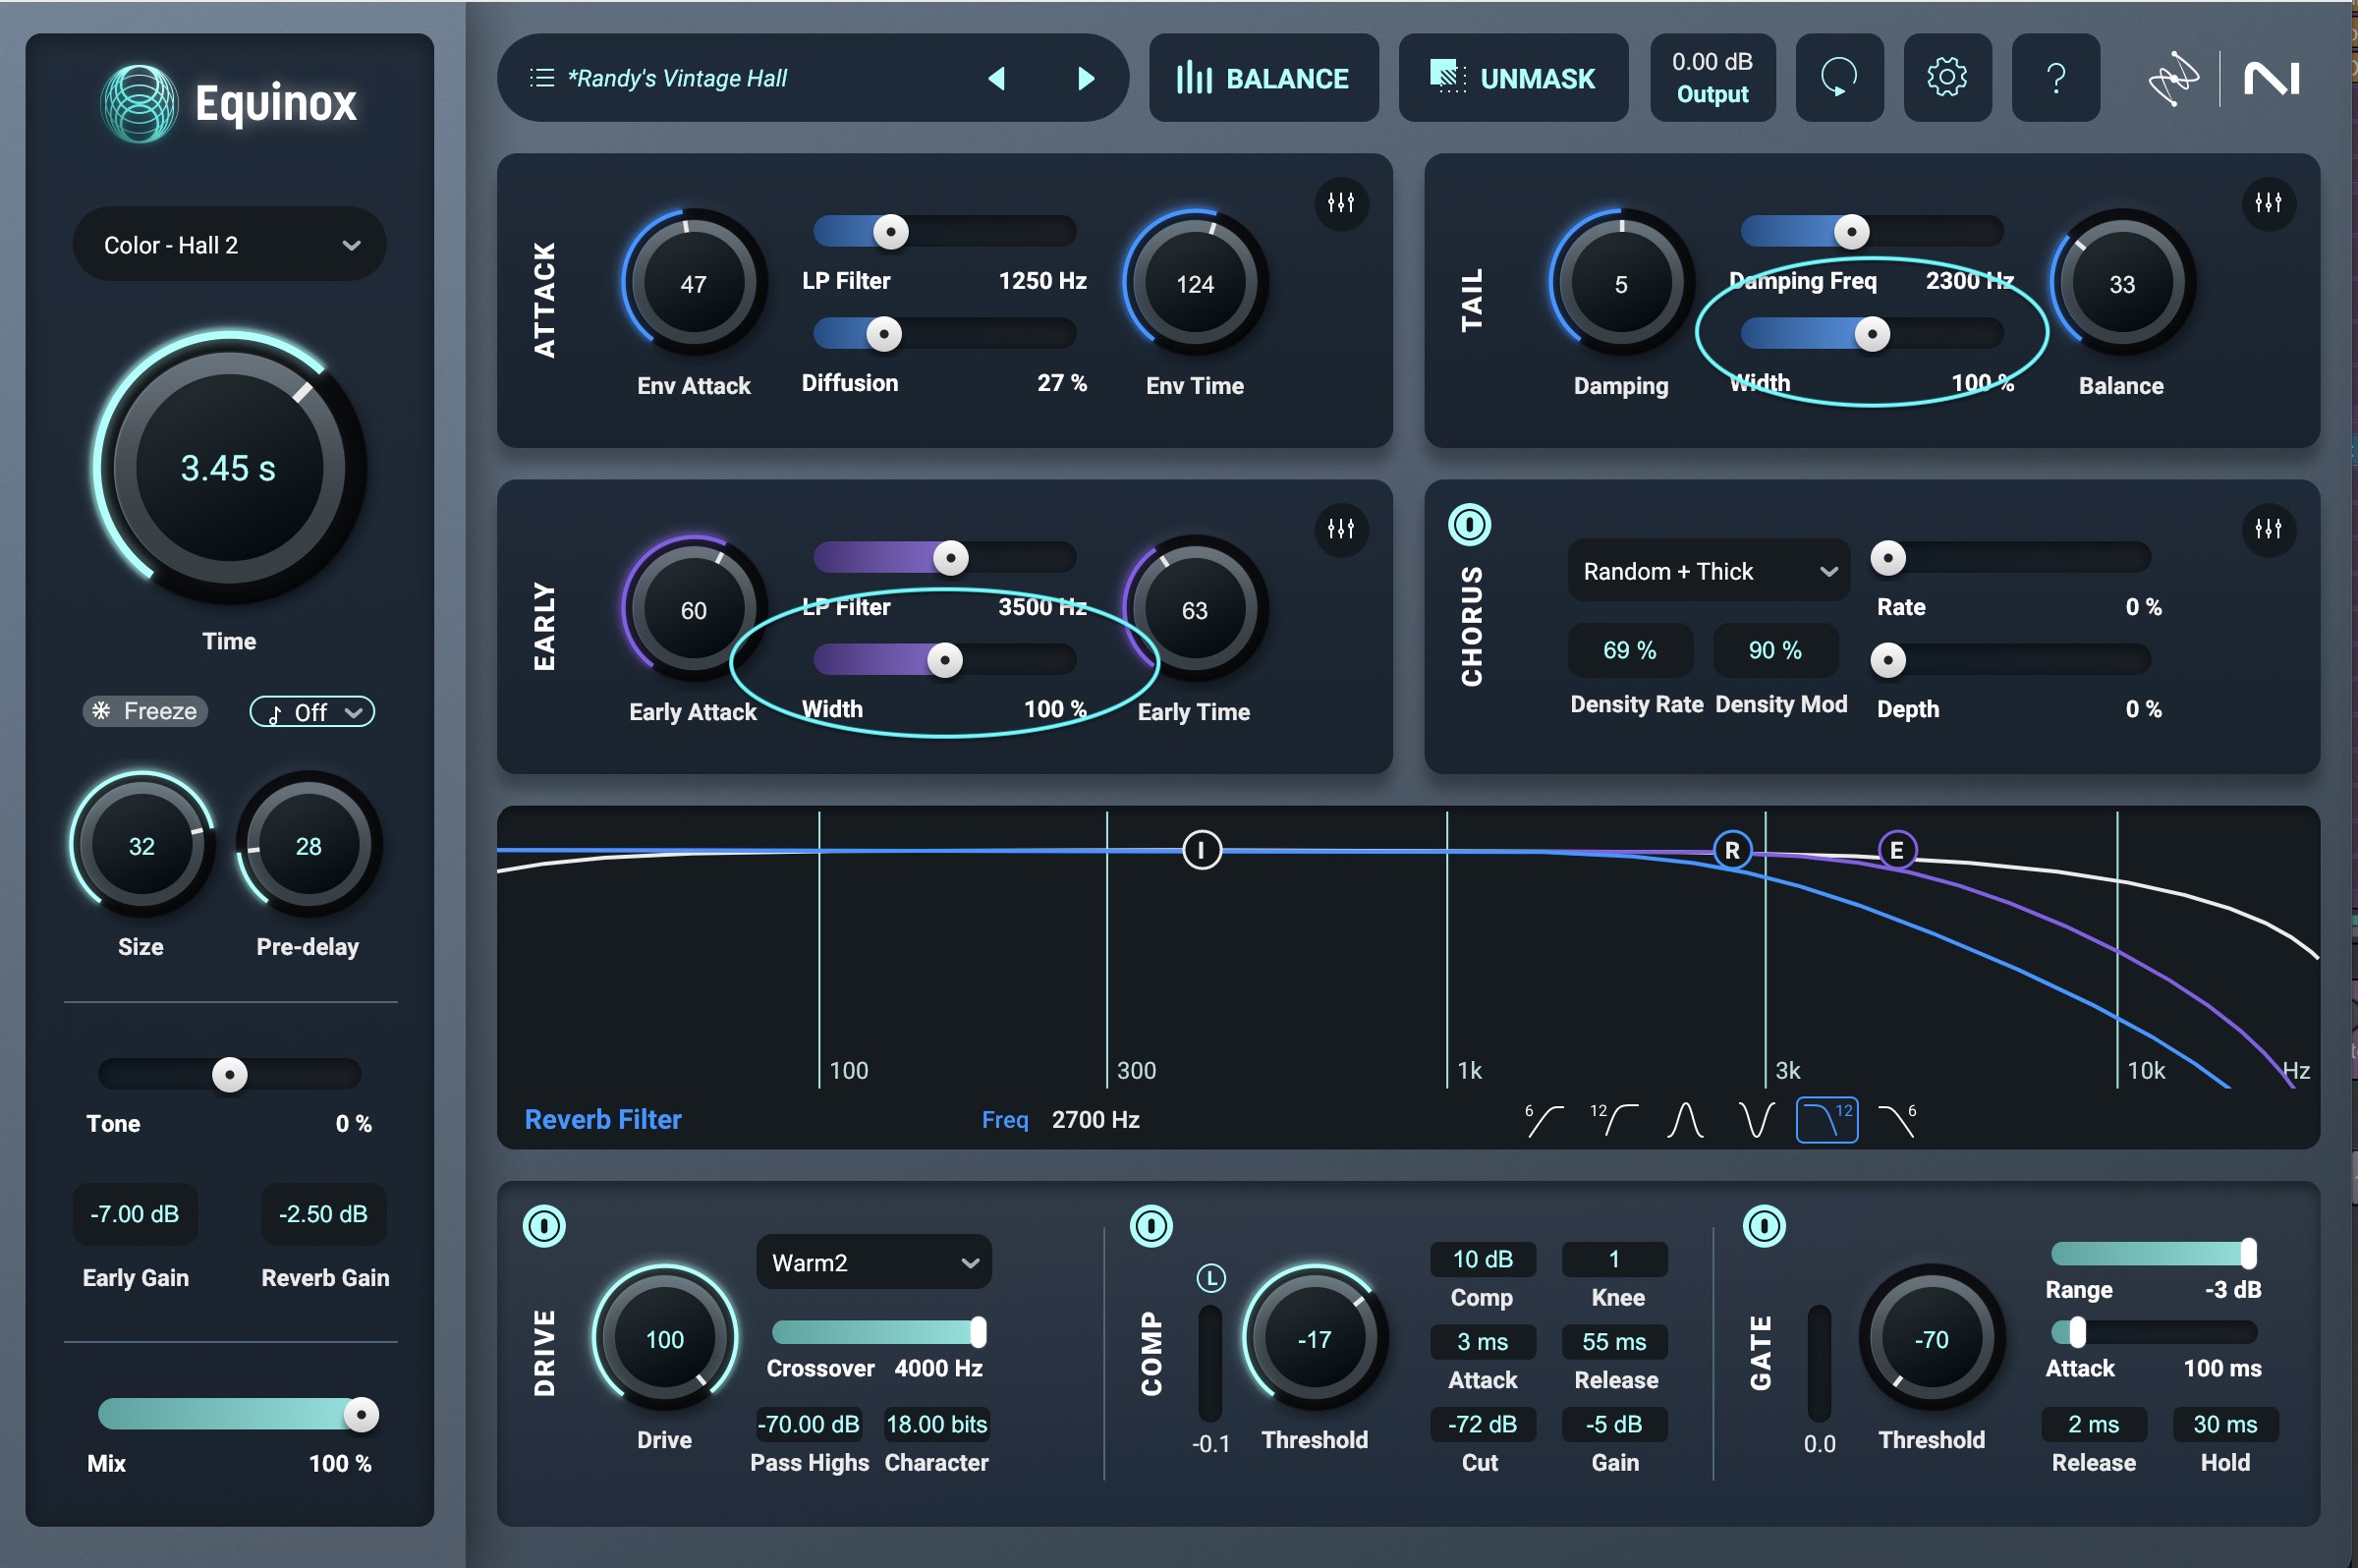
Width slider in iZotope Equinox
Early reflections are exactly what they sound like – the initial impressions of a sound as it bounces around the space. The tail is the backend of the reverb, its build up.
With dedicated width controls on each section, Equinox allows for extensive spatial tailoring.
Start using reverb on your vocals
Adding reverb to vocals is often the right choice for creating a convincing sonic environment. Using the above tips, you should be able to take advantage of these benefits while maintaining the clarity and presence that a solid vocal should also provide.
And if you haven’t already, demo iZotope Equinox for free to experiment with all of the different reverb effects on your vocals.
