Reverb pre-delay explained: how to avoid a muddy reverb sound
Explore the intricacies of using reverb pre-delay to elevate your music production and get a better reverb sound.
Reverbs can be tricky to get right. Many of them have a confusing number of controls, often labeled incongruously. Add the nature of the effect itself to the mix and you can easily wind up with something hard to handle: reverb tends to emphasize frequencies in ways that can become overwhelming if not handled well. Resonances turn into mud or undue harshness.
You might be tempted to reach for an EQ to tamp down these resonances, but perhaps there’s a different control you’re overlooking – one that nearly every reverb has. This control is called “pre-delay,” and used correctly, pre-delay can be an effective tool for adding depth and avoiding mud in a reverberated context.
This article is all about how to use pre-delay effectively in your mix.
Follow along with iZotope


Neoverb
What is pre-delay in reverb?
Take an audio track and slap a reverb plug-in on it. Without pre-delay, the reverb will begin as soon as the plug-in detects a signal. The reverb will start to add its roominess – and consequent blurriness – right away.
However, if you delay the signal going into the reverb just a little, a lot of that blurriness goes away. This is what pre-delay does: it offsets the signal feeding the reverb by however many milliseconds you deem necessary.
Imagine you had a pre-delay of 50 milliseconds before the reverb on the lead vocal; now, you’d hear the vocal, and the reverb would wait 50 milliseconds before beginning to apply its time-based magic, whether that consisted primarily of early reflections, longer tails, or a blend of the two.
Why do we want to use pre-delay?
Using pre-delay helps you avoid muddiness and adds depth to your audio. Pre-delay prevents the reverb from masking the initial attack of the sound, allowing it to cut through the mix more clearly. By adjusting the pre-delay time, you can achieve a balance that enhances spatial characteristics without compromising the clarity and definition of the source sound.
Let’s take a listen to this vocal example:
We’ll put it through iZotope’s Neoverb with the following settings:
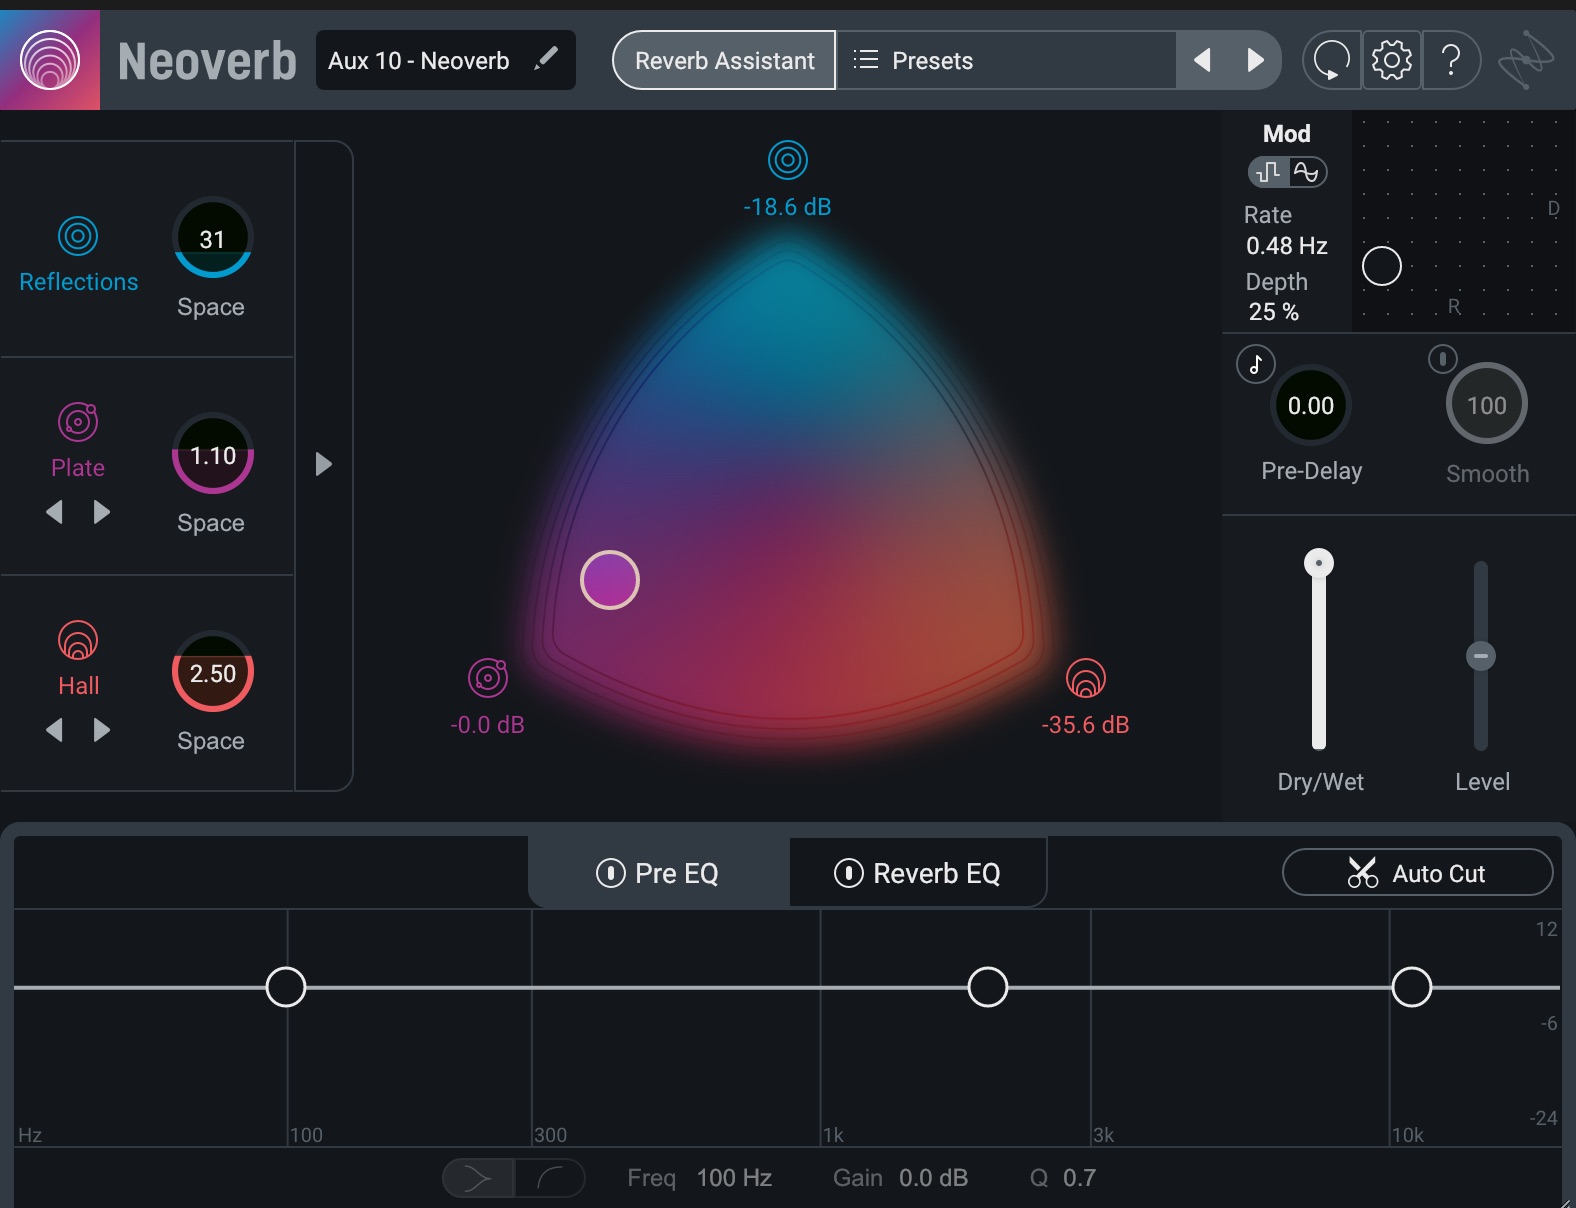
Neoverb settings
This sounds fine, but we can add more apparent depth to the signal – and give the vocal midrange more breathing room – if we introduce 72 milliseconds of pre-delay:
The effect can seem subtle in a vacuum, so I’ll give you a few ways to hear it better.
First, let’s take a relatively simple static mix, like so:
Let’s send all the elements in this song – drums, bass, acoustics, ukes, sitars, vocals, etc – to Neoverb with the following settings:

Neoverb mix settings
You can hear some nice ambiance, but feels a little tubby (in terms of frequencies) and flat (in terms of depth). All the reverberated sound hits our ears at the same time, creating a wash.
So, let’s add pre-delay to each instrument group.
With some fancy-schmancy routing in my DAW, I’m sending each instrument submix to its own auxiliary channel. Each of these auxes gets its own pre-delay in the form of a utility plug-in – the sort of one-time, non-repeating, colorless delay found in every DAW. The drums might get a short delay, the vocals might get something longer, but in the end, each aux will feed the exact Neoverb you’ve already heard.
This is a way of putting a different pre-delay on each instrument and have them go to the same reverb. Furthermore, it’s a simple way of showing you the depth individual pre-delay times can give your mixes.
Compare these examples and listen to the space around each instrument. You’ll notice more front-to-back depth when we use pre-delay, and less midrange build-up as well. Once I play the reverbs in isolation, the difference will become quite apparent:
Reverb with and without pre-delay
Hear how the timing of everything changes with the pre-delay? You can really notice how each element is hitting the reverb at slightly different times.
I’ll give you one more example to really pre-delay. In the following video, I’ll only send one element at a time to the reverb, but I’ll play with the pre-delay setting in real-time, and you can hear what it’s doing, both in terms of frequency content and in terms of depth.
Using pre-delay on individual instruments
What follows next is a general rule of thumb on how to use pre-delay on a few common instruments. Don’t feel the need to follow these to the letter; consider them to be starting points.
Vocals
Vocals often take center stage in a song, so controlling their reverb is critical to maintaining clarity and prominence. Think of pre-delay for vocals as a vital tool in managing clarity and prominence.
pre-delays in the range of 20 to 80 milliseconds can work wonders on a vocal. These timings allow the dry vocal to shine through before the reverb tail blooms, giving the impression of the singer standing distinctly in front of the sonic landscape. This is especially effective in genres like rock, where the lead vocals need to cut through a dense mix to deliver their emotional punch.
Do remember, however, that these are just guidelines.
Guitars
Guitar, whether acoustic or electric, can often benefit from longer pre-delay times than vocals. Something in the 40 to 100 millisecond range can add an enveloping feeling that complements the guitar's natural resonance. This effect is well-suited for acoustic ballads, as well as any situation where you want the guitar to feel like it's filling a room.
For guitar solos, try working at the longer end of this range, as longer ranges can work wonders in evoking a live-room feel.
Here’s a guitar solo in a mix with a Spring Reverb from Native Instruments applied:
It sounds fine, but I can make you feel the solo more with a judicious use of pre-delay. I’m going to use a utility plug-in in my DAW to delay the signal before reverb – and here’s where it gets really fun: I’m going to use different delay times for left side and right.
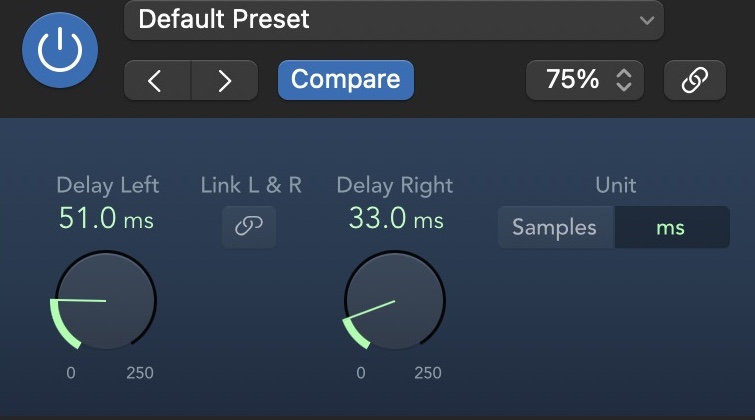
Stereo pre-delay
The aim is to get that “lead-guitar at a concert” feeling, and thus secure more drama from the solo:
Drums
Drums are the backbone of so many music genres, which means you do not want to blur them needlessly with reverbs on the whole kit, or add any annoying frequencies. Yet, you often need reverb to help elements like a snare or a tom cut through.
This is where shorter pre-delays – say between 5 and 50 milliseconds – come into play. They help preserve a sense of punch to the drums without muddying things up.
Once again, let’s lead by example. Here’s a drum loop with a plate reverb that sounds great, but is too long for all the drums.
I’ve got the reverb boosted very loud, and we’re starting to lose the transients. But if I add 29 ms of pre-delay to the reverb, you’ll notice we’re actually able to hear and feel those kicks and snares better:

Stratus Pre-delay controls
Keep in mind, in this example, I’m intentionally using a reverb that doesn’t fit the drums – and showing you how a little pre-delay can make it sound a whole lot better.
Reverb pre-delay times for different genres
You’re probably wondering if different genres have different guidelines for pre-delay times. The answer is complicated, as music changes all the time.
I cannot tell you to add 50 milliseconds of pre-delay to a vocal for acoustic jazz and 20 milliseconds for a pop track. That would be careless. However, you can look back across music with a proven track-record and use pre-delay to help evoke its mood, if that particular mood is suitable for the mix at hand.
80s pop, for instance, was drowning in a specific kind of reverb that relied heavily on audible pre-delays. You can hear it in anything from David Bowie to Paul Simon to Michael Jackson.
90s grunge, on the other hand, was a whole lot drier. You wouldn’t get much audible reverb at all, let alone much pre-delay on the reverb – it was far more common to rely on a distorted delay to emphasize a grunge vocal rather than a reverb (generally speaking).
These days you’ve got a popular artist like Post Malone who issues both synth-pop more akin to eighties music as well as 90s throwbacks. You can bet the pre-delay choices his engineers go with are a direct response to the eras they’re trying to evoke.
Master the art of pre-delay in your productions
Hopefully by now you have a good grasp on what pre-delay is, and how to use it to get a clean reverb sound in your productions. With the right settings and plenty of listening, you’ll be able to achieve a balance that enhances spatial characteristics without compromising the clarity and definition of the source sound.

