Introducing iZotope Aurora reverb plugin
This article will introduce you to Aurora, iZotope’s newest reverb. Hear how beautiful it sounds and see how well it combats frequency bloat.
Into a market saturated with reverbs, iZotope is excited to release “Aurora,” a smart reverb for our modern age.
Why this plug-in, and why now?
The answer is simplicity in itself: Aurora provides newbies and pros alike with a fantastically fitting reverb in seconds flat—doing so in an adaptive manner different to every other plug-in available today. Packed with stellar algorithms and easy-to-use unmasking features, Aurora aims to get you the right reverb right away.
This article will introduce you to iZotope’s newest plug-in, showing you how versatile it is, and how much time it will save you in the mix. We’ll start by highlighting its features, and then move on to real-world applications.
Aurora: A ray of light in a crowded field
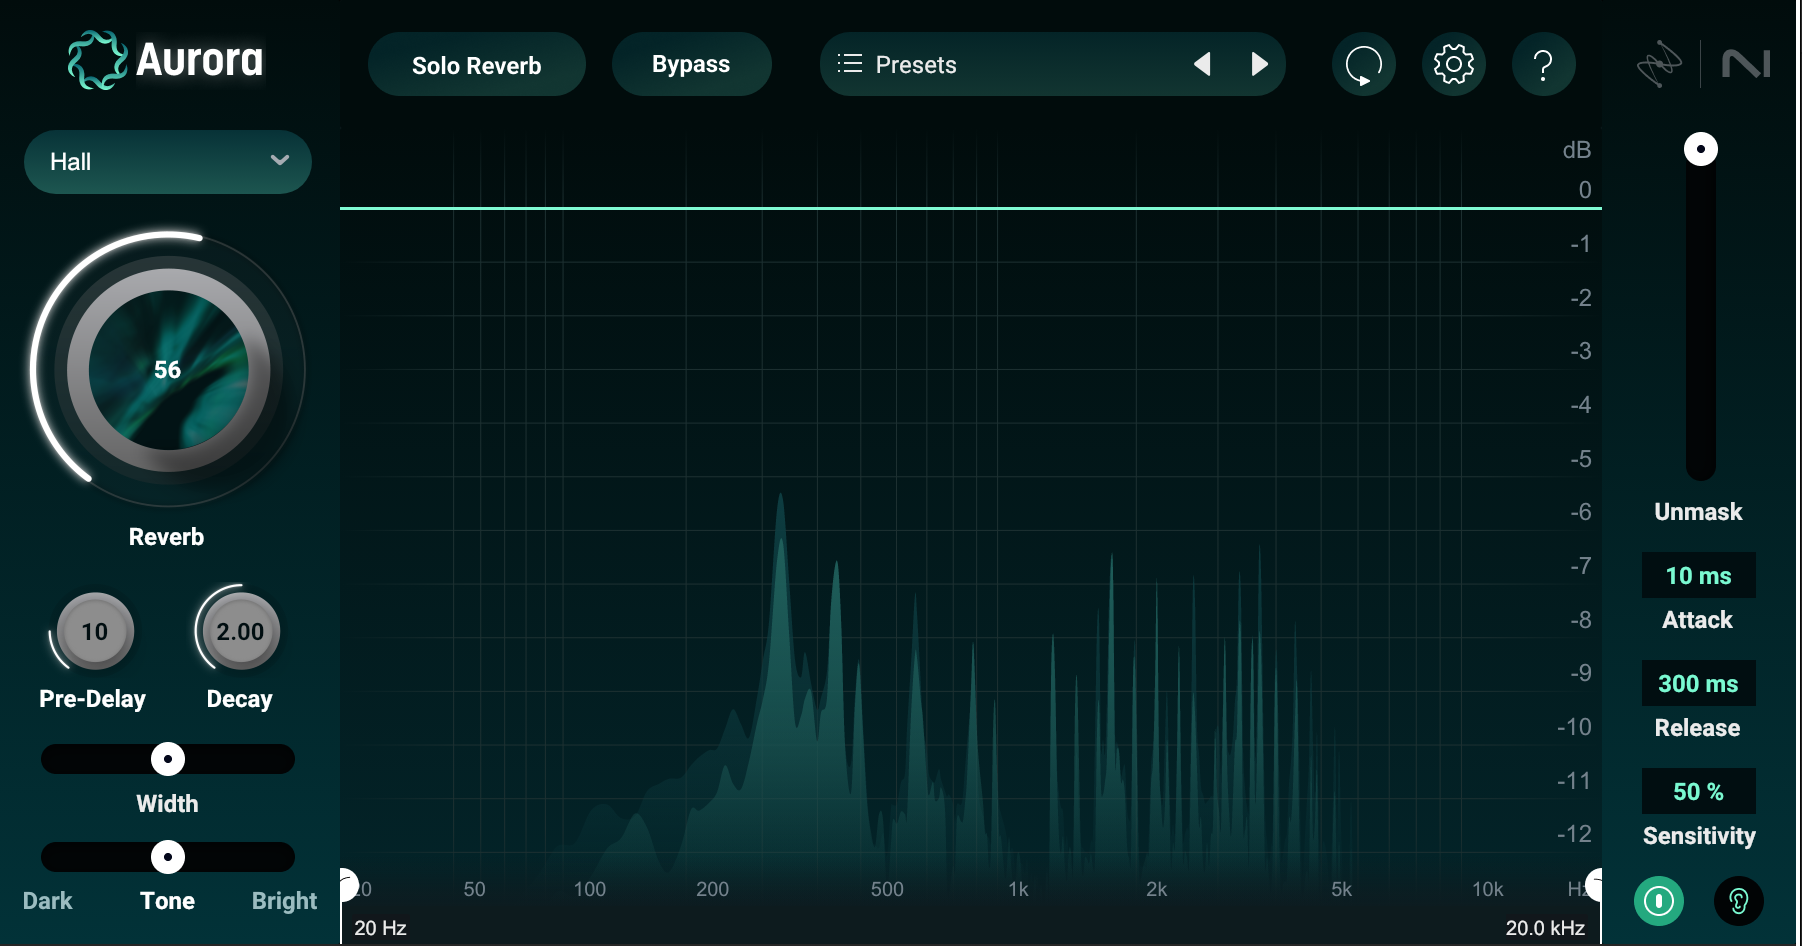
This is Aurora, and as you can see its interface is simple, economical, useful, and visually appealing. Let’s walk around the GUI and highlight some important features.
With adaptive unmasking, you control the reverb—not the other way around
Aurora’s most innovative feature is its quickness in keeping your mix clear of frequency build-up. Using spectral ducking, the plug-in listens to incoming audio and efficiently suppresses conflicting resonances in the verb, creating space for your instruments and vocals to dominate.
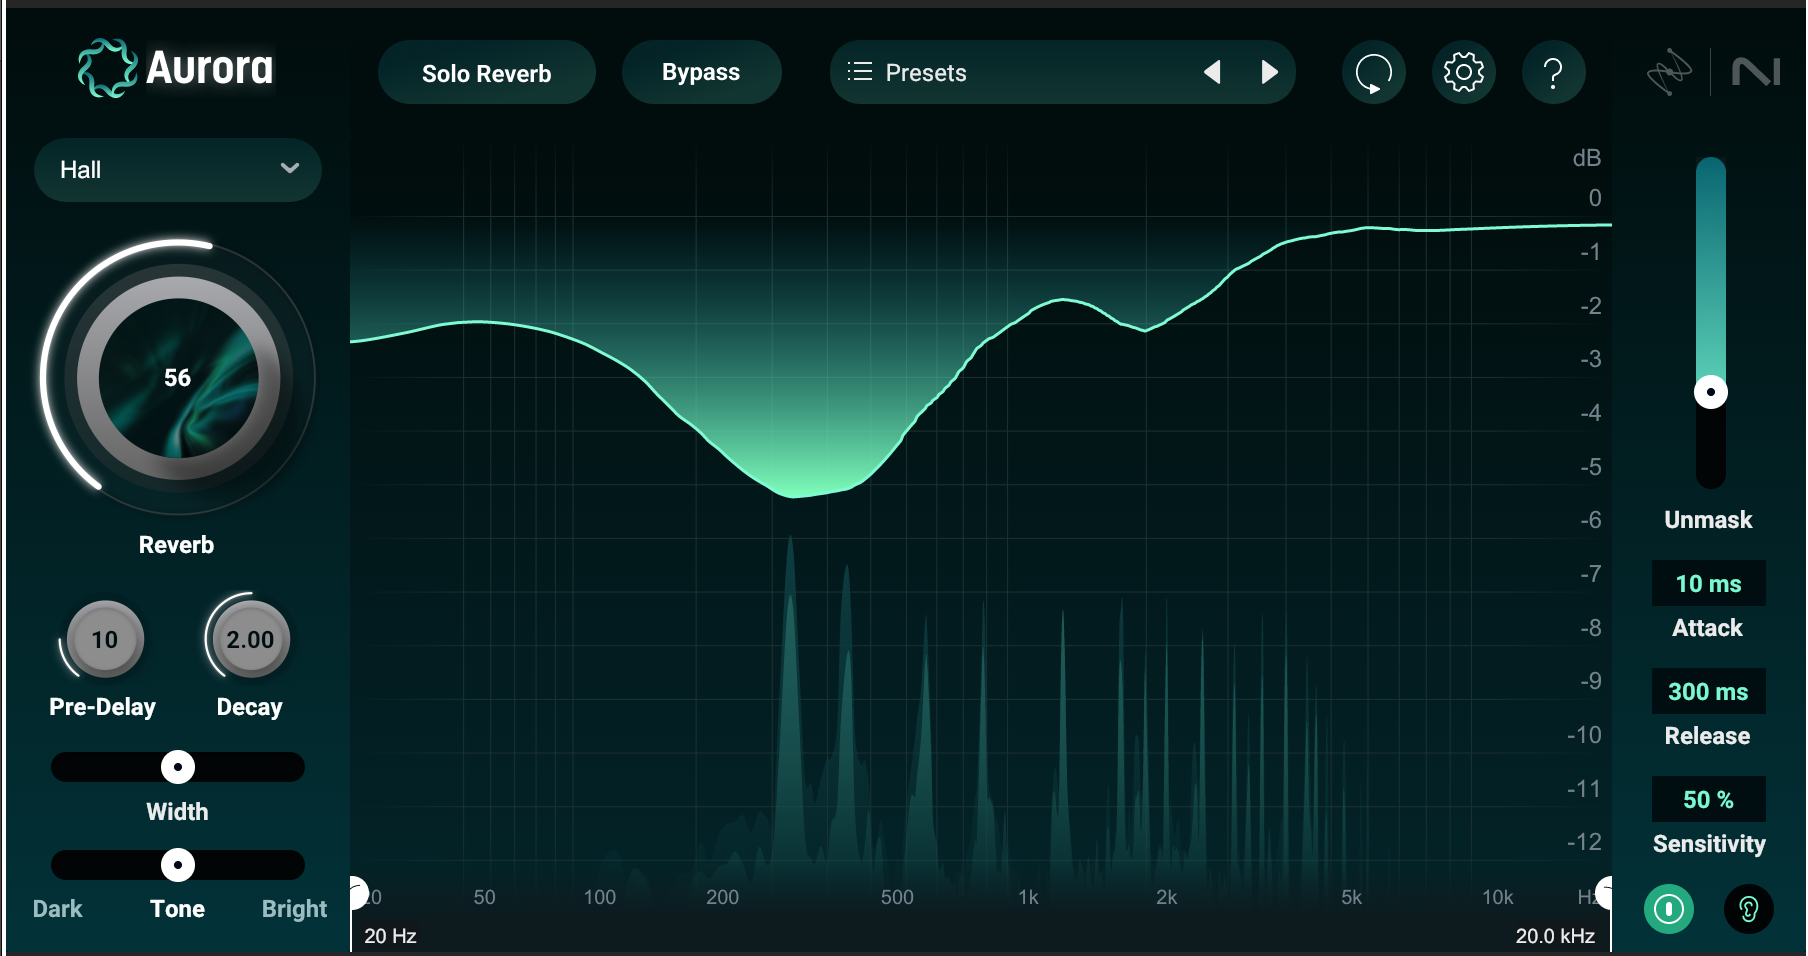
Effortlessly control the unmasking in real-time.
The spectral ducking in Aurora is different to other methods of controlling resonance build-up, including EQ, multiband compression, or Dynamic EQ.
For one, spectral operations often rely on FFT processing, which can circumvent some of the issues inherent in the crossovers of multiband plug-ins. The science behind FFT processing is a bit technical for an introduction piece like this, so instead, let’s focus on speed:
Aurora’s spectral ducking effect requires no offline analysis, nor any external sidechain routing. It simply listens to the input signal and makes its intelligent judgment.
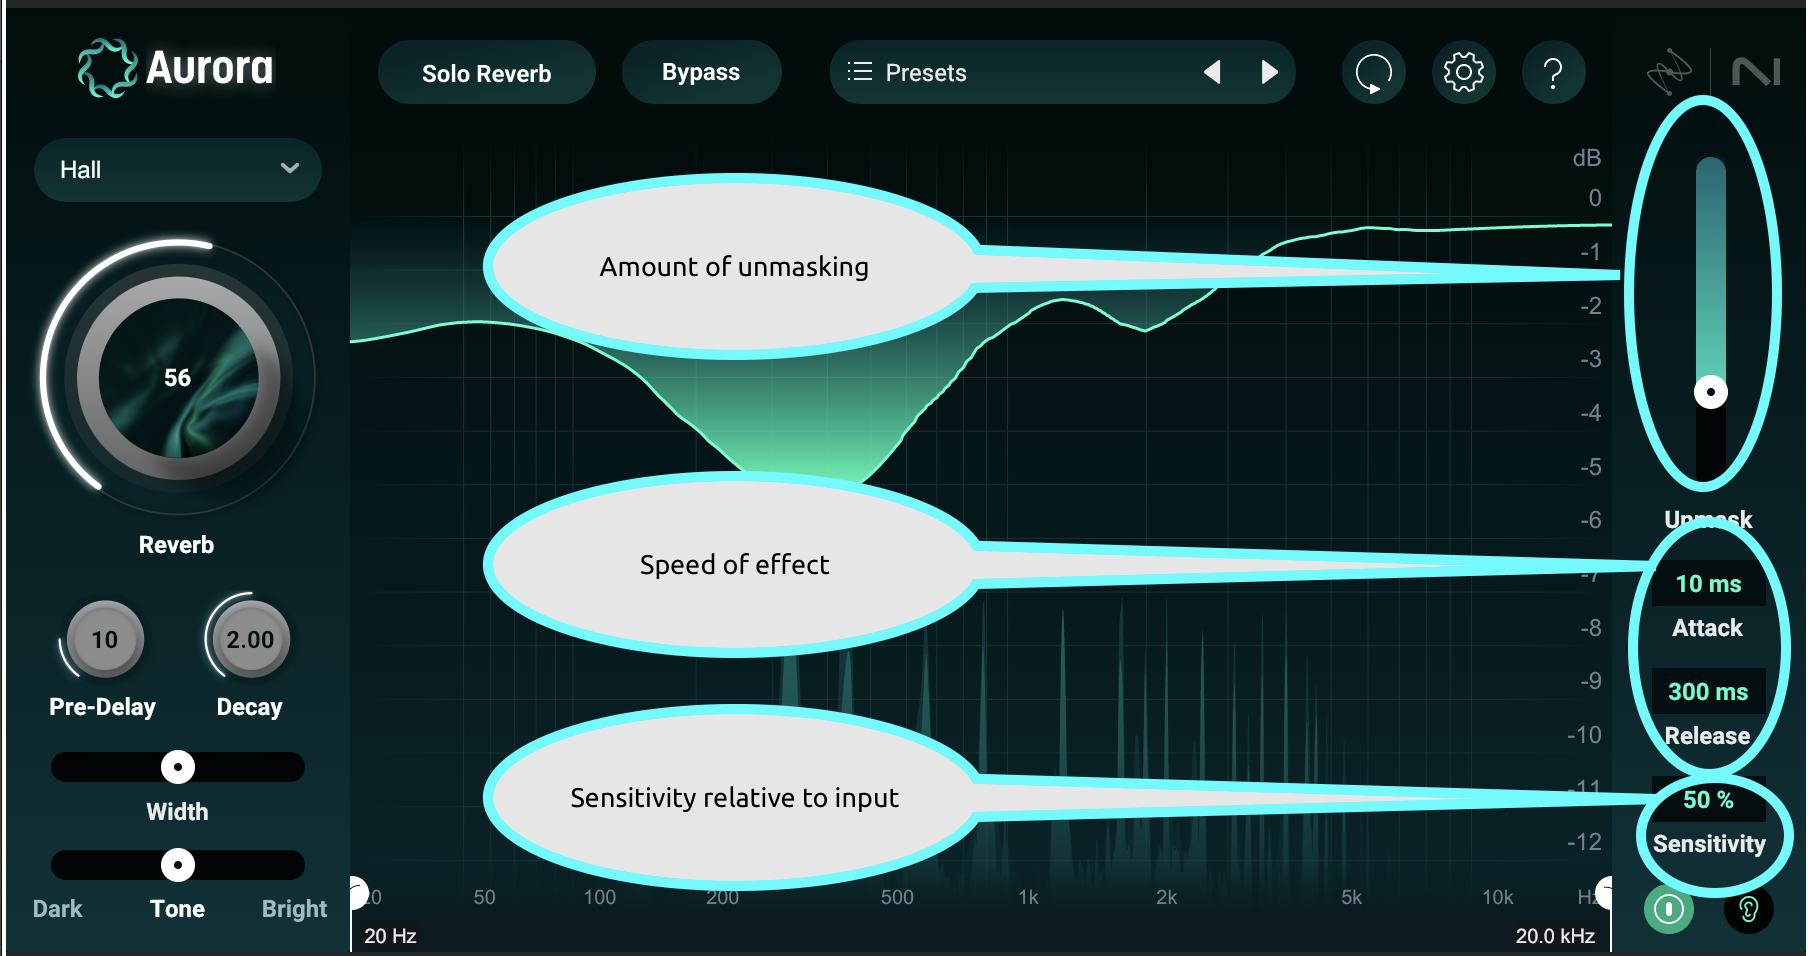
That’s not to say you have no control over the effect. In fact, if you’ve ever used a compressor, you’ll grasp the controls Aurora provides. Attack and release are on hand to control the speed of the dynamic suppression. The “unmask” slide functions like a ratio control: the more you use, the greater the amount of spectral ducking. Sensitivity acts like a threshold, making it easy to adjust the effect to lower inputs.
Eliminate complicated reverb chains.
Does your reverb aux look like a plug-in sandwich on EQ bread? Aurora speeds things up by eliminating the need for multiple processors feeding or following your reverb. It also has high- and low-pass filtering, as that’s the first thing people tend to reach for when tweaking reverb.

Broad controls for broad control.
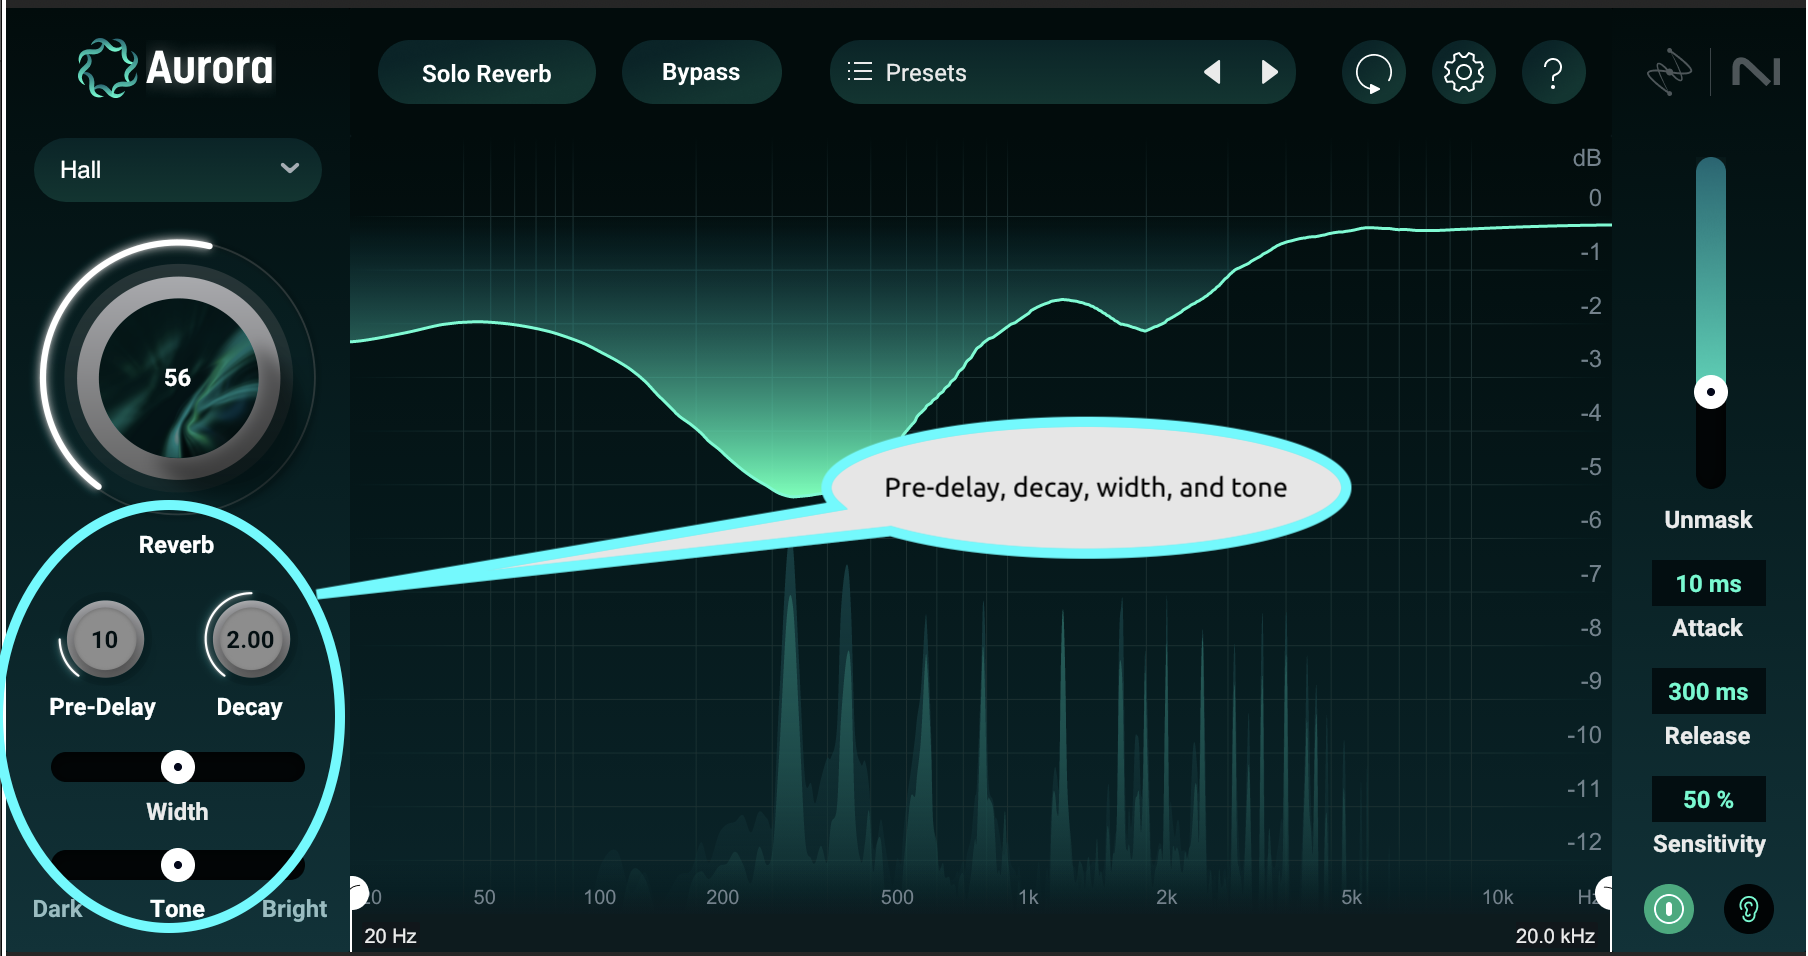
Pre-delay, adjustable decay time, width, and global tonal controls allow you to tweak the verb’s basic operation quickly and effectively, further eliminating the need for extra plug-ins.
Great on the insert or the buss.
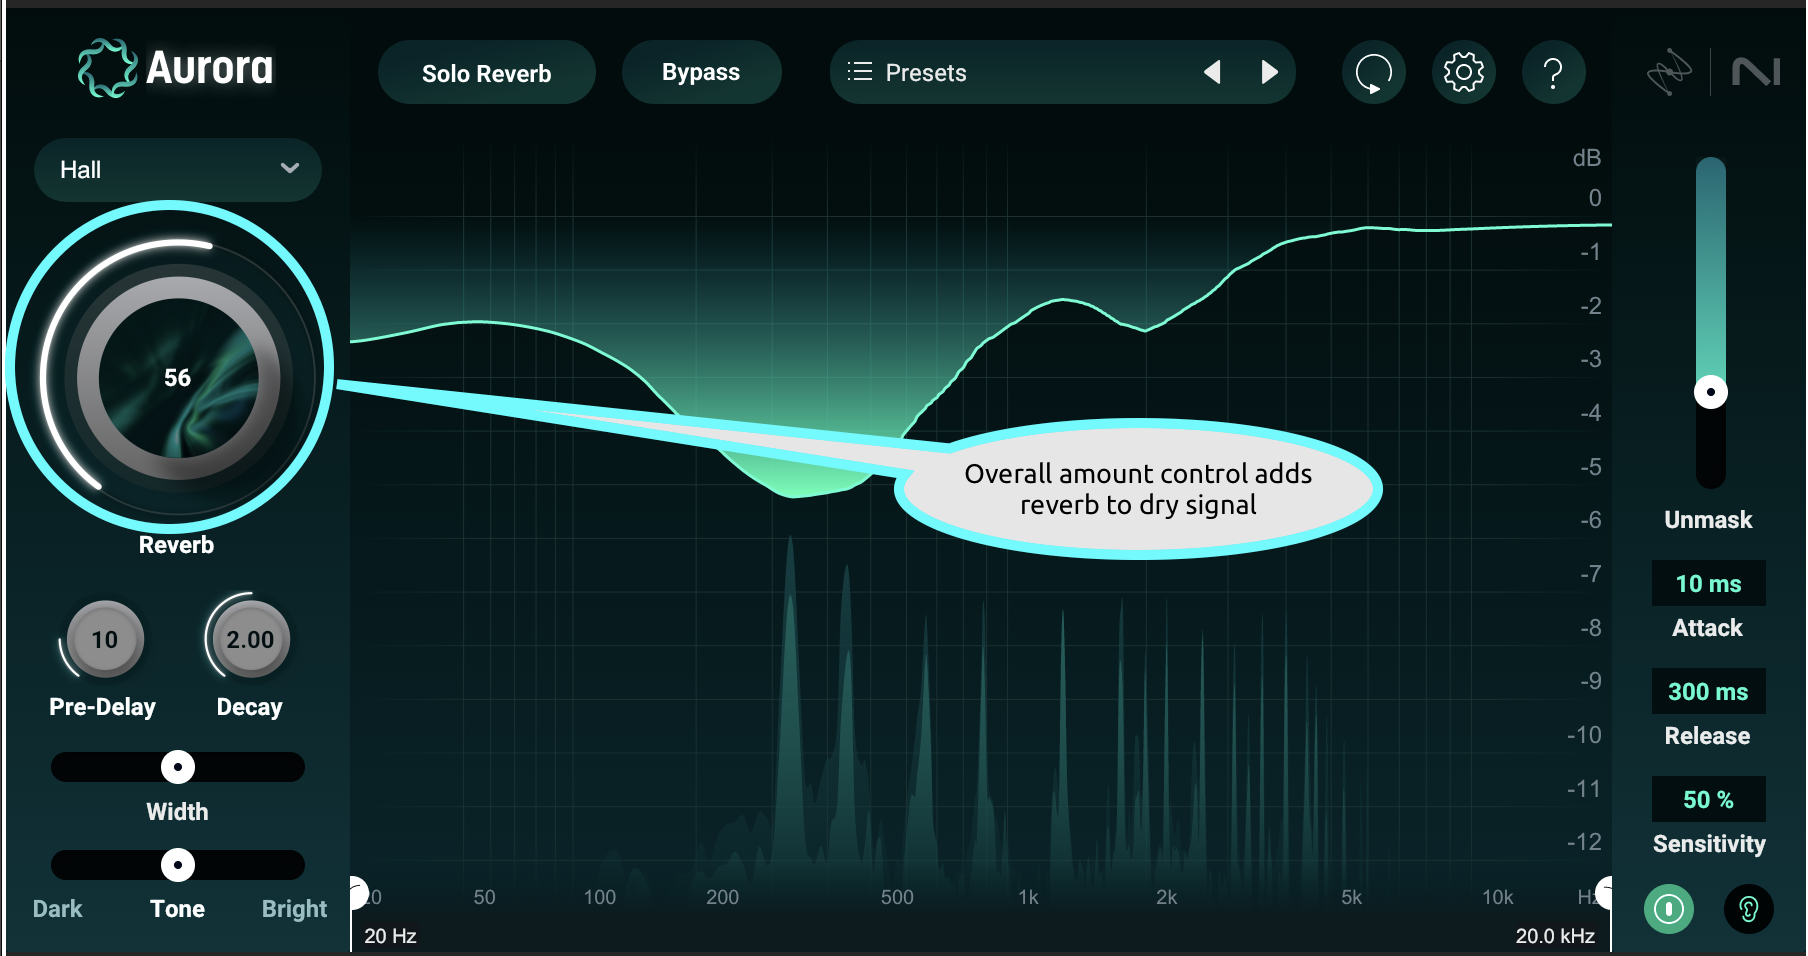
Instead of a conventional mix knob, Aurora sports a Reverb control that simply adds wet effect to the dry signal. This means the dry signal will never decrease in level when you use Aurora as an insert effect.
This may sound kind of arbitrary, but pros who care about gain staging know exactly how important this is:
Blend knobs usually decrease your dry signal as you increase the verb, resulting in unpredictable changes to downstream compression, distortion, saturation, and other non-linear processors. With simple additive behavior, downstream effects are easier to anticipate and account for.
Of course, many engineers prefer to bus their reverb to dedicated effects return tracks, so they can send multiple instruments to one reverb effect. That’s why Aurora has its prominent “Solo Reverb button.”
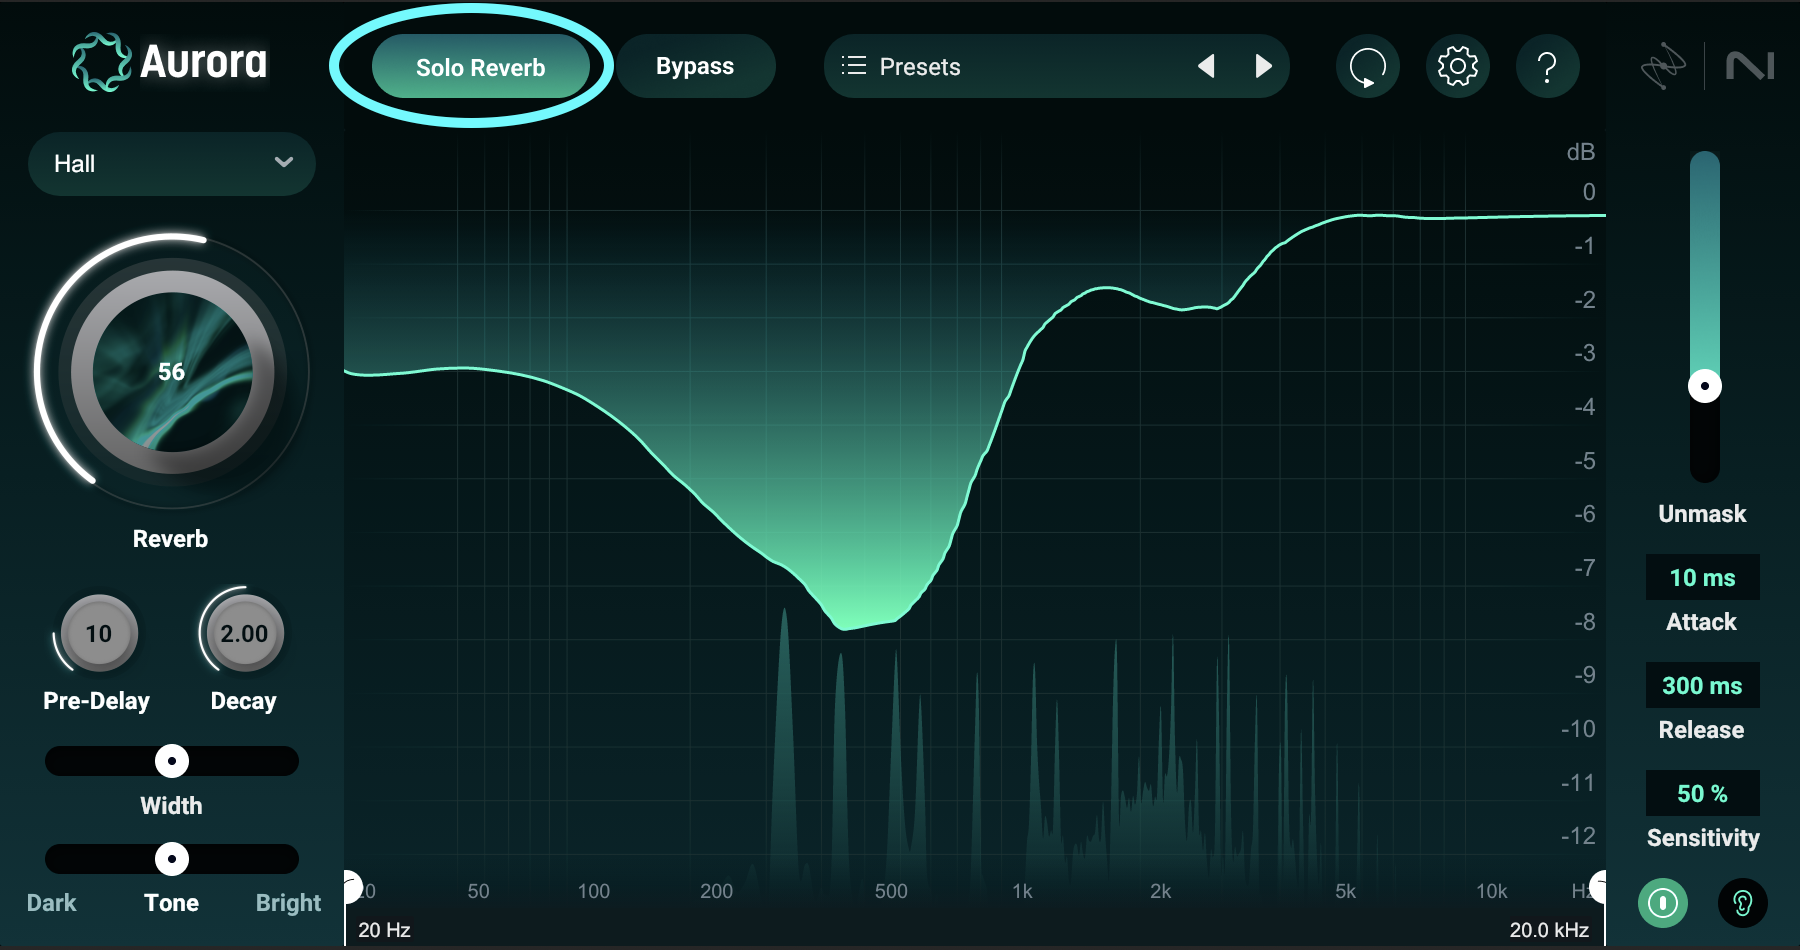
Click this button, and the amount control becomes a dedicated volume control for the reverb—also a useful feature for gain-staging in its own right.
Most importantly, this reverb sounds great.
Who would care about all these workflow enhancements if the reverb didn’t sound good?
Nobody, that’s who. That’s why Aurora mines the legendary sound of Exponential Audio—algorithms famous for their beautiful and stunning sound, and a little infamous for their huge range of tweakable controls.
You get six algorithms in total:
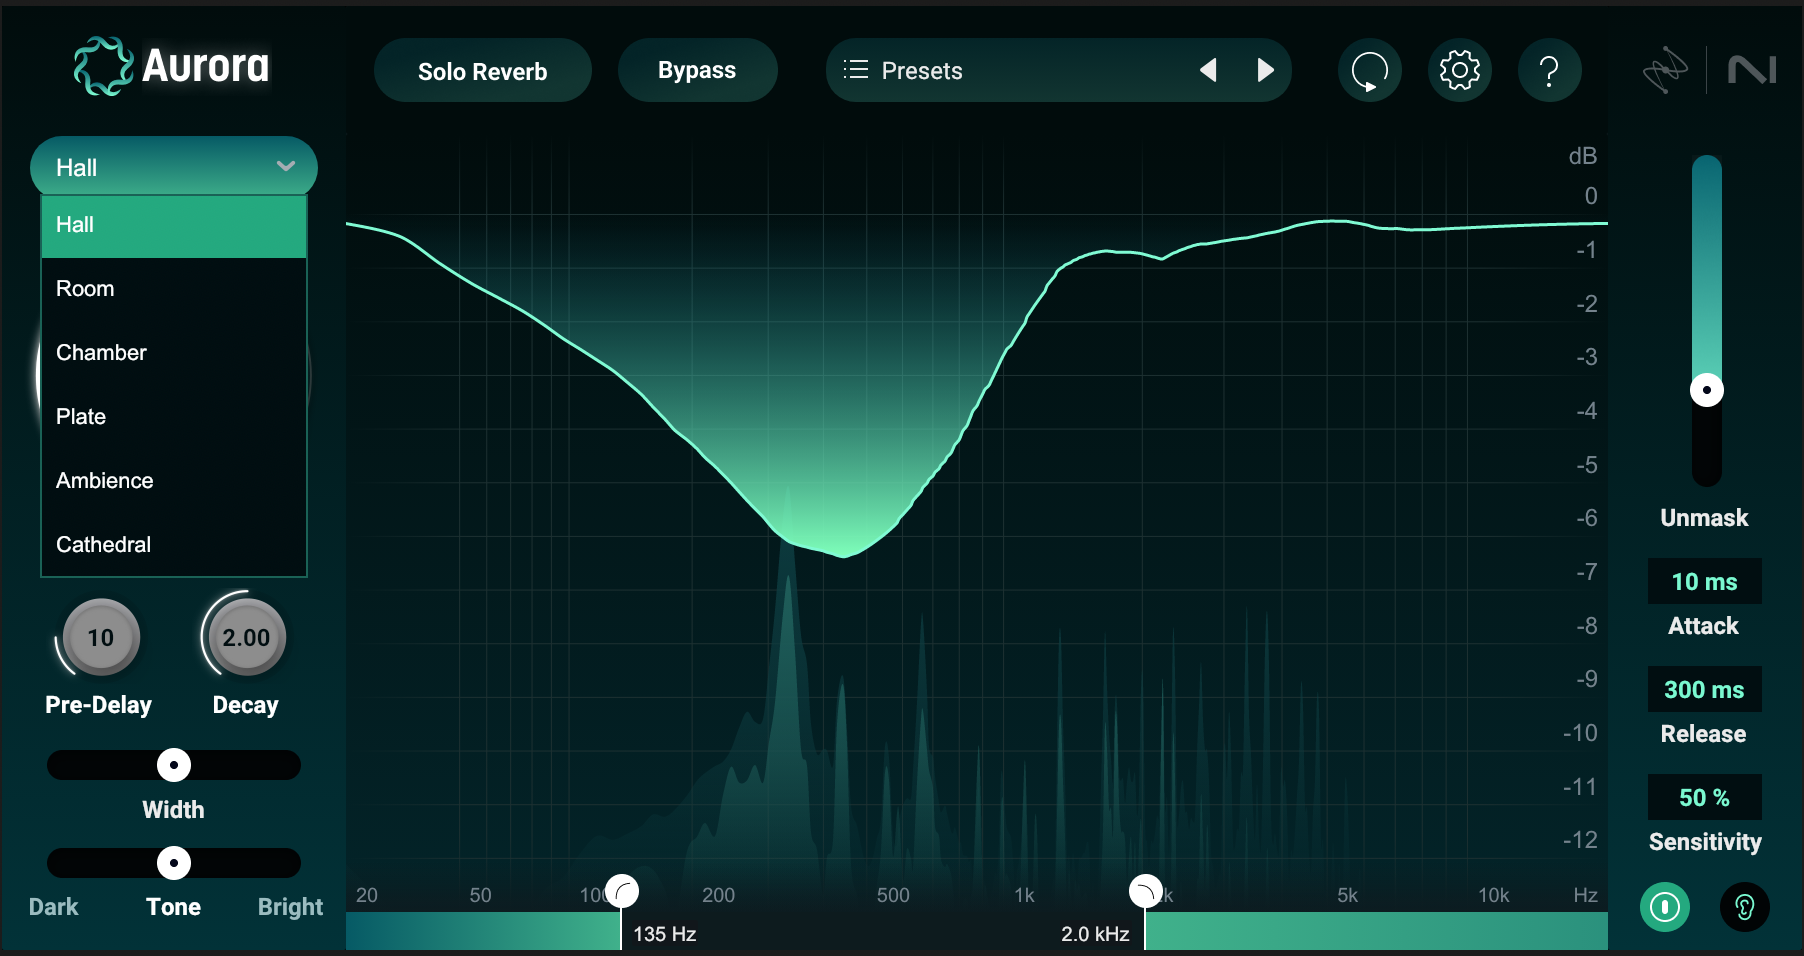
These cover the standard algorithms one tends to reach for in reverberation.
Affordable for the producer on a budget
Priced at $49 when it isn’t on sale, Aurora won’t break the bank.
Spectral unmasking illustrated in depth
Having highlighted the features, let’s dive more deeply into the plug-in, so you can see just how effective it is. We’ll start with its spectral unmasking abilities.
Masking defined
Masking, if you don’t know, is when the frequency build-up of one sound makes a different sound harder to hear.
You probably do know about masking, however—especially if you’re a fan of iZotope Neutron or iZotope Neoverb. Both plug-ins offer their own tools for handling frequency masking, often by means of interplug-in communication.
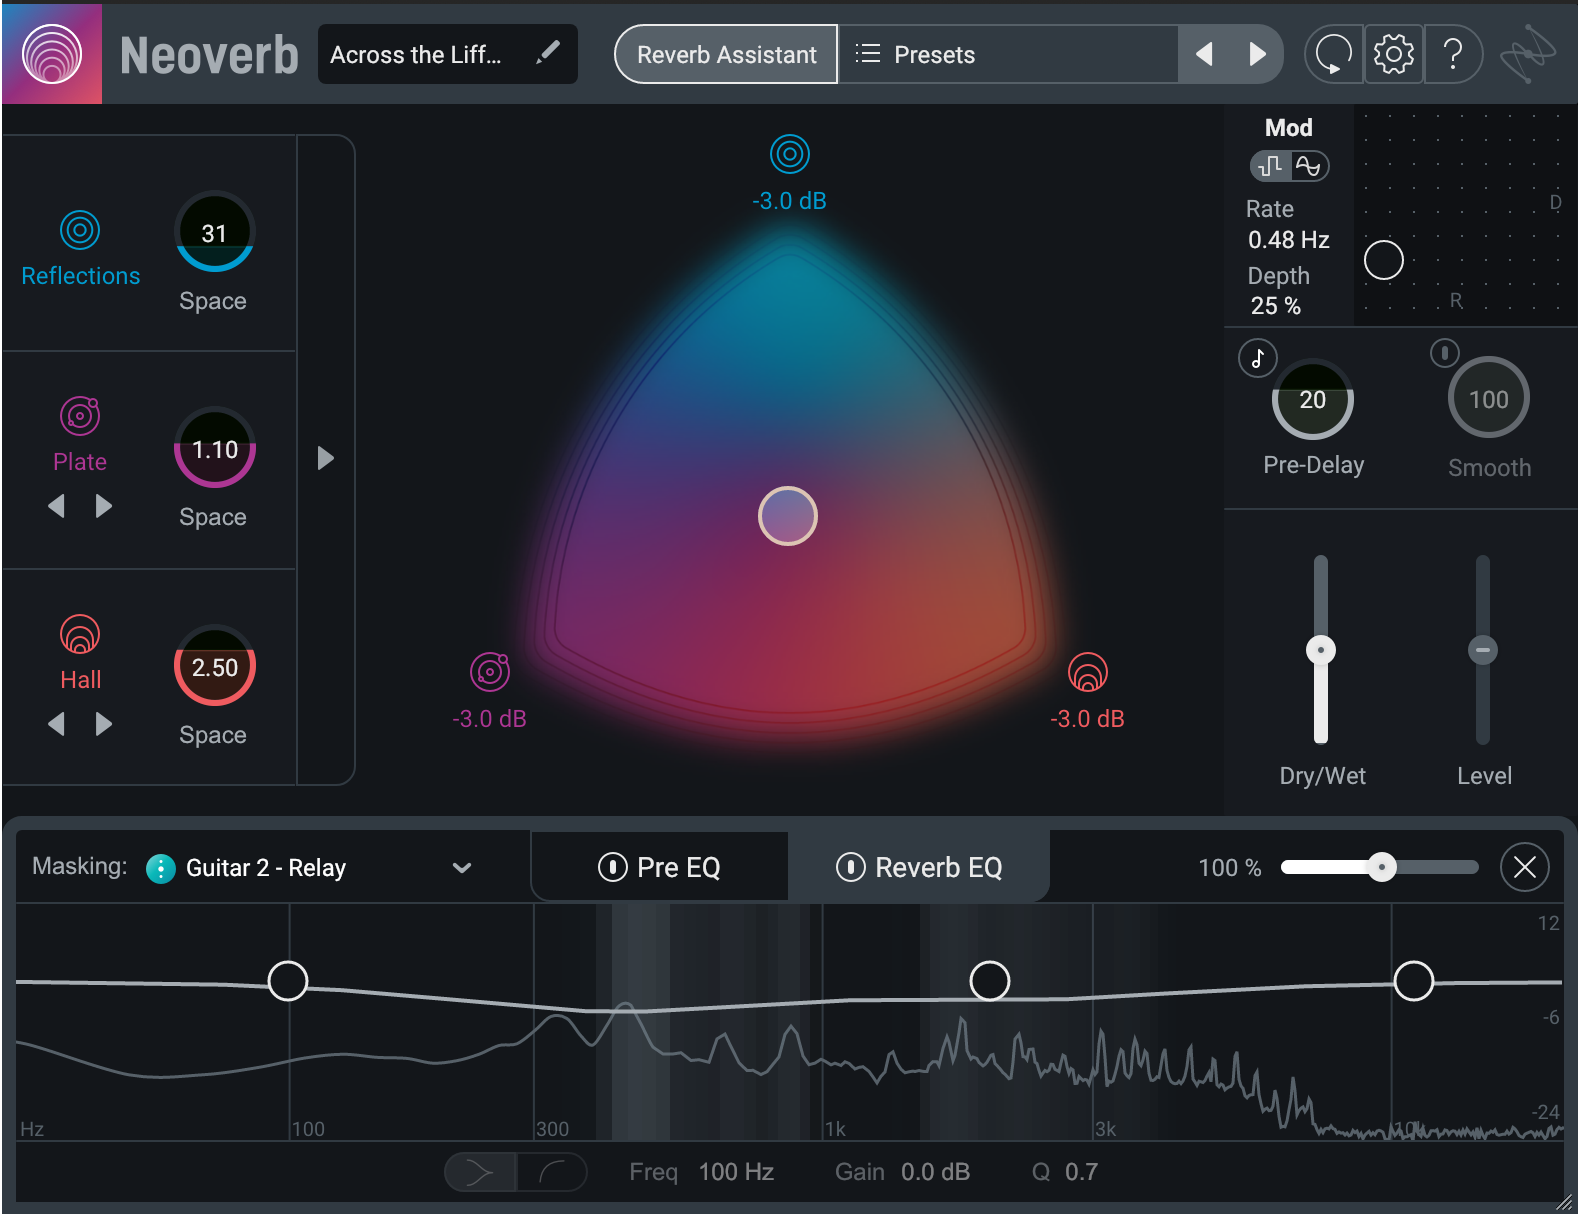
If you find the reverb of a guitar is interfering with your ability to hear vocals, Neoverb—or any other reverb followed by Neutron—is a suitable choice.
But for the more common issue of reverbs muddying up their own input signals, Aurora uses a different methodology—one that’s easy to grasp and simple to implement.
Masking in Aurora
Aurora analyzes the input signal and applies intelligent, spectral ducking to the resulting verb. In simple terms, It’s going to know which frequencies need to be dialed down in the effect—and it’s going to know this instantly.
It’s only going to apply reduction when it needs to. Unlike other processors, you’re not applying a static cut to a reverb return, or a dynamic EQ to a prescribed frequency band.
Instead, the process is spectral, much like the tech in Ozone. If the resonance build-up moves from 300 Hz to 430 Hz as the song transitions from verse to chorus, Aurora will track the change instantly and apply an appropriate amount of spectral ducking.
Observe this static mix of the song Monument by Pete Mancini, and pay attention to the guitars:
Let’s say I want to add some reverb to them. For the sake of argument, let’s say I wanted Aurora’s hall algorithm. I’ll slap it on a buss with masking bypassed, like so:
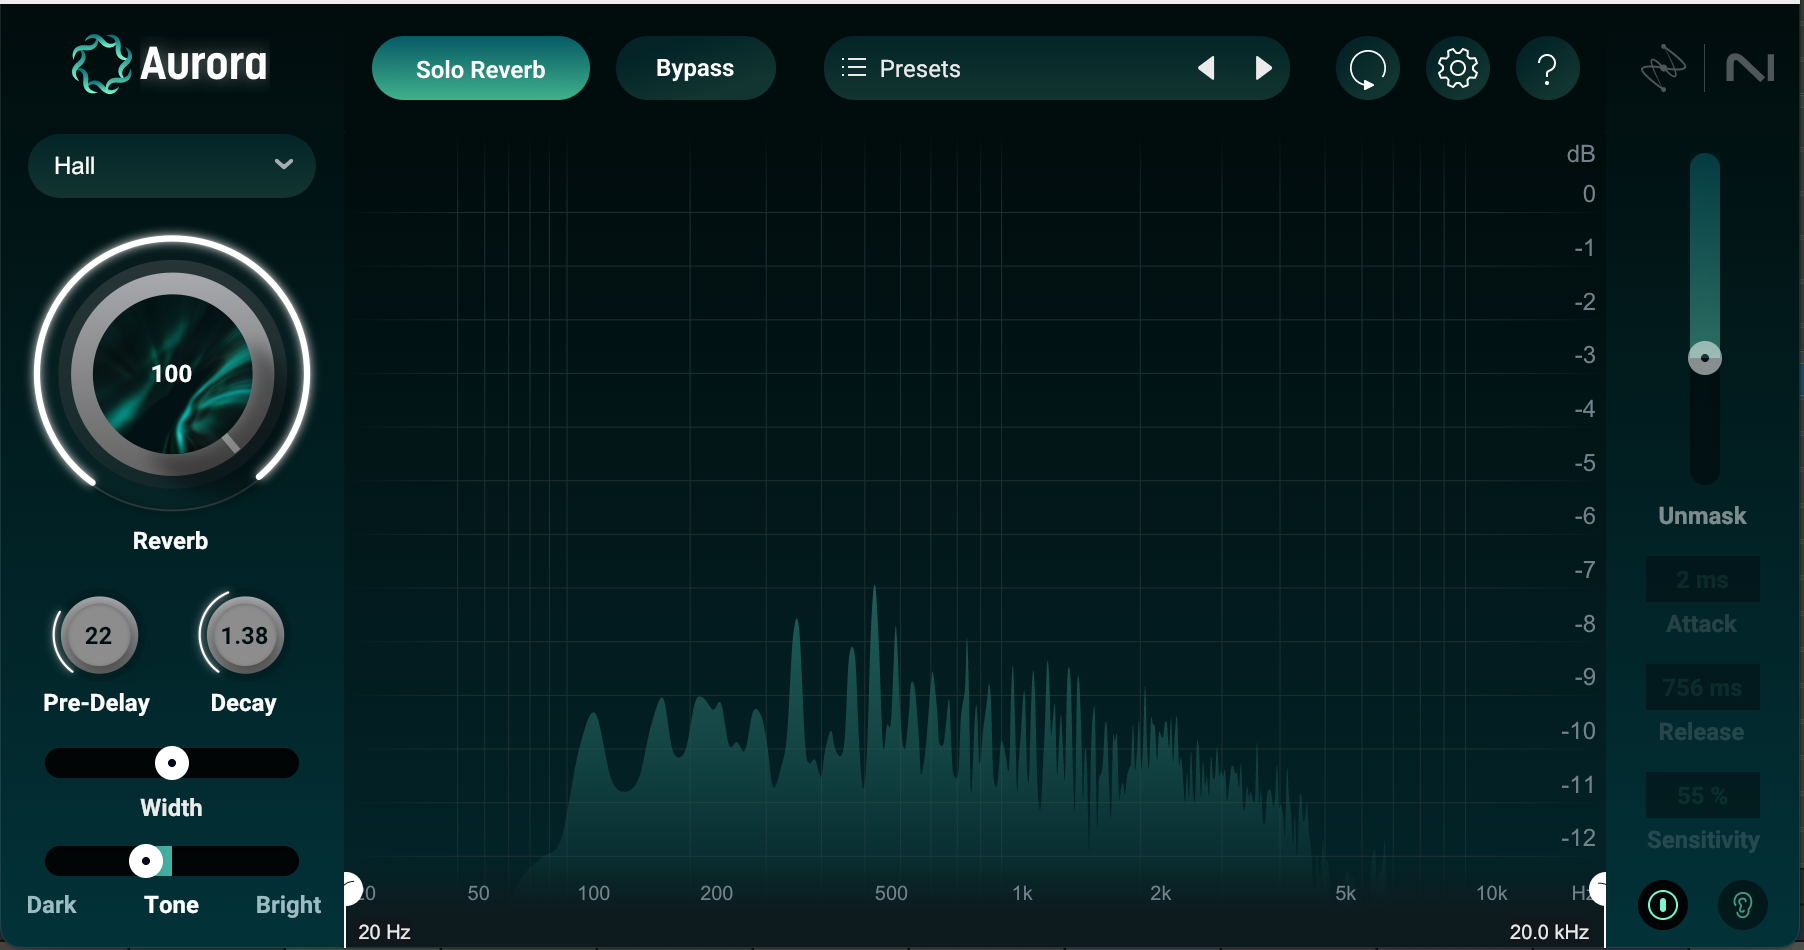
Sounds good on its own, but in the mix, we’re going to get some mud:
The reverb has made everything sound blurrier, less distinct, and less professional.
With Aurora, I don’t have to abandon the verb entirely to make it work. All I have to do is enable the masking features in Aurora with one button click, like so:
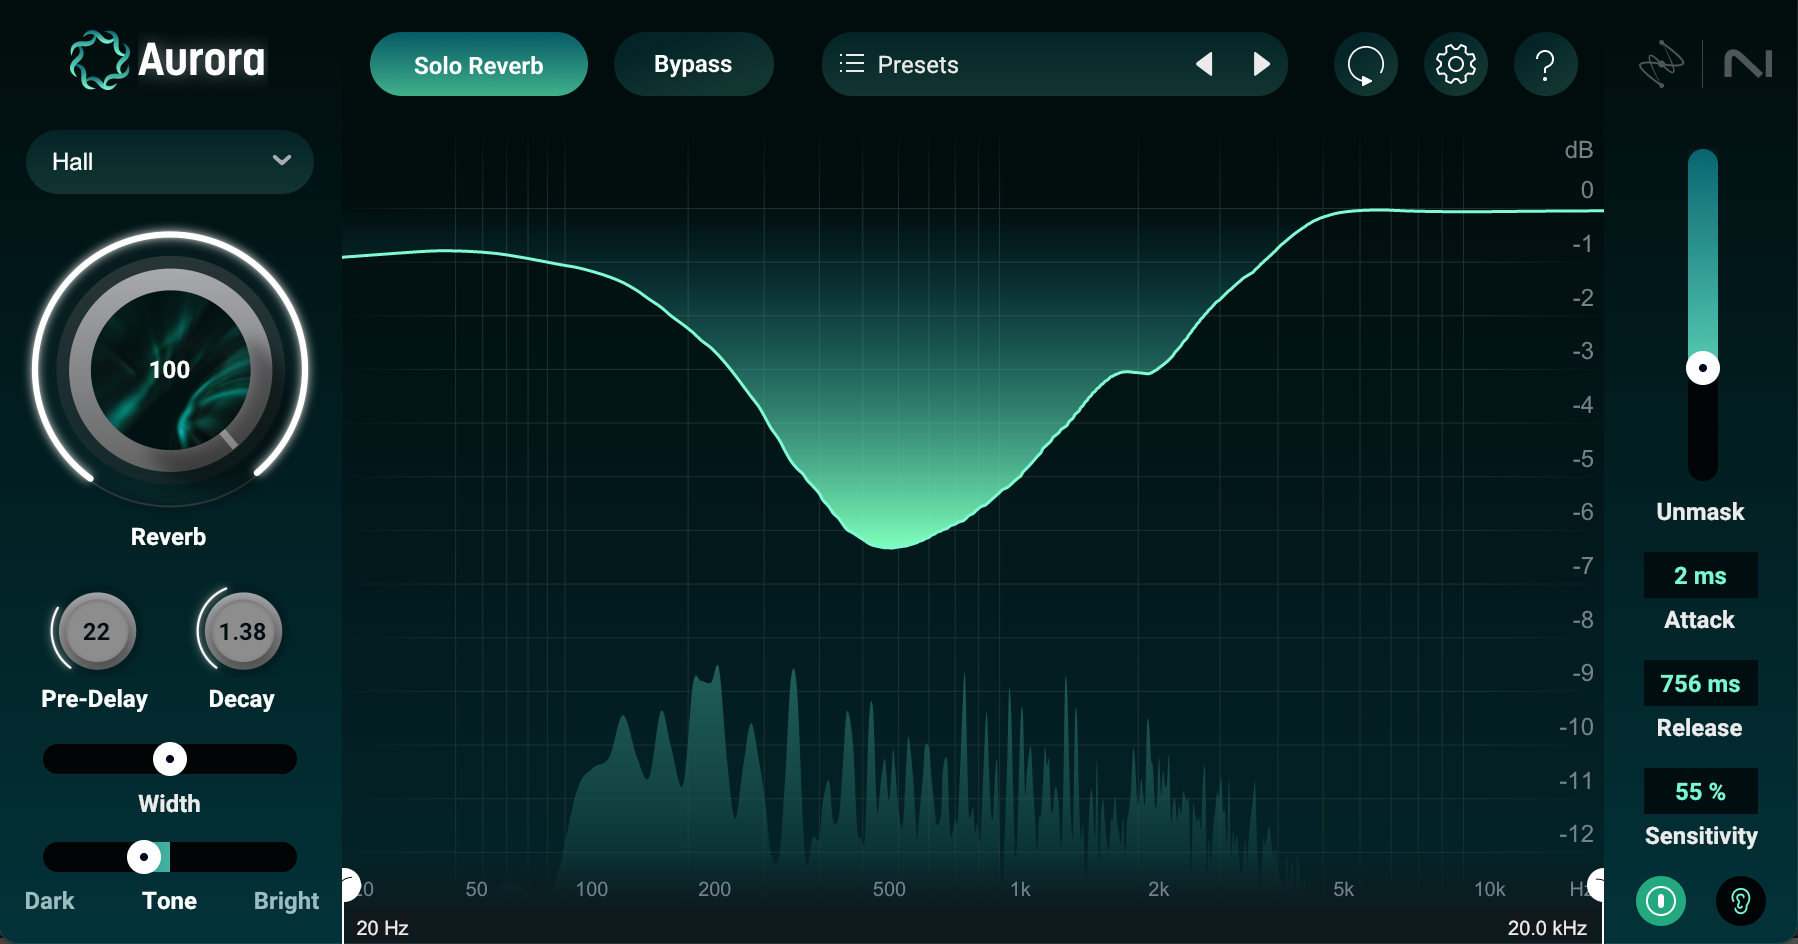
And we have a mix that’s much cleaner:
Of course, you can tweak these unmasking parameters in a variety of ways, using attack, release, and sensitivity controls. Not exactly sure what you’re taking away? Use the delta button in the unmask section to monitor what Aurora is suppressing:

Press this button, and you can hear exactly what Aurora is taking out of your verb. Use Delta in combination with the sensitivity control, attack, and release to fine tune the effect to your liking.
Quality reverbs for any mix
Now let’s highlight how beautiful—and functional—these verbs are in their own right. These reverbs are suited to various different genres, and can accommodate both subtle and dramatic implementations.
Subtlety for days
Here’s a useful exercise for putting a reverb through its paces, especially where subtly is concerned:
Take a static mix with real world elements and use the same verb across multiple instruments. Do this directly, as an insert effect, rather than as a send. Put the verb on everything you can think of: drums, guitars, vocals, heck, even the bass.
We’re intentionally using different instances of the plug-in to test its cohesive abilities. A verb that passes this test will make us feel as though everything exists in the same space. A verb that fails will bring annoying frequency build-ups and phase inconsistencies to the forefront.
For this exercise to work, the core reverb settings must remain the same. We need the same verb engine, the same decay times, the same tonal settings, and the same spatial parameters.
We will, however, use different amounts of verb depending on the instrument, and we will also change the pre-delay control on a case-by-case basis.
The reason for the first change is self-explanatory: in no real-world scenario will every mix element be cranked to maximum reverb—that’s a one way ticket to mudville.
The pre-delay, however, becomes our depth control: changing the pre-delay will alter our perception of where in this virtual space each instrument is sitting. Furthermore, how the verb responds to pre-delay is also a valid parameter to test.
Let’s put aurora through this test. Here are the basic settings we’re using:
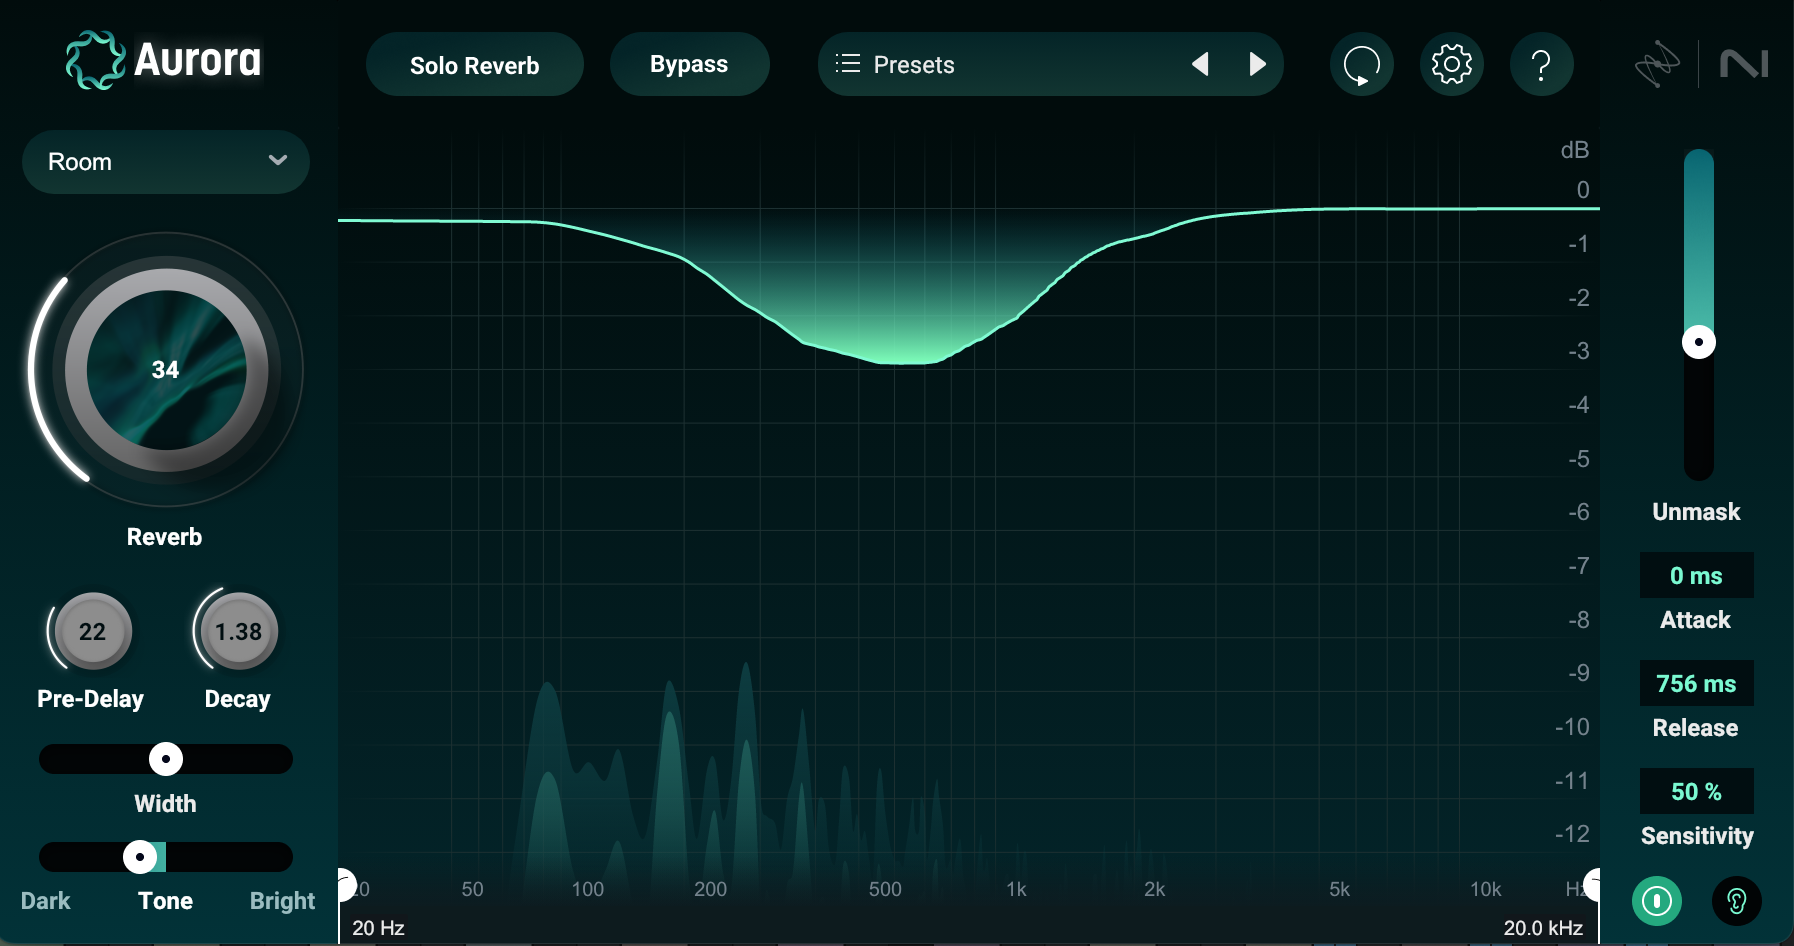
Here’s the mix with no Aurora:
And here’s the mix with Aurora on every instrument:
It’s subtle enough to not call attention to itself, yet you miss it when it goes away.
In case you think this is a one off, here’s another static mix from a different song. Same artist, but a much more acoustic track. To make things more interesting for myself, I also set up this mix in a different DAW.
Here’s our static mix:
Here are our settings:
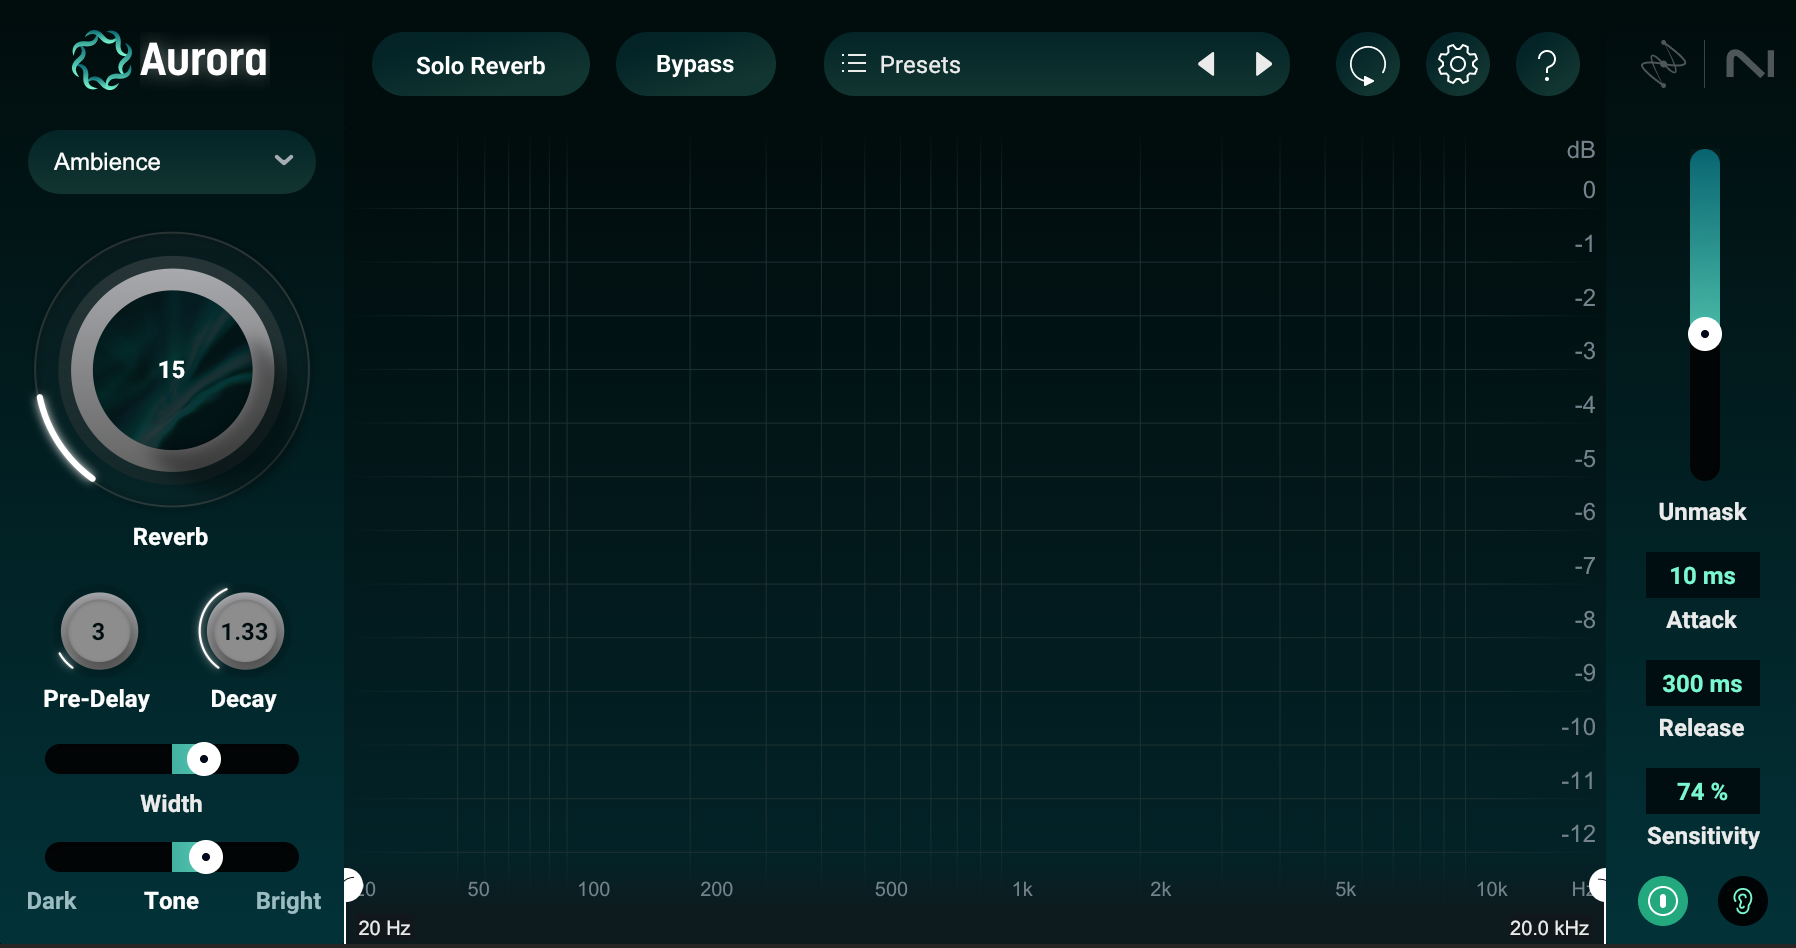
And here are the results:
Dramatic landscapes at the click of a mouse
This reverb is built on the legendary back of Exponential Audio and its pristine, gorgeous reverbs. Now, if you’ve used Stratus or Phoenix Verb and the like, you’ll know that these classic verbs of yore are immensely tweakable—which cuts both ways: yes you can tailor them extensively, but they aren’t so easy to get around at first glance.
Aurora takes a lot of the head-scratching away, but the effects are no less dramatic when you want them to be. And to show this off, I believe you need to watch what happens when we stretch the decay times of the six reverb engines on hand. The plate, for instance, behaves quite differently the longer it lasts—and the behavior is quite dramatic to behold.
Here’s our acoustic mix stripped down to vocal and guitar. I’m going to automate the decay time and width parameters on the vocal as time goes on, just to show you how different—yet how natural—each setting of the plate effect sounds as the vocal moves through its phrases.
The same kind of attention to sonic detail can be found in every setting from the plate to the hall to the chamber:
Download Aurora today
That’s all for now. If you found this intriguing, please demo Aurora today.

