What is frequency masking?
Learn what audio frequency masking is and how to recognize it. Know which instruments often clash, and discover mixing solutions.
Picture this if you will: you’re working on a mix, and you realize two instruments are clashing, covering each other up, and competing for the same sonic space. This is a telltale sign of auditory masking—also known as frequency masking.
In this article, we’re going to show you how to recognize frequency masking, show you which instruments often clash, and give you solutions for dealing with the problem. We’ll be using iZotope


Neutron


Visual Mixer
This article references a previous version of Neutron. Learn about the latest version of Neutron.
What is frequency masking?
Frequency masking is an auditory phenomenon that occurs when two similar sounds play at the same time, or in the same general location. One masks the other, confusing your perception of either sound.
One could imagine frequency masking being quite useful to prehistoric humans: simply wait for the rain to fall and your prey won’t hear your footsteps in the forest. In mixing music, frequency masking can be either encouraged or problematic (but not bad) depending on its context:
Encouraged masking: when two sources blend, there is likely some overlap in a frequency range, and therefore some amount of masking happens. This is similar to the use of distortion in mixing.
Problematic masking: when two sources blend, but their frequencies tend to obscure rather than compliment each other. This can be frustrating because it is difficult to listen, analyze, and understand where tracks compete across an entire mix.
When masking is problematic, it can lead to an unprofessional sound.
Luckily the condition is treatable! For one thing, you’ll find the same sort of instruments tend to clash over and over again, despite the music or genre.
Common instruments that encounter masking
Kick and bass: like two protagonists of any good romantic comedy, these two love to clash at first. One usually masks the other in a mix.
You might listen to them in solo and find they sound big, full, and loud—but play them together and one might get lost. Here’s an audio example of what frequency masking can sound like between the kick and bass, and what it sounds like after they are unmasked:
Before and after unmasking
Notice how after the instruments are unmasked, the kick is more pronounced while the bass maintains its space.
You’re likely to run into issues with kick and bass masking each other a fair amount, as they both compete for the low end of the mix. But that doesn’t mean you can just ignore the high-mids: both instruments have attack ranges, and these can conflict as well.
Here are some other classic pairings:
- Electric bass and electric guitar
- Acoustic guitar and hi-hat (again, pick attack frequencies)
- Electric guitars and electric pianos (Fender Rhodes piano, Wurly, etc.)
- Snare and guitar (the body)
- Vocals and piano
- Vocals and nearly any other instrument (the voice is a complex machine)
- Background vocals and pads (often serving the same function in a mix)
- Synths and any other synths (synths can sound like anything)
Here’s a frequency chart to visualize where these instruments are on the frequency spectrum.

iZotope Carnegie Chart
How to unmask your mix
There are a few techniques that can be used to unmask your mix. We'll review some below, and for even more ways to create space for elements in your mix, take a look at how to unmask your mix with Neutron.
Complementary equalization
Complementary equalization is a simple process of identifying which frequencies collide between the kick and bass, and then boosting those frequencies slightly in the kick, while making a complimentary cut to those same frequencies in the bass.
You can actually adjust instruments with this method in one solitary instance of Neutron, like so:

Complementary unmasking with Neutron
As noted earlier, this sounds markedly better than our initial example.
Sidechain compression
Another way to unmask instruments is with sidechain compression, which means in simplest terms, we can duck one instrument’s volume when the other plays.
Let’s take our kick and bass again. Bass parts are often sustained, whereas each kick drum impact is going to be quick and percussive. Because the bass is constant, our ear may naturally gravitate towards that, masking the kick drum in return. Here sidechain compression comes to our aid.
We put Neutron Pro on our bass, instantiate a compressor in wideband, and sidechain it to the kick:

Sidechain routing and ducking in Neutron Pro
Now the bass only ducks when the kick hits.
Dynamic EQ or multiband compression
Dynamic EQ or multiband compression apply the same concepts as above, but we’re only ducking the masked frequency when the kick hits. You can do this with Neutron Pro’s compressor, like so:
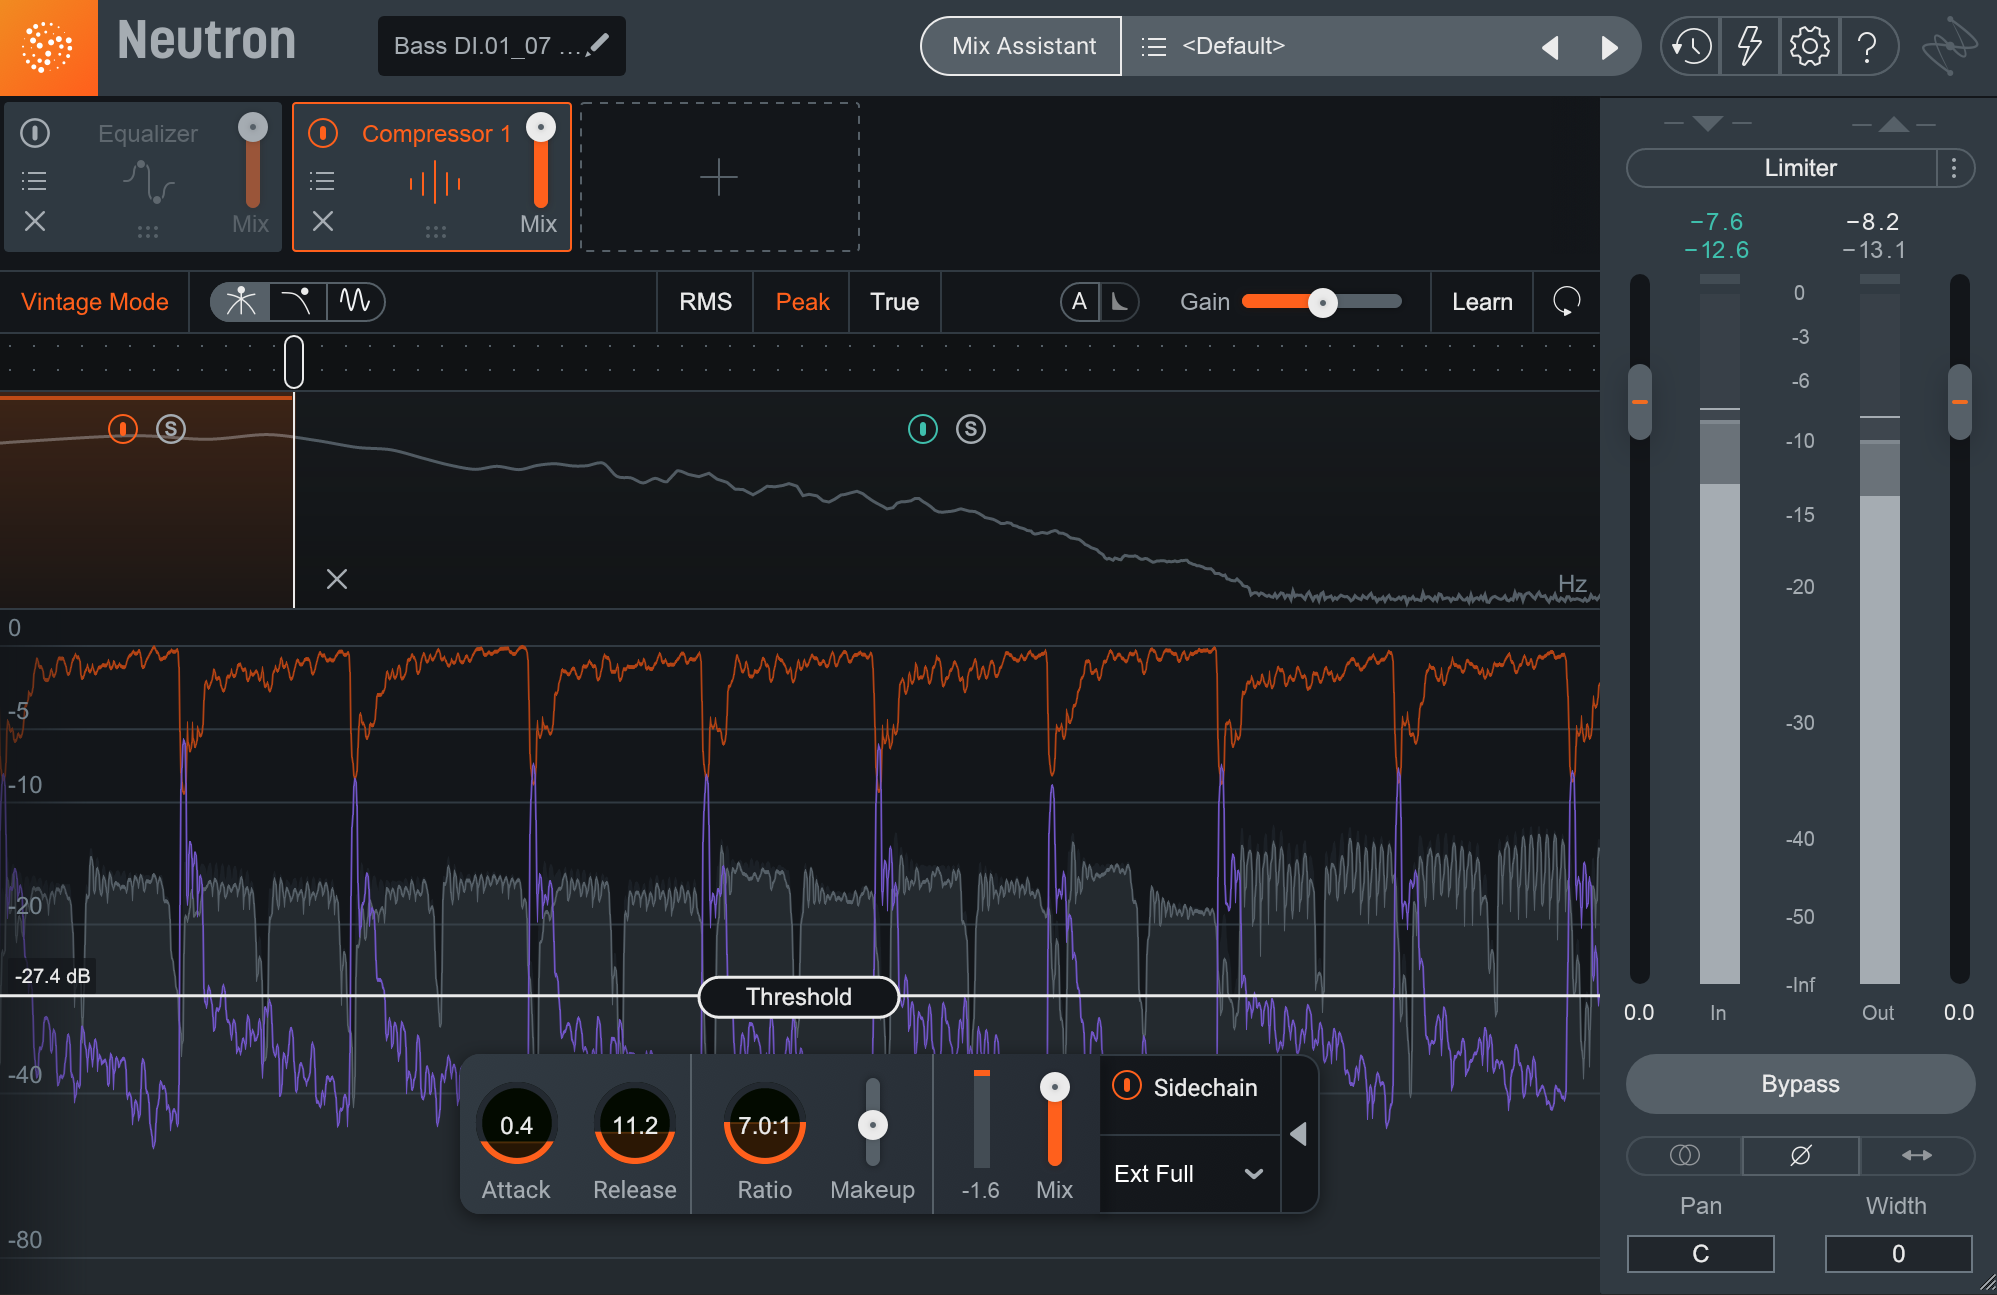
Multiband compression ducking
Or, you can use a dynamic EQ with Neutron, shown here:
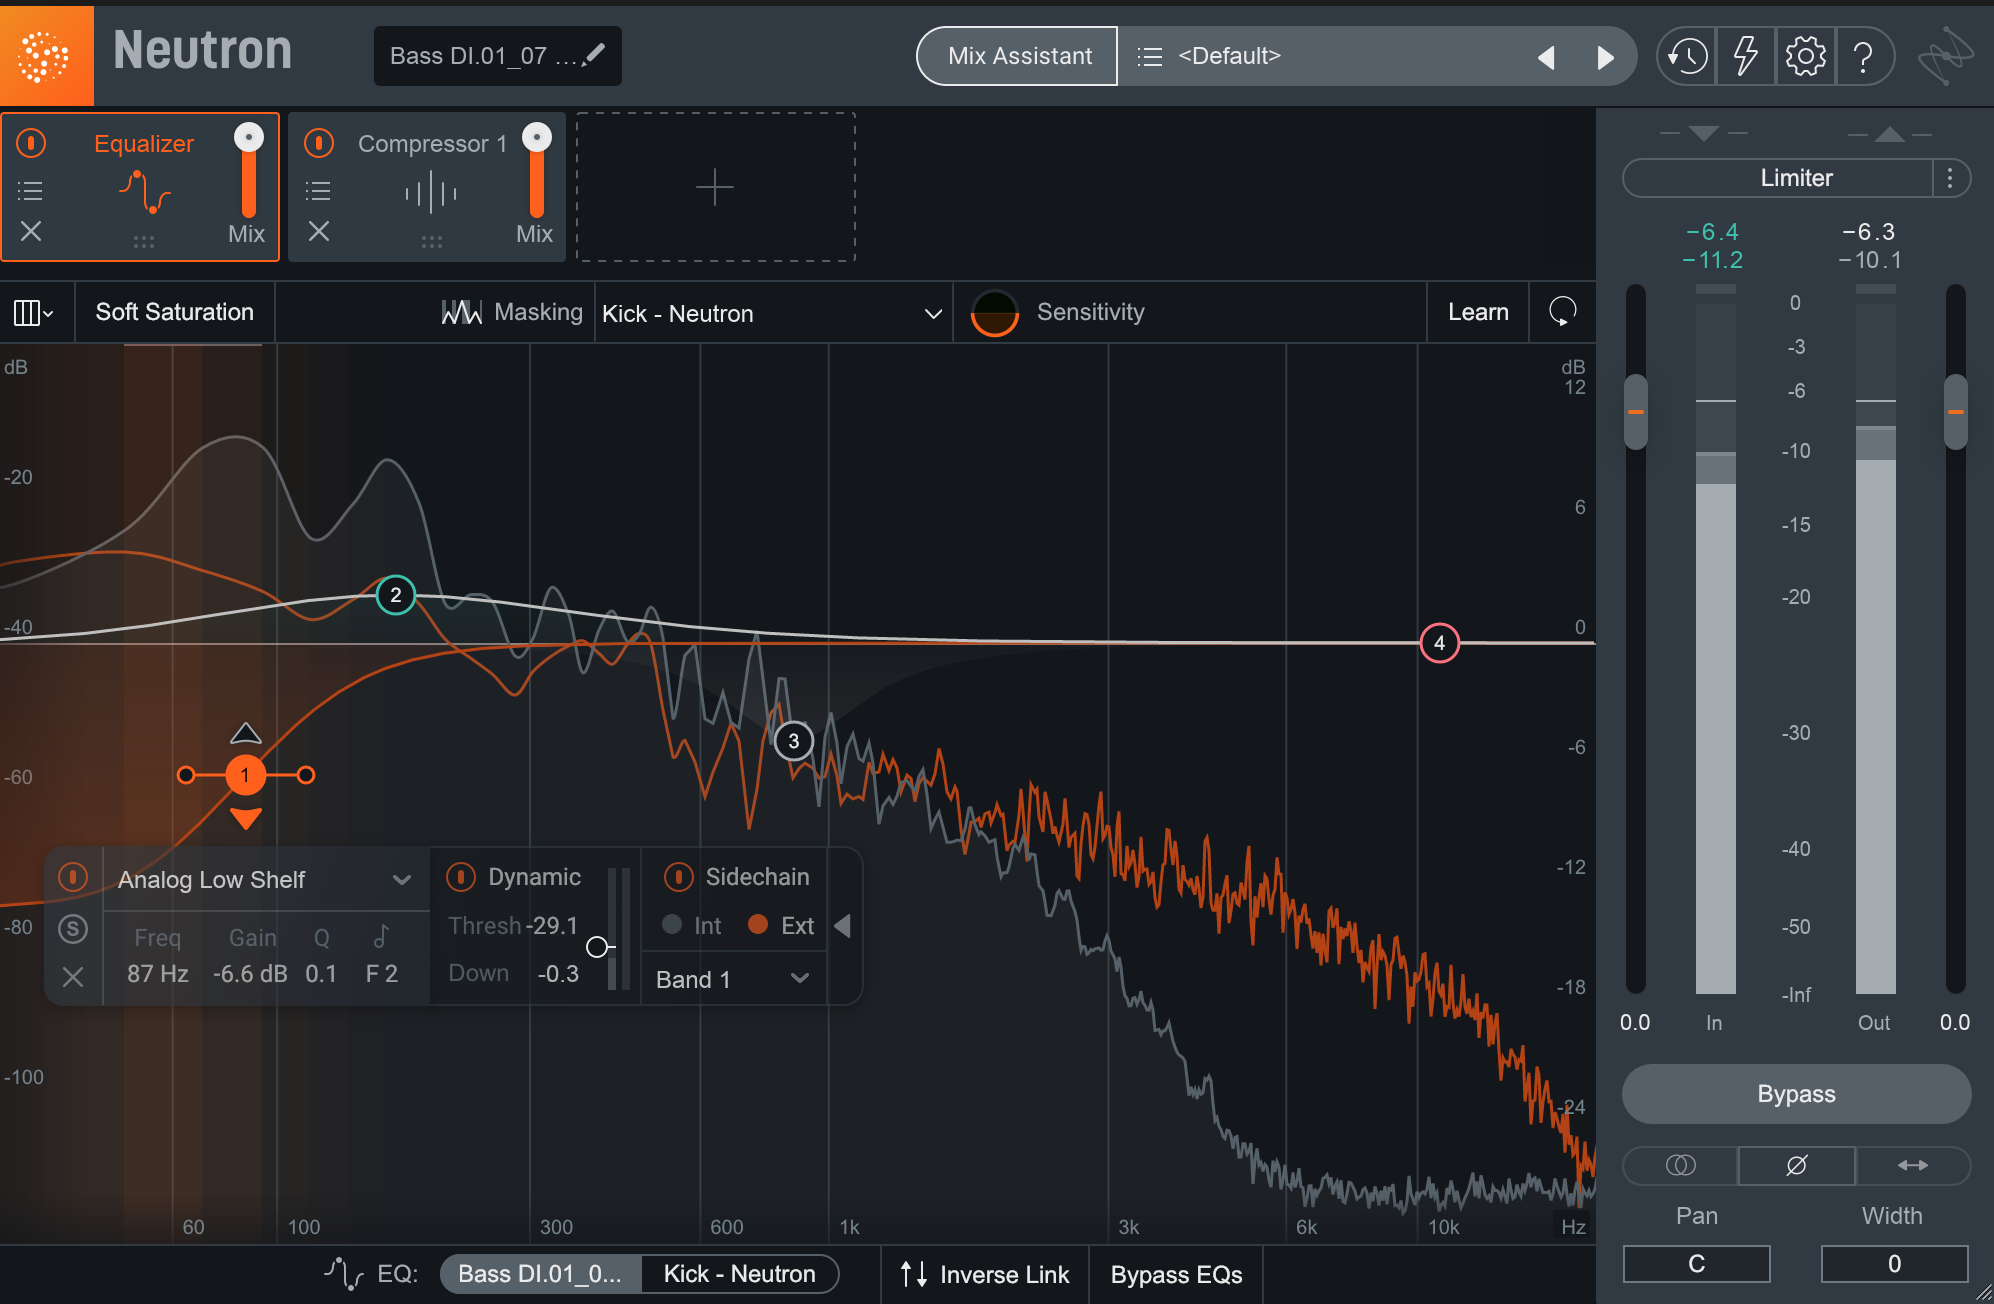
Dynamic EQ ducking
Both get you to a place like this:
Use panning to your advantage
The kick and the bass generally play up the middle, but not every instrument does. Take a high-hat pattern and an acoustic guitar.
They’re presented on their own, but they will clash in the mix. However, if we pan the instruments to different places of the sonic spectrum with a tool like Visual Mixer, they won’t clash as much.
Before and after panning
Use iZotope’s dedicated unmasking processors
These days, we can make use of intelligent processors to avoid frequency masking.
A few iZotope tools come to mind: Neutron’s Unmask module, and the Aurora reverb plug-in. Both processors have real-time unmasking algorithms built right into their functionality.
With Neutron’s Unmask module, you can easily keep one instrument out of another’s way.

Neutron Unmask
Neutron’s Unmask is similar in use to sidechain compression, except it operates on a spectral basis—spectal here meaning “more multiband than multiband.” The dynamics-taming processing is infinitely more finely-tuned than any multiband effect.
Before you use Unmask, however, you need to make a judgment call: which instrument would you like in the forefront? Which instrument should occupy a background position? The battle between kick and bass is an obvious example of this choice: do you want the kick to defer to the bass, or the other way around?
Once you’ve made your choice, take the track that needs to be put in the background and put Unmask on it. Route the track you want to occupy the forefront of the mix into Unmask’s sidechain input. Play with the amount, sensitivity, attack, and release controls, and you’re good to go.
Well, almost: you can also use frequency curtains to restrict the processing within a specific frequency band.
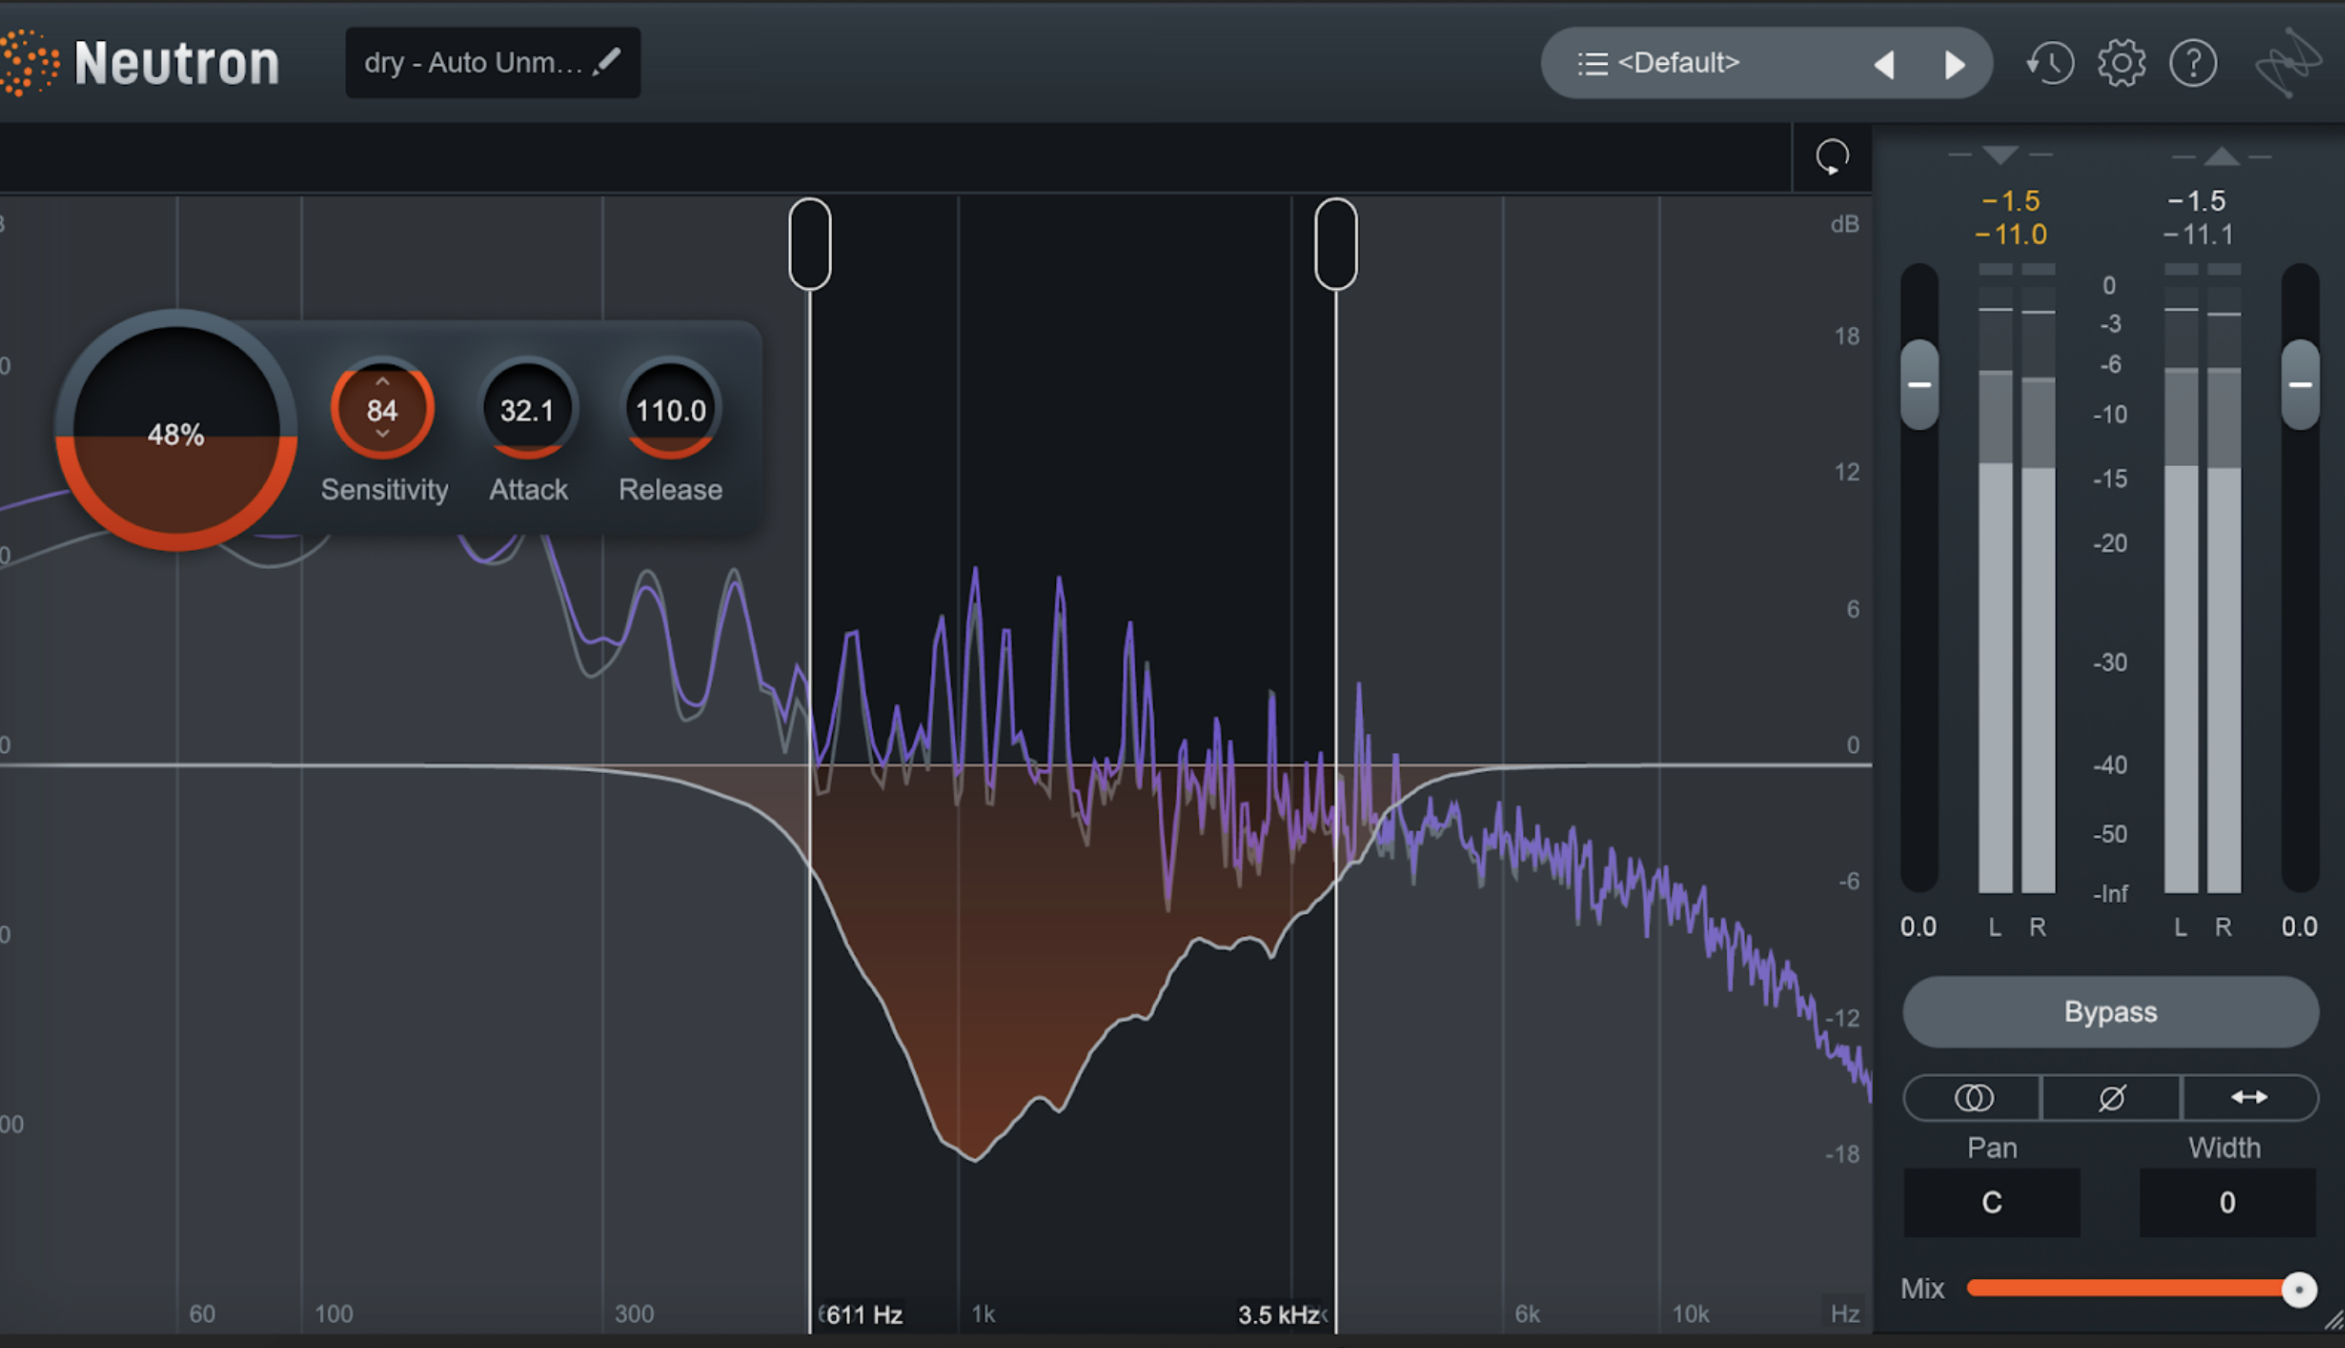
Curtains
That way you don’t accidentally step on low or high-end information you’d rather preserve. Not all frequency collisions are bad, after all. We’ll always encourage you to use your ears!
Aurora, on the other hand, is the perfect tool for a more commonplace problem: keeping the sustaining, booming nature of reverb from muddying up the original sound source.
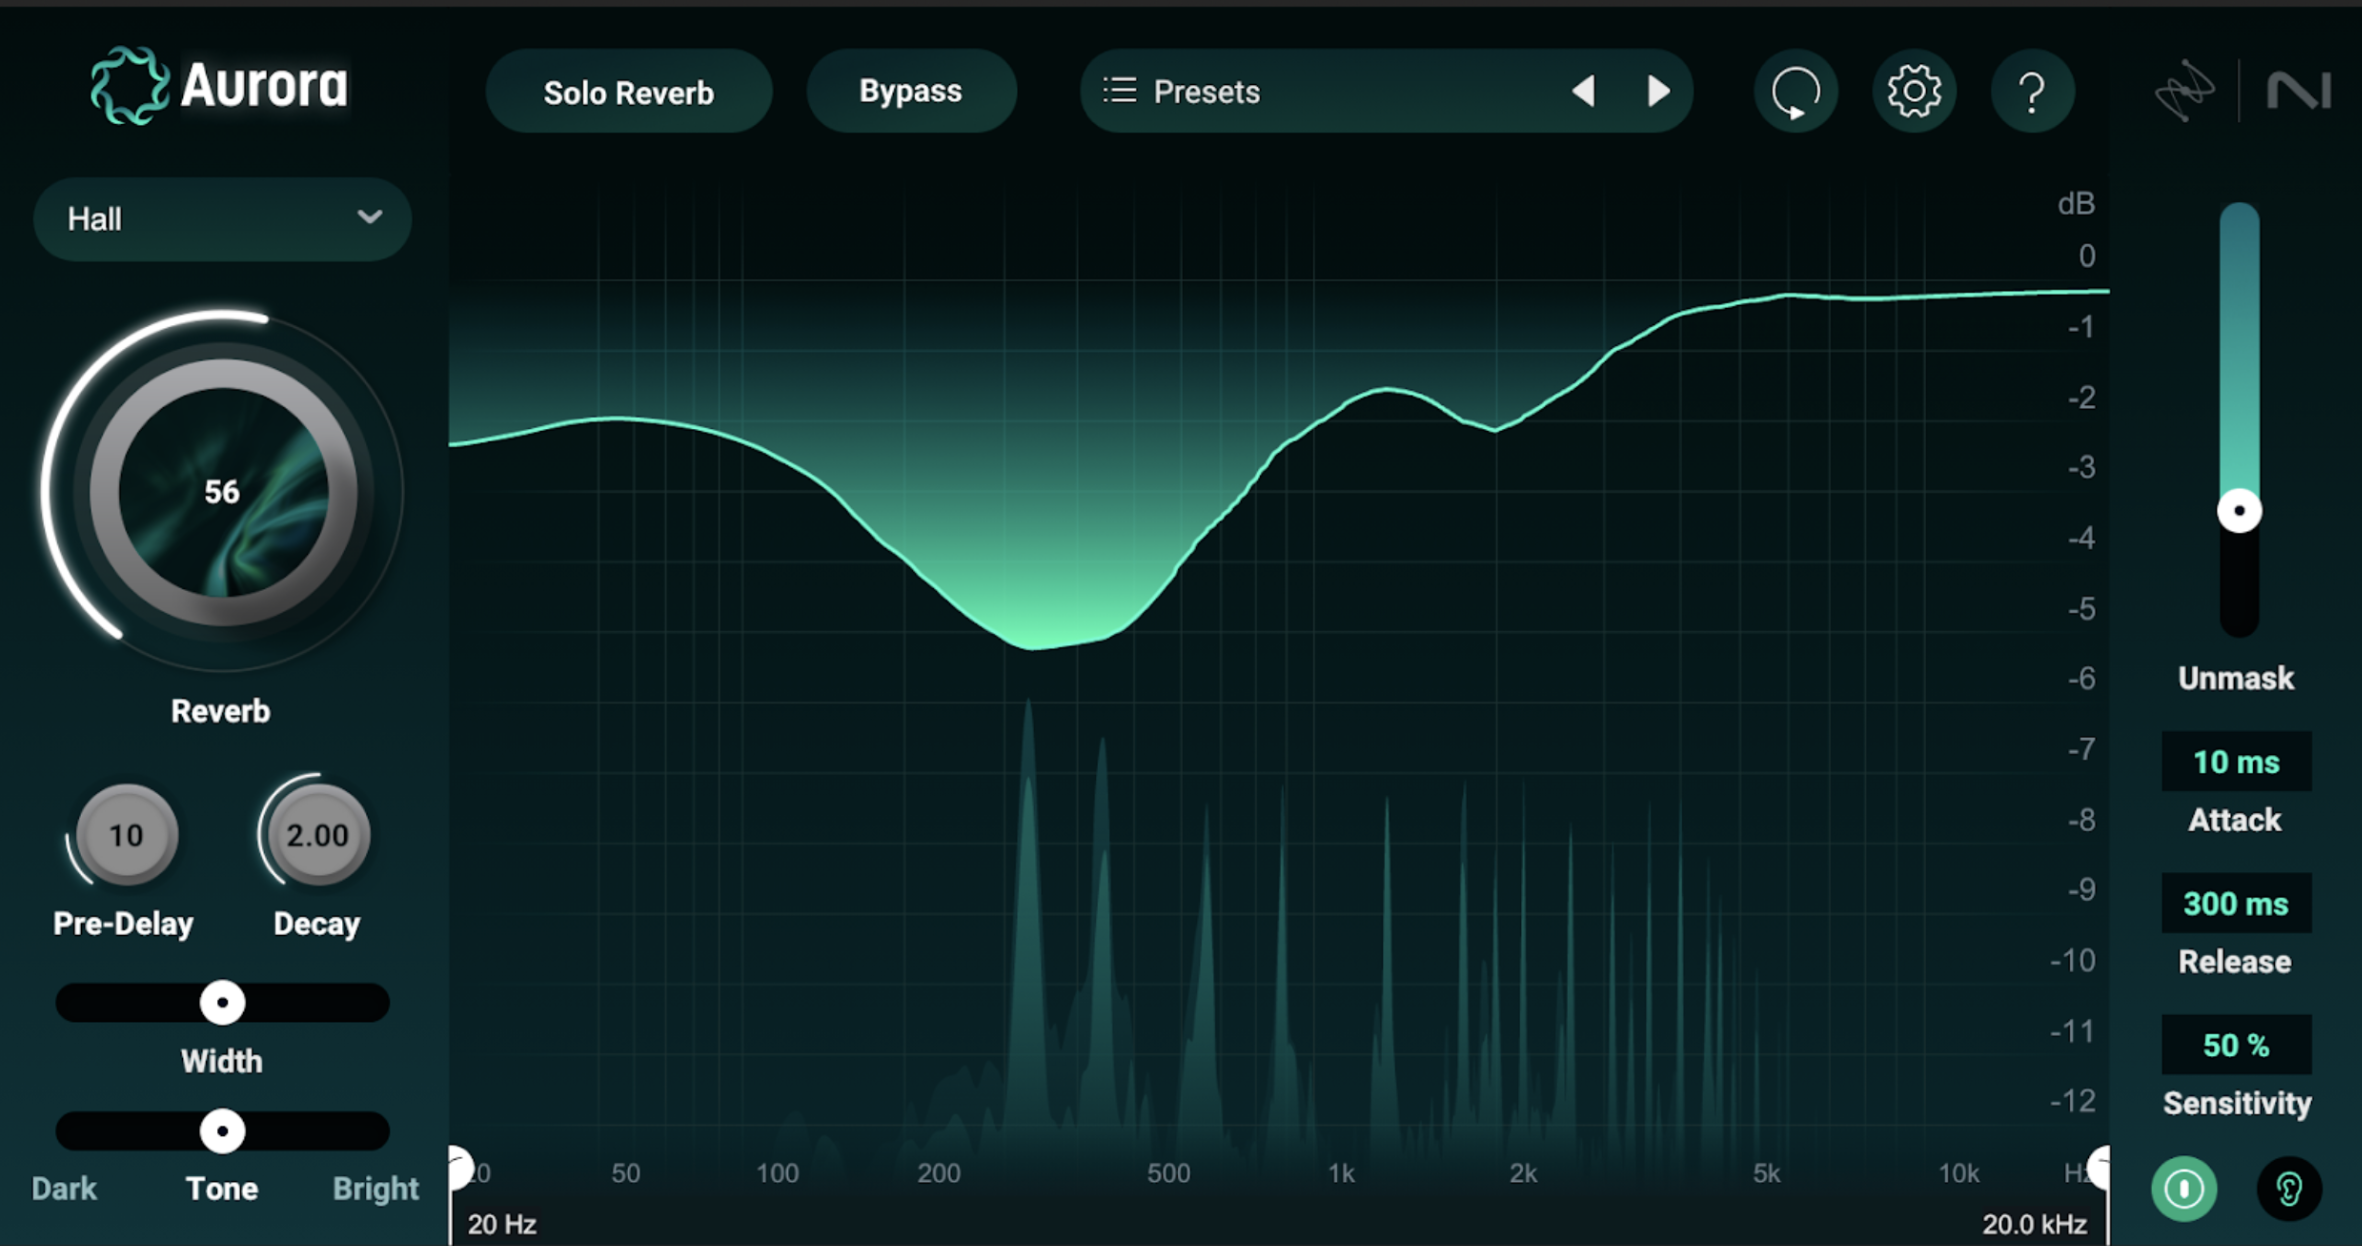
Aurora is our new reverb plug-in, one that works well across a variety of genres, whether you’re using it for a touch of ambiance or a fully dramatic statement. Like Neutron’s Unmask module, Aurora uses spectral ducking to intelligently suppress unwanted frequency masking in the reverberated signal. Like Unmask, the plug-in provides controls over amount, sensitivity, attack, and release.
Unlike Neutron’s Unmask module, no sidechain routing is required: the plug-in simply analyzes the input signal and intelligently moves the reverb out of the way. The effect is such a workflow enhancement that one could easily imagine iZotope has this spectral ducking in mind for other processors in the future (spoiler alert: we do).
Tackle frequency masking in your mix
Remember that balance is key in all things related to mixing. It’s always a good idea to assess, assess, and reassess the balance of your mix to make sure everything is prioritized the way you want it to be. A great way to do this is to break down the mix to its most simple elements.
For a rock mix, this might just be the kick, bass, hi-hat, and lead vocal. Getting that balance just right, and then layering in other elements with that core balance in mind, can help you keep everything sounding as good as it can.
It’s a philosophical approach, but no less valid. Remember that mixing is about balance, and issues around masking will gradually solve themselves.
Ready to try this for yourself? Explore


Neutron

