8 tips for mixing vocal harmonies
Discover eight essential tips for mixing vocal harmonies that will elevate your music to new heights. From perfecting pitch to creating lush textures, we've got you covered.
Mixing vocal harmonies offers the unique advantage of creating lush, captivating textures that enhance the emotional impact of a song. These harmonies can add depth, warmth, and a sense of unity to your music. However, the art of vocal harmony mixing can be challenging, as it requires precise tuning and timing to achieve a seamless blend, often necessitating significant attention to detail and patience in the process.
In this article, we’re going to give you some solid, concrete tips for background vocals and how to mix harmonies. Some of these tips will consist of specific techniques, some will be philosophical. All of them have helped me get my background vocals to gel, and more importantly, to get them sitting in the mix just how I want them to.
Learn how to mix vocal harmonies with iZotope Nectar, a powerful plugin with a complete set of tools for mixing, producing, and designing vocals.
1. Edit your background vocals
As with any technical concept, we’re going to start with the basics: if you want polished background vocal stacks, you need to edit them.
Vocal editing includes chopping out breaths, cutting out bursts of extraneous noise, de-noising if necessary, color-coordinating, and sometimes – provided the part repeats many times in the tune – flying in good phrases from later passages to replace the bad ones. Yes, this happens, and any pro knows it’s a time-saving trick that nearly no one will notice.
Editing breaths is actually much easier now thanks to Nectar; the suite comes with the Nectar Breath Control component plug-in, which can intelligently target and suppress stray breaths.

Breath Control in Nectar
Make sure to align your vocals so no consonants are out of whack, no one vowel outlasts another, and no single sibilance stretches past the rest. This can be done with expensive third-party software, or you can do it by hand. The latter takes more time but can often give more natural results: not only will you have total control, but you’ll be able to learn a lot about editing in the process.
Tuning background vocals is another part of the editing process, though tuning can have creative as well as naturalistic benefits. I’ll cover what I mean in the next tip.
2. Try pitch correction as modulation
Why do you think Auto-Tune, Melodyne (included in Music Production Suite), and other such applications have become so ubiquitous, even for singers who actually sound great without it? I would argue that pitch correction has a peculiar, secondary effect that has become sought after in pop:
Pitch correction doesn’t just tune the notes, it also aligns the overtones to sound more coherent – a little “synthy” for lack of a better term. This process can often sound rounded or warm. Used not for correction, but for tone, the effect is almost like modulation, and can contribute to the sumptuousness of harmonies, particularly if they function like pads.
In the next before/after audio example, listen to the "before" stack of background vocals, sung by yours truly.
I’m not saying they’re perfectly in tune, but they’re not horrendously pitchy either. We could get away with this if we had access to no tuning software. Nevertheless, adding gentle pitch-correction to each vocal – supplied here by Nectar – can create a chorus effect that is often quite lovely and dreamy in the "after" example.
Pitch Correction for Effect
3. Use an auto-leveler for smoothing dynamics
Vocals – even supposedly flawless doubles – are both incredibly dynamic and incredibly sensitive to processing: bad compression is particularly offensive on vocals.
Yet, vocals often need dynamic processing, especially in a stack of background parts. All too often, one wayward vocal will suddenly poke out and draw too much attention. So what do you do? I wouldn’t compress here; vocals can quickly sound small and unnatural when subjected to many rounds of compression.
Instead, use the Auto Level Mode in Nectar 4, which now can learn the dynamic range of a vocal and apply intelligent leveling to get everything transparently even, without the pumping artifacts compression can bring to the table.

Auto Level Mode in Nectar
4. De-ess vocals
Imagine a crowd of vocalists, each one singing, “somebody sold me some substandard soup.” Yeah, those are really stupid lyrics, but they demonstrate the potential of sibilance to harsh your mellow, as that sentence sports a sinful sum of sibilance.
If you were only dealing with one vocal, you might be able to get away without de-essing, depending on the singer, and how the singer was mic'ed. But once you’re dealing with four to six people all singing the same sibilant line, you’ll probably want to reach for a de-esser.
The De-esser in Nectar offers a wideband operation, so it will compress the whole signal when it detects a sibilance, rather than split the vocal into a multiband signal path. I find this to be a more natural approach, as the processor won’t alter the tone of each vocal as it hits the threshold.
The operation itself is simple: loop a passage with some offending sibilance, and click the “ear” icon (the Listen button) in the GUI.
Now you’ll be able to isolate the range of frequencies indicated by the detection filter, illustrated below.

De-esser in Nectar
Tune the filter until it’s grabbing the most offensive sibilance you can hear, and click the ear icon again to get out of Listen mode.
Now, pull down on the threshold control until the esses are to your liking. I like to go overboard on the threshold control at first, so I can really hear what it’s doing. Knowing what “too much” sounds like is key to getting to a goldilocks sound.
5. Route your vocals to a bus
It’s been years since I didn’t route multiple background vocals to a shared bus, if only to control their level in one fell swoop. But often this serves a deeper purpose: the compression I told you to avoid on each track?
Well, the mix bus is a great place to play with compression. Not only will you have a chance to apply some dynamics-taming to the vocals, you’ll be able to infuse them with character from the compressor.
By way of example, let me take our background vocal stem and run it through some compression algorithms in Nectar, so you can hear the differences. Here’s our stack of background vocals again.
Here they are played through the optical compressor in Nectar.
Now, here they are played through the vintage compressor.
Each one has a different character. And either might be right for the song. Paired with other elements, such as saturation, flanging, delay, and reverb, you can get a characterful impact.
Because we’re applying an effect to them all, we’re getting a vital glue, rather than the constricted, overly-tightened, stiff sound of each track compressed on its own.
6. Consider song sections
Songs have different sections. This can be a traditional verse-chorus structure, or something more through-composed if the piece is more progressive. Either way, different sections require their own approach. Depending on the genre of the song, you might have a few genre conventions that need to be obeyed as well.
Consider the typical verse in a rock song. Commonly, background vocals in a verse are narrower in the stereo field, and they’re mixed under the lead vocal to support it without distractions.
Consider this example, from a tune I’m mixing for Ari and the Buffalo Kings entitled “Get Real.”
We have a high background singer supporting the baritone lead. The lead has been processed, the background has not. A supporting vocal can clash in the mix if we’re not careful.
So, using Nectar’s Vocal Assistant, we’ll find a balanced EQ curve so nothing pokes out, and supply an amount of reverb, delay, and modulation to help keep the vocal in the background without drawing too much attention.
When we get to the chorus, however, things should get bigger, wider, and more spacious.
Consider what we have in the chorus.
That’s one processed lead, one unprocessed double from the same singer, and one unprocessed high background vocal.
We will widen the background vocal, give it an airier sound with Nectar’s Vocal Assistant, and then choose to supplement the harmony with thirds, like so.
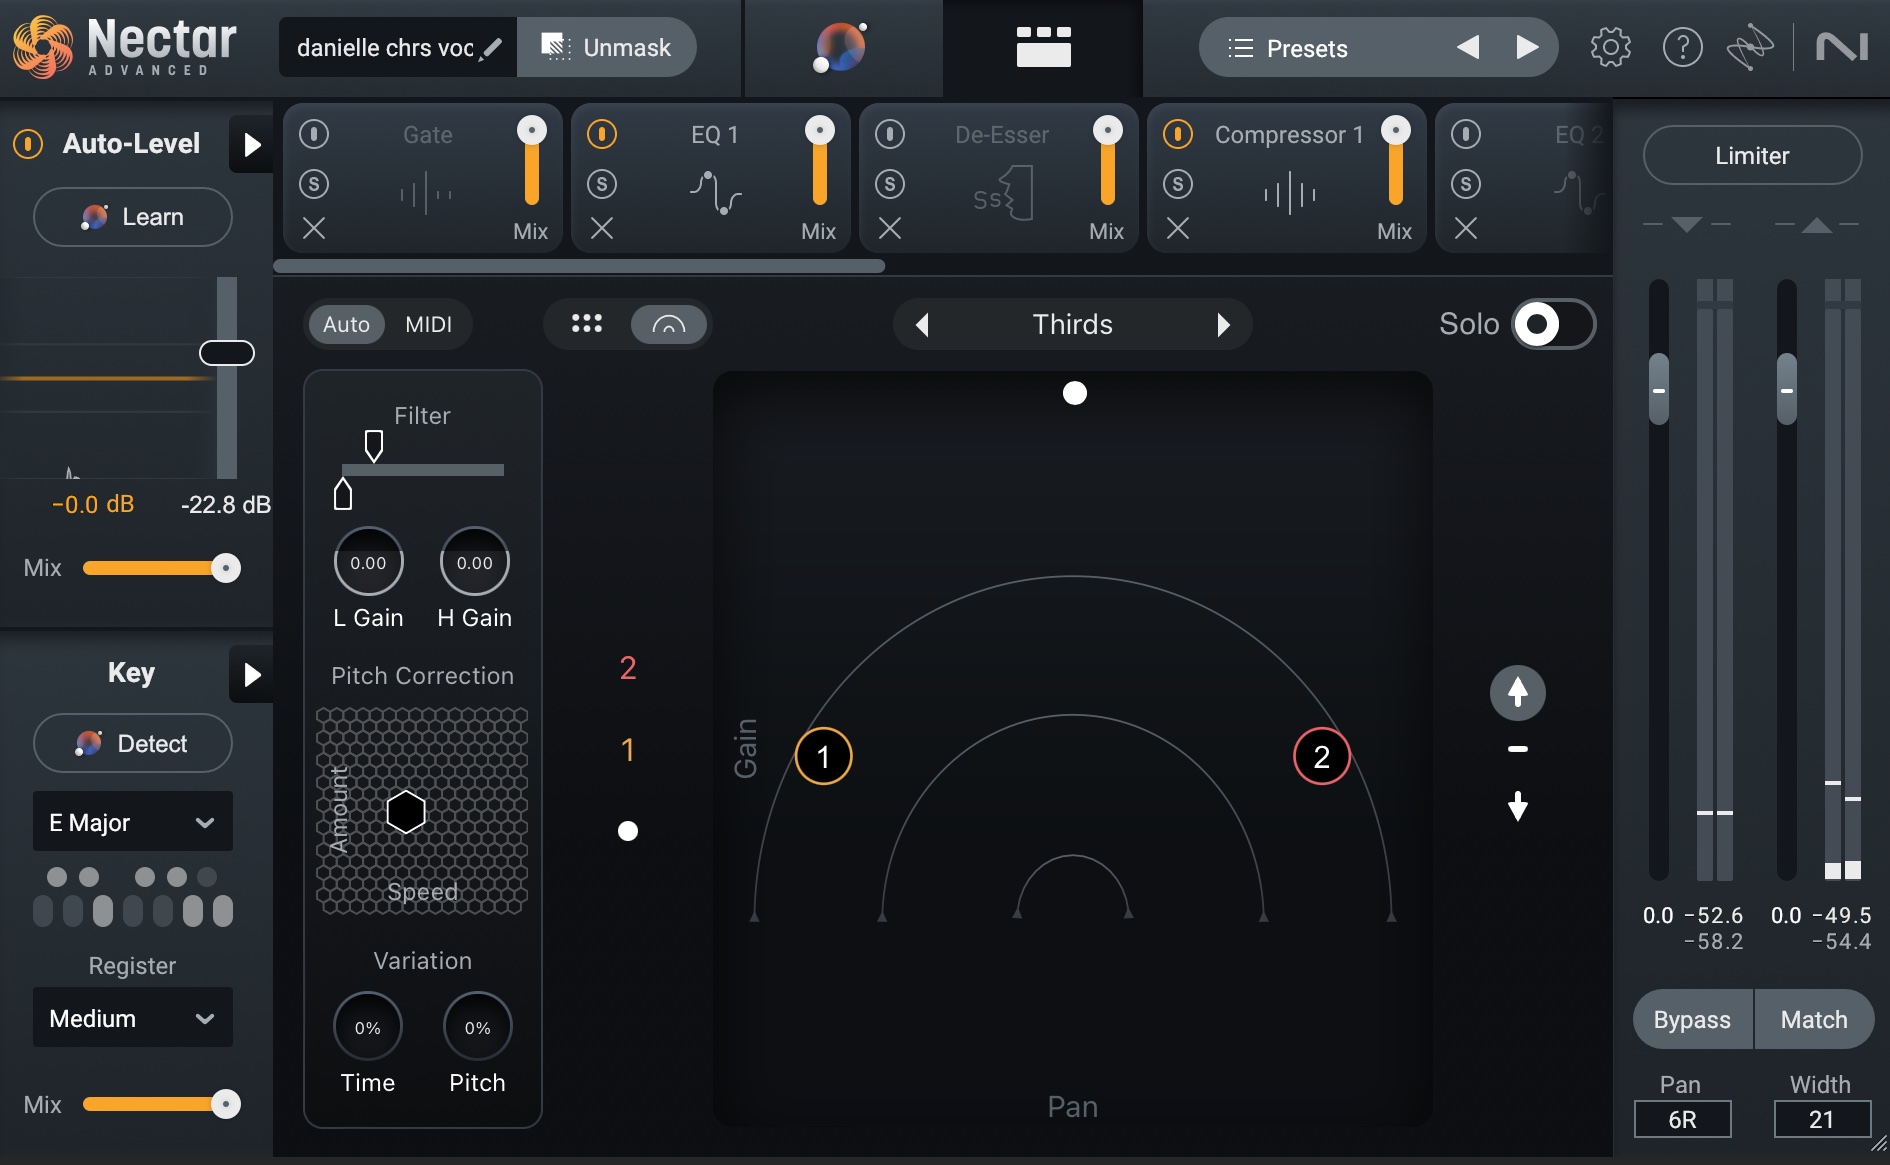
Harmony on background vocals in Nectar
For the double, we’ll also run it through the Assistant, even out some frequency imbalances, crank the width, and choose another harmonization preset.

Harmony on vocal double in Nectar
In the context of the mix, it sounds like this.
As you can hear, the whole thing sounds more cohesive now, and serves the tune – and the processing couldn’t have been simpler to achieve thanks to Nectar.
7. Ask the client for a genre reference (or find one on your own)
Make sure to have genre references for how you’re mixing background vocals. This will help guide you to the right place. Nothing works like a reference for focusing your attention.
For instance, I was recently mixing a tune called “Garbage” for an artist named Glorian. It was our first time working together, so I asked for references.
I was provided a Bjork tune, a Depeche Mode song, and the general directive to make things feel like classic Kate Bush era numbers. That told me exactly what I needed to know, and the whole mix came together much more quickly since I had the reference.
If you are working on your own music, just pick a genre reference that you enjoy. Audiolens is now fully integrated with Nectar, allowing you to select the acapella of any reference you gather from your device or streaming service in Audiolens, and Nectar will then analyze it to provide an EQ setting to match those characteristics.
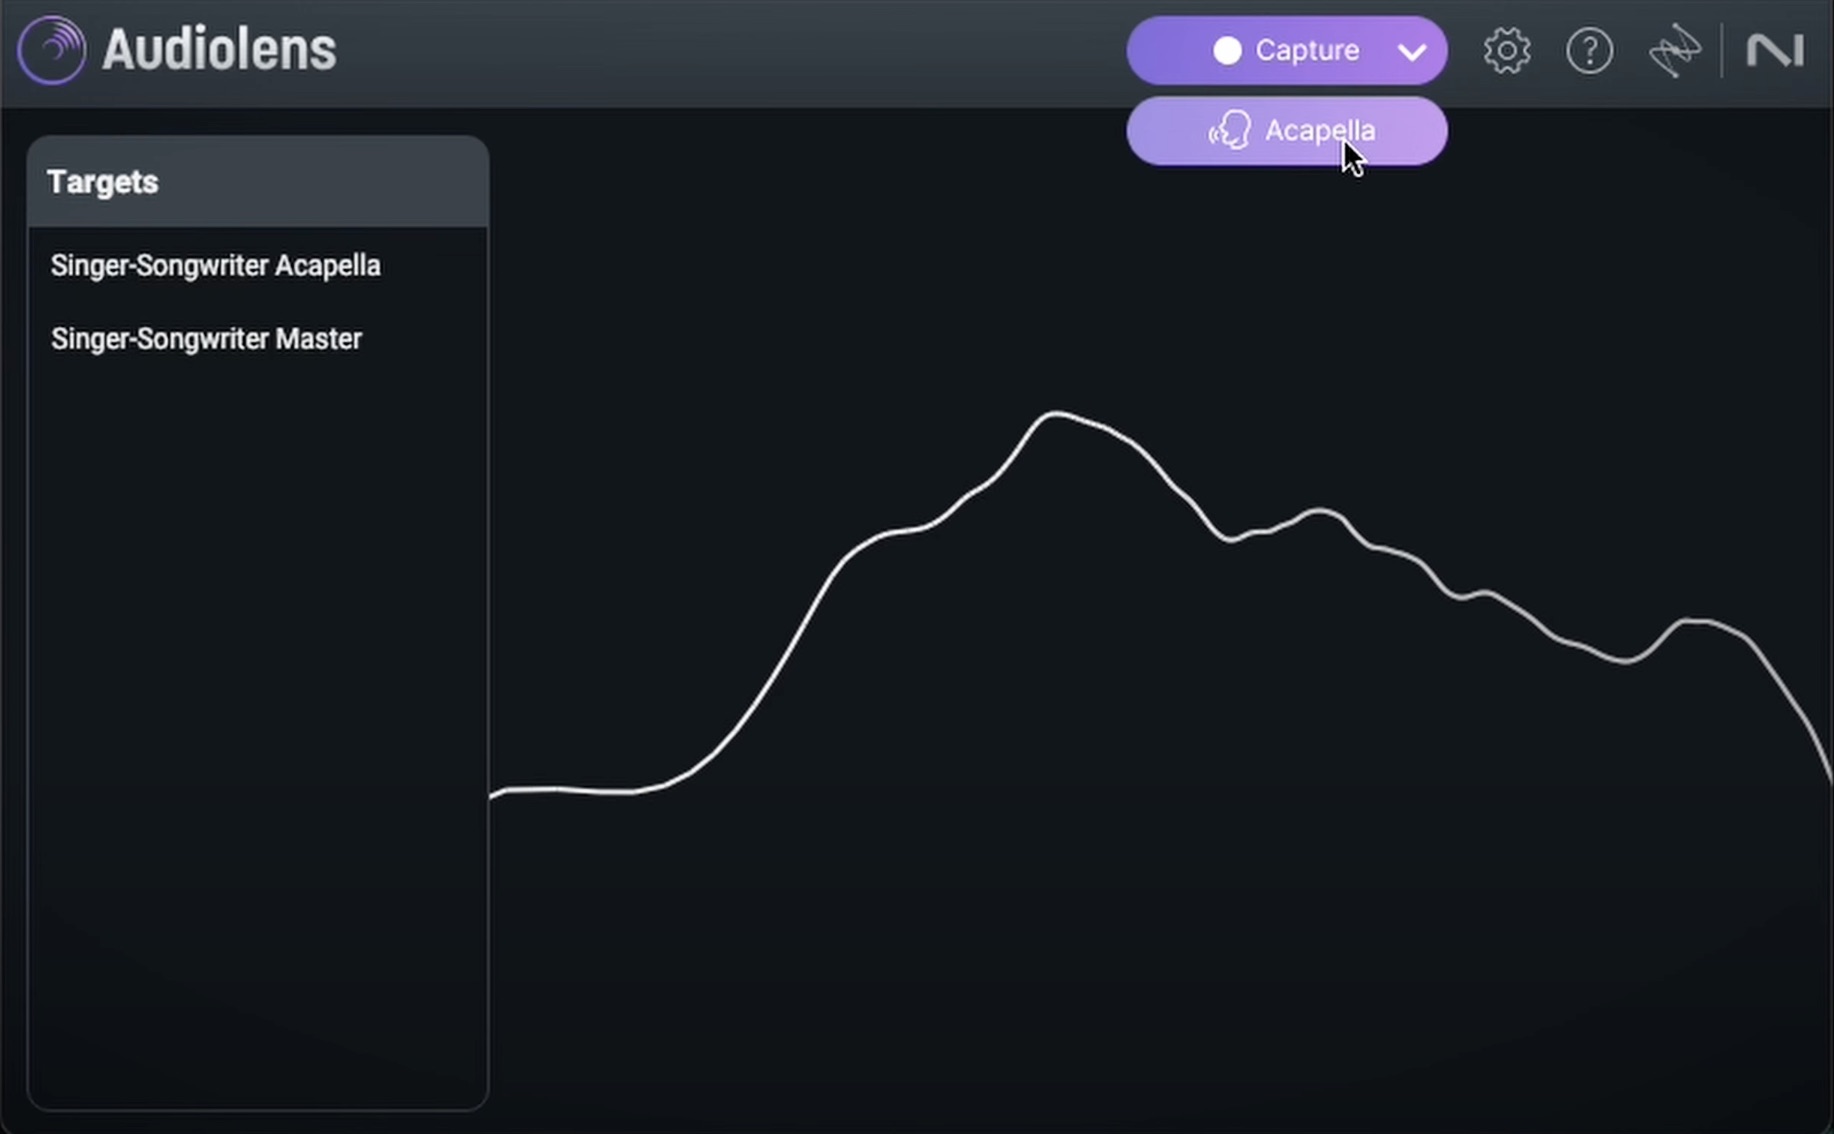
Acapella setting in Audiolens
8. Pay careful attention to panning
I’ve left this for last, and what a shame, because there are so many ways to pan a stack of background vocals! Indeed, that’s exactly why I left it for last: it’s so track-dependent that I can’t possibly give you concrete rules of thumb for panning your vocals.
Or can I? Well, it turns out I can give you two pointers:
Go “asymmetrical” for interesting
Things that aren’t balanced stand out of the mix and things that stand out have the potential to be interesting. If the song you’re working on is quirky, don’t go with a conventional panning scheme. Be as quirky as the music is; put one vocal up the middle and the rest to the left, or something else that sells that particular song.
Go symmetrical for atmospheric
Note that I did not say “go symmetrical for boring,” because we never want to be boring – and symmetrical panning doesn’t necessarily make the listener snooze.
When you pan a vocal symmetrically, I find it sinks back into the tune in a manner that influences its atmosphere. Take those backgrounds I showed off earlier, the ones that sounded like pads. They were panned like this:

Symmetrical panning
When I have background vocals that are basically pads – oohs and aahs that are all doubled and layered – I do have a panning scheme I try out first. I’ll relate them as though they were on a clock:
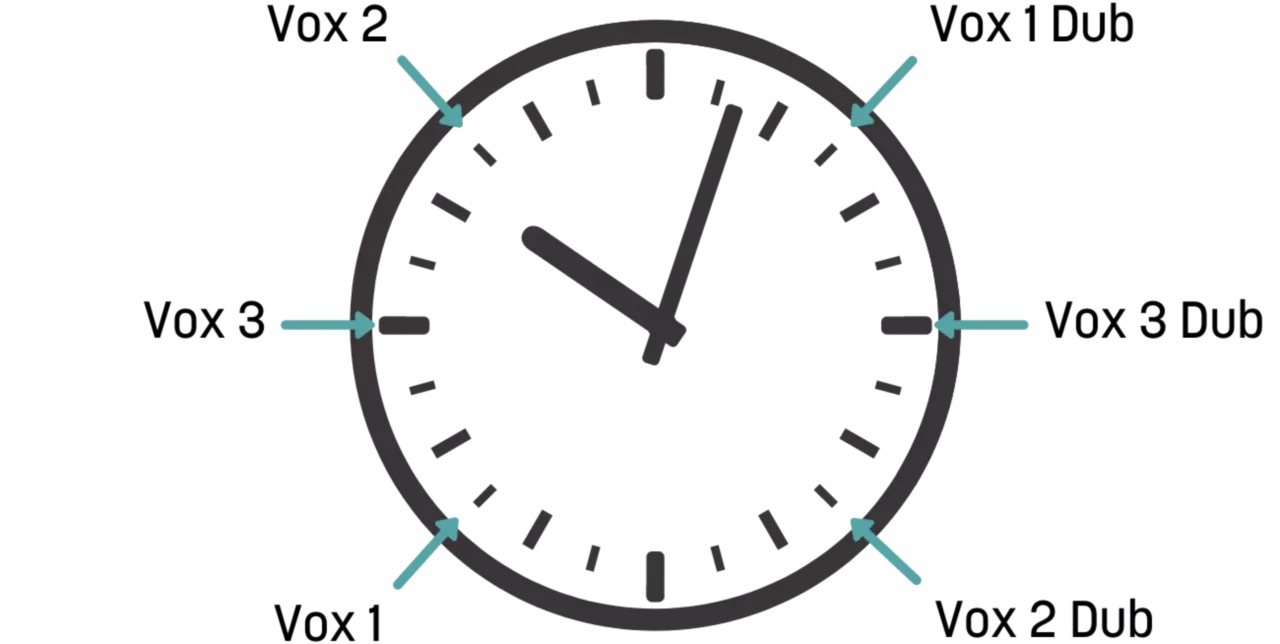
Clock of pad vocals
Get started mixing background vocals
Mastering the art of mixing vocal harmonies can elevate your music to new heights. With the right techniques, tools, and a keen ear for detail, you can create harmonious soundscapes that captivate your listeners and leave a lasting impression.
Now that I’ve shown you what to look out for when mixing background vocals, feel free to grab a demo of Nectar 4 and get started.