You could argue that all modern media production – from music to film – revolves around the practice of overdubbing. It’s essential to the modern-day recording workflow, helping musicians fix notes in otherwise stellar takes, or helping them thicken up guitar parts that need extra muscle. In film, overdubbing is also essential, allowing actors to redo takes in much the same fashion as the music world.
Indeed, overdubbing is one of the most powerful tools in the recording toolkit – subtle, often invisible to the listener, yet vital in achieving a professional result. In this article, we'll explore how to incorporate overdubs into your productions.
Follow along with this tutorial using RX , a powerful suite for audio repair and enhancement.
What is overdubbing?
Overdubbing is the act of recording something over an existing piece of audio.
We tend to think of overdubbing as someone correcting a mistake – coming back to the studio to fix a flubbed vocal, for example. But that’s just one aspect of the enterprise: if your band has ever recorded a song instrument by instrument, rather than playing live all at once, that is overdubbing.
You’d think overdubbing would be easy to define, but it quickly becomes one of those umbrella terms that overcomplicate themselves. Punching in the right note is an overdub. Double tracking a guitar part is an overdub. Adding the solo after the song has been roughly tracked? Also an overdub.
Overubbing exists in the podcast and post production realms too. Perhaps a pod host stumbled through their question during the actual recording; it’s not uncommon for the host to redo the question and send it off to the engineer, who will swap it in. This is called a pickup – and a pickup is an overdub.
Likewise, overdubbing is vital to film. Anyone who has ever had to make the decision between the subtitled or dubbed version of an anime intrinsically knows this. The “dubbed” version has been re-recorded by a whole new cast in a whole different language. It’s been overdubbed.
There’s also the common practice of “ADR” or “Looping”, where an actor comes into a studio to redo their lines for any number of reasons. Maybe they distorted the mic. Maybe they flubbed a line but the other actor nailed the scene.
Like a musician, the actor has to repeat their part perfectly in time with the original, so that it syncs easily to the picture. Indeed, the actor Burt Reynolds used to chew gum on screen whenever he could just to make the job of overdubbing easier on himself (your mouth moves a lot when you chew gum, making the movements easier to match in post production).
Common questions about overdubbing
Let’s answer some common questions related to overdubbing, so we can demystify the process for you.
What is the difference between double tracking and overdubbing?
Double tracking is a kind of overdubbing, the way a square is a kind of rectangle. Double tracking means recording the same part again and layering it with the original for a fuller sound. It’s not uncommon to do this with electric guitars. It happens all the time in rock music.
For example, here’s a song that came to me a while ago:
I felt like the guitar needed to be double tracked, and I was able to grab a performance from later in the song to make that happen.
What is punching in?
Punching in, like double tracking, is a method of overdubbing. It’s the act of starting the new recording at a precise point – often in the middle of a take – and stopping (or punching out) at another. In DAWs, this is usually automated. In tape days, it required a steady hand and good timing.
Punching in usually happens when someone has flubbed a note or word in otherwise stellar take. Rather than record the whole thing again, the person simply re-records the bad bit.
Or, punching in occurs after a specific part. Everything up to the second chorus might have gone smoothly, but the person needs to redo the performance after that specific moment. This would be another case for punching in.
What overdubbing can do in music
Fixing mistakes: Overdubbing allows for precise correction of errors like wrong notes or missed words without re-recording entire takes.
Augmenting arrangements: It enables adding new musical elements or ideas after the initial recording.
Thickening arrangements: Overdubbing creates richer sounds through layering multiple takes of the same part.
Asynchronous recording in different studios: It facilitates collaboration across different locations and schedules.
Keeping costs down and schedules loose: Recording parts separately can be more budget-friendly and flexible.
What overdubbing can do in podcasting and post production
Redo or reframe a question: Overdubbing allows for fixing unclear or poorly phrased questions in recordings.
Let the B team do the A work: Sometimes, interviewers are dubbed in later over a producer's initial questioning.
Dub a line that wasn’t captured well on camera: In film and video (ADR), it's used to replace unusable on-set audio.
Dub a film for a foreign audience: Overdubbing is crucial for translating dialogue into other languages for international viewers.
How to overdub in music
Whether you're recording vocals or instruments here are six tips to make sure your overdubs fit right in.
1. Prep the session for overdubbing
Often your session is in no state to handle an overdub by the time you get this part of the process. Maybe you’re half-way through the mix, with a million plugins gumming up the CPU. Maybe you’ve got your buffer set to 1024+ samples, which is better for CPU but hell for recording, as these high settings introduce latency.
At this stage of the game, even routing the mix to a pair of headphones can be a pain in the behind, as your mixing template might not make sending instruments to a cue mix easy for you.
So what’s an engineer to do?
Hit that save-as key, and prep the session for overdubbing:
Freeze/bounce in place all the tracks you aren’t going to be messing with. This will free up your session to use less CPU – and will let you do the next thing you have to do.
Bring the buffer settings down to 128 samples or fewer. Each DAW has its own way of doing it. Here’s what it looks like in the three I use most often.
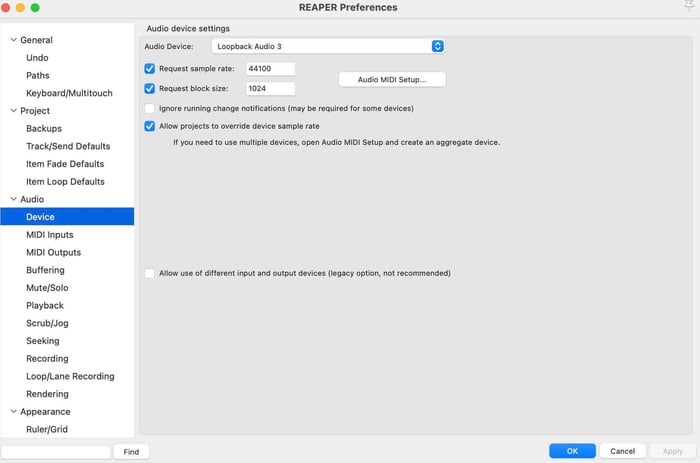
Bringing the buffer settings down in Reaper
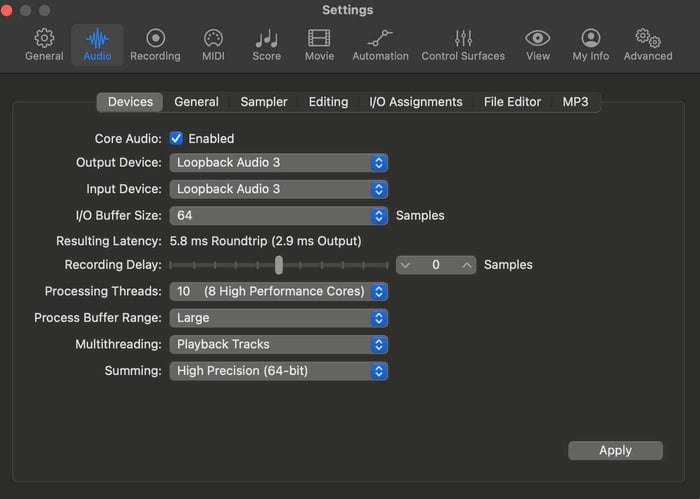
Bringing the buffer settings down in Logic
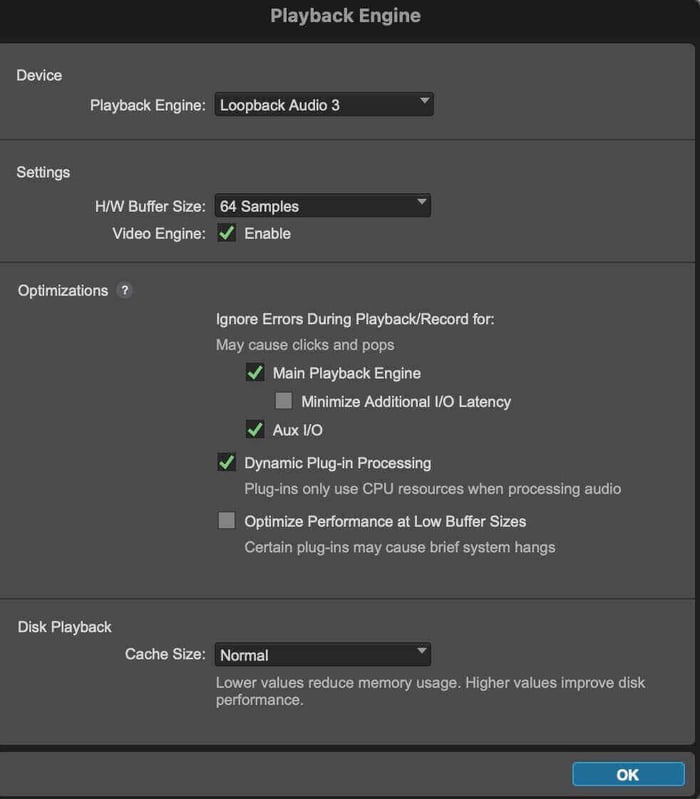
Bringing the buffer settings down in Pro Tools
Route any “cue mixes” you need to route ahead of time. This is a fancy way of saying “set up what the musician needs to hear in their headphones before the session.”
This could mean routing your submixes to a dedicated aux track, and making sure the musician only hears that aux track. How this is handled will change depending on the interface.
Or, again, you could just work in a copied section, and just ask the musician how they’d like to hear parts. In general, it’s good to be able to raise or lower elements as needed so the artist can get the best take.
With all of this handled, you can record your overdubs. When you’re done, just import them back into your mixing session.
2. Rewind the playhead and rehearse into the overdub point
Always give yourself a few seconds of lead-in. This helps you match the feel and tempo of the original. Most DAWs have a pre-roll function – use it. Listen. Rehearse. Then punch in. Practice a few times before recording. Think of it like merging onto a highway – you don’t just swerve in, you ease in at the right speed.
3. Don't destroy your original take
Before you record anything, make sure you’re not overwriting the only usable version of the part. Use playlists (Pro Tools), lanes (Logic), or takes (Reaper). Duplicate tracks if needed. Many great performances are lost to an itchy record finger and a lack of backups.
4. Consider tone and mic position
Overdubs stick out if they don’t match the original sound. Use the same mic, same chain, same distance. If you recorded near a window at 2 p.m. with birds chirping, guess what? You might need the birds.
Room tone is real. Even the smallest change in mic placement, reflection, or time of day can subtly shift the sound. If you can’t get the original space or gear, at least try to replicate the recording space as best you can. A little EQ might help close the gap, but don’t rely solely on plugins to do the job.
If you’re double tracking an instrument, do the opposite of what I just advised: an audible variance in tone among double tracked instruments will lead to a grander sound. This is why musicians often swap mics, instruments, pickup settings, and more between overdubs.
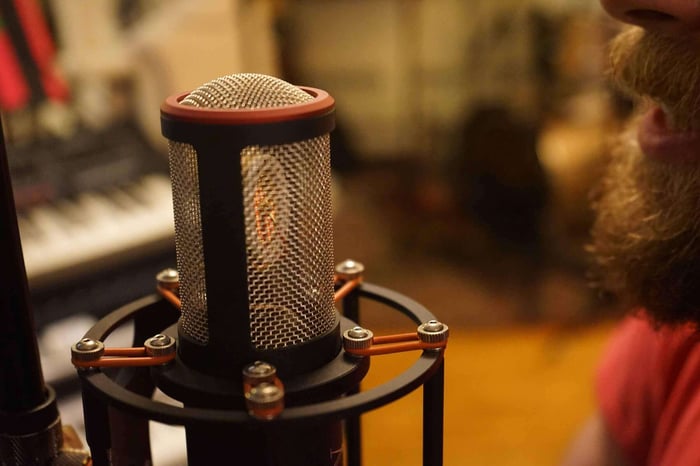
Mic placement for vocals, on-axis
5. Use closed-back headphones
You should use closed-back headphones while overdubbing, so that audio from playback doesn’t leak into the recording. Otherwise, you’re asking for problems with tonal matching.
6. Emotion and phrasing are key
Whether you're re-singing a phrase or re-doing a line, you have to match the performance. Not just pitch or diction – but intention. Re-listen to the line before and after and match the attitude.
7. Crossfade like your life depends on it
Once the overdub is in, smooth the edges. Zoom in on the waveform. Make sure the transition point is clean. Crossfade in and out to avoid clicks or shifts in tone.
In many DAWs, crossfades are easy to apply. Just remember: the goal is transparency. No one should hear the punch. Take the time to listen critically and adjust as needed.
8. Always listen in context
After the overdub is in place, listen to it in the full mix – not just soloed. Something might sound great on its own, but it could stick out in the track. Check the balance, the tone, the emotion. Make adjustments as needed.
Here’s an example of me recording a vocal overdub for my friend/collaborator’s project, adjective animal. You’ll see me recording a low vocal part on top of a mix that has all heavy-weight processing automatically bypassed.
After listening in context, and doing some more mixing, that part of the song now sounds like this.
How to overdub in podcasting
1. Use the same mic, gear, room, and mic position that you used previously
Microphones all have unique tonal signatures, and even the same mic can sound wildly different depending on the preamp, interface, or acoustic environment. That’s why recreating the exact setup – same mic, same interface, same room, and especially the same mic distance and angle – is crucial when overdubbing in podcasting. Any mismatch will call attention to the edit and distract the listener. If you recorded while seated on a squeaky chair near a window with traffic in the background, embrace that reality – consistency matters more than perfection.
2. Listen to how you sound in the interview and practice getting your take to sound like that
Before you punch in a fix, listen carefully to how you spoke in the original take – your energy level, your pacing, how emphatically (or casually) you delivered the line. Then rehearse your overdub until it blends in naturally. The goal isn’t just to match tone – it’s to match intent. A line recorded in a rushed, late-night session will clash if you re-record it days later in a calm, cheerful mood. Your audience may not consciously notice the mismatch, but they’ll feel the disjointedness.
3. Listen in headphones as you work
Use close-backed headphones to keep any audio from leaking into the tape – and also, to really hear what you sounded like at the time of the original recording. Headphones let you hear your performance in the context of the original recording and better judge whether the edits will be noticeable. Ideally, listen back to the full sentence or exchange before and after your overdub to make sure it flows. If your new take jumps out or feels isolated, you’ll catch it more easily on headphones and can adjust accordingly.
4. Use room tone under the edit – if you haven’t already used room tone throughout – to sell the match
Room tone is the ambient sound of your recording environment – air conditioning hum, computer fan, street noise, etc. If you’ve used room tone throughout your edit, you’re ahead of the game. But if not, adding a short clip of room tone underneath your overdub can help mask transitions and make everything feel like it happened in the same moment. Use a short crossfade in and out of the room tone layer to avoid any clicks or abrupt shifts.
How to do ADR for film at home
1. Use the same gear as you used on set, if possible
For ADR to sound natural, you need to minimize any sonic differences between the original location audio and the replacement recording. That starts with using the same microphone model, preamp, and signal chain whenever possible. Mic placement and distance should also match the original shoot – if the boom mic was positioned above and slightly in front of the actor, replicate that setup. Using different gear introduces subtle but noticeable changes in tone and frequency response, which makes it much harder to sell the illusion that the actor is still in the original environment.
2. Use a quiet space, free of reflections
The recording space is just as important as the gear. A reflective room will add reverb or tonal color that clashes with the drier, more controlled sound of the on-set dialogue. ADR should ideally be recorded in a well-treated, acoustically neutral space, like a vocal booth or a DIY room lined with absorptive material. If that’s not available, use blankets, rugs, and other soft surfaces to create a dead-sounding environment. The goal is a clean, dry vocal you can process later to match the scene’s space without interference from the room itself.
3. Listen to the surrounding audio so your voice matches what you did before
Actors are expressive creatures, and dialogue isn’t just about words—it’s about tone, rhythm, emotion, and even breath. Before recording, play back the production audio surrounding the line so the actor can hear how they sounded in context. This helps them replicate the same intensity, vocal texture, and timing. A line shouted in a burst of anger should sound like it comes from the same breath and emotion when re-recorded. Even small deviations in phrasing or energy can break the illusion.
4. Put the scene you’re dubbing on a monitor for the actor to see
Lip sync is everything in ADR. If the replacement line doesn’t align with the mouth movements on screen, the audience will notice immediately – even if the sound is technically perfect. That’s why you should always have the scene playing on a screen in front of the actor. They need to see when the mouth opens, how long it stays open, and how their own body and face moved in the original shot. The visuals are a guide to locking in timing and performance.
5. Practice a couple of times to make sure you’ve got the timing right
Good ADR requires rhythm. Before hitting record, let the actor run the line a few times in sync with the video. Practicing helps them internalize the timing, breathing, and emotional beats of the scene. Rushing into a take too soon can lead to flat or disjointed performances. A little warm-up goes a long way in achieving a more natural, locked-in delivery that sits well in the scene.
6. Set up a click track that goes into the performance for the actor
To help with timing, especially in scenes that require tight sync, set up a simple click track that counts in. Tell the actor that they’re going four beats, and on the fourth one, they should begin their line. This pre-roll cue gives the actor a rhythmic reference to start their line at just the right moment. It’s especially useful when re-recording lines with a lot of movement or overlapping action. Make sure the click isn’t in the final mix, of course—it’s just for the actor’s headphones.
7. Record multiple takes
This is your opportunity to get it right – or even make it better than it was originally. Record several takes so you have options to choose from later. Sometimes a line improves with repetition, or you’ll get a more nuanced delivery that better fits the moment. You can also comp together a final take using the best phrases or words from multiple performances. ADR isn’t just about fixing – it’s about finessing.
What tools to use after overdubbing
If you're working with overdubs in a mixing session, here are some tools that can help you after you’ve captured an overdub.
iZotope RX
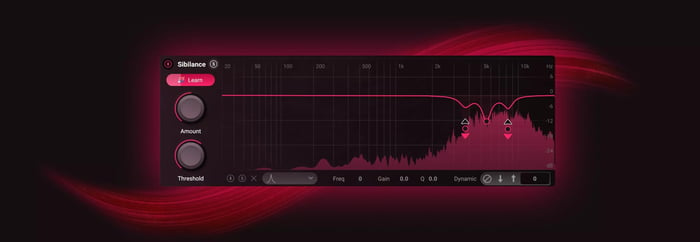
iZotope RX stands out when it comes to cleaning and refining overdubs.
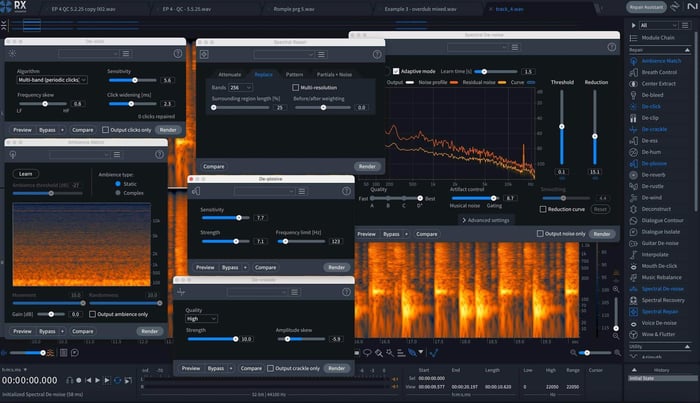
RX modules used in editing overdubs
If you're working with spoken word, features within RX excel at addressing common issues like distracting mouth noise and harsh plosives.
Inconsistent room tone can be a challenge when adding overdubs, but RX's Ambience Match module is incredibly useful for creating a cohesive sonic environment. By analyzing the ambience of your original recording, Ambience Match can help your overdub sit more naturally within the mix.
RX Ambience Match is also great for matching noise profiles. Use this in matching space if necessary: if your overdub has less room sound than the original, RX can help bring consistency without degrading the audio.
Additionally, if your overdub punch-in point introduces unwanted artifacts, tools like De-click and Spectral Repair can surgically remove those clicks or other strange transients.
iZotope Nectar
The ALM (Auto Level Mode) in Nectar 4 can be a handy leveler that works well for the spoken word. The ALM tool can smooth out volume inconsistencies for a more consistent listening experience.
iZotope Ozone: Match EQ
When overdubbing stems or sections for mastering revisions, Match EQ and dynamic tools in Ozone can help preserve the tonal consistency of the full mix. Sometimes, mastering tweaks reveal earlier mix inconsistencies. Ozone can help make sure your fix doesn’t sound like a band-aid.
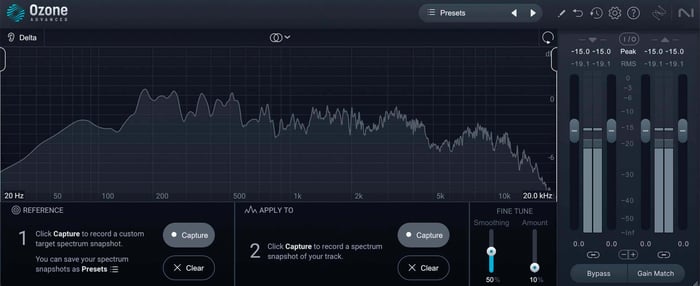
Ozone Match EQ module
RX has its own Match EQ as well, it’s worth noting.
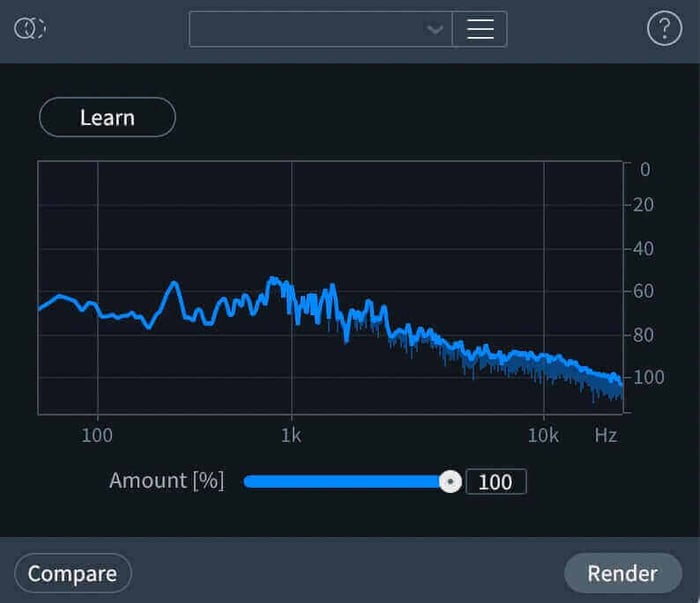
RX EQ Match module
iZotope Audiolens
If you're dropping in new elements to an existing mix, Audiolens can help you keep track of tonal matches. You can use the original as a reference, or “lens” for looking at the overdub. Any profile you generate in Audiolens will automatically make its way to Ozone – so you can use Ozone's assistive technology to match the sound and dynamics of the original.
Get dubbin’
In the end, overdubbing is more than just a fix-it tool – it’s a creative process. By strategically adding and shaping sonic elements, you're not just correcting errors; you're actively sculpting the narrative and deepening the listener's engagement.
Indeed, mastering the art of overdubbing means mastering the art of seamless storytelling in sound, where each carefully placed layer contributes to a richer, more compelling, and ultimately more resonant final piece.