Learn Music and Audio Production | iZotope Tips and Tutorials
Mic Placement 101: How to Get a Great Sound

Jump to these mic placement sections:
- Microphone basics
- Microphone polar patterns
- Other considerations in mic placement
- Important microphone concepts
- Microphone placement techniques

Never Miss an Article!
Sign up for our newsletter and get tutorials and tips delivered to your inbox.
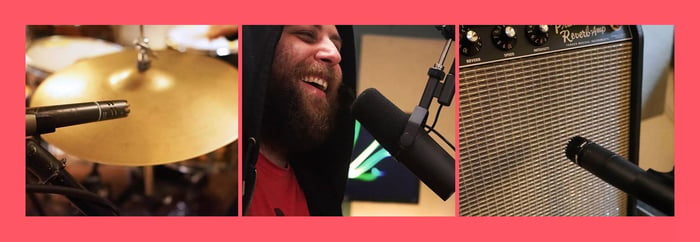
Microphone placement can be the difference between a great-sounding recording or the need to redo the whole session. In this article, we’re going to give you the best practices for mic placement, showing you how to mic vocals, guitars, and drums in the home-studio environment.
You’ll find plenty of pictures and techniques down below, but that’s not at all. I’m providing tons of concepts to keep in mind as well—principles that will help steer you to the best possible sound with the tools you have at your disposal.
As the saying goes, give a fellow a fish and they’ve got one meal—but teach a person to fish, they’ll feed themselves for the rest of their lives. So, think of this article like one long fishing lesson.
Microphone basics
Before I get into proper mic placement, let me cover some basic things about microphones themselves, so you can think quickly on your feet.
How microphones work
In all mics, a transducer is used to convert soundwaves into electrical energy. However, different mics utilize different types of transducers, and these transducers have different characters. We’ll cover four types of mics—though I’ll spare you the science of how they work.
Dynamic microphones
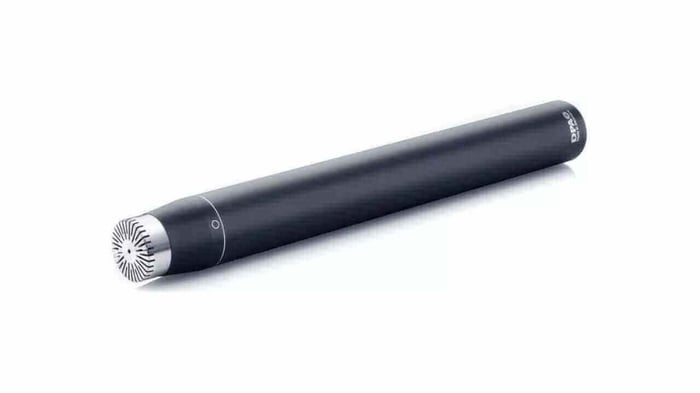
Dynamic mics are usually robust that can handle loud transients with ease. They are often insensitive to the room, so they’re a good choice for untreated spaces. Dynamic mics tend to emphasize the midrange presence of a sound thanks to their inherent resonances. They’re frequently used on drums, live vocals, and guitars.
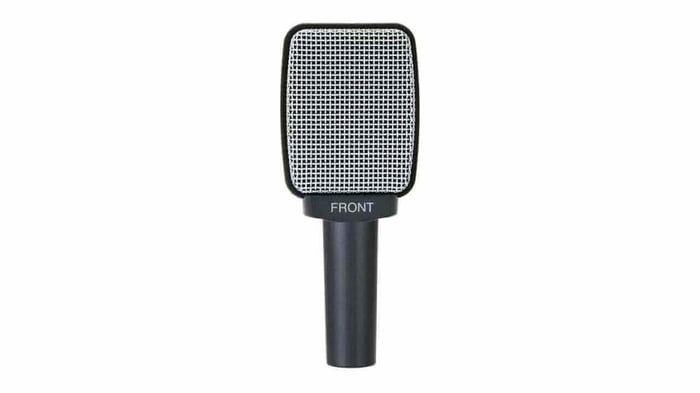
Ribbon microphones
Because of their construction, ribbon mics tend to be more accurate than traditional dynamic mics, but they are far more sensitive. Vintage ribbons can be damaged easily by phantom power, so never run phantom power into a ribbon unless the manual explicitly gives you the go ahead. Ribbons are considered more flat and neutral than other mics, trending towards the warmer timbres. This makes them fantastic for naturally bright sources, like trumpets, drums, electric guitars, and harsher vocals.
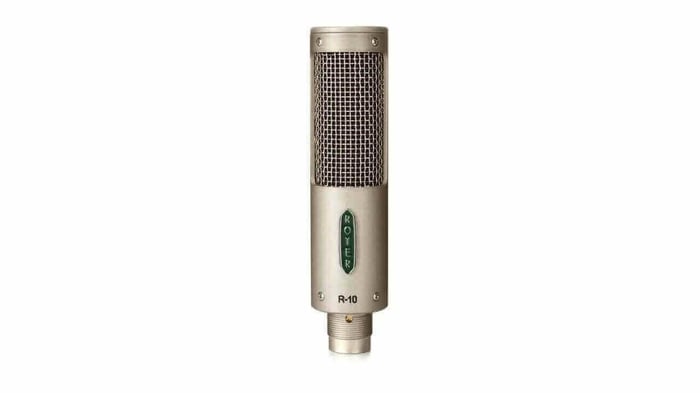
Condenser microphones
Condenser microphones require external power to run and offer lots of color, particularly in the highs and midrange. Due to their construction, they tend to be quite sensitive to your room—so definitely treat the space! Large-diaphragm condenser microphones are often favored for pop vocals because of their silky high-end. Small diaphragm condenser microphones shine on overheads and string instruments because of their fast, flattering response to transients.
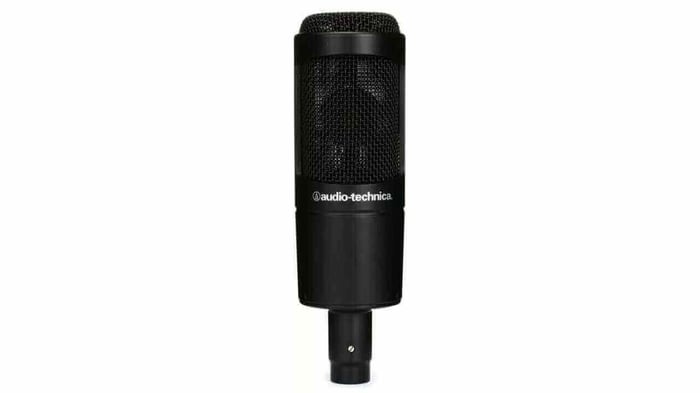
Back-electret condensers
I used to think of back-electret condensers as a niche subset, one relegated for consumer electronics. But since the proliferation of USB microphones, these guys have lept to the forefront of what you hear on a daily basis. So, they deserve their own little rundown, because they are almost exclusively what you’ll find in USB mics.
People say that a back-electret condenser mic can be every bit as good as a regular condenser. In my experience, they’re certainly every bit as bright and sensitive as their condenser cousins. But I have yet to hear one that offered the same warmth.

Microphone polar patterns
Next, you ought to familiarize yourself with your mic’s polar pattern—or, which physical parts of the mic are picking up sound. Understanding polar patterns goes part and parcel with understanding mic placement.
Omnidirectional
In an omnidirectional polar pattern, sound is captured all around the capsule. Omnidirectional polar patterns tend to be more flat in frequency.
Cardioid
In cardioid, the signal is captured in a heart-like pattern around the microphone, with only minimal response at the rear. Cardioid mics tend to sound bassier the closer they are to a sound source.
You’ll also find further classifications of cardioid, like supercardioid, hypercardioid, and unidirectional. These adjectives are giving you a clue about how focused the sound really is in front of the capsule.
Figure 8
A capsule in Figure 8 will pick up sound at the front and rear of the mic, leaving the sides almost entirely dead. This polar pattern can be quite useful when trying to get separation among instruments or speakers.
Other considerations in mic placement
Technical knowledge only gets you so far. You also have to consider many variables when figuring out where to put up the mics.
The player-instrument dynamic
No two instruments sound alike. No two players sound alike. This makes every situation involving mic'ing an instrument unique. So, I like to think in terms of what the source is giving me and react accordingly: if the singer is bright, I’m going to think about which mics I have that complement their brightness. This also extends to placement, as I might place a mic closer to an innately brighter voice than I would if the voice were warm.
The demands of the song
If the song demands a bright guitar part, I shouldn’t try to undercut the brightness in my mic selection or mic placement. The extent to which I’d mitigate brightness would only be to shave out the harshest frequencies.
The opposite is true as well: if the song requires a thumpy kick—one without clicky distinction—this changes where I’d put the mics.
The room
The room is the most important consideration in mic placement. Sure, you could bring out a fancy laser to measure the angles of all your mics for phase coherence. But if the room sounds terrible, such precision will only net you a precisely terrible sound. Yet in the same terrible room, a highly-insensitive dynamic mic right up on the sound source might give you everything you need without much trouble. It’s about knowing what you’re working with and reacting accordingly. Proper room treatment can also help your recordings (more on that in our room treatment tutorial).
If you’re in an unfamiliar room, walk around while clapping your hands to listen for flutter echoes. Hiss like a snake to judge how bright and harsh the room is going to be. Vocalize a big “ooh” from the top of your range to the bottom to ferret out any weird room resonances. All of this will give you good information.
If you have the luxury of time, try a few places in the room for test recording. Find which one sounds the best for the matter at hand, and set up there for the actual session.

Important microphone concepts
More than the specific examples I’m about to give you, this is perhaps the most important section of the blog, so do not skip these concepts.
On axis versus off axis mic’ing
When a mic’s capsule is pointed directly at the sound source, we call this “on axis.” When a mic’s capsule pointed not directly at an instrument, but angled off ever so slightly, we call that off axis.
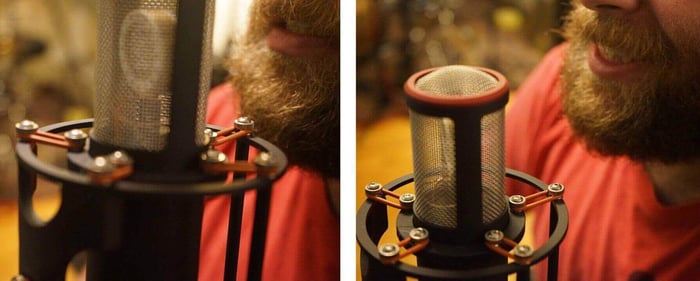
An on axis sound is generally going to be more bright and more focused than an off axis sound. I’m underlining this for emphasis, because it’s a shortcut to getting you what you want:
Is the singer too sibilant and harsh? Try turning the mic slightly off-axis to their mouth. Is the guitar too dull coming out of the amplifier? Check to see if you’re mic'ing the cab on axis. If there’s any angle in the mic'ing whatsoever, try going straight on the cab.
Proximity effect
The proximity effect describes what happens as you move a mic physically close to the instrument you’re recording. With a cardioid microphone, the closer the mic sits to the instrument, the more low end you’re going to get in the signal.
This is an incredibly powerful concept for adding body to thin-sounding vocalists or guitars. It also serves you well in shaping the lows out of a naturally boomy sound. If the guitar amp is too full bodied, don’t tell the guitar player to change their tone dials; instead, try moving the mic farther away from the cabinet.
Phase between multiple microphones
Say you've got a drum set, and you want to use two microphones to get a stereo sound. Here’s the thing about that: the soundwaves off that drum set will arrive at each mic independently.
This concept is the building block of phase relationships—and it’s crucial to multi-mic'ed instruments like drums. If one mic is farther away from the snare than the other, you might get a weird, thin, washy snare as a result.
Consider a drum kit captured with two mics. This is what it sounds like:
That’s a good phase relationship. I can simulate a bad phase relationship by delaying one of the channels 1 millisecond—which is roughly tantamount to moving one of the mics away from the other by a 1.13 feet.
That’s pretty weird, right? Set the mics up really bad, and the whole kit could sound out of phase.
Now listen, I could write a whole article—who knows, even a book—on how important phase relationships are to drums. But we’re already like a thousand words into this thing!
So let’s move on to the main event: basic tips on microphone placement, particularly in the home studio.
Mic placement techniques
Most of you reading this may be recording at home. We're using a well-appointed home studio for this article, one operated by my dear friend James Crawford.
Here’s a picture of me in his control room, to show you the kind of vibe we’re dealing with.

Yes, that’s a Trident console behind me:

James is a quiet legend in Brooklyn Front-of House sound. In addition to running a huge rehearsal studio in New York City—working daily with bands like LCD Soundsystem—he’s gone out on the road with rock legends like Marky Ramone. But his recording chops are just as serious: having learned at the feet of Stevie Wonder’s recording engineer, Crawford gets great sounds out of his attic studio. Indeed, when I need to record drums on my own projects, he’s the one I call.
In that selection, drums and guitars were recorded at his place, and played by yours truly. No samples were used in the mixing of that project.
James took me through his typical recording practices for his home studio. I’ll describe the positioning and show you pictures. All of these setups represent standard practices adapted for a particular room. Keep in mind, you’ll need to change these positions for your own situation. These are starting points.
How to mic kick drum
Mic placement for drums begins with the kick drum. Many engineers like to record their kick drums with two mics—one “kick in” and one “kick out.” “Kick in” gives you your attack, and “kick out” gives you your body.
The photo below shows “kick out,” and you can see that the name is apropos: the mic is placed outside the kick drum, a little to the right.

The distance and angle is something you’ll have to play with, keeping things like tone and phase in mind. James is using a large diaphragm condenser mic here.
For “kick in,” James simply places a dynamic mic inside the kick drum, like so:

Here’s the mic—an Audix D6 dynamic—inside the kick, resting on a comfy pillow:

You can see now why it’s called “kick in.”
The blend of these two mics gets you your overall sound, and as you can hear in the recording above from 2018, it’s pretty good.
In bigger studios, people often use sub-kicks or kick tunnels to reinforce low end as well, but James doesn’t do this in his space.
How to mic snare
When mic’ing a snare drum, we’ll be using two mics. Both are Shure SM57s, a classic choice in the dynamic department. One is pointed at the snare’s top, while the other mics the underside to catch fizz off the snare wires. The top mic captures the body and attack. The bottom gives you that tizzy snare sound.

The bottom mic may be out of phase with the top mic depending on the angle—so be sure to try flipping the polarity on the bottom mic. Whichever setting gives you a fuller snare sound is the one you want to go with.

You can see the mic is angled toward the center of the snare drum. That’s how James likes it, but this is personal preference: pointing it towards the center gives you more body and punch, while aiming at the rim gives you more ring.
How to mic toms
There’s many ways to mic toms, but in a common home studio setup, James recommends keeping two things in mind: phase relationships, and rejection of the other instruments. He likes to angle the tom mics, like so:

The mic, a Sennheiser 421, is positioned directly on the tom to reject bleed from other instruments as much as possible.
How to mic hi-hats
James uses a similar rejection method for the hi-hat. The mic mirrors the angle and directionality of the snare—which helps with the phase relationships—but is placed in a way that it stays clear from the cymbals.


Overhead drum mic placement
Small-diaphragm condensers, large diaphragm condensers, and ribbon mics are common choices for overheads. Ideally, you’d want a matched pair—two mics of the same make and model, spec’d to be as identical as possible. James is using two large diaphragm condensers in his set up.
I’m going to show you three overhead techniques. The first is a spaced pair, which James prefers for his room:


The reason behind the name should be self-evident—though sometimes people call it “A-B”. It's a spaced pair of microphones, one favoring each side of the kit.
This is a good technique for capturing a recording that really favors the cymbals, but in my experience, isn’t the best if you want to rely on your overheads as your overall drum picture, as it can sound unnaturally wide.
Note that this is a modified take on the spaced pair. Usually, we’d use omnidirectional capsules facing the kit, rather than mic'ing the cymbals at a right angle. This configuration happens to sound better in this room—remember, you always have to tweak things by ear!
The next stereo overhead technique I’ll show you is called ORTF mic placement, and it looks like this:

ORTF is a near-coincident pair of cardioid microphones, meaning the mics are close to each other, though not touching. They’re angled at about 110 degrees.
Note that this technique is commonly used with small diaphragm condensers, which often resemble pencil mics. When I asked James to put up SDCs for a more traditional picture, he said, “do you want me to show you what looks good in a picture, or what sounds right for this room?”
Again: your ears must be the judge of what sounds best!
Now here’s ORTF’s cousin, the coincident pair more commonly known as X/Y:

In the X/Y configuration, two directional (i.e., cardioid) mics are placed with their capsules as close to each other as possible at 90 degree angles, resulting in a naturalistic stereo image of the whole set. I often find it less wide than ORTF, but with better snare cohesion.
This technique is more commonly accomplished with small-diagram condenser mics—but again, the LDCs sound better in this room.
How to mic guitars and bass
Dynamic and ribbon mics are commonly used on the cabinets of electric guitars, and here are some common setups.
This first example is a ribbon microphone on a guitar cab.

Next, we have a dynamic microphone placed in front of a guitar cab.

And lastly, we have a dynamic mic placed off-axis on a guitar cab.

Notice the difference between the last two pictures. Here matters of on-axis and off-axis come into play. On-axis will sound more focused and brighter, but off-axis might be less harsh.
It’s also not uncommon to use multiple microphones on guitar cabinets.

Here a Shure SM57 is right up on the grill (very common), while the ribbon mic (a Cascade Fathead) sits about a foot back. Blending these two mics will give you a combination of point and focus from the 57, and overall body from the ribbon. Again, flip the phase on one of the mics and use whichever combination you think sounds best for the song.
This video from Brian Fisher below gives an overview of mic placement for acoustic guitar as well as vocals at home.
How to mic vocals (singing)
Unless you’re using a dynamic mic like a Shure SM7B when mic'ing a singer, the room is really going to matter when handling mic placement for vocals—I can’t stress that enough. All those tests I told you to conduct when judging a room really come into play here, so make sure you do those!
The most common arrangement these days for pop-style vocals is some kind of large diaphragm condenser, with this style of mic'ing:

Forgive the unkempt beard: I have a small child and I rarely leave the house. On a more practical note, let's observe again the difference between addressing the mic on axis (singing straight into the capsule).

You can see how I’m facing the capsule (plainly visible through the mesh) at an angle. I’m exaggerating for the picture, but this is the general idea: addressing the mic on axis will sound more focused, more crisp and sharp. Going off axis usually sounds a bit duller, but it will mitigate harsh sibilants to a large degree.
I often ask a singer to hiss like a snake straight into the microphone, and then ask them to gradually cheat the angle out to one direction until it’s less harsh, but not overly dull. Then, I ask them to say something sibilant, like “say something sibilant.” That will tell me if the sound has struck the right balance.
In general, place the mic anywhere from three fingers to a foot away from the singer. Remember, the closer they are, the bassier it’ll sound. The farther away the singer is, the thinner it will be, and the more room you’ll capture.
And unless your singer has impeccable mic technique, you should use a pop filter, like so:

The pop filter will help catch unwanted p-pops and plosives, saving you the trouble of having to RX them out later.
How to mic vocals (spoken)
Remember what I said up top: the room is really going to matter—unless you’re using a dynamic unit like the Shure SM7B, which is my number one favorite mic for podcasting. For the spoken word, nothing will take the room out of the equation like this mic.

Note that when I say “take the room out,” I’m not referring to machine noise or the sound of air conditioning. I’m talking about things like room reflections, which can absolutely color the sound.
Note that on the Shure microphone, I’m really up on the capsule: you can do that with this mic, as the mic is housed in its own windscreen.
The other kind of podcasting mic you’ll find is the electret condenser of USB microphones, like the Blue Yeti.
With USB mics, the first thing I recommend is treating your room. They will pick up a ton of the room’s character. I also recommend using a pop filter, getting about three to four fingers away from the mic, and speaking off axis into it, as demonstrated in one of the pictures above.
Get started with mic placement
Would you believe that was over 3000 words? They flew right by, didn’t they? You’d think that after a novella’s worth of prose we’d have everything covered—but we don’t! There’s a lot more to say mic’ing drums, let alone the instruments we didn’t cover.
That’s why the concepts I provided are more important than the setups. Proximity effect. Rejection through polar patterns. On-axis vs. off-axis mic'ing. Complementing the instrument/player. Keeping the room in mind. Phase relationships. All of these matter so much in the recording process. Get a handle on these techniques, and you’ll be well on your way.
Once you have your room treatment, microphone placement, and recordings completed, explore iZotope's other Learn tutorials on audio mixing, vocal production, and more.