What Is the Noise Floor? How to Reduce It In Your Recordings
The noise floor is a certain amount of electrical noise that adds to an audio signal. In this article, we’ll explore what the noise floor is and show you how to deal with it in your recordings.
The noise floor is one of those confounding technical terms that many budding engineers are ashamed to ask about in public, feeling that they should already know what it is by virtue of its name. So you can save face the next time you’re asked—and learn some things about how to record audio along the way—we’re going to take some time to define what the noise floor is, and show you how to deal with it in your recordings.
Jump to these sections:
- What is the noise floor?
- Audio examples of the noise floor
- The noise floor in modern-day music
- How to minimize the noise floor in the recording stage
- Minimizing the noise floor in the mix
Follow along with this tutorial using


RX 11 Advanced
What is the noise floor?
Any piece of analog recording or mixing gear generates a certain amount of electrical noise that it adds to the audio signal. The term “noise floor” is used to describe this self-generated noise. Crank up a mic preamp or a headphone amp with nothing plugged in, and eventually you will hear a ton of noise, almost like a powerful hiss. Congratulations—you are now hearing the noise floor in action!
However, that’s not the only thing that contributes to the noise floor. Air handlers, air conditioning units, computer fans, even nearby train tracks and more can all impart undesirable noise that ends up in your recordings. What can seem innocuous, or even inaudible, during recording, can easily end up as distracting noise once it’s mixed and mastered.
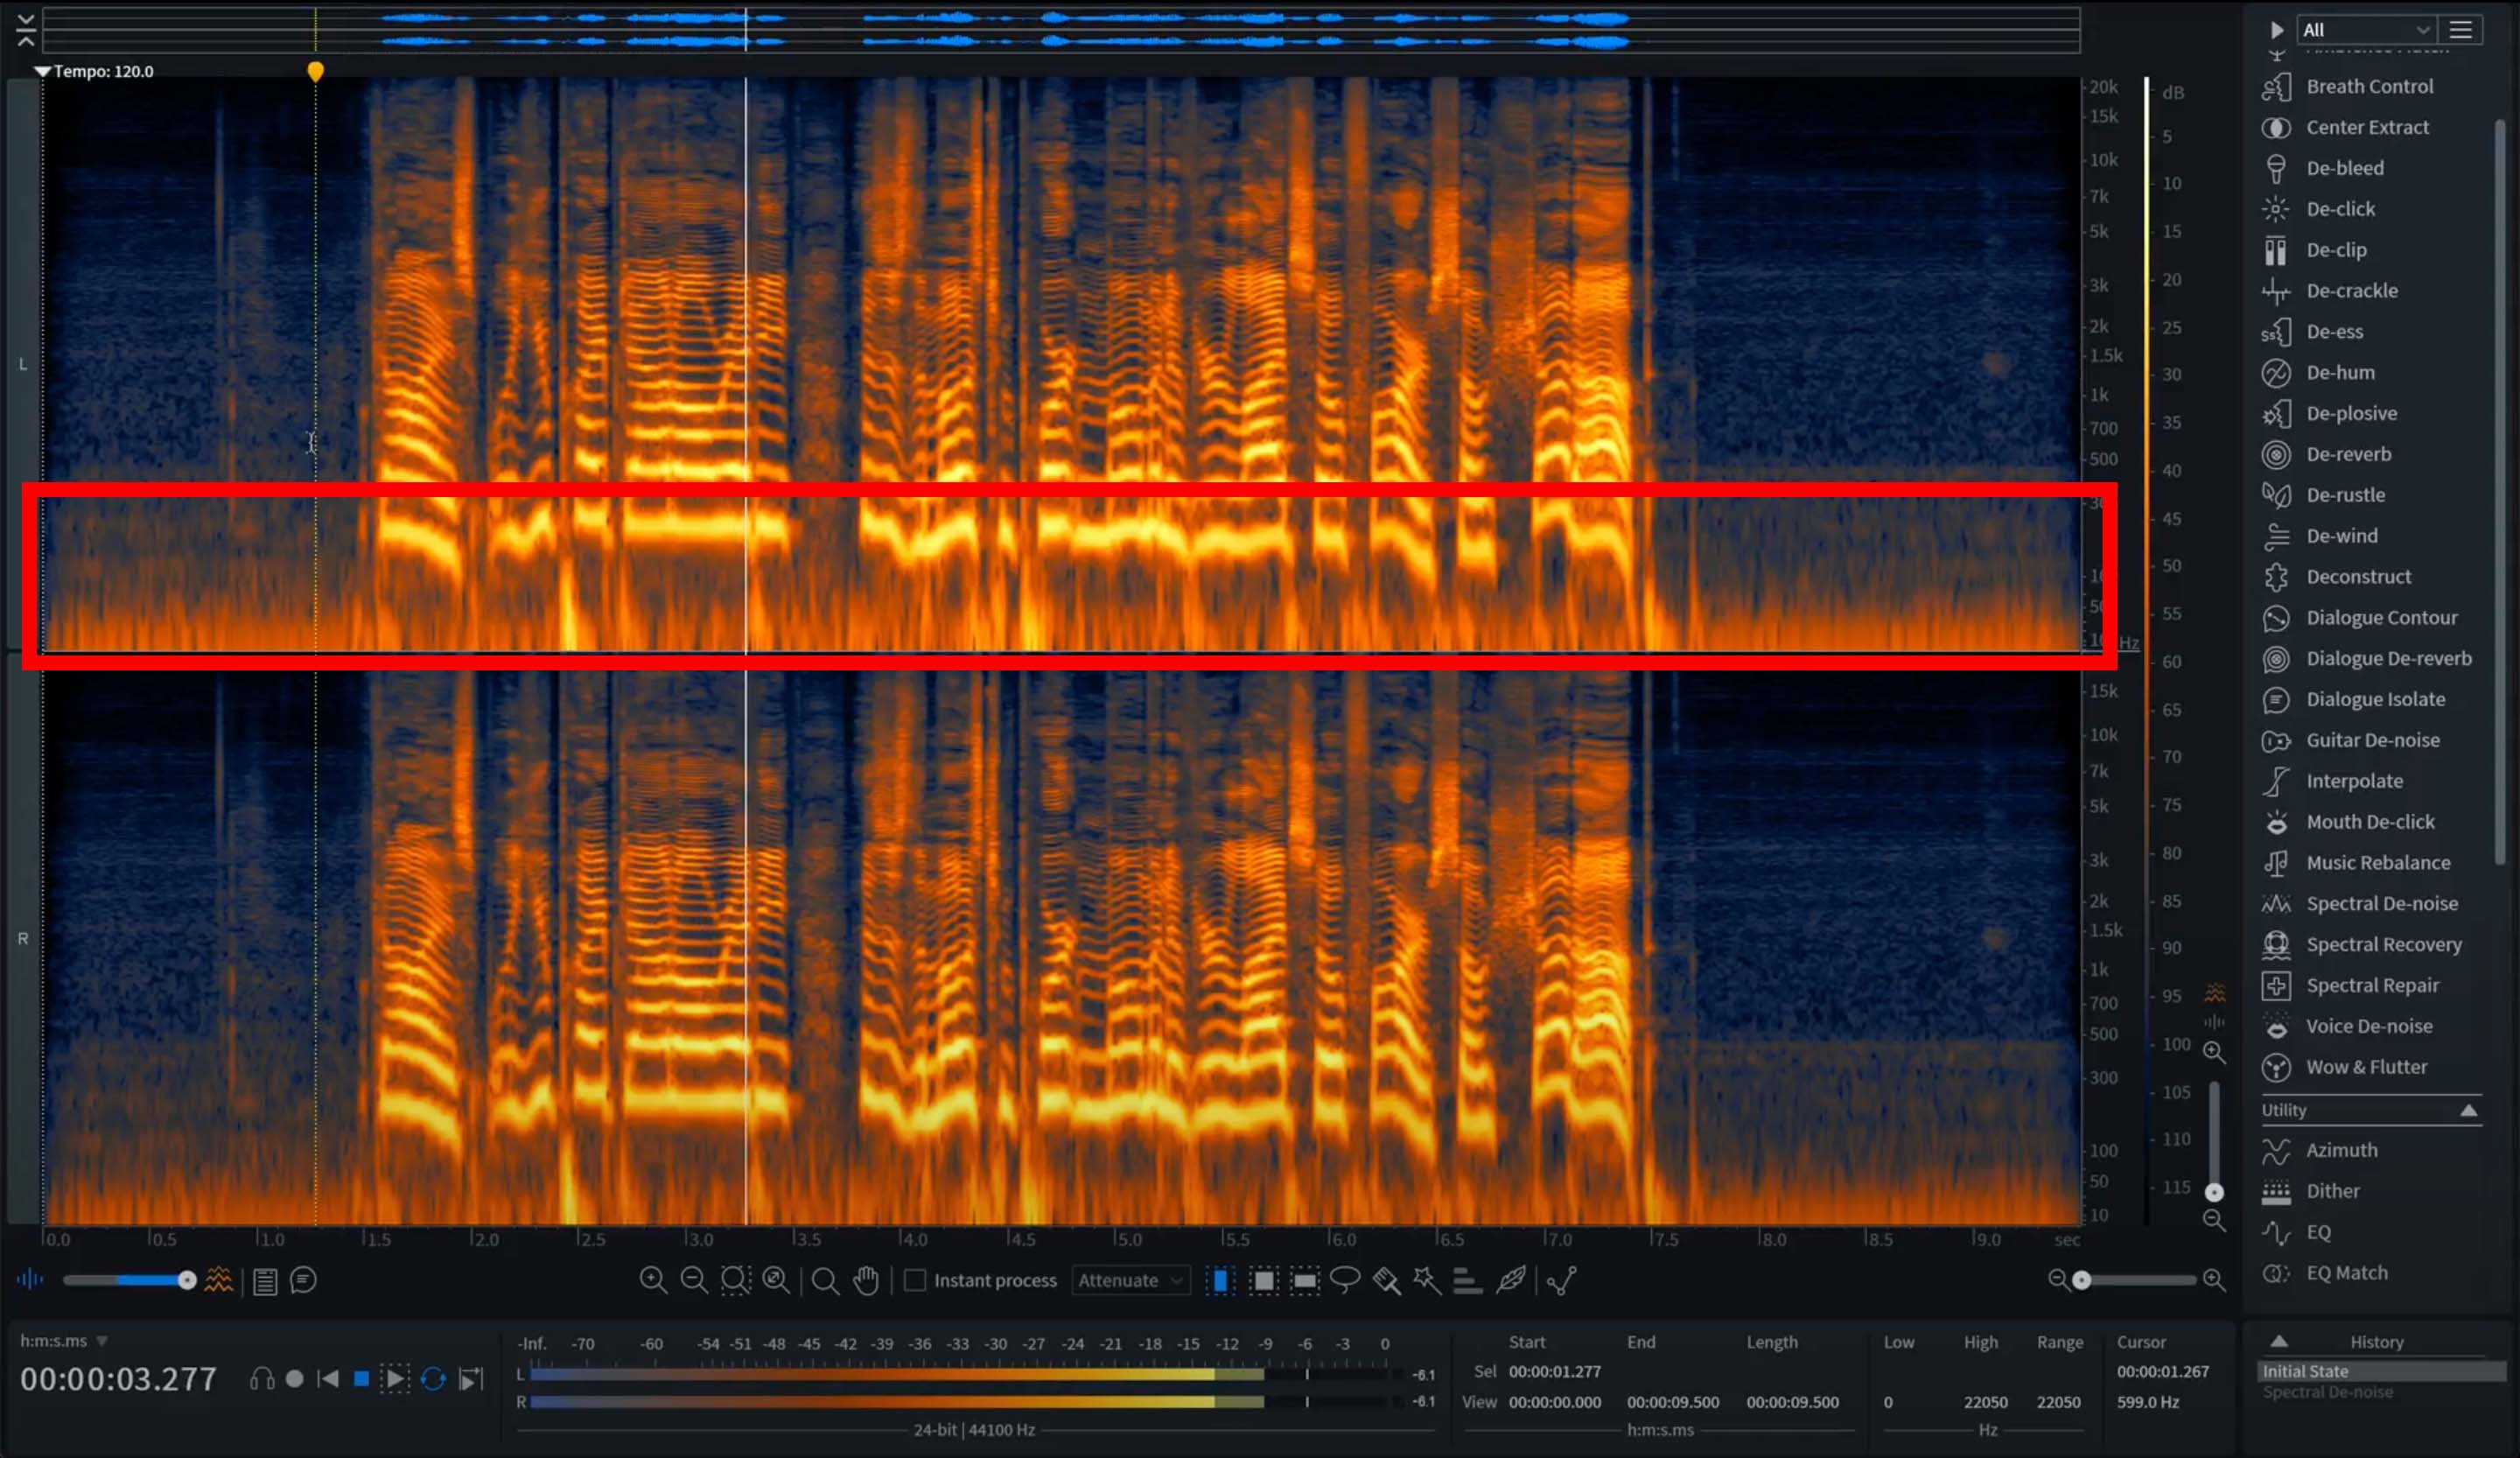
Electrical noise added to an audio signal, also known as the noise floor, viewed in the RX Spectrogram
Audio examples of the noise floor
Each piece of gear in a chain contributes to the noise floor. It’s highly interactive—so it’s highly dependent on all the gear you’re using. You could be using the same preamp, the same settings on the preamp, the same interface, and record in the same room—but if you swap out the mic, you’ll have an entirely different noise floor.
By way of example, plug in some high-quality headphones and listen to the following:
Here’s me recording my voice with an Aston Origin going into an API 3124 preamp, feeding a Cranesong Hedd 192 converter. Then, listen to the same chain in the same room, but with a Shure SM7B.
Noise Floor Audio Example
Note how in the silences, the Shure’s noise floor is louder—you can hear a distinct buzz. Whatever is causing the buzz, it’s contributing to the noise floor in a most unwelcome manner.
The noise floor in modern-day music
You’d think the noise floor would’ve gotten lower and lower with the ever-onward march of technology—and yes, the tools we have at our disposal for minimizing the noise floor are truly phenomenal (here’s looking at you, RX).
But the opportunities to introduce noise into the signal have actually increased in modern-day recording. Sometimes, we can’t avoid the things that contribute to the noise floor, and sometimes, we need to actually introduce a noise-floor!
You have two developments to thank for this: the rise of digital systems, and the proliferation of home recording setups.
Digital Systems
How does a digital sound contribute to the noise floor?
You might think a sound programmed within a computer is free from noise. But consider that the samples used in many virtual instruments all come with a noise floor: at one time or another, they were analog sounds recorded with electronic components. There are whole forums online dedicated to how annoying people find the noise-floor on many symphonic string libraries.
It’s quite easy to ignore this phenomenon and process sampled instruments in a way that contributes to the noise. Compression, EQ boosts, harmonic saturation, and analog emulations are all processes that could bolster the noise floor.
But what about sounds made by digital oscillators? Do they have a noise floor?
The answer is slightly sneaky. Consider what veteran DSP guru Paul Frindle said to mastering engineer and guest contributor Ian Shepherd:
“There is actually no difference between digital and analogue signals–all have a dynamic range set by the ratio between the max level and noise. The difference is that analogue comes with its own noise (caused by the reality of signal in the physical world) whereas any digital representation in math requires us to re-insert the physical random component the math does not provide us.”
He is alluding to dithering—a noise we add to digital signals so that analog systems can interpret them correctly, without adding truncation distortion (which is decidedly nastier sounding than broadband noise!)
It’s not that digital systems have a problematic noise floor—it’s that representing them in analog domain properly requires inserting a noise floor to help facilitate a smooth, “contiguous” sound. Here, the noise floor is not a problem, but a sneaky necessity!
Generally speaking, if you use dither every time your production goes down in resolution (from 32-bit float to 24-bit, and from 24-bit to 16-bit), you won’t experience an audible buildup of noisy errors. The bottom line here, is that even at 16 bits, the noise floor of properly dithered digital audio is lower than all but the very fanciest analog gear, and at 24-bits (which you should absolutely be using for your recordings), it’s virtually inaudible.
Digital systems are complicated, and what I’ve written above is the breeziest way I could think of to cover noise therein.
Home Studios
So much recording is done at home nowadays, and the homestead is a trap for errant room noise that wanders into the floor of your signal.
Cell phone interference can muddle up a signal path, as can dirty power, which is prevalent in many homes. In the conventional home, you’re a bit hamstrung by environmental interferences on the noise front. You most likely can’t build a faraday cage for your studio live room, and you can’t tell your neighbors to quit using their air conditioners.
Then there’s the environment itself: you could have an air conditioning system that makes itself known at every interval; this is detestable for recording scenarios. You also probably don’t have a machine room to stow noisy computers and hard drives—they will whir in the background, and your sound will need to overcome this basic floor of background noise.
These phenomena aren’t classically defined as being a part of the noise floor, as they are not generated by the signal chain itself. But functionally they present a similar problem: they effectively kneecap your dynamic range, as the quiet moments are subsumed by atmospheric noise.
Going back to classical definitions, we must next consider prosumer interfaces with subpar signal paths; their components are not going to be as quiet as something purpose-built for the professional studio.
Can’t afford decent cables? That’s fine, but there is a nonzero chance you may introduce interference into the signal.
So yes, audio has the potential to be noisier than ever these days—even without tape machines hissing away! To put it more accurately: the space between your audio signal and unwanted noise has the potential to be quite narrow indeed.
Luckily we can take precautions when recording to mitigate the noise floor as best we can—and failing that, we have digital tools that can help us.
How to minimize the noise floor in the recording stage
We’ll start at the source: the sound as it interacts with the room. This might not apply to all sound sources, but it’s a good place to start.
- Have all your gear either plugged straight into the wall, or plugged into a power conditioner. I’m not saying you should empty your wallet for an audiophile-grade setup—but do spring for something beyond your garden-variety surge protector.
How to keep power from interfering with your signal is a complicated topic, and one beyond the bounds of this blog. For now, start with a power conditioner. - Do your best not to have any power line physically touch, or run parallel to, any audio cable (if it must touch, try to have them cross at a 90 degree angle). This can introduce noise into the signal!
- Wherever you’re recording, keep the windows closed (to minimize outside noise) and turn off all air conditioners, fridges, and every mechanized noise maker that you can.
- If you’re recording an instrument through a microphone, position the mic in such a way that little computer-fan noise, hard drive noise, or other machine whirring gets into the sound. This is unbelievably hard to accomplish in a small room, requiring much in the way of trial and error.
This is also why cardioid and figure-8 polar patterns are arguably more prevalent in home studios. These mics have dead spots, and it’s easier to put the noisy elements of your room squarely into these dead zones. - If the instrument you’re mic’ing goes through an amplifier by means of an unbalanced cable (a guitar lead, for instance), keep all cell phones away from the amp, cable, and instrument to minimize interference. The same holds true for any DI, like an electric bass or guitar going straight into a preamp: cell phone interference is real, especially through unbalanced cables.
- Speaking of cables: the shorter the cable run, the less possibility you’ll pick up extraneous noises along the way. If you are experiencing noise in your signal, always start by swapping the cable; it’s the most likely suspect.
- As demonstrated earlier in this article, the total noise floor will change depending on the mic and the preamp, or the direct instrument and the preamp—you really can’t separate one from the other.

Have all your gear either plugged straight into the wall, or plugged into a power conditioner.
With limited funds on hand, there might be nothing you can do to mitigate the noise floor in these elements. But you can still measure the noise floor so you know how much real dynamic range you’re working with.
How to minimize the noise floor in the mix
Sometimes, despite our best efforts, noise gets into the audio path, and all we can do is try to fix the issue. What tools do we have at our disposal? Obviously, iZotope RX is loaded with a ton of stuff that will help you. RX Spectral De-noise, Voice De-noise, and De-humcome to mind.
RX Spectral De-noise and Voice De-noise can both learn the noise floor and filter it out quite extensively. But there’s an important point here: most of the noise reduction tools in RX can benefit greatly from a few seconds of just noise. Any time you’re recording it’s a great idea to capture about five seconds of dead air—or room tone—at the top or tail of a take. You never know when this will pay dividends later!
Let’s take an example from earlier in this article.
Observe RX Spectral De-Noise in action in the following video.
Here are the steps I followed:
- Open up RX Spectral De-noise and make a selection of the longest section of noise you can find in your file. To ensure the best results, your selection should not contain any content that you wish to preserve.
- Click the Learn button to capture a noise profile.
- Select 'Output noise only' that outputs the difference between the original and processed signals (suppressed noise) to listen to the noise that is being removed.
- You can play around with the Threshold and Reduction settings, but the default settings should be enough to remove the noise floor impacting the audio.
- Select Render to finalize your audio. You'll see that the visual of the noise floor in the Spectrogram has been greatly reduced.
We can also use RX Voice De-noise, which is a little simpler to get your head around.
I prefer Spectral De-noise most of the time; it’s more controllable, but it is more advanced. Voice De-noise works great for many applications.
If the noise is an electrical hum caused by a power issue, RX De-hum might be a better bet.
It’s worth noting that you can also go the opposite route: you can embrace the noise floor, and even introduce it more prevalently into the recording.
I’ll give you a real-world example from the 1990s. This song has audible noise-floor issues when the vocalist comes in, about 18 seconds in.
In good headphones, a hiss is clearly audible. If the engineers had sampled this noise and looped it right up top, you wouldn’t notice it when the vocals enter.
With the noise floor, knowledge is most of the battle
That covers it for the time being. Now that you’re armed with knowledge, you’ll be able to avoid the pitfalls of the noise floor, or at least deal with them in your mix. If you want to dive more into practical ways to defeat the noise floor in a mix, check out this tutorial on how to remove background noise and this tutorial on reducing ambient noise in your recording—all using iZotope RX to help get clean, professional-sounding audio.
