
Background noise can be caused hundreds of different ways. It could be a neighbor mowing their lawn while you record a podcast, a creaky floor shifting under a boom operator on a film set, or something even less conspicuous such as mouthy pops and clicks.
Even though each noise requires special treatment, it's easy to figure out what tools will work best to remove background noise when you categorize each noise. Is the noise a sudden, fleeting moment? Or is it sustained background hum affecting a long section of audio? Classifying the sound is the first step to fixing it.
Jump to these sections:
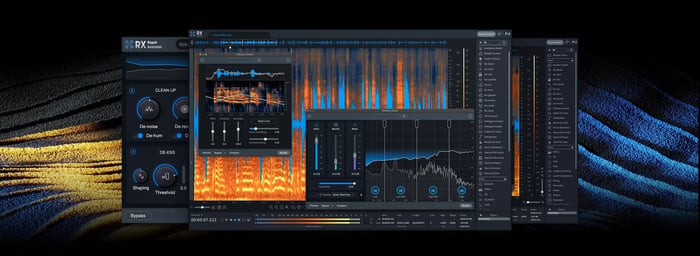
Follow along with this tutorial using Dialogue Isolate and Spectral Repair inside RX.
What are some issues that can cause background noise in dialogue recordings?
There are so many different ways background noise can be caused. A person with a trained ear can hear a noise and often identify its cause. An intermittent crackle on a track usually is caused by a faulty connection somewhere, most often a bad mic cable. A low-pitched hum is often a ground issue in the signal path. A bad internet connection can cause glitches and drop outs when audio is being recorded over long distances. Of course, there's more obvious issues as well such as construction happening outside, the sound of which can bleed into a microphone. I could go on and on.
How to remove background noise from dialogue
Identify your audio issues first, then you can tailor your approach to tackle them. You can't fix a problem if you don't first know what the problem is! Specifically, decide if your noise is consistent or intermittent. Each of these categories has their own basic workflow but share the following common principles.
- A couple of gentle passes with the same denoising process is going to be more transparent than taking one, really extreme pass at the audio.
- As you're making changes, it's helpful to create copies of the audio so you can always reference the original to make sure you haven't taken denoising too far and introduced artifacts.
- Some noises need a combination of tools to get it right.
With all that in mind, let's zoom in to a couple of workflows that are used to cleanup dialogue recordings.
Consistent background noise
For steady noise like air conditioning, refrigerators humming, or in this case crickets, RX Dialogue Isolate works well to separate the dialogue from the background noise. The sensitivity slider determines how much separation there is between dialogue, reverb, and background noise while the three faders control the volume balance. You can expand the plugin to be able to adjust how much processing is applied to the low frequencies vs the higher frequencies.
First, open Dialogue Isolate in RX 11 Audio Editor, launch RX Connect in your DAW, or in my case, I used it as an Audiosuite plugin in Pro Tools. There are different presets you can choose, allowing you to tell the plugin to focus on removing certain types of background noise or even do the opposite where it removes dialog, leaving only the background noise intact. I do this when I need a bit of extra room tone to smooth out a scene.
In this example, there is wind noise heard mostly in the low frequency range, under 100 Hz, and crickets that are more prominently heard in the upper mids, around 3.2 kHz. I focused my processing on these two areas specifically by expanding the plugin to show advanced controls.
You'll always have better luck with de-noising if you use a lighter touch and de-noise in stages rather than one time with extreme settings.
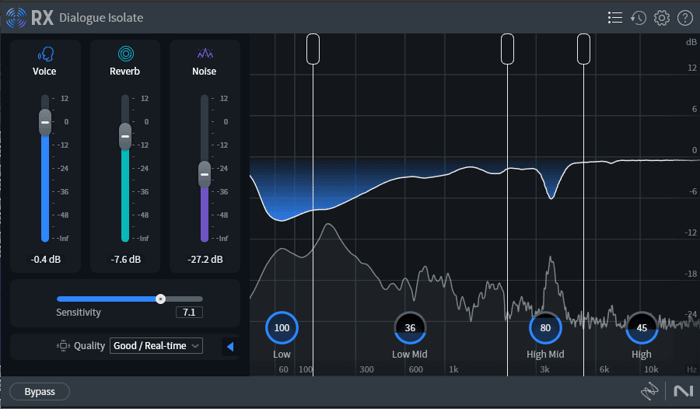
Dialogue Isolate focuses on removing low-pitched hum, and higher-pitched crickets from a dialogue recording
Intermittent background noise
For background noise that is more sudden and intermittent, you need a different approach. Rather than processing the entire audio file, we are going to use RX Spectral Repair to select the noise and remove it from the rest of the audio. Here is a different scene from the same movie, Grim Whimsy. In this scene, there's some creaking under the line "I don't know whether to be worried or relieved." This line would have more emotional impact if the creaking wasn't so distracting so let's remove it.
Below is what the audio looks like before cleanup. Using the lasso tool, draw a circle around the noise you want to remove. In this example, I'm going to remove the creaking which looks like sharp, orange spikes in the image below.
Then, using Spectral Repair, you can decide to attenuate the noise or have the noise be replaced with audio that comes before and after the noise to smooth out the problem section. In this example, I decided to attenuate the noise when it directly overlapped with dialogue and to replace the sound when it occurred during sections containing only room tone.
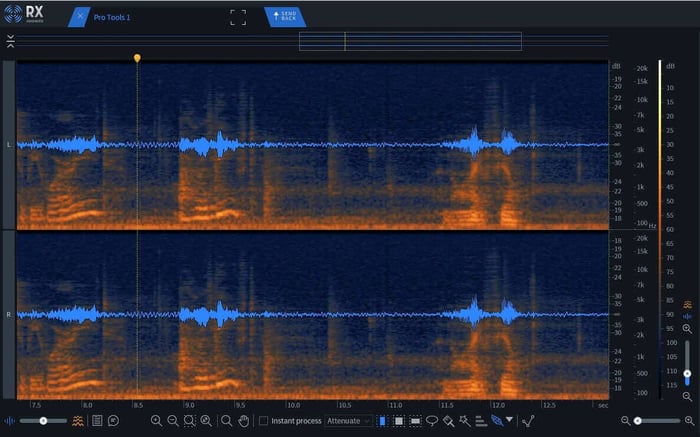
Spectral Repair allows you to select a noise and remove it from audio recordings
Start removing background noise from dialogue
Identifying your problem is the first step toward solving it. Is your background noise a short, random sound or is it sustained and kind of always in the background? Now that you know workflows for addressing both categories of common background noise, you can apply them to almost any noise to clean it up. Or you can even apply a combination of tools to get the sound just right! For more tips for audio cleanup, check out our guide on removing background noise and these techniques for cleaning up dialogue recorded via Zoom.
Download iZotope RX and start removing distractions from your dialog recordings today!