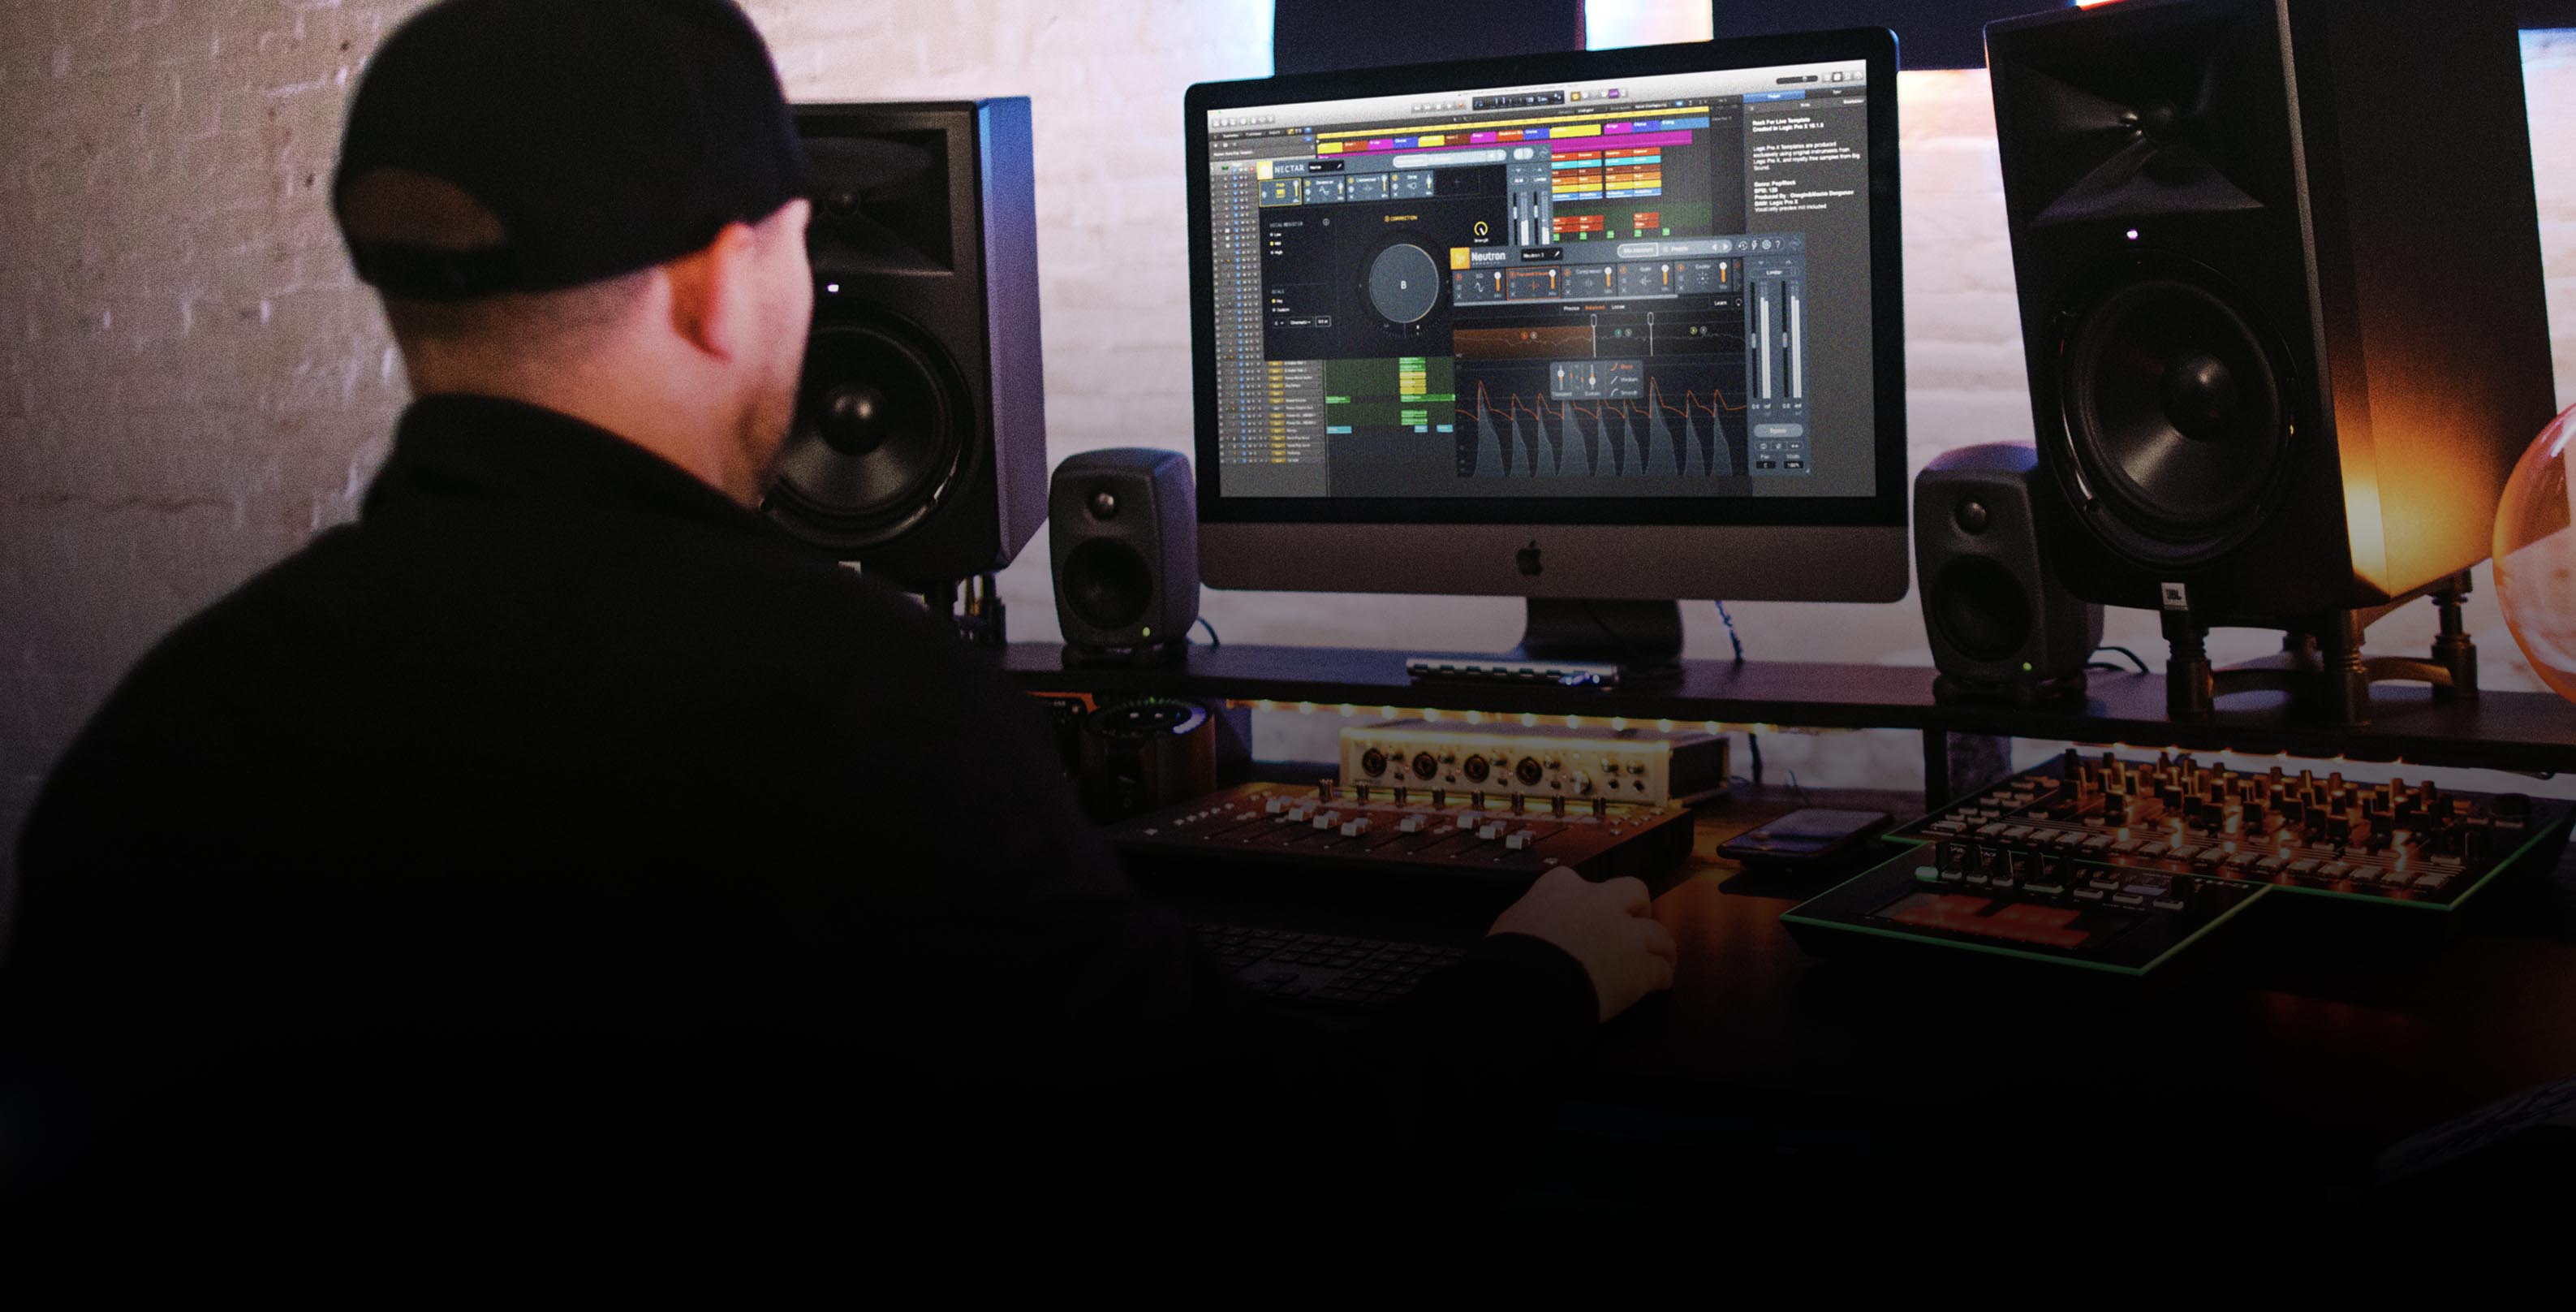
7 Tips for Mixing Drums
Learn how to get a full, clean drum mix with these tips for mixing drums, including how to EQ drums, transient shaping and panning techniques, and different ways to apply compression to drums.
We get a lot of questions about how to mix drums—and that’s understandable. Drums are a vital element in music. They get people moving and they provide a pulse that keeps songs alive. Well, hopefully they do. If they sound weak, the drums might do nothing more than cause disappointment and even death to your production.
In this tutorial, I’ll be sharing mixing tips to get a full, clean drum mix in your production. We’ll be using iZotope


Neutron
Should you mix drums first?
Lots of engineers prefer to begin their mix with the drums—some starting with the granularity of the kick and building out from there. Others have different methods, including mixing with all the instruments all the time; getting the vocal first and placing it against bass, kick drum, and snare; and many more.
Mixing is such a personalized art. There is no “one size fits all” answer to this, so I would not presume to prescribe.
I work on gain staging first, then assemble a kind of overall static mix—either one that matches the rough mix, or one that represents my choices, depending on what the producer/artist wants.
When that’s completed, I have a good idea of how the song feels and sounds already. I lower the faders on everything but the drums and the bass, and I work from there. I do not mute the other elements—just bring them down about -18 dB or so.
Sometimes the music beckons me to start mixing from the overheads first, back to the kick drum. Other times, I start with the bass and kick together. It depends.
You’ll find your own way, but I strongly suggest the static mix. It makes your life so much simpler, especially when it comes to drums.
What effects should you put on drums?
EQ, compression, saturation, and transient shaping are common effects we use on drums. Depending on the sound and the recording, gating may be necessary. For atmosphere, we might use convolution or algorithmic reverb, and delay is often applied.
Flanging, phasing, and other modulations don’t usually occur unless one has very specific motives—or unless one wants to enhance the reverberation/delay in a specific manner.
Now, let’s move into techniques for mixing drums with Neutron. None of these tips are time-consuming, but all can give you big sonic rewards.
1. Visualize your drum sound with panning
Panning your drums is an important consideration, and I like to tackle it early. Two things come into play when thinking about how to pan drums:
- What do I want to happen in the arrangement?
- What do the recordings allow me to achieve?
The arrangement has a huge influence on how to pan drums. In many rock mixes, the drums might not be as wide as you'd think, since the guitars are handling the hard left/hard right positions. On other mixes, the drums are the widest thing going, while the instruments occupy a narrower space. These decisions are aesthetic.
But the recording itself plays a huge part. Drums are usually captured with multiple mics. If the phase relationships aren’t great to begin with, no amount of panning, balancing, EQ, or phase trickery is going to give me complete freedom. I’ll have to match the kick, snare, hat and tom mics to the overheads as best I can—and that’s the image I’m stuck with.
Some engineers are so good at recording drums that you can pan their recordings without restraint. Steven Wright (Lonely Islands, Super City) is one such engineer: I’ve been lucky to work with his drum recordings; they are so well done that I can forget about any limitations and concentrate solely on the arrangement.
This, sadly, is the exception. Most drums have a ceiling when it comes to what you can get away with.
Once you explore these considerations, you can use your DAW’s pan pots to get where you want to go, or you can use a tool like iZotope’s


Visual Mixer
Visual Mixer offers a single control to simultaneously adjust level and panning of multiple instruments at once in a single window. Feast your eyes upon the next image, which shows the Visual Mixer on the drums.

In the Visual Mixer, panning is left to right and level is up and down (up is louder and down is quieter)
Here's one method of panning you can try. Start by listening to your overheads, with all the other tracks dragging the bottom (i.e., muted). A lot of the time, if you’re working with two mono overheads, you’ll start by pushing them all the way right and all the way left. Listen to the stereo image. Is your snare in the center? If not, here’s a tip on how to get it there: Try moving one of the overheads in to make the snare more centered. You’ll notice the kick will be off-centered then; don’t worry about that for now, the actual kick drum will fix that, or a high-shelf on the overheads—attenuating them—should help as well.
Next, bring up your snare, your kick, your hat, your room mics, and your toms. Try to match the panning with the overheads.
2. Give your drums shells a head start with Track Enhance
Neutron’s assistive technology recently made a fascinating leap forward. Now, it relies more on the Sculptor module to guide your sounds into their proper shape. Instead of a static preset, you get the Assistant View, which lets you tweak things with macro controls.

Neutron Assistant View
This Assistant View works especially well on drum shells.
Observe what happens when I use it on the kick drum. We go from this:
To this:
It’s not a drastic change, nor is it a totally wrong estimation of what should happen. The results are subtle, but better—and that’s exactly as it should be. We have a head start, and an easy path forward: by tweaking the controls found in the Assistant View, I can get a sound I really enjoy:
3. Use the Transient Shaper to add impact or roominess
If your kick and snare don’t hit hard, or your toms ring out too much, consider Neutron’s Transient Shaper to be a go-to secret weapon. It offers a shockingly effective and simple manipulation of the attack and sustain properties, and provides a dry/wet mix control as well. Plus, its handy real-time scrolling waveform display shows both the original signal and the gain trace of its activity.
Observe these drums, and what I will do simply by adding a transient shaper to the kick, snare, overheads, room mics, and toms.
Note that the change isn’t drastic—it’s bringing more body to the instruments in an understated way. Subtle changes are often what we want, especially when the recordings are already good. Over-processing tends to sound bad.
4. Use Dynamic EQ or Unmask to keep elements from conflicting
Kick and bass. Snare and vocal. Snare and guitar. Toms and guitar. These elements can conflict in specific frequency bands, and we can use a few tools to help them stay out of each other’s way.
The first is dynamic EQ. Using a sidechain input and the masking meter, we can tell the kick drum to duck the bass’s low end when the kick hits. Watch how to perform this task using Neutron's Dynamic EQ module in the video below.
Neutron also provides a dedicated module for this task called Unmask. This new module doesn’t just show you where frequency masking is happening—it fixes the problem for you, allowing you to unmask your mix faster than ever. Here, we can accomplish the same goal with a more subtle, spectral hand.
We’re using Unmask quite delicately, since it’s a spectral process. But with these settings, we can help the kick cut without overt side effects.
5. Delineate drum tones from spill with a multiband gate
Even “perfectly-miked” acoustic drums will not have perfect isolation from mic to mic. There will be some bleed from the snare, toms, and cymbals in the kick mic, bleed from the kick, toms, and cymbals in the snare mic, etc. Sometimes the bleed is great, and sometimes there’s too much of it.
The downsides of editing out the bleed from the recorded tracks are “choppy” sound and using too much of your limited time, not always what you need. Using gates is a classic solution that iZotope has modernized and made even better by utilizing Multiband functionality.
The image below shows Neutron’s Gate in a Multiband configuration optimized for a tom. As you can see, the bands have independent settings to allow for different gain control of the frequency zones. Those zones were set via the Learn function, which lets the plug-in choose appropriate crossover frequencies based upon the analyzed audio signal.
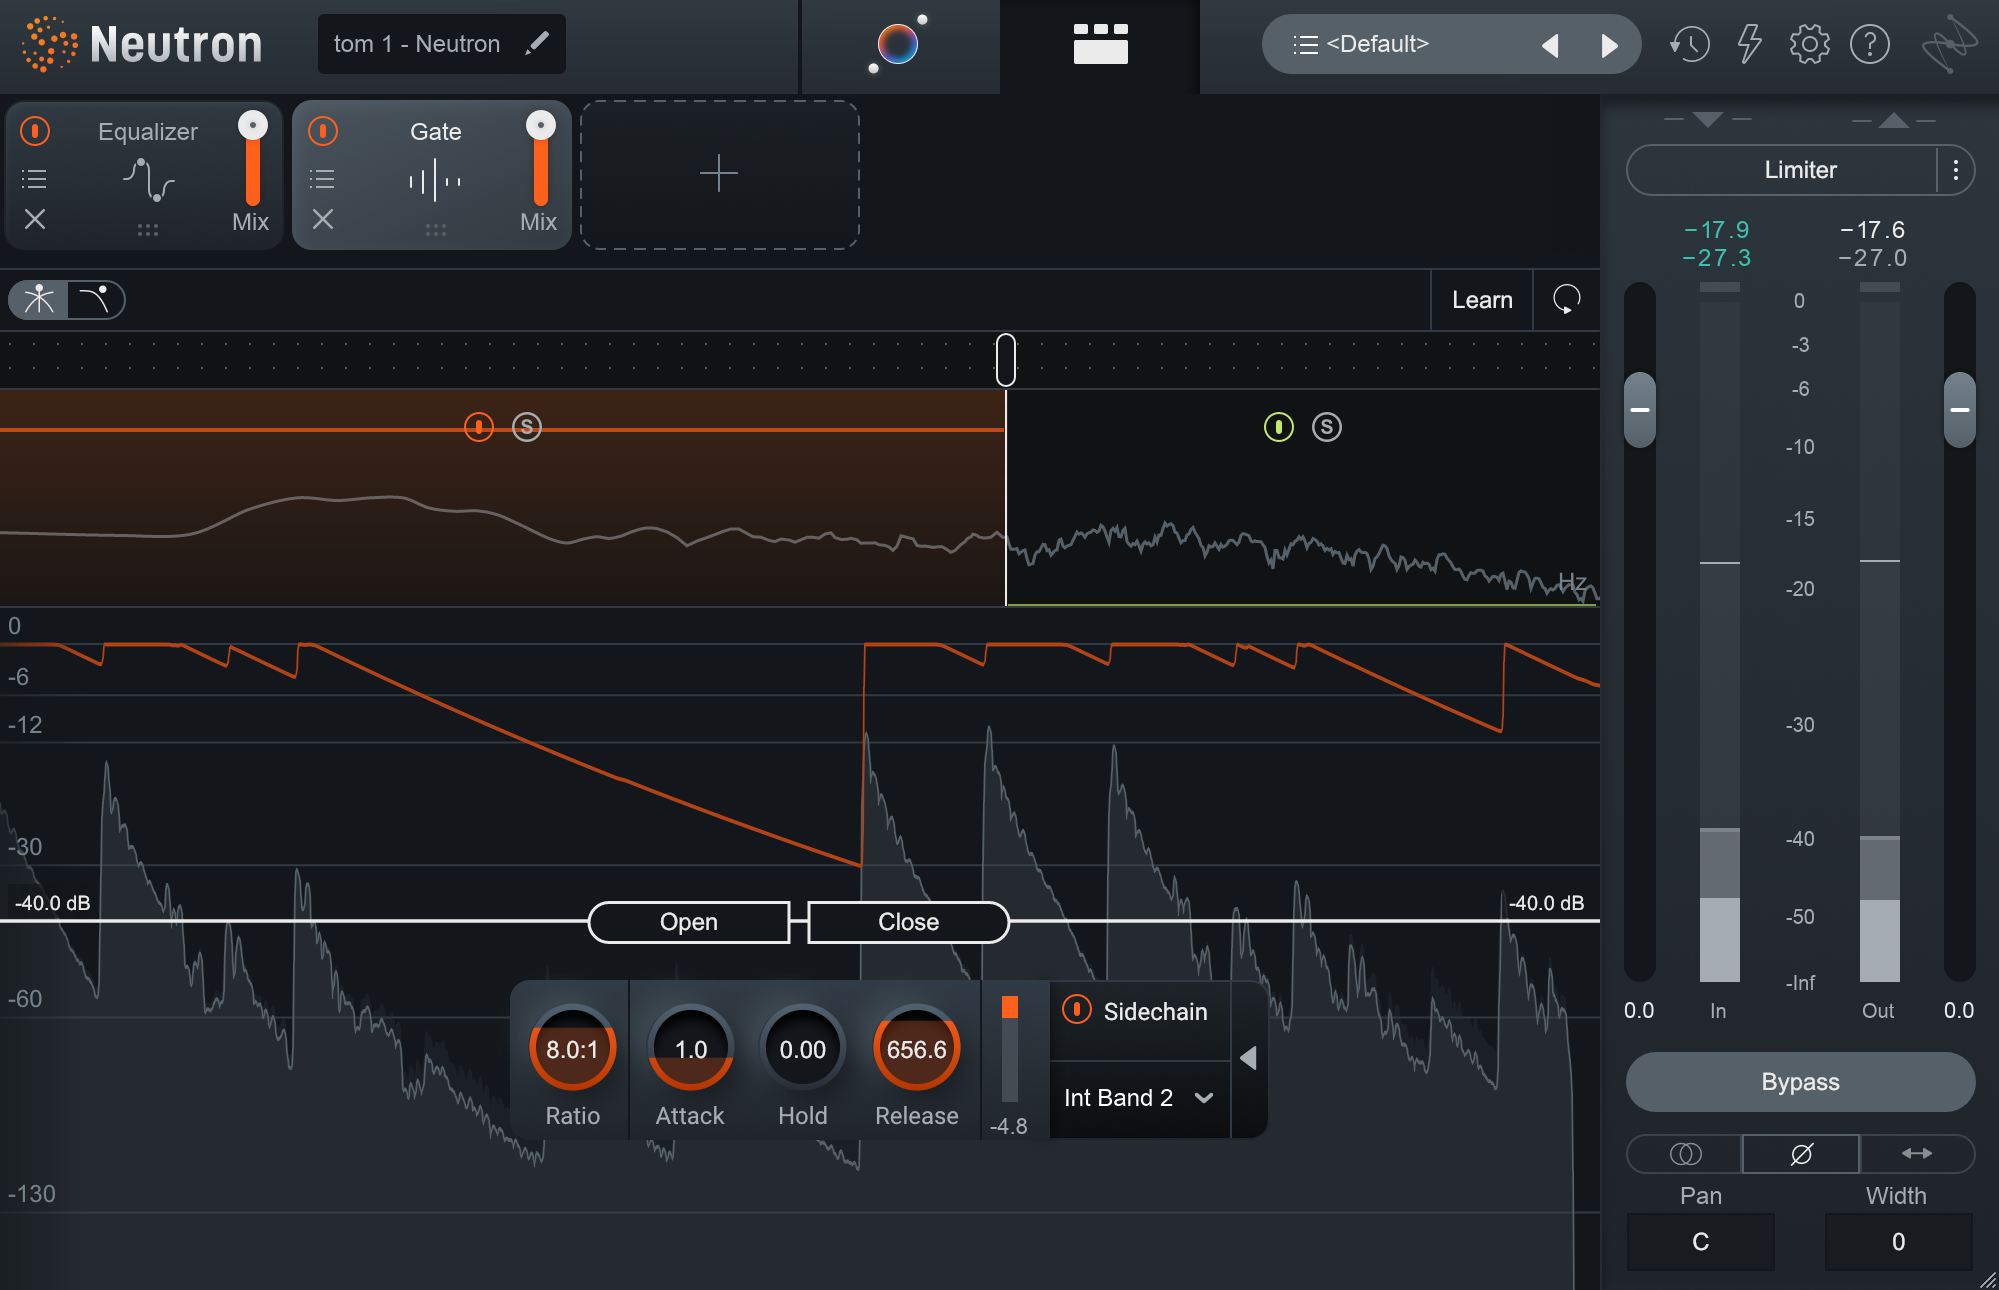
Neutron’s Gate in a multiband configuration optimized for a tom, low band
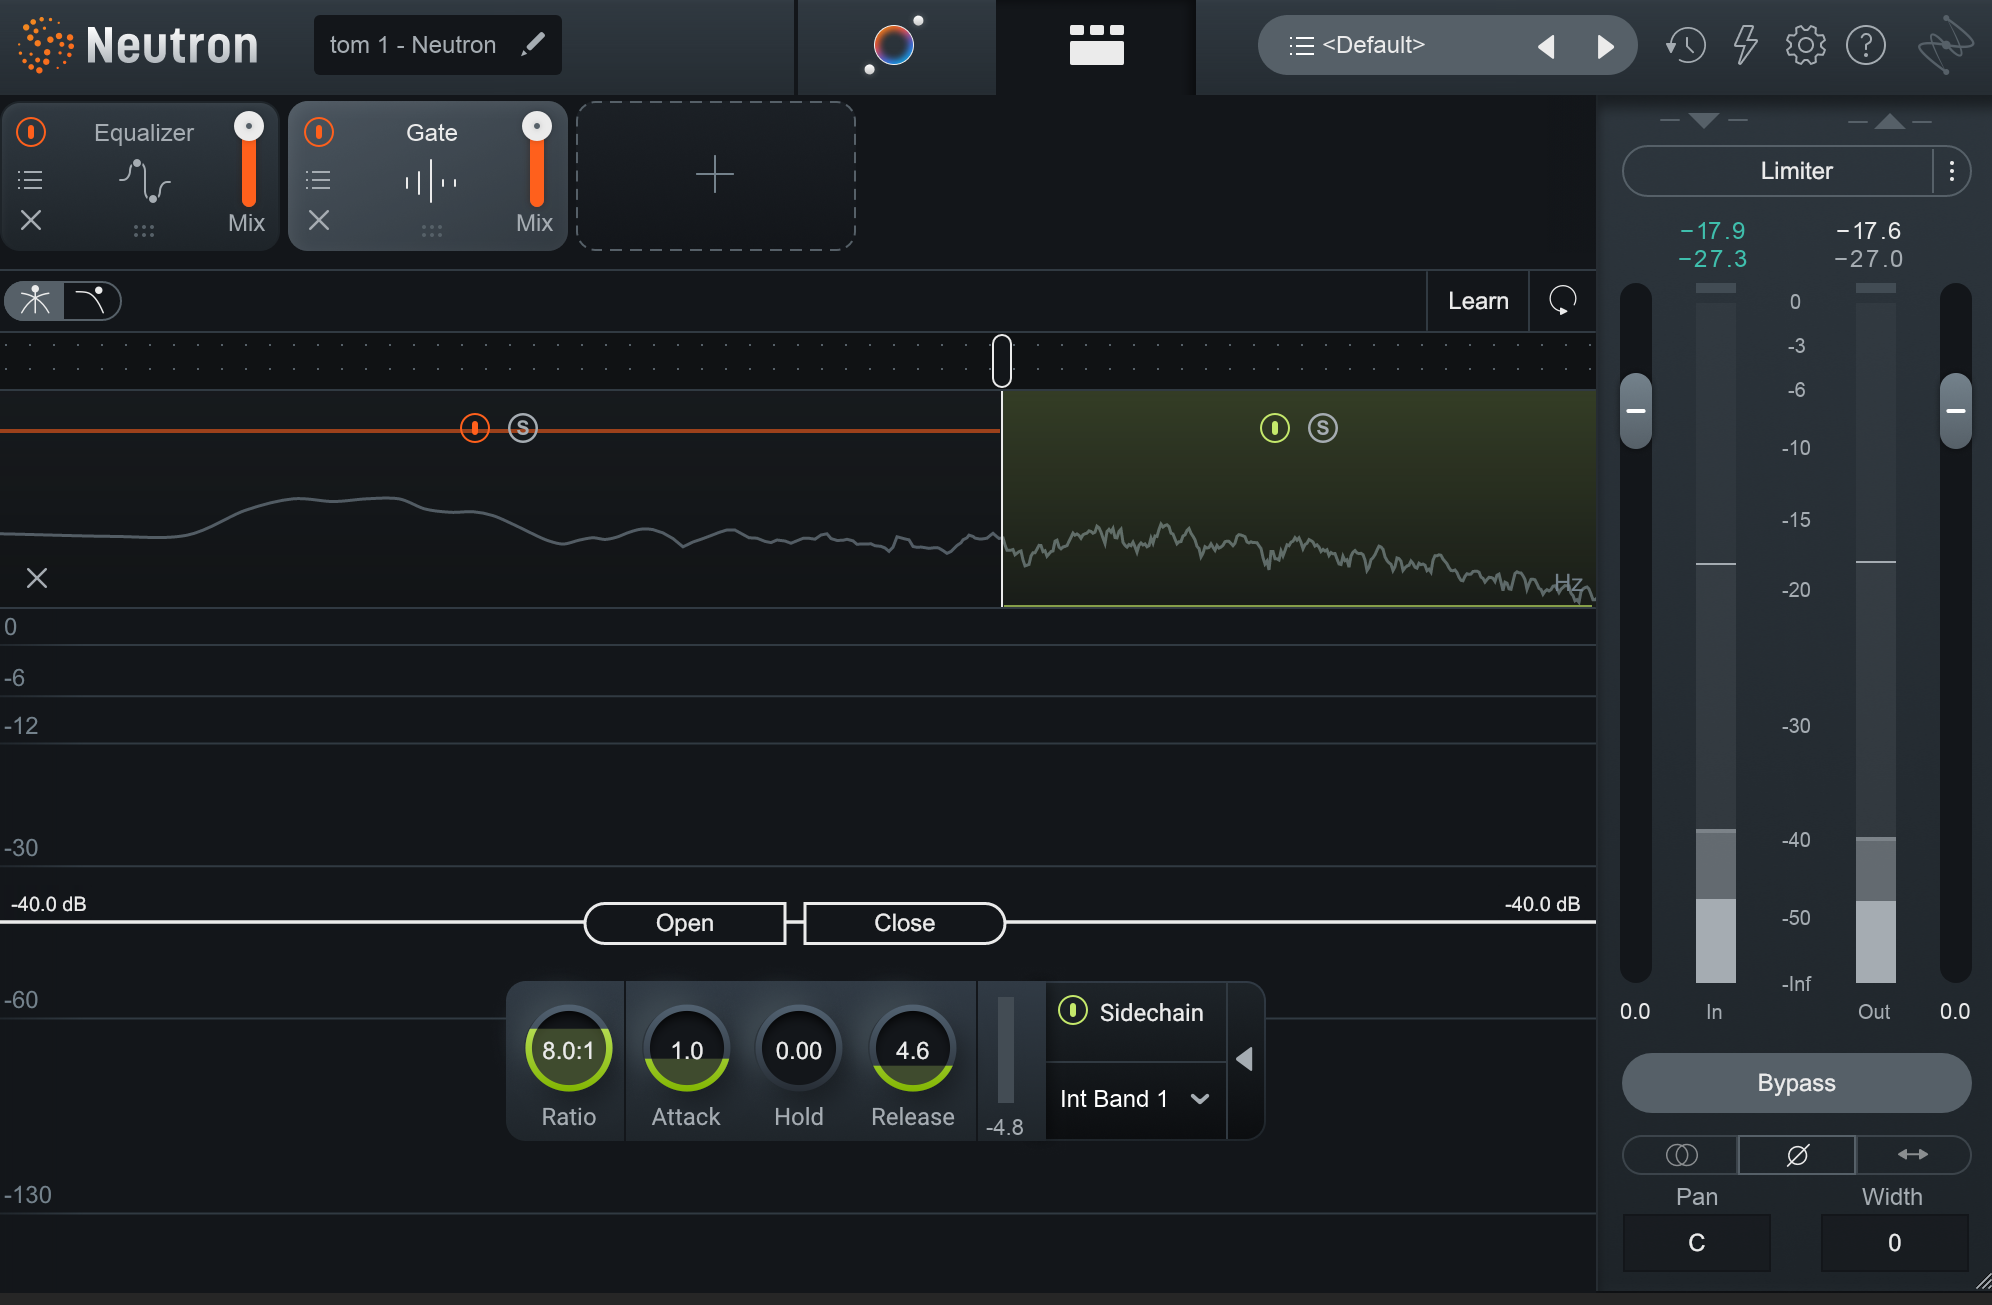
Neutron’s Gate in a multiband configuration optimized for a tom, high band
Now, the tom will open perfectly for the hit, but fade out in a way that dampens extraneous cymbal responses quicker than the body of the tom. This way, unflattering cymbal frequencies are less pronounced.
6. Use Target Libraries on the drum submix
We all work with references, and Neutron gives us an interesting way to incorporate references into our mixing with Target Libraries, a tool that dynamically match a track's tone to a sample or stem.
Simply load a sound you want into the panel like so.
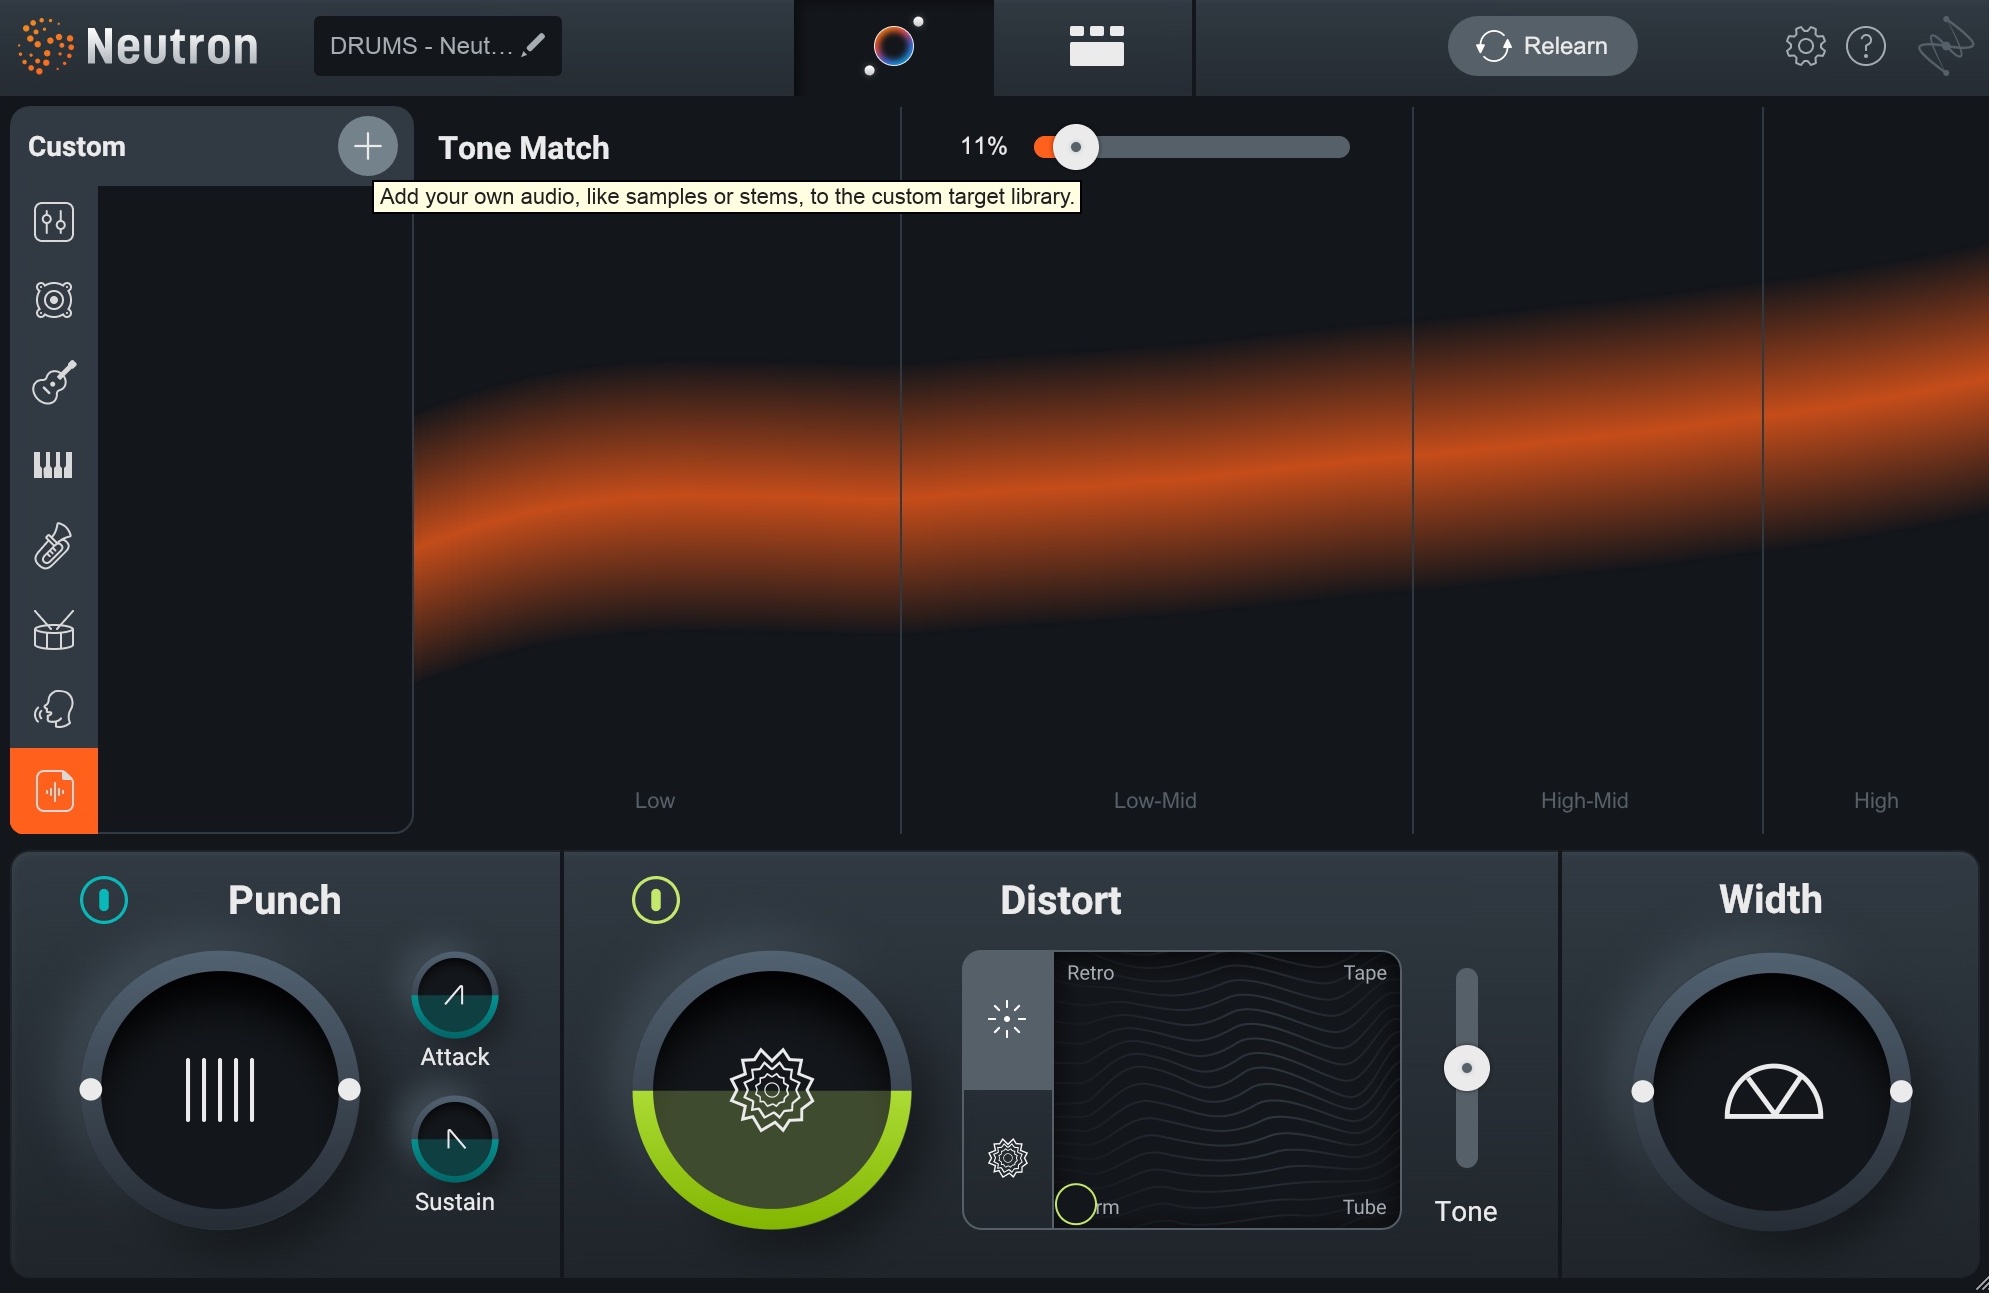
Loading a custom target in Neutron Target Library
And, when using the Assistant View, Neutron will attempt to match the sound. I find this works much better at getting the character of a drum sound than a conventional match-EQ might.
Let’s take some drums:
And let’s say we want the snare to sound more like the opening from “Where The River Goes”, by Stone Temple Pilots.
Since I own that record, I can sample the opening drums, load the sample into Neutron, and add it to my Target Libraries. This helps me change the drum sound to something like this.
You don’t always need to do this, but if matching a particular sound is what you’re after, this way can sound better than using a match-EQ.
7. Use the Punch Compressor in parallel to cut through the mix
The Punch mode in Neutron’s compressor can be helpful on the drum bus as a send effect—especially in modern rock and metal mixes, where drums need to cut without dominating.
We can use the punch compressor to emphasize both cut and sustain, and blend them in as we see fit.
Route your drum buss to a send, and place Neutron’s punch compressor on with settings roughly matching these.
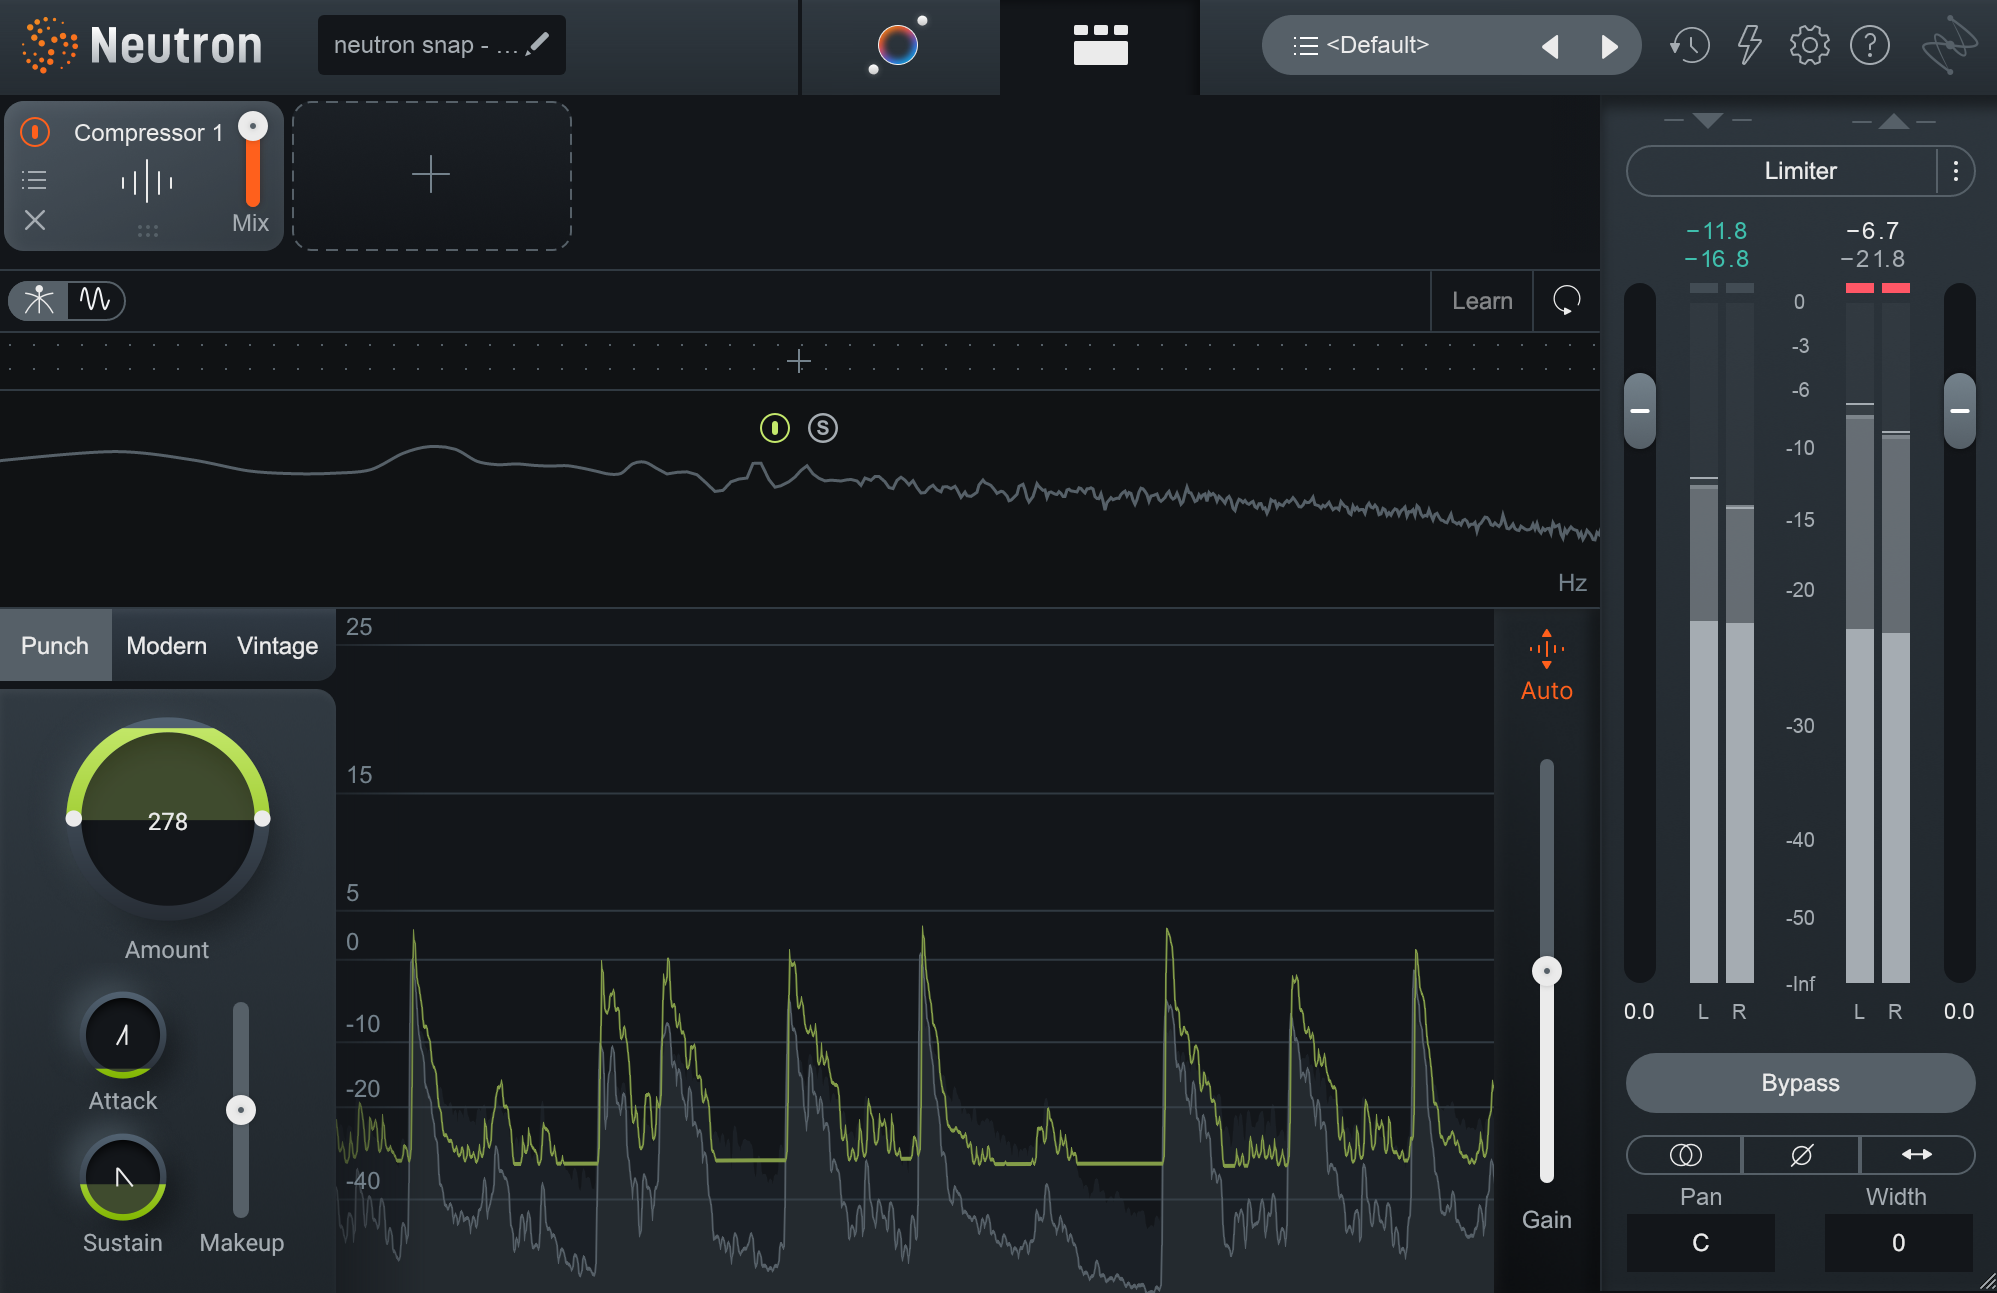
Using Punch mode in Neutron's compressor for snap
The results will sound like this:
Now, route your drum bus to a second aux send. Same deal as before, Neutron’s punch compressor, but with settings that look roughly like this:
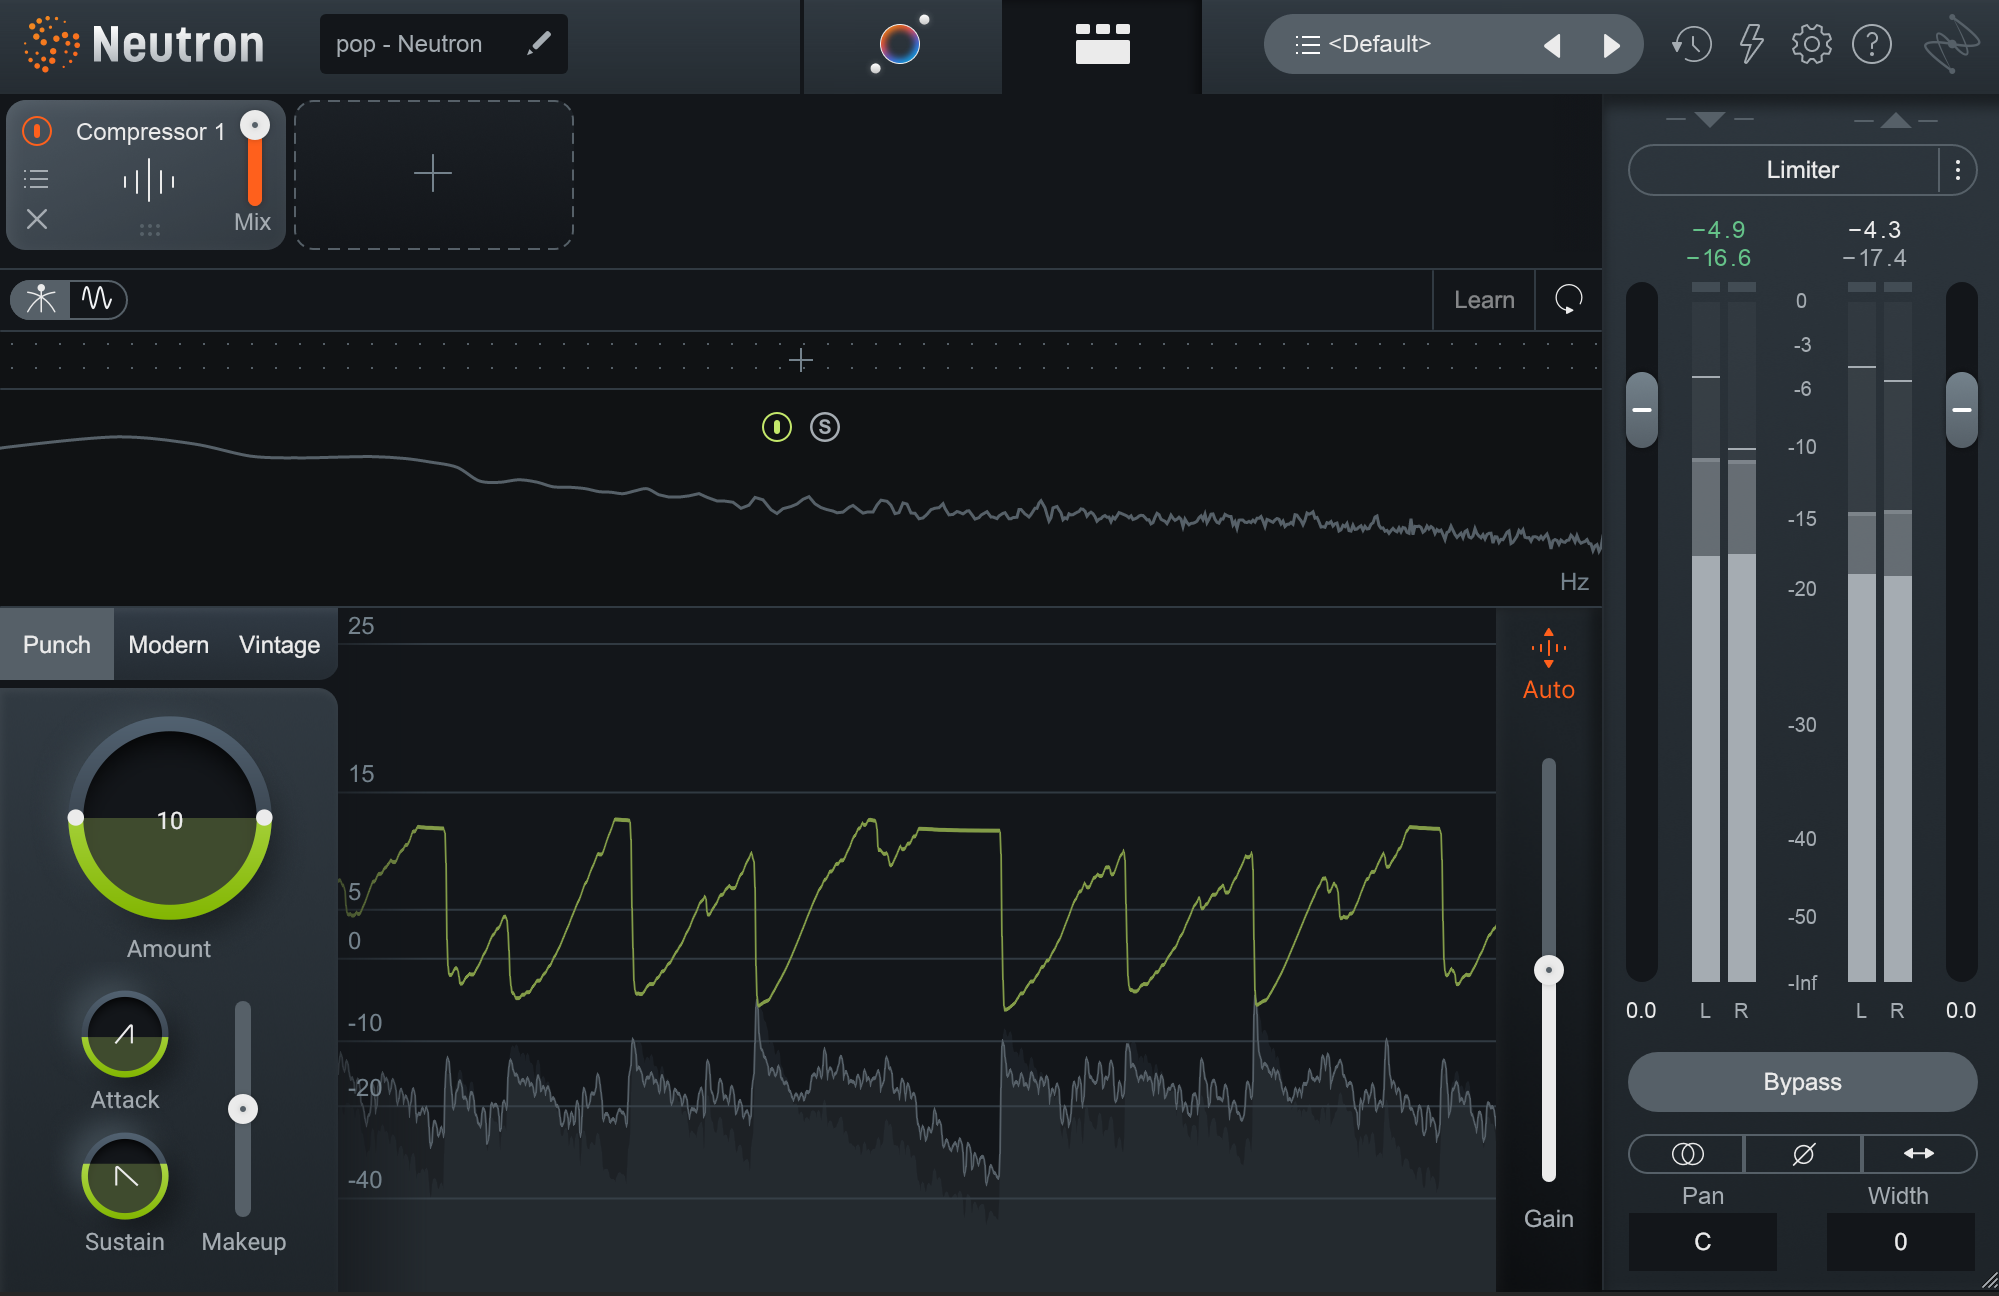
Using Neutron's Punch mode for body on drums
These two parallel effects can help add the necessary cut to your drums, as well as that roominess we often want in rock drums.
Start mixing drums
Not all tricks will work all the time. Try them and try them again; what works for one song may not work for another and what isn’t right for one track may be perfect for another. If you feel comfortable using Neutron for dialing in your drum sounds, try it on other instruments.
Good luck in mixing your next project! I hope these tips have been helpful to give you a full and balanced percussion mix. And remember, you can try all of these concepts in your DAW with a free demo of iZotope Neutron.
