6 Ways to Use Neutron 3 for Post Production
Learn how to use the tools in Neutron 3 for post production. We’ll cover the multiband Transient Shaper, Sculptor, and other powerful modules.
This article references a previous version of Neutron. Learn about 

Neutron 5
By now, you’re probably familiar with the ways Neutron 3 can help you in your mixes. This article will demonstrate how Neutron is also a perfect companion during the post production process—mixing sound for film, television, and other viewable media. The tools in Neutron are often transparent in timbre, which is perfect for post production. Let’s dive right into it and show off six tips for using Neutron 3 for post production.
1. Use Track Enhance for notching
Within Mix Assistant in Neutron 3 Advanced, there’s a great little feature called Track Enhance which creates custom presets for your audio. Why is this feature so great? C’mon, you’re an iZotope reader—you know the drill! It’s going to take your exact audio into account and try to make it sound the best that it can. Here's how this works well in post production:
On set, audio from an actor is generally recorded from a boom mic held above their head, a lapel mic pinned to their clothes, or both. In any scenario, you’re probably going to notice some pesky resonances in the voice that you’ll have to notch—at least, I always do. You’re also going to notice that you have different pesky resonances for every actor in every scene!
Now, by all means, you can dynamically notch each actor in each scene individually, but that time can pile up. Also, during particularly grueling tracking sessions, your ears can get more and more fatigued. Sometimes it’s better to use Track Enhance, which happens to include a dialogue setting.

Using Track Enhance to process dialogue in Neutron 3
In my experience, Track Enhance will catch these pesky resonances and notch them out intelligently, usually with a dynamic EQ, and often without needing further tweaks!
Running Track Enhance is often the first thing I do to process a dialogue track. I’ll usually bypass all the other processing and go with my own gut from there—but boy is this a wonderful tool for eliminating resonance issues fast!
2. Use Sculptor first to shape vocals
The Sculptor module in Neutron is an interesting processor indeed. It’s part compressor, part equalizer—a real-time chisel for any audio you throw at it. It can work exceedingly well in post, as it can further tailor the troublesome resonances we talked about up top. Observe the following vocal:
We’re hearing unwanted midrange blooms, primarily around 247, 564, and 859 Hz.
If we notch those bands, it might sound better, but it’s still a bit static and lifeless:
Sculptor can give us another approach to attenuating the problematic issues:
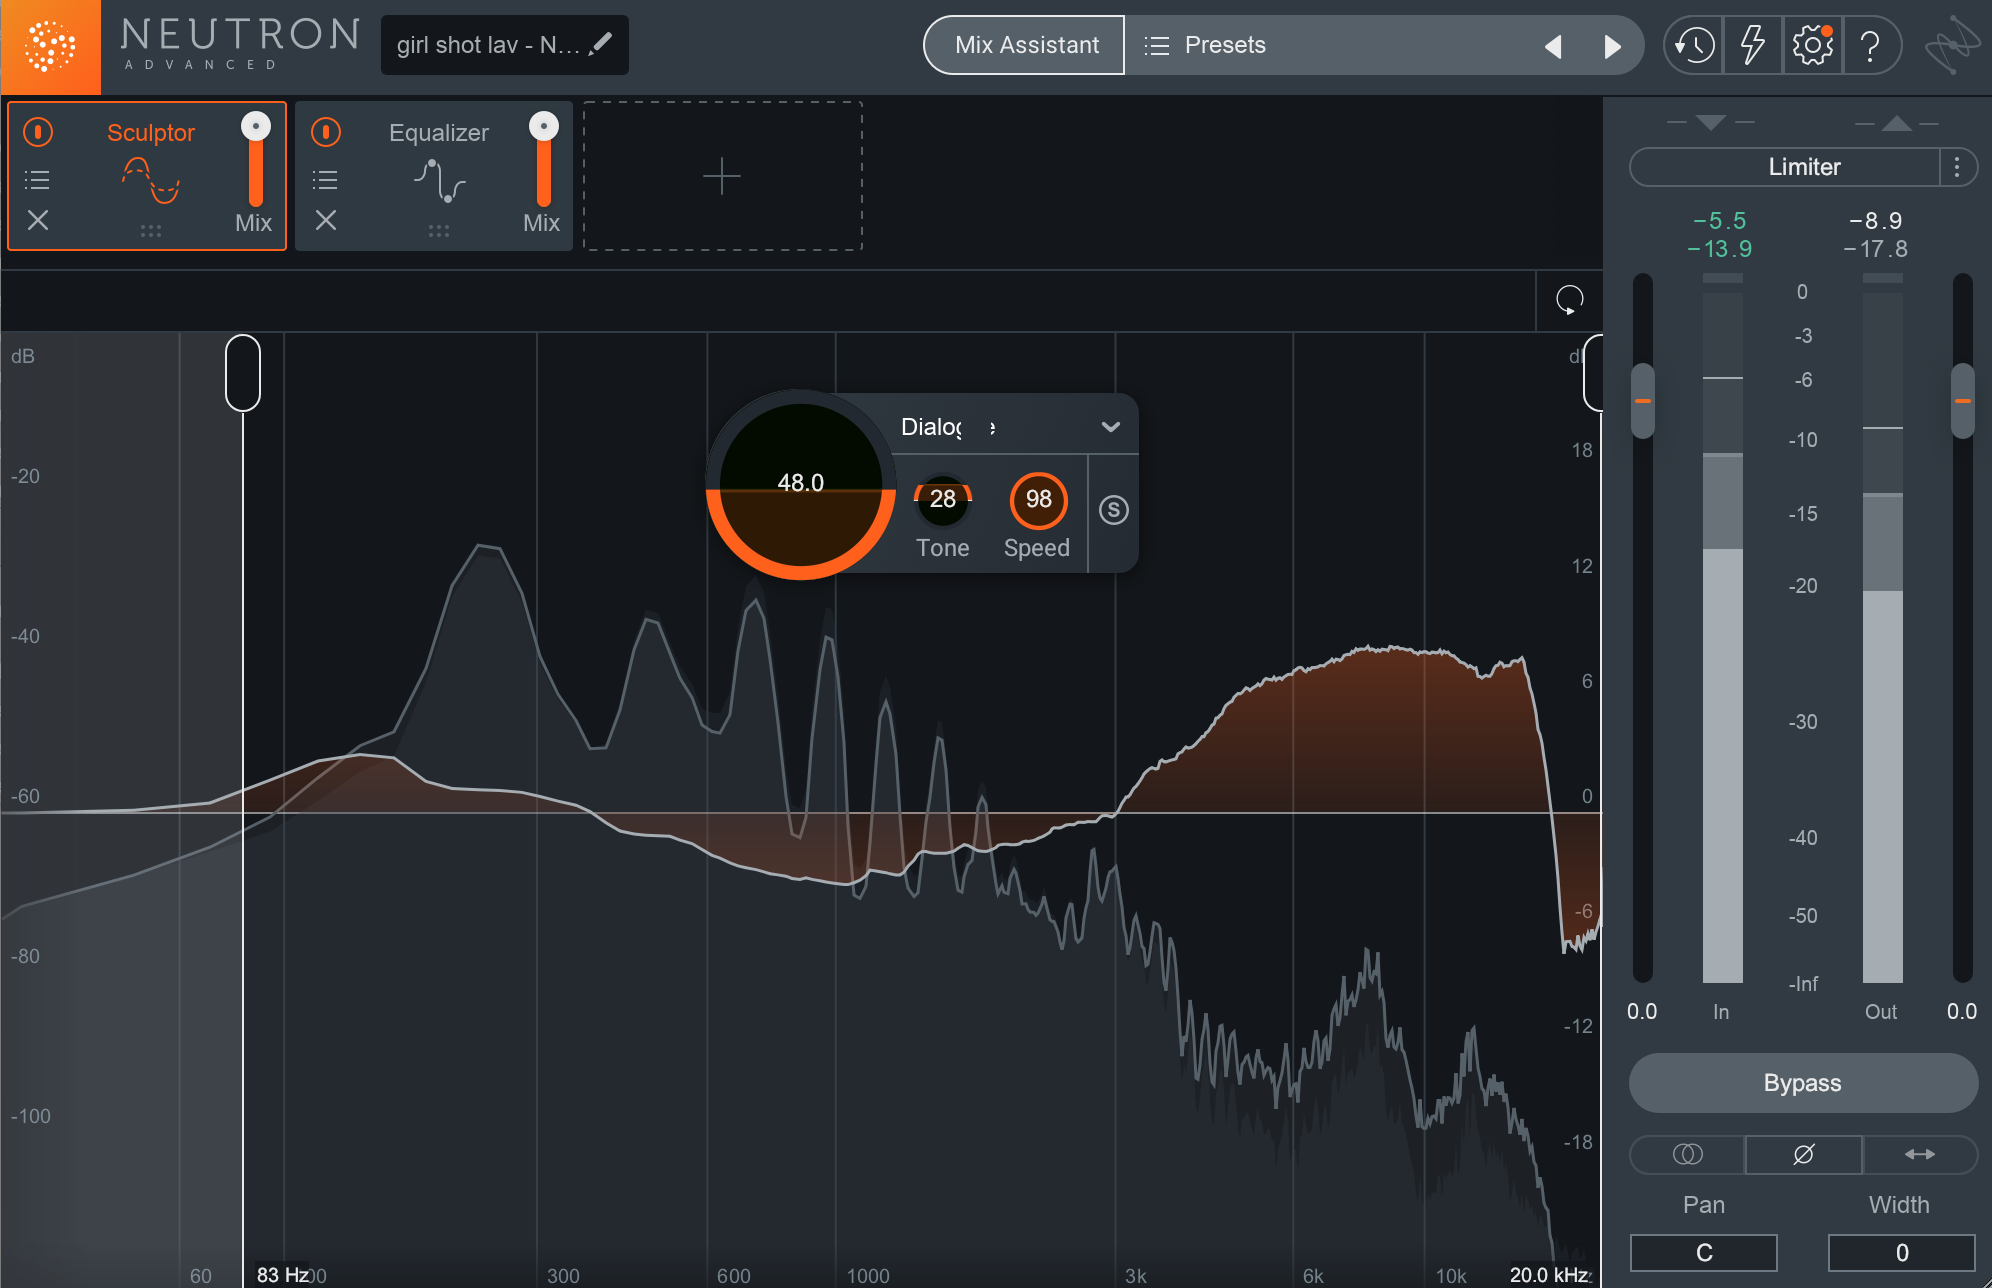
Smoothing resonances in dialogue with Sculptor in Neutron 3
With these settings, I don’t need as much of a heavy hand on the EQ. Also, there’s more presence, more life in the track now. It may require further processing—I’d like to tamp down the low mids more now than before—but that can easily be done with a dynamic EQ, or a compressor in multiband.
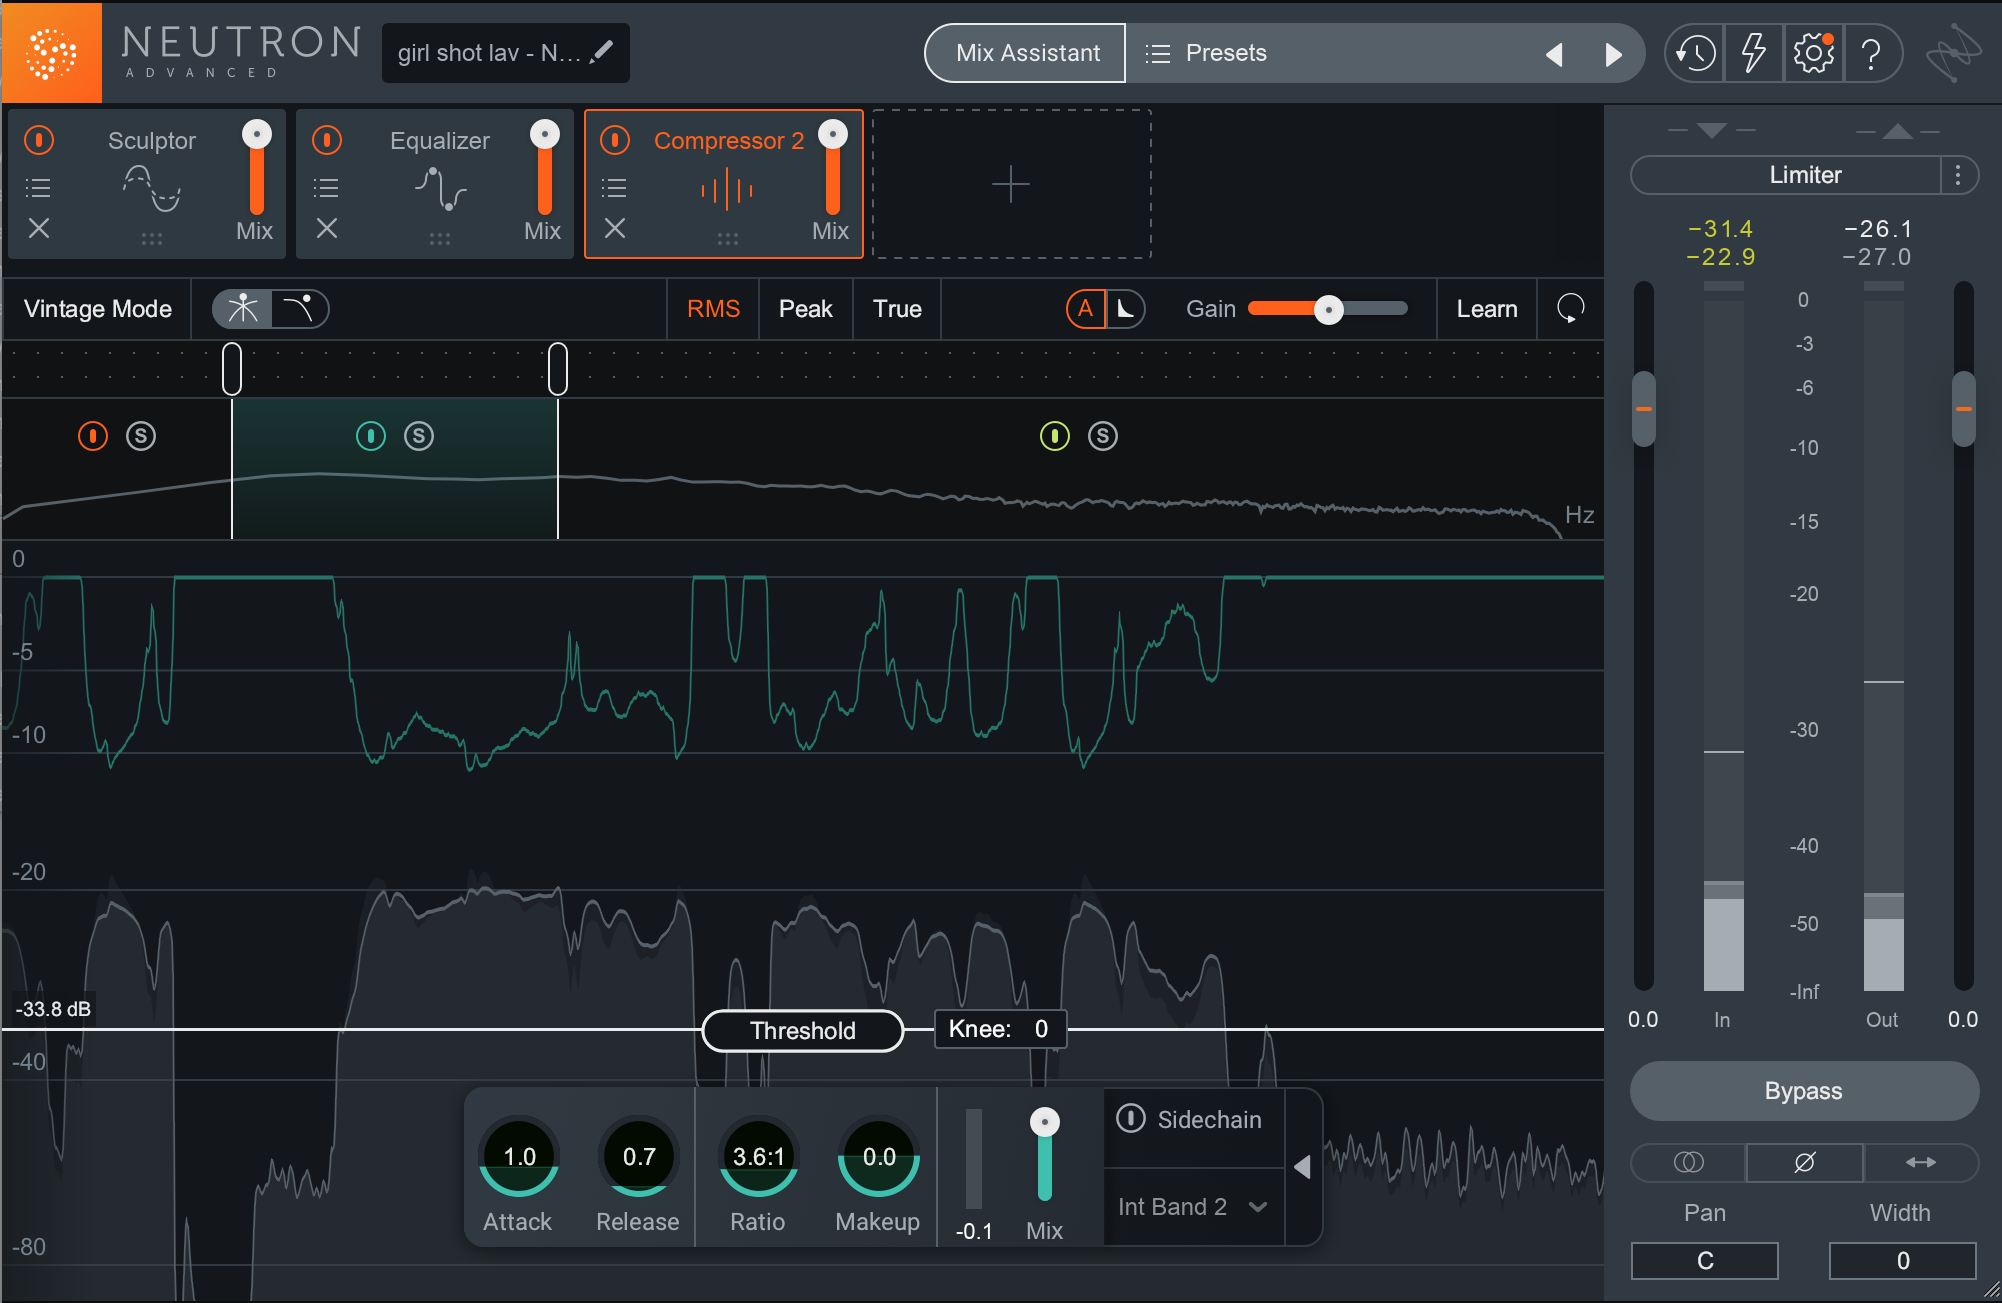
Further compression of the low mids
3. Use the multiband Transient Shaper as an inline de-reverb tool
Sometimes you need to compress a vocal to ensure every word is heard, but when you do, you notice something horrendous: you’ve brought up the room reflections—not the background ambience, but the quality of the room itself, made all too prominent inside the vocal.
You can’t just run a de-noiser, because that’s not the issue. The problem lies within the vocal itself. So what do you do?
Try the Transient Shaper in multiband!
We think of this tool as something to make drums more punchy, but post people have been using transient shapers as gates for years. I happen to think the multiband Transient Shaper in Neutron is the best in the business for this application.
When using the Transient Shaper in post, the key is to locate the frequency area of the troubling room reflections. This can be challenging, but you can use an EQ if you like to boost, sweep, and seek it out.
You’ll usually find these unwanted reflections in the midrange and high mids. Solo within the crossover points and drag them around till you really hear the offensive frequencies. You may want to bring up the Sustain slider when you’re starting out doing this—it will help you really hone in on the horrid sound.
Once you have your crossovers set, the Sustain slider is the main parameter you’re messing with. You want to edge it back until you’ve tamed the room. Also, experiment with the modes and shapes—listen to Precise, Balanced, and Loose, and futz with Sharp, Medium, and Smooth.
Just don’t touch Attack; that’s not the parameter you usually need to tweak in this situation. We don’t want to bring anything out, so much as tamp the room down.
Here’s a setting I just used on a project:
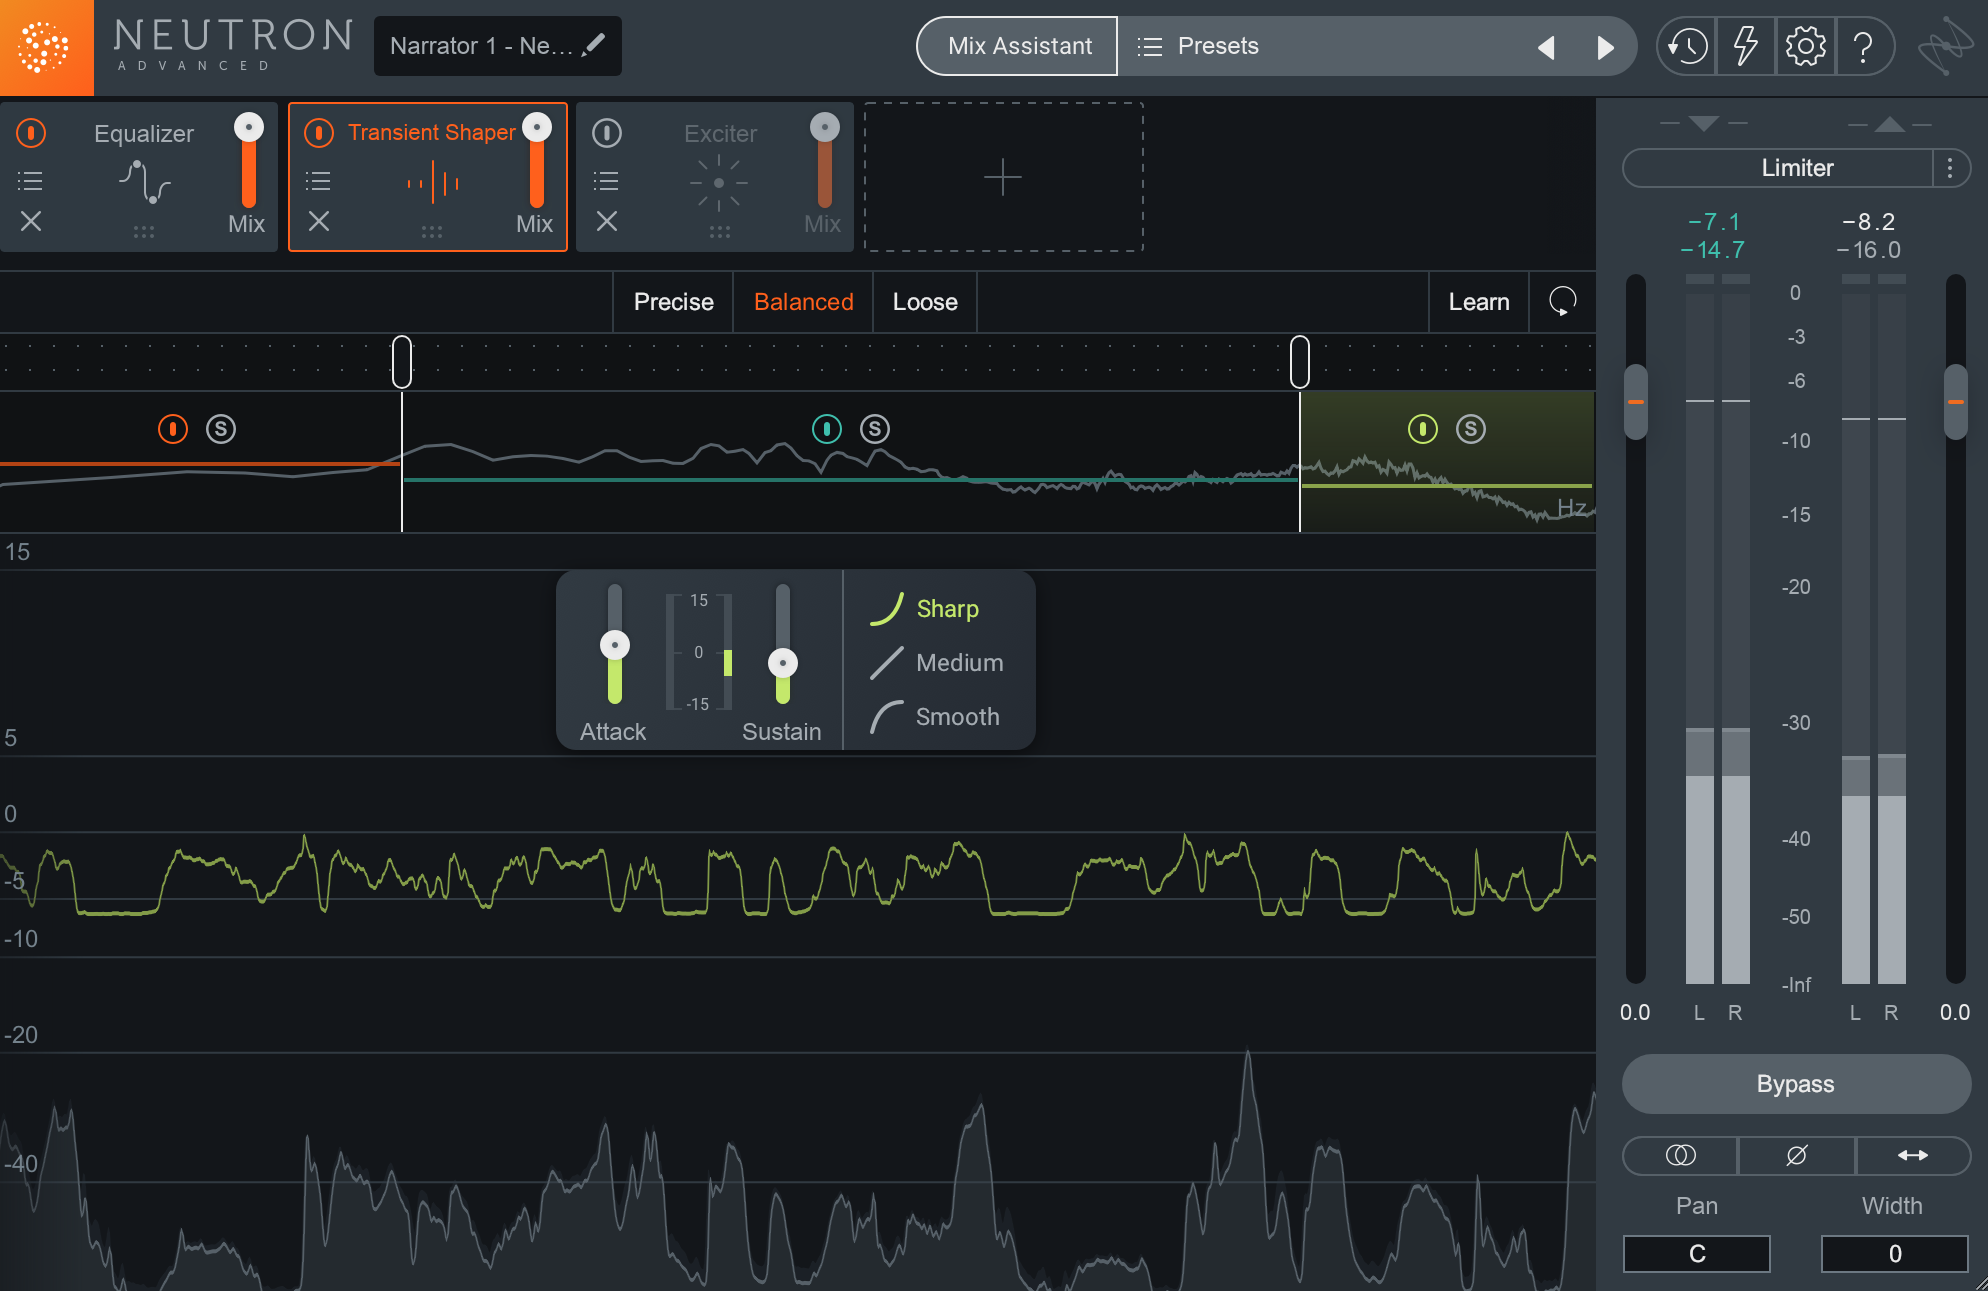
Using Transient Shaper in Neutron 3 to minimize room tone
It really helped get the ambience out of a poorly recorded bit of ADR dialogue so I could place it in the scene later.
4. Use the Visual Mixer to pan elements in a scene
We talk about using the Visual Mixer to pan mixes all the time—but you can also use it to pan elements in scenes, especially if you’re an innately visual person!
You'll usually want to keep your dialogue in the middle, but if you have sound effects whooshing through the stereo field—bullets flying, cars driving by, footsteps moving from left to right, etc.—you can use the Visual Mixer to automate or plot out these panning decisions. In many cases, it can feel more natural than using the pan pots.
5. Use the low-latency limiter to protect against clipping without messing up the sync
When it comes to post, you have to keep two things in mind: never, ever incur unwanted distortion, and don’t mess up the sync. The sound has to match the picture!
Unfortunately, sometimes things are going to distort unless you limit them. Many brick wall limiters, however, incur unacceptable latency.
Fortunately for you, Neutron 3 has a built-in limiter that will only add a maximum of 2.5 ms of latency, which will not necessitate moving vocals around in the arrange window to compensate—it should all just work.
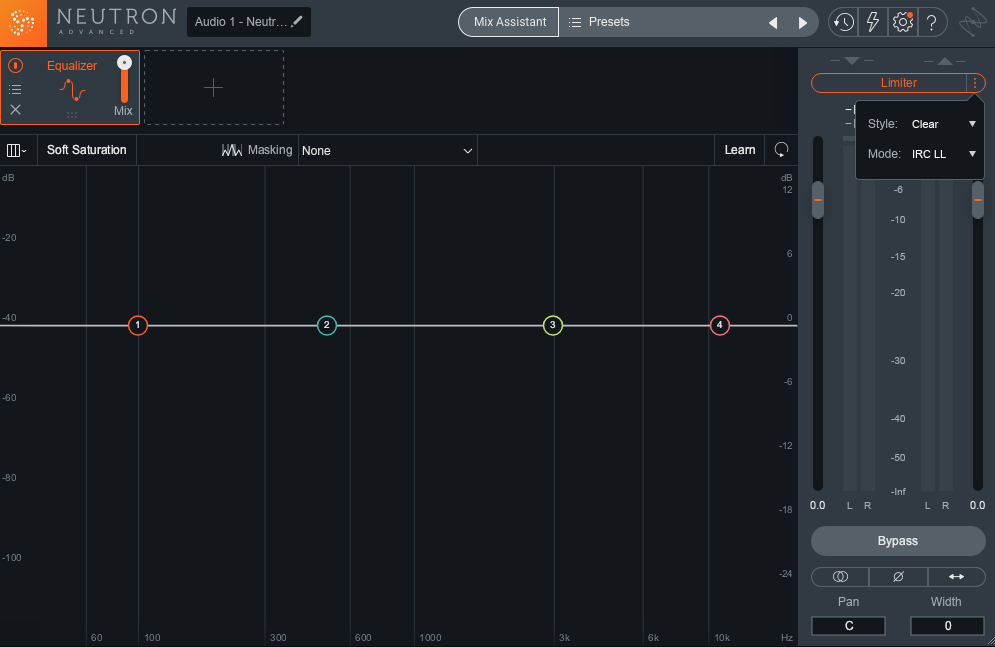
Low-latency Limiter in Neutron 3
This limiter has been specifically designed to the BS.1770-⅔ broadcast standard. It can work in mono, stereo, and surround, which makes it excellent for post production needs.
Sonically speaking, it’s quite transparent, unless you push it really hard; then you’ll notice a curtailing of the low end. You can EQ to compensate for this, select among the different behaviors—Clear, Thick, or Smooth—or you can leave it be.
Now, when your actor screams, or when the score hits a big brass note to indicate something terrible has happened, you don’t have to worry that things will be off—or sound bad in the limiting stage.
6. Use the Masking Meter EQ function with room tone, sound design, or music beds
Post is always a tricky balancing act—you have so much to keep at the forefront of the viewer’s attention.
Someone is talking. They’re usually moving, and their clothes make noise. The sounds all have emotive motivations; even footsteps can indicate something about mood. Room noise must be present, because no one lives in an anechoic chamber.
And then there’s the score: the composer has carefully calibrated the score to sound a certain way—a way that the director has endorsed when the final approval was granted—so the score must be represented in its best light too.
All of these elements must be heard and balanced against each other, and this is not always easy. It means identifying frequency ranges that are the most important for each element, and ensuring they don’t step on each other.
This is where the Masking Meter in Neutron can be quite helpful. You can set up a relationship between two key elements—say, the dialogue and the music bed—and you use the inverse EQ to ensure they’re staying out of the way of each other.
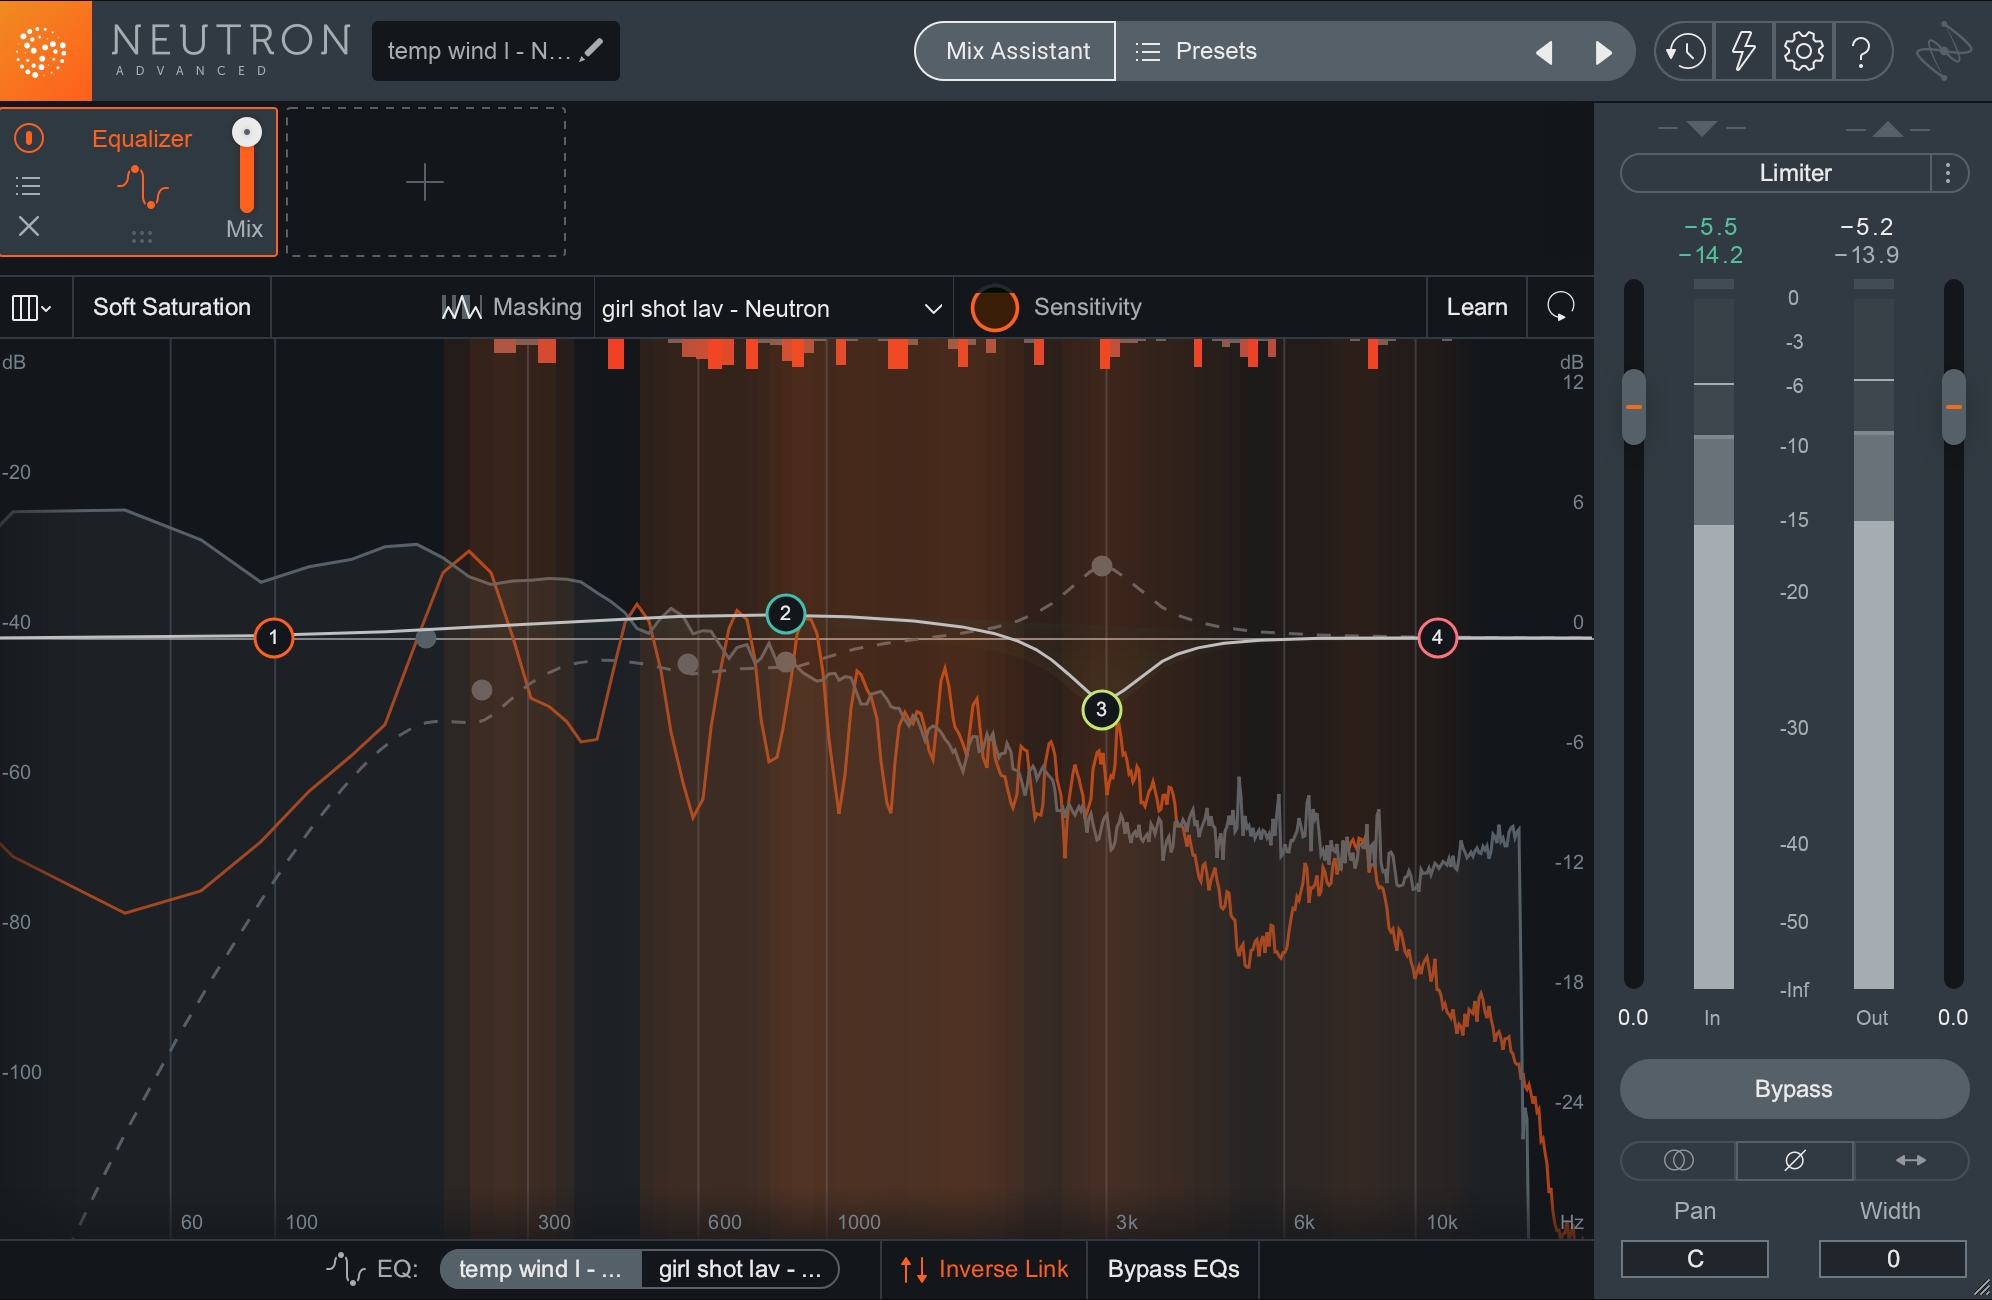
Using the Masking Meter’s Inverse Link mode in Neutron 3 to resolve areas of masking
You can also just use the easy-to-read meter to show you what you need to notch out of the offending music. Then, use a separate dynamic EQ sidechained to the dialogue to intelligently push it down when the character is speaking.
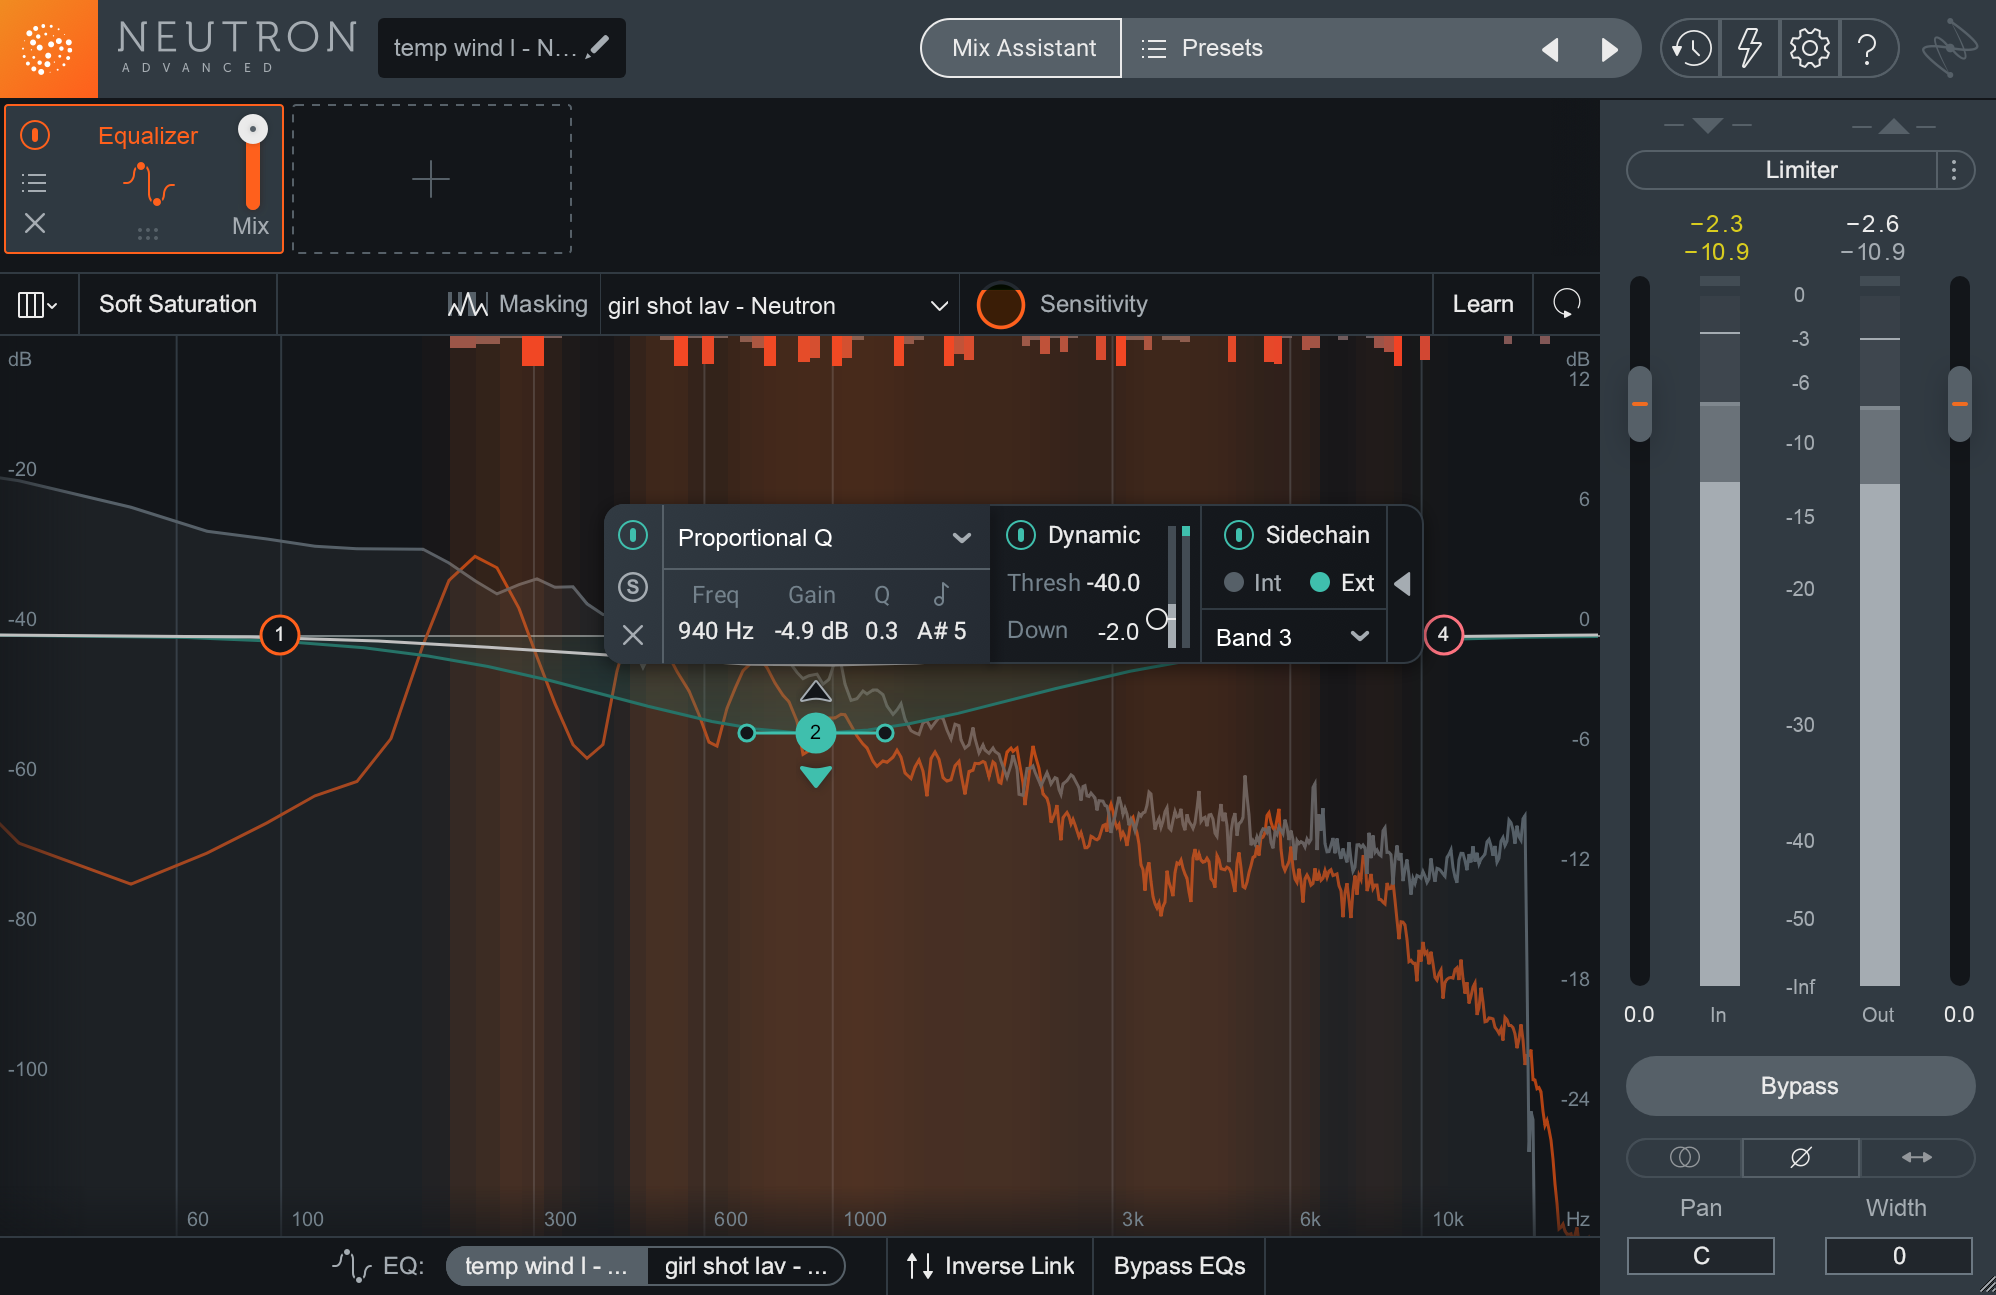
Referencing the Masking Meter as we apply some dynamic EQ
This is where Neutron 3 can really shine—it shows you what you need to change, and provides easy tools for tackling the problem.
Conclusion
In the old days of mixing for post, you needed to creatively use multiple expensive tools to get the sound up to snuff. Now we have plug-ins like Neutron 3, which place so many forward-thinking processes in one channel-strip plug-in. We hope you make good use of this tech, and that these tips will get you started using Neutron for your next post-production project.
