How to Use Dynamic EQ in Mastering
Learn when to use dynamic EQ rather than multiband compression in audio mastering, and what can go wrong when you take it too far.
If you’ve ever found yourself wondering, “Hold on, should I be using dynamic EQ or multiband compression here? And actually, when should I be using dynamic EQ?” fear not. This is an incredibly common question.
We’ll take a look at how to decide when to use dynamic EQ in your audio mastering practice, along with some common techniques to enhance and control different frequency regions. Additionally, we’ll examine what happens when we flirt with the danger zone and take things too far. So let’s roll up our sleeves and see how we can get the most out of our dynamic EQs.
In this piece you’ll learn:
- When to choose dynamic EQ rather than multiband compression
- Common uses in different frequency ranges
- The dangers of overusing dynamic EQ
Want to learn these mastering techniques in real-time? Start your free trial of a


iZotope Music Production Suite Pro: Monthly


Ozone 11 Advanced


Insight Pro


Tonal Balance Control Pro
Dynamic EQ vs. multiband compression
To start, let’s talk briefly about the technical differences between a dynamic EQ and a multiband compressor.
What is dynamic EQ?
In short, a dynamic EQ is just like a standard EQ—it has various types of bell and shelf filters with frequency, gain, and Q controls—except it also allows you to say, “Hey, if the signal within this filter’s bandwidth gets too loud, or quiet, adjust the filter gain like so.” It’s very useful in controlling specific frequencies in your mix that are too loud, with a degree of precision not possible with a static EQ.
What is a multiband compressor?
A multiband compressor, on the other hand, uses crossovers to split the audio signal into two or more frequency bands—everything below the crossover frequency and everything above it—and then allows you to compress these bands individually. By using a multiband compressor, it is possible to fashion the compression to the different elements in a mix, compressing the recording more transparently than with a standard single-band compressor.
The pros and cons
There are some pros and cons to both these approaches. A multiband compressor is great at controlling slightly wider frequency ranges, not unlike a standard wideband compressor, and it can often provide a cohesive yet subtle sense of “glue.”
A dynamic EQ, on the other hand, tends to be better at focusing on specific frequencies—a particularly resonant bass note, or a strong snare fundamental—and giving you a way to control or enhance them. The lack of crossovers also means that when a filter’s not doing anything, it’s really not doing anything. That said, while a dynamic high or low shelf can have a similar “gluing” effect as a multiband compressor, it’s a little harder to achieve that same kind of cohesion in the mid-band.
So when should you reach for a dynamic EQ over a multiband compressor? I like to think of it this way: a dynamic EQ is a great problem solver. Whether you want to reign in or enhance a drum fundamental or an overly strong—or weak—bass note, suppress a particular low-mid vocal resonance, or tame some sibilance or an especially pokey hi-hat, dynamic EQ is an excellent tool to turn to.
Next, let’s take a closer look at some of those examples and how you might set up for them.
Dynamic EQ in use
To explore some of the ways we might use dynamic EQ, let’s walk through a practical example. Here’s Caleb Hawley’s “Tell Me What It’s Like to Have a Dream Come True” with just a little pre-EQ—a low shelf cut if you’re curious—and limiting.
There are a few things I’m noticing that I’d like to address:
- The fundamental of both the kick and snare feel quite strong, in just a slightly unbalanced, too-forward way.
- At the same time, I’d love to bring the warmth of some of the softer bass notes forward just a bit.
- I feel like I’m missing just a little vocal presence in spots, but want to be careful not to make things harsh or nasal during the loudest, highest notes.
- I’d love a little more top-end sheen, but during the final chorus, the hi-hat is already fairly forward in the mix.
Let’s tackle these one at a time.
Controlling drum fundamentals
For the kick and snare fundamentals, I’m going to use the alt-solo functionality of the


Ozone 11 Advanced
Enhancing bass detail
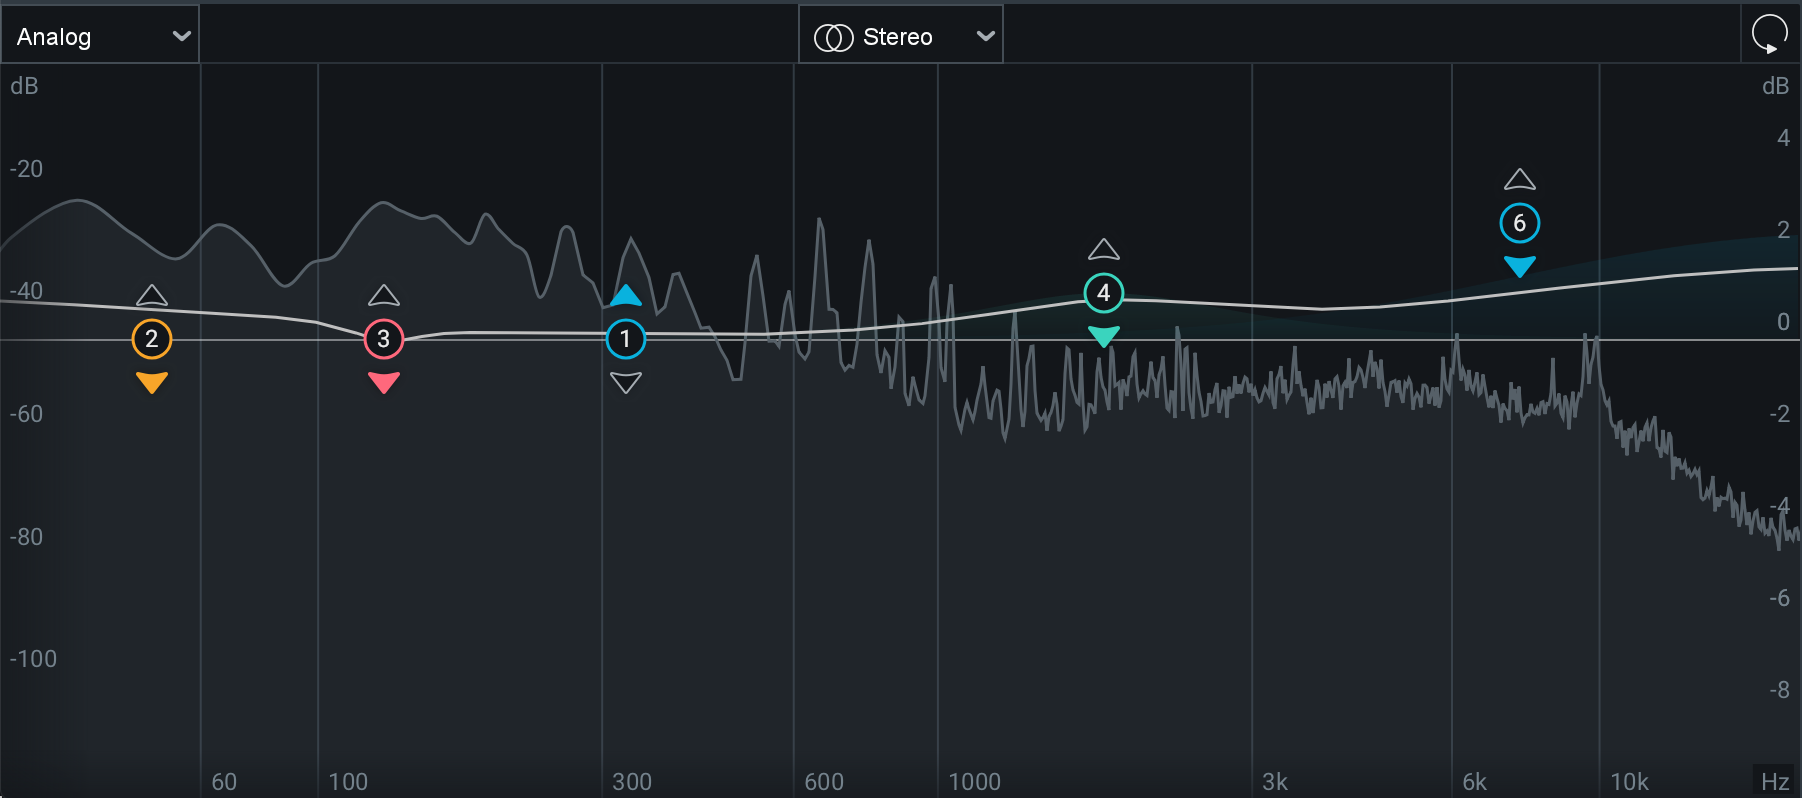
To warm up the softer bass notes, I’m going to use a trick that’s more akin to multiband upward compression but is easy to dial in with a dynamic EQ. I’m going to create a Baxandall low shelf and set it to upward expansion mode by clicking the arrow above the filter node. Then, by leaving the gain at 0 dB but setting the offset in the advanced panel to 1 dB we can create a behavior whereby the gain of the shelf is increased when the signal drops below the threshold. Voila! The sustain of soft bass notes are brought slightly forward and made a little rounder and warmer.

Ozone Pro Dynamic EQ curve for this example
Balancing vocal presence
To add the vocal presence I’m looking for, I’m going to start as if I were just making a standard EQ move, adjusting frequency, gain, and Q until I’m broadly happy. Then I’ll listen to that final chorus and adjust the dynamic parameters—threshold, attack, and release—to pull the gain boost back just enough to keep it from getting harsh or nasal. Attack and release times above about 100ms here can help prevent it from triggering on the snare, instead, focusing on more sustained elements like the voice.
Controlled sheen
Lastly, to achieve the high-end sheen without pushing the hi-hats too far forward in the mix, I’ll add a Baxandall high-shelf with fast downward dynamic characteristics. Here I’m using a 1ms attack and 5ms release, and a threshold just low enough to tickle the tops of the high-hats.
Here’s the same section of “Tell Me What It’s Like to Have a Dream Come True” with the above dynamic EQ added. Notice how the kick and snare seem to be a little less bloated in the low-end and have a little more midrange-focused punch. The vocal also feels that little bit more forward in the mix, without getting overbearing, and there’s a little extra top-end sparkle while the high-hats feel as if they’re in more or less the same place.
Of course, this is just what works on this song, but it should give you some ideas of what’s possible, and how to achieve it.
What to look out for with dynamic EQ
As with nearly any type of processing, it’s thoroughly possible to overdo things, but with dynamic EQ there’s a bit of an added wrinkle. With an EQ, you can over-EQ; with compression, you can over-compress; with dynamic EQ you can do both, simultaneously. One good trick to avoid this is to dial in an EQ band so that you’re happy with it and then reduce the gain or offset by 25–50%. The dynamic behavior will stay in place, just in a subtler way, and chances are when you power the band off and on you’ll still hear the effect you set out to accomplish.
The other things that are a danger with just about any master processing, but are especially present here, are confirmation bias and unintended consequences. For example, you may think to yourself, “I’m going to use a dynamic node to tighten up the fundamental of this snare!” But what happens if by chance you have a rhythm guitar that lives in that same frequency range and at a similar level? If you’re just focusing on what’s happening to the snare, you may completely miss the fact that you’re robbing the vitality from the bottom end of your guitar.
It’s fine to zoom in and focus on an element you’re trying to fix, but don’t forget to zoom back out and listen to the big picture. Be sure to ask yourself what else is going on in any frequency regions you’ve adjusted and how they sound before and after. If you do this effectively, you can strike a balance and find a happy medium more often than not.
Use dynamic EQ in your mastering session
So there you have it, the fundamentals of using dynamic EQ in your audio mastering practice. Hopefully now you feel more confident about when the right time to reach for a dynamic EQ over a multiband compressor is, and are also primed with some ideas about how you might use it in practice. Additionally, you’ve got some tips on how to avoid the worst pitfalls—overuse and unintended consequences.
As a little bonus, I’ll leave you with one of my favorite ways to use the Ozone Dynamic EQ, and a feature that I think exemplifies how AI and machine learning can be incredibly useful in a mastering environment. Once I’ve got a song processed just the way I want, I’ll run Master Assistant between my final limiter and any previous processing. Once it completes, I’ll remove the EQ, compression, and limiting, leaving just the dynamic EQ, which then helps ease the load on the limiter I already have in place.
Good luck, and have fun making those dynamic nodes dance!

