
Parallel compression is a powerful tool. By blending a compressed signal into the dry audio, you can enhance the punch and power of that instrument without altering the original transients, or without eating up lots of headroom.
However, in pursuit of parallel compression perfection, there are some common obstacles that might prevent you from getting the sound you want.
In this article, you’ll learn about six common mistakes people make when using parallel compression along with some tips to sidestep them.
Follow along with a free demo of Neutron , a powerful mixing plugin with an easy-to-use parallel compression Mix slider.
Let’s define exactly what parallel compression is and when you should use parallel compression in your mixes.
What is parallel compression?
Parallel compression is the process of blending a compressed music track or submix with an uncompressed copy of the track. This particular type of parallel processing allows you to retain much of the original dynamics of your audio while still letting you harness all the benefits of using a compressor. Rather than adding compression to the entire signal (which can end up really squashing your transients), parallel compression gives you more control over the balance between dynamic and compressed. This can also be referred to as New York Compression.
Here’s what parallel compression sounds like on an EDM track:
Parallel compression
There are many different approaches to setting up parallel compression in your mix sessions. One method involves duplicating the original signal and only adding compression to the duplicate. With this type of setup, you can now blend the two resulting signals together to dial in the right blend of dynamic/compressed.
The other is creating an aux buss with a compressor as an insert. You then route the dry signal to the input of the aux track. The aux track will output only the wet signal. You can then blend the wet and dry signals to taste.
Another method for setting up parallel compression is to use mixing plugins that allow you to control how much of the original signal is being sent through them. Neutron has Mix sliders that allow you to choose how much of the original signal will get processed by the plugin’s modules. This allows for all sorts of creative parallel processing, but is especially useful for applying parallel compression quickly (and without cluttering your mix session with a ton of extra buses and complicated routing).
Parallel compression mistakes in mixing
Let’s take a look at some common parallel compression mistakes that you can avoid in your mix.
1. Not knowing what you’re trying to accomplish
Simply put, you can easily mess things up if you don’t know why you’re doing what you’re doing. Compression on its own is a confusing topic, especially for newcomers. Using parallel compression just for the heck of it can complicate things even further, since we’re now using the effect in an intentionally excessive way.
So, it helps to know why you want to use parallel compression in the first place.
Here are two common use cases.
Adding density to a track with clear transients and low-level information
I often employ parallel compression when working with signals that have clear transients alongside quiet, dynamical playing. If I use compression “normally” as an insert effect, the quiet stuff is more audible, but the transients suffer as a result. Acoustic pianos are instruments that often suffer in this regard. Observe this piano part:
It’s a bit lost in this static mix. We can use a parallel compressor to help retain the original dynamics, while adding the necessary density that makes the whole thing seem more up-front.
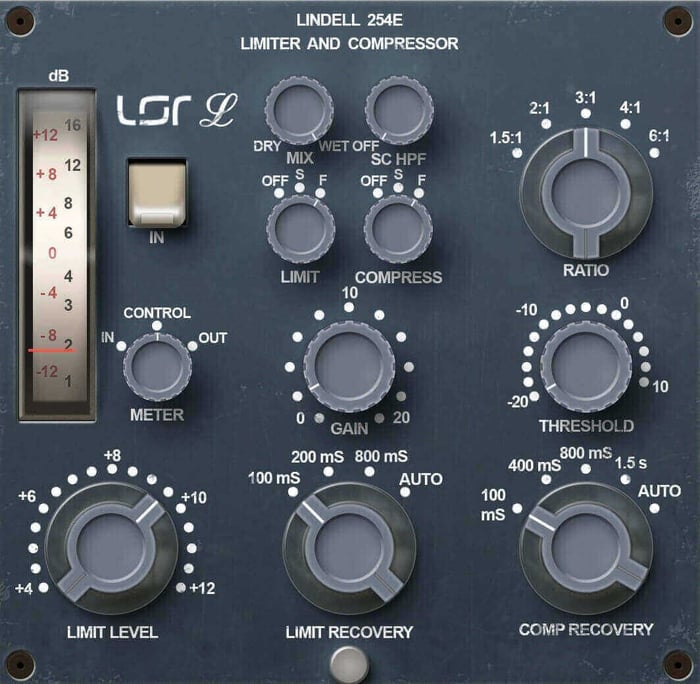
Using Lindell 245E as parallel piano compressor
Here’s why parallel compression works: When the piano is playing softly, you can hear the compressed signal more – and because the piano playing is soft, the transients are not very spiky. Consequently, they are not affected so much.
But when the piano gets loud, the dry levels mask the compressed signal, leaving it buried in the mix: you can’t hear the compressed signal anymore. Instead, you hear the transients of the original piano.
Adding punch to a drum track in a busy mix
As we mentioned earlier, this is often called the New York Compression trick – and it works wonders:
Rake a dense mix, send your kicks and snares to a parallel compression track, and edge that parallel compression track in with the original mix. As a rule, start with medium attacks and fast releases to really emphasize the transients on these compressors – or, use compressors without time-constants that are famous for their ability to add parallel smack, like the Purple Audio MC 77, or the Native Instruments VC 160.
Let’s take the same tune from before, this time listening carefully to the drums:
These drums could pounce more – and here the VC 160 is a good candidate to help them do so, creating parallel compression drums.
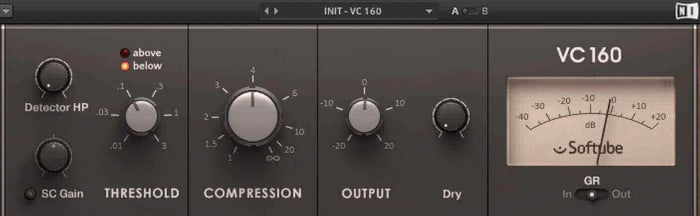
VC 160 on kicks and snares
2. Not compressing hard enough
In a typical parallel setup, the compression should be much heavier than what you would normally use as an insert effect. Because you have the option of blending as much of the compressed signal into your mix as you want, go ahead and really work that compressor to make sure it’s doing its job.
To get that in-your-face bite, try starting with a fairly conservative ratio. As for time constants, this depends on what you want to achieve. If you want to add to the density behind the dry transients of the original signal, use faster attack and slower release times. If you want to emphasize the transients by means of parallel compression, a more moderate attack speed and a shorter release might be better.
All controls will change from project to project – not just the time constants. You may even want to bump the ratio up higher to bring out some exaggerated pumping and intentional distortion. In the case of parallel compression, this might result in good grist for the mill.
Keep in mind that the compressed version of your audio is simply there to augment the uncompressed version. Don’t be afraid to really clamp down with your compressor to make sure you’re getting all the benefits of running things in parallel – as long as you keep the parallel track suitable low in volume!
3. Introducing phase anomalies
Whenever you duplicate a track and process it differently, you are introducing shifts in phase. These shifts can either work to your advantage or destroy the integrity of your mix.
Remember, not all compressors play nicely with plugin delay compensation – and for that matter, not all DAWs handle plugin delay compensation in an equally adroit manner. So, when using parallel compression, you have to be on the lookout for potential timing or phase issues that leave your sound hollow.
You might hear this kind of issue with some instruments more than others. For instance, I have largely moved away from using parallel processing on bass because I don’t like the overall tonal shift that comes from parallel processing. Your mileage may vary.
One way to ensure you’ll have issues galore is if you carelessly use EQs on the parallel-compressed tracks. EQ can be necessary, but a minimum phase EQ might create smearing around the transients – or around specific frequencies. This is why it can be desirable to use linear phase EQs on parallel returns.
Observe the difference in the following video:
4. Getting fooled by level
Parallel compression increases the level of your mix—you’re adding another track of audio to your mix, after all. Since we have a preference for louder over quieter, it's hard to know whether the decisions made in parallel are improving your mix or just playing to our natural bias.
Because parallel compression involves multiple tracks, it can be difficult to loudness-match your comparisons. No plugin is going to auto-compensate the gain for you here, so you have to do it on your own.
Finding the right balance between your compressed and dry signals is something that takes time and experience. However, using meters can help you learn to find these balances more quickly.
If you’re new to the game, you may benefit from a metering tool like Insight 2 or ADPTR Metric AB. These plugins provide feedback on the levels and loudness of your mix before and after parallel compression. Loads of people rely on meters to double-check their work.
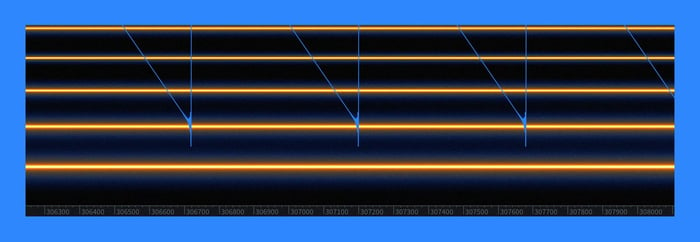
Personally, I prefer oscilloscopes, because I find they can show me things in a more visual way, one that’s easier to comprehend.
I’ll show you what I mean in the following video:
5. Reinforcing frequencies you don’t actually want or need
When applying parallel compression to a track, you run the risk of emphasizing frequencies you don’t actually want, doing so by shear reinforcement. This often happens with cymbal bleed in a snare mic: you wind up reinforcing the harshness between 2 to 6 kHz.
For something like a parallel snare, a gate before the compressor could come in handy, such as the one in Neutron.
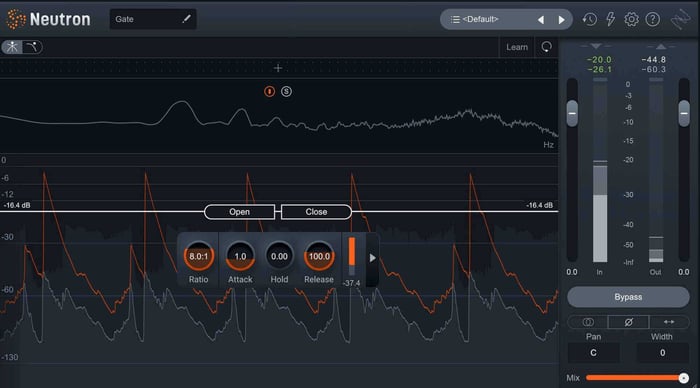
Neutron Gate module
With the snare gated, hi-hat bleed and cymbal spill won’t be as much of an issue.
If you’re routing your kick and your snare to the same parallel compressor, try duplicating your snare track, gating the duplicate, and routing its output directly to the parallel compressor. This will help you avoid gating the kick if you only need to de-bleed the snare.
Parallel compression vocals can often suffer from this problem, which is a pity, as vocals so often benefit from parallel compression. The effect reinforces quiet parts, disappears during the louder phrases, and becomes a clean way of maintaining an even dynamic.
But here’s the thing: vocals have all sorts of funny resonant build ups, depending on the singer. You’re liable to reinforce them with parallel compression. So, you might need to EQ before the compression in your parallel track.
6. Changing the groove of the performance too much
Every musician has their own feel. Even when a producer programs a MIDI part, they are doing so with their particular sense of groove. This is why producers like J Dilla achieved mythical status back in the day. It’s also why some musicians chart to the top on YouTube, while others get a quick swipe when you stumble across their TikTok pages.
Groove is everything. Compression, when used too liberally, ruins the groove.
I’ll show you just what I mean in the following video, wherein I absolutely ruin what the drummer is doing.
Start using parallel compression
There are many benefits to using parallel compression, but like all techniques, there are also pitfalls. The tips in this article should give you a clear idea of when you’ve fallen into one of these traps and how to get out.
Start your free trial of iZotope Neutron to experiment with all of these parallel compression techniques in your mixes.