10 Music Production Tips for Beginners
Learn how to get better mixes, discover educational resources, and access the tools that help you achieve a professional sound in your music production.
In my 15 years as a music producer, I’ve learned tons of tips and tricks that have really upped my producing game. In this article, I’ll be sharing the top 10 music production tips that helped me the most throughout my journey as a producer. Whether you’re just getting started on the music production path or you’ve been on it for years, I hope these tips help you shave time off your own learning curve!
In this article you’ll learn:
This article references a previous version of Neutron. Learn about 

Neutron 5
Tip 1: Fill up the space
When it comes to mixing, I like to picture that I’m filling a box with sounds. Almost like I’m creating a sonic diorama where every sound has a place, and every element works together to create an overall aesthetic. If you’re painting a scene, you wouldn’t put everything front and center (no matter how much you loved it). It’s the same with audio mixing. With loudness, panning, and instruments competing for the same frequencies, you only have so much space to fit everything into. That’s why I approach mixing by focusing on finding a place in the mix for each instrument so that every sound has a space to live and breathe. You can use some of these basic mixing concepts to help you achieve a full, rich mix:
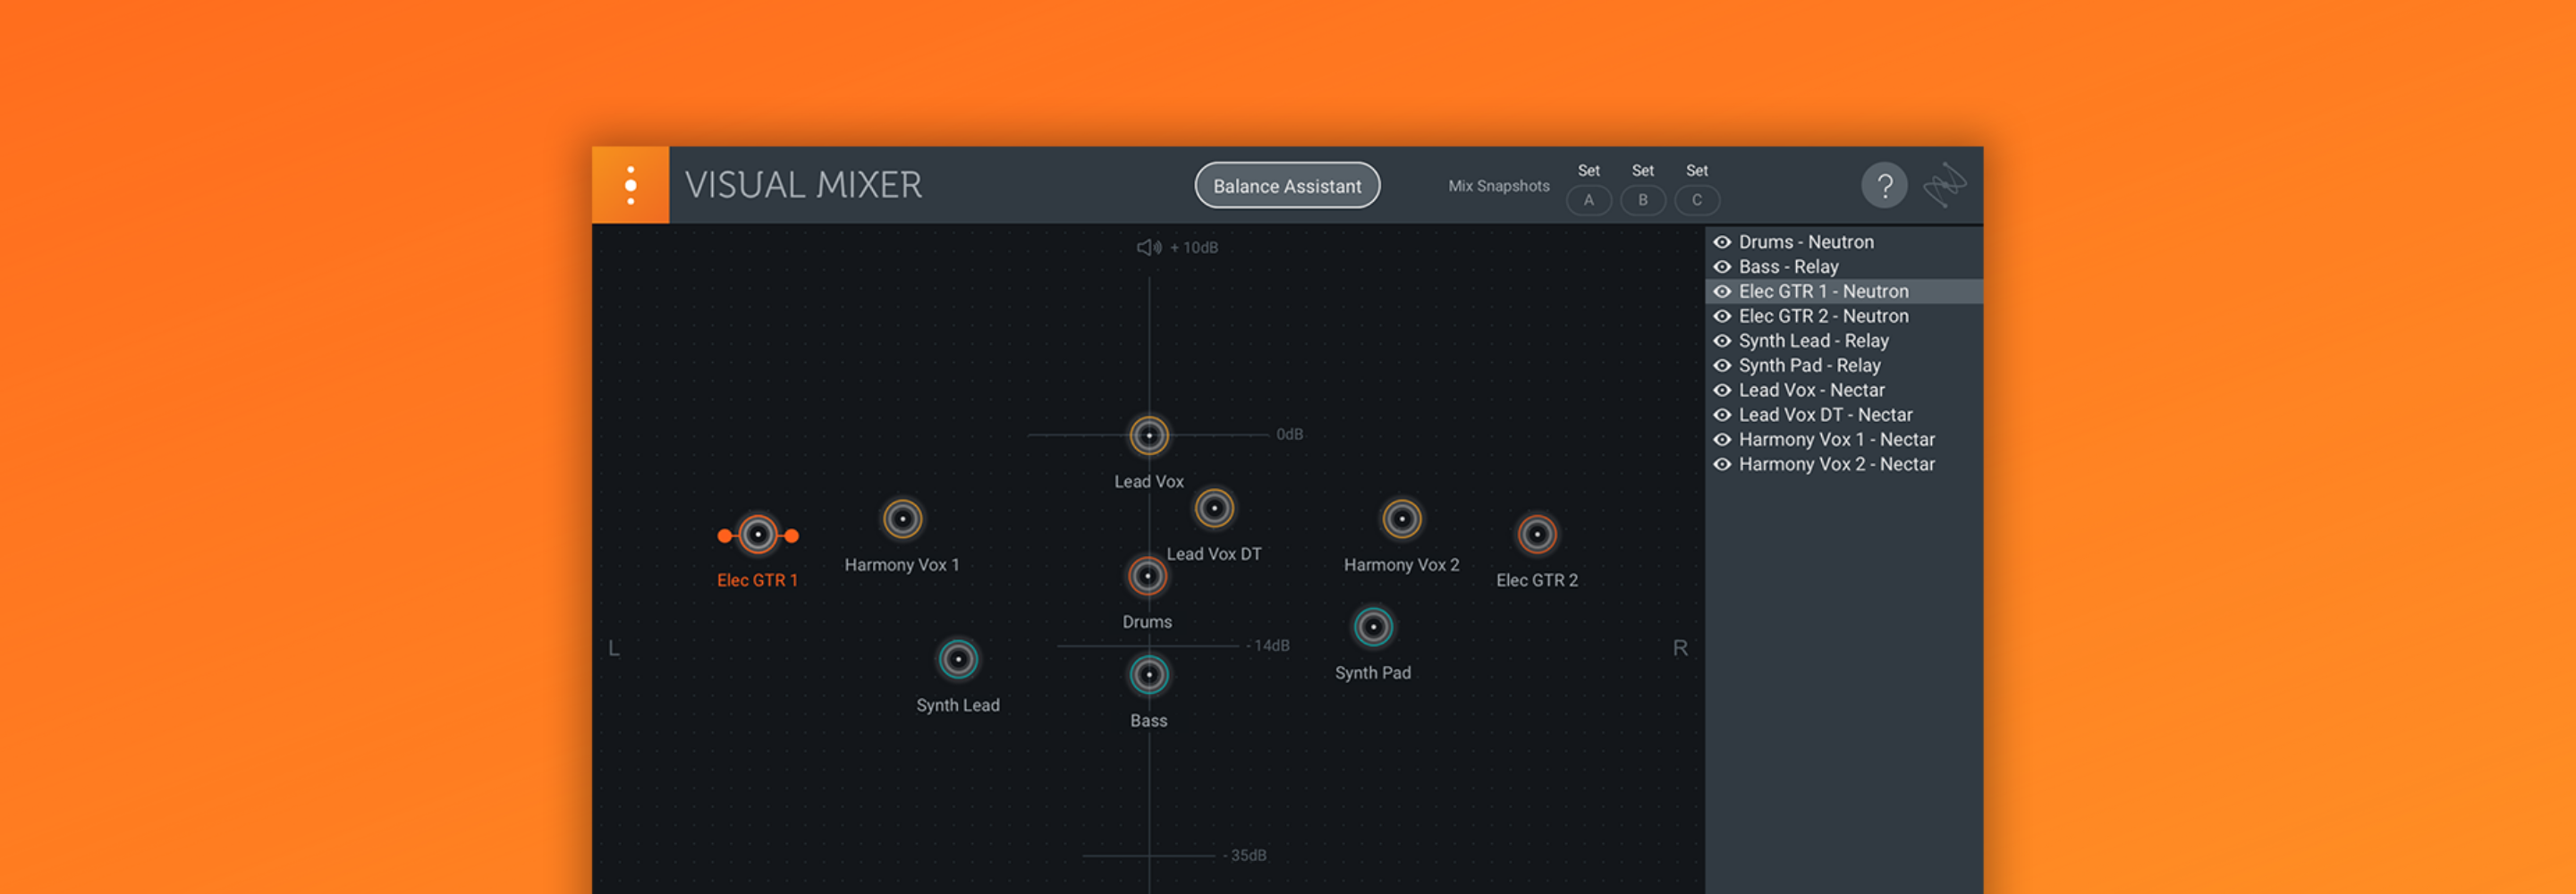
- Panning: Pan instruments left or right to widen your overall mix and make sure your sounds aren’t competing for attention in any given area of the stereo field.
- Gain/Volume: Decrease the volume of an instrument to make it sound further away and increase its volume to bring it to the front.
- EQ: If you want an instrument to sound closer to the listener, cutting the lows and boosting the high frequencies will make it sound more present. Do the opposite to place an instrument further back in the mix.
- Reverb: Instruments with more reverb will naturally sound farther from the listener than instruments that have little to no reverb.
The Visual Mixer included with iZotope


Neutron

An example of a wide panning scheme in Neutron’s Visual Mixer
Tip 2: Create contrast
If you’re looking to create a more dynamic track, focus on creating contrast. Keep in mind that listeners aren’t just hearing what is currently coming through their speakers, they’re hearing it in context of what they just heard in the few seconds before. So, if you want your chorus or “drop” to sound loud, decrease the volume of the section leading up to it. If you want that 808 sub to blow people away, cut all the bassier elements right before it comes in. And if you want that synth lead to come in nice and wide, make sure to keep your other instruments more narrow. Remember, it’s all about perception. And the context in which a new instrument comes in is arguably just as important as the instrument itself.
An example of a song with great contrast is “Lenguas” by Elephant Heart.
Tip 3: Sculpt your sounds
To create space for all the instruments in your mix, it might be necessary to cut some of the frequencies from certain sounds using an equalizer. Having two instruments that occupy similar frequencies can cause your mix to get muddy, but ducking down certain frequencies from one can help them both sound better in the mix. For example, if your kick isn’t punching through how you’d like, try reducing the level from your bass in the same frequency range that your kick occupies. This will make room for the kick drum to really slap, while still maintaining the overall sound of the bass.
If you aren’t sure where to start cutting frequencies, Unmask in Neutron is a huge help. It can show you where there are competing frequencies between two instruments to help you know where to begin sculpting your sounds.

Using the Unmask module in Neutron to unmask the kick and bass
BONUS TIP: When sculpting your sounds with an EQ, don’t “solo” the tracks as this can bias your ears and cause you to make some poor mixing decisions. Make sure you’re listening to the full mix when making EQ adjustments.
Tip 4: Use distortion when mixing
When it comes to getting instruments to stand out in a crowded mix, distortion can be one of your best tools. Distortion plug-ins like Trash mode in Neutron 4 can be great for crafting some unique sounds, but when it comes to mixing, a little bit goes a long way. Distortion added from an exciter or a saturation plug-in will add harmonics to your original signal that can help fill out the sound and get it to punch through your mix. I personally like using the Exciter tab in Neutron to bring a little extra life to my synths, pianos, and guitars. And, when it comes to getting vocals to sparkle, the Saturation tab in Nectar is a godsend.
Tip 5: Watch other producers
Many of these tips have come from observing other producers over the years. There are countless tutorial videos online made by producers of all genres, working on any DAW you can think of. Pull some up and start taking notes. Whenever I watch other producers, I find that I learn way more than just what the tutorial was aiming to teach me because I also get to see other workflows, learn keyboard shortcuts I didn’t know existed, and observe new and different ways to use the software I’ve been using for over a decade. Watching other producers really helps you stretch your brain to new creative possibilities. I recommend watching Reid Stefan and Julez Jadon.
Tip 6: Close your eyes (then open them)
When I first got started producing, I soon became obsessed with all the graphs and meters available in my software. I wanted to make sure I was producing “correctly,” so I made adjustments to my mixes to make sure they looked good on my screen. I learned the basic guidelines for how loud your kick should be, how much compression you should be applying to vocals, and what your master bus frequency spectrum should look like. But, you know what constantly watching the meters got me? Many really terrible mixes.
Meters can be useful tools if you know how to use them. If you’re just starting out, they can be a bit overwhelming. Learn to trust your ears when it comes to what sounds good, and use metering as your assistant. If you get stuck on a mix, close your eyes and listen. Then make adjustments as needed.
Tip 7: Stay organized
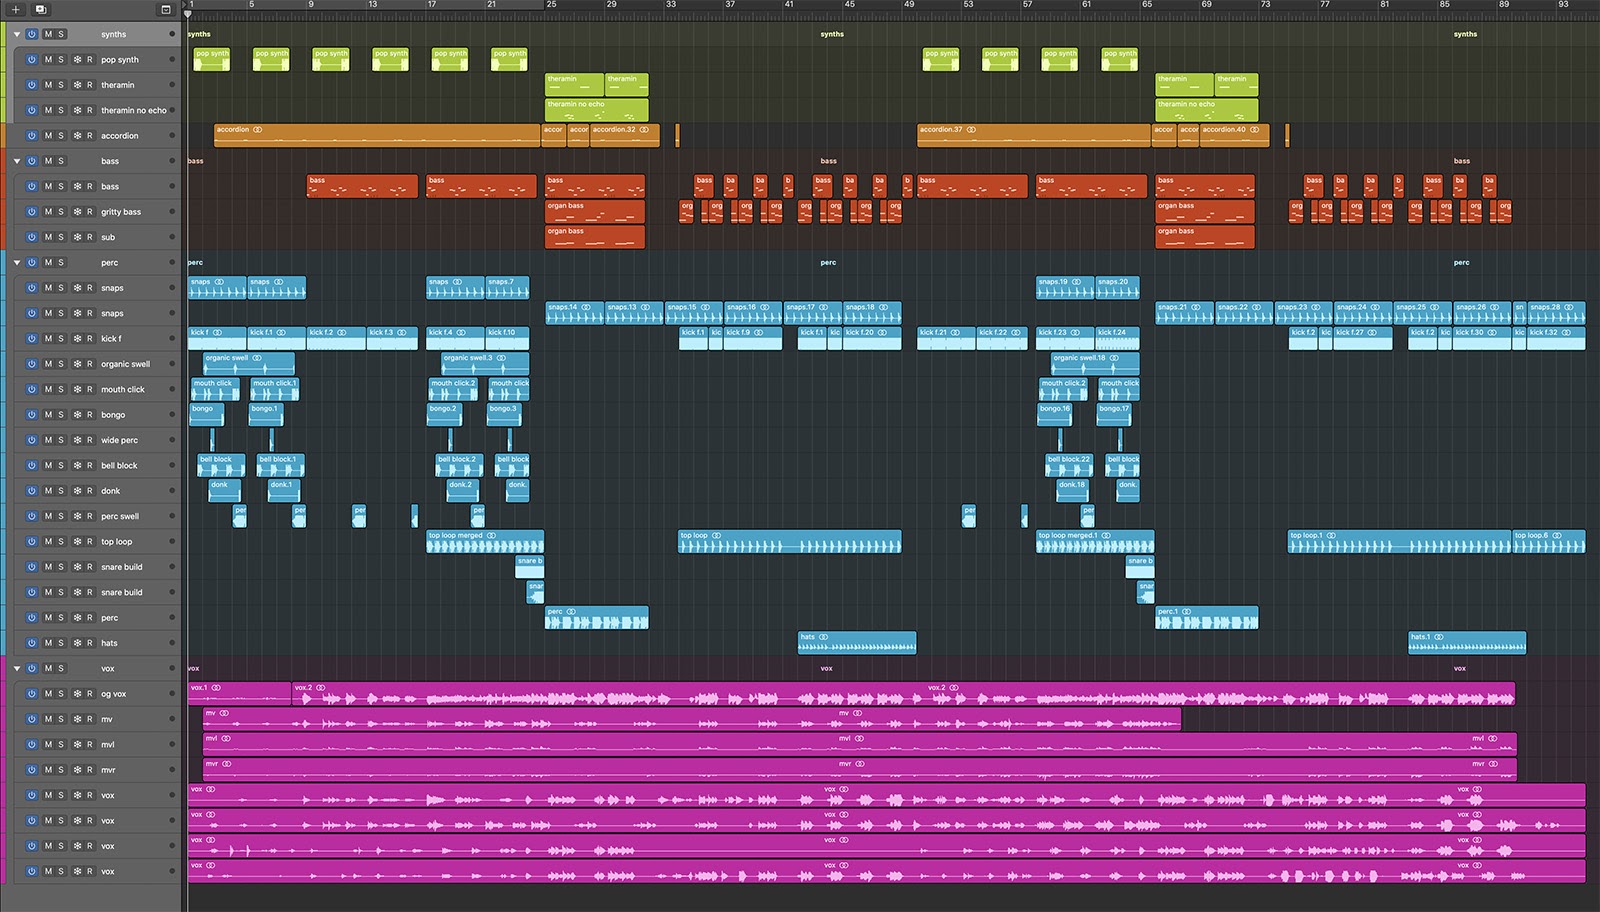
Knowing exactly where all your project files, samples, and presets are will save you so much time in the long run. So, I encourage you to find an organizational system that works well for you and stick to it. Name your files in a consistent way, color-code your instruments the same for every project, and create templates whenever possible to save you time and energy later.

An example of how I organize my project files to maximize efficiency
BONUS TIP: Store all your files on an external hard drive and back it up to the cloud often. This will save you so much hassle if your computer ever crashes or gets lost (fingers crossed).
Tip 8: Make it a habit
Practice makes better. Set aside time each week to hone your craft. Make a commitment to yourself and schedule some recurring events in your calendar for dedicated music time. Like going to the gym, the more you show up on a recurring basis, the easier it becomes to show up because it becomes part of your routine. It’s been said that it takes 10,000 hours to become a master of something. So, start setting aside time for producing and then stick it out for the long haul.
Tip 9: Get to know your tools
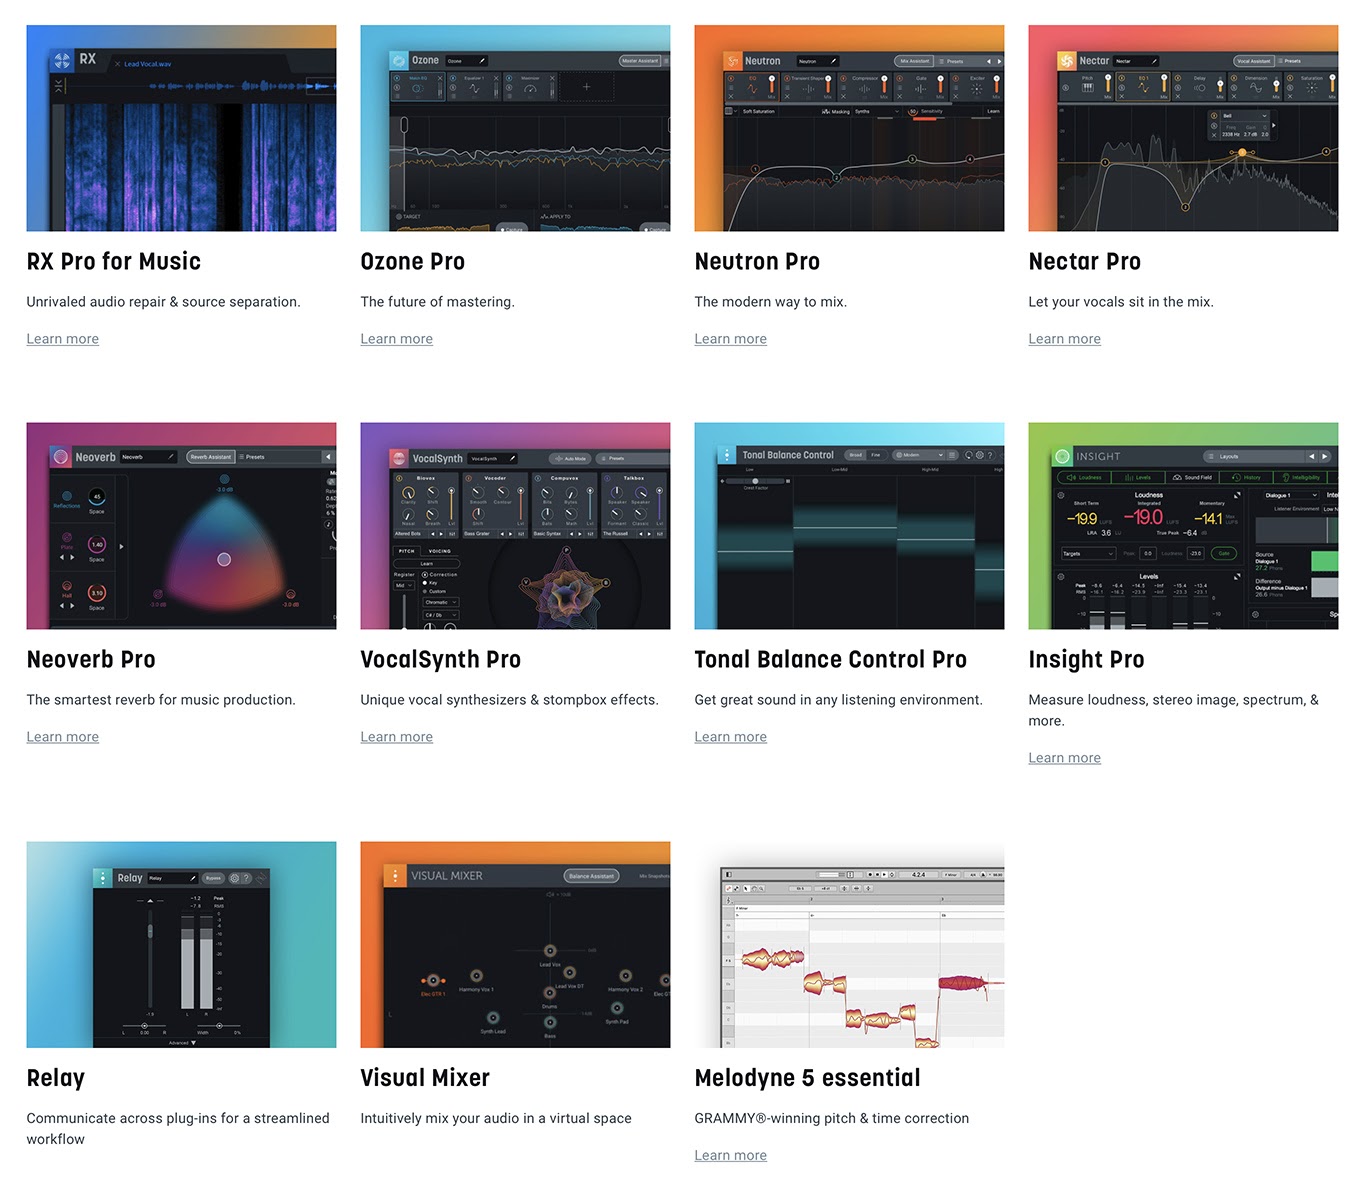
Any professional producer will tell you this: it’s not how many plug-ins you have, it’s how you use them. You don’t need seven compressors and five equalizers. That’s just going to slow you down. Keep your toolbox small. I use iZotope’s plug-ins almost exclusively for mixing, mastering, and sound design. Since they all have similar user interfaces, it makes learning how to use each one a breeze. Plus, they’ve really covered all the bases with just a few plug-ins (Neutron for mixing, Nectar Pro for vocals,


Neoverb Pro


Ozone 11 Advanced


iZotope Music Production Suite Pro: Monthly

The plug-ins that come with iZotope’s Music Production Suite Pro
Tip 10: Finish your work with intention
Finishing a song is an artform in and of itself. I believe it's a universal law that, as artists, we are never going to be 100% happy with our work. But, knowing when to say "this is good enough" is a key component to actually getting your art out into the world. Procrastination often masquerades as perfectionism. So, learn when to say a track is finished, put your stamp of approval on it and release it. Is it going to be your best work? Probably not. But at least it's done and your fans, friends, and family can hear it, love it, and share it. Don't get stuck in the rut of not releasing songs because they "aren't ready yet." That's a slippery slope that leads to dozens of "almost-ready" songs gathering dust on your hard drive. Don't be afraid to say you’re finished.
Start creating your next project
Now that you have the music production basics down, it’s time to open up your next project and get to work. For even more tutorials and production tips, check out iZotope’s Learn site to jump into topics like audio mixing, vocal production, and music production.


