
5 techniques for mixing with Guitar Rig 7 Pro
Guitar Rig isn’t just for guitars—it’s a powerhouse suite of plug-ins for all the elements in your mix. Learn how to mix your music faster and easier with the intuitive processing in Guitar Rig 7 Pro.
Despite the word “guitar” being featured front and center, Guitar Rig Pro is one of the most powerful plug-ins on the market today for mixing and sound design. Be it drums, vocals, bass, or keyboards, Guitar Rig Pro has something for every element in your productions.
Does that sound like marketing to you? Maybe it does. But here’s the thing: the person writing this is real (hello), and his passion is genuine: I’ve been using Guitar Rig in music mixes, film projects, and audio-drama productions for more than a decade. I fervently believe in the tools provided here. So, I’m going to show you five different techniques to get the maximum impact out of Guitar Rig in your mixes.
Follow along with Guitar Rig 7 Pro, a powerful creative audio processing multi-effects rack and amp simulator included in iZotope Music Production Suite 6.
What is Guitar Rig Pro?
Guitar Rig is a multi-effects rack and amp simulator for creative audio processing, with cutting-edge circuit modeling technology. Its processing goes beyond guitar amp simulation—its effects and plugins span crucial mixing tools including EQ, compression, reverbs, distortion, and more.
Let’s listen to Guitar Rig Pro in action. This is the drop from the single "Strawberry Moon" by the artist Rileyann. Guitar Rig is on the vocals (the reverb and echo throw). It’s on the drums (compression and parallel compression). I’m using distortion modules from Guitar Rig on the keyboards.
And yes, it’s also providing amp emulations for both the guitars and the synth bass.
Guitar Rig has been around for decades—I’ve personally been using it since version 3—and it is essentially a modular plug-in. Inside of Guitar Rig, you’ll find amplifier emulations, as well as various kinds of distortion, reverb, delay, compression, EQ/filtering, modulation effects, bizarrely creative utility tools, and unclassifiable sonic manglers.
The most recent iteration of Guitar Rig provides an ergonomic update as well as several new, high-quality modules.
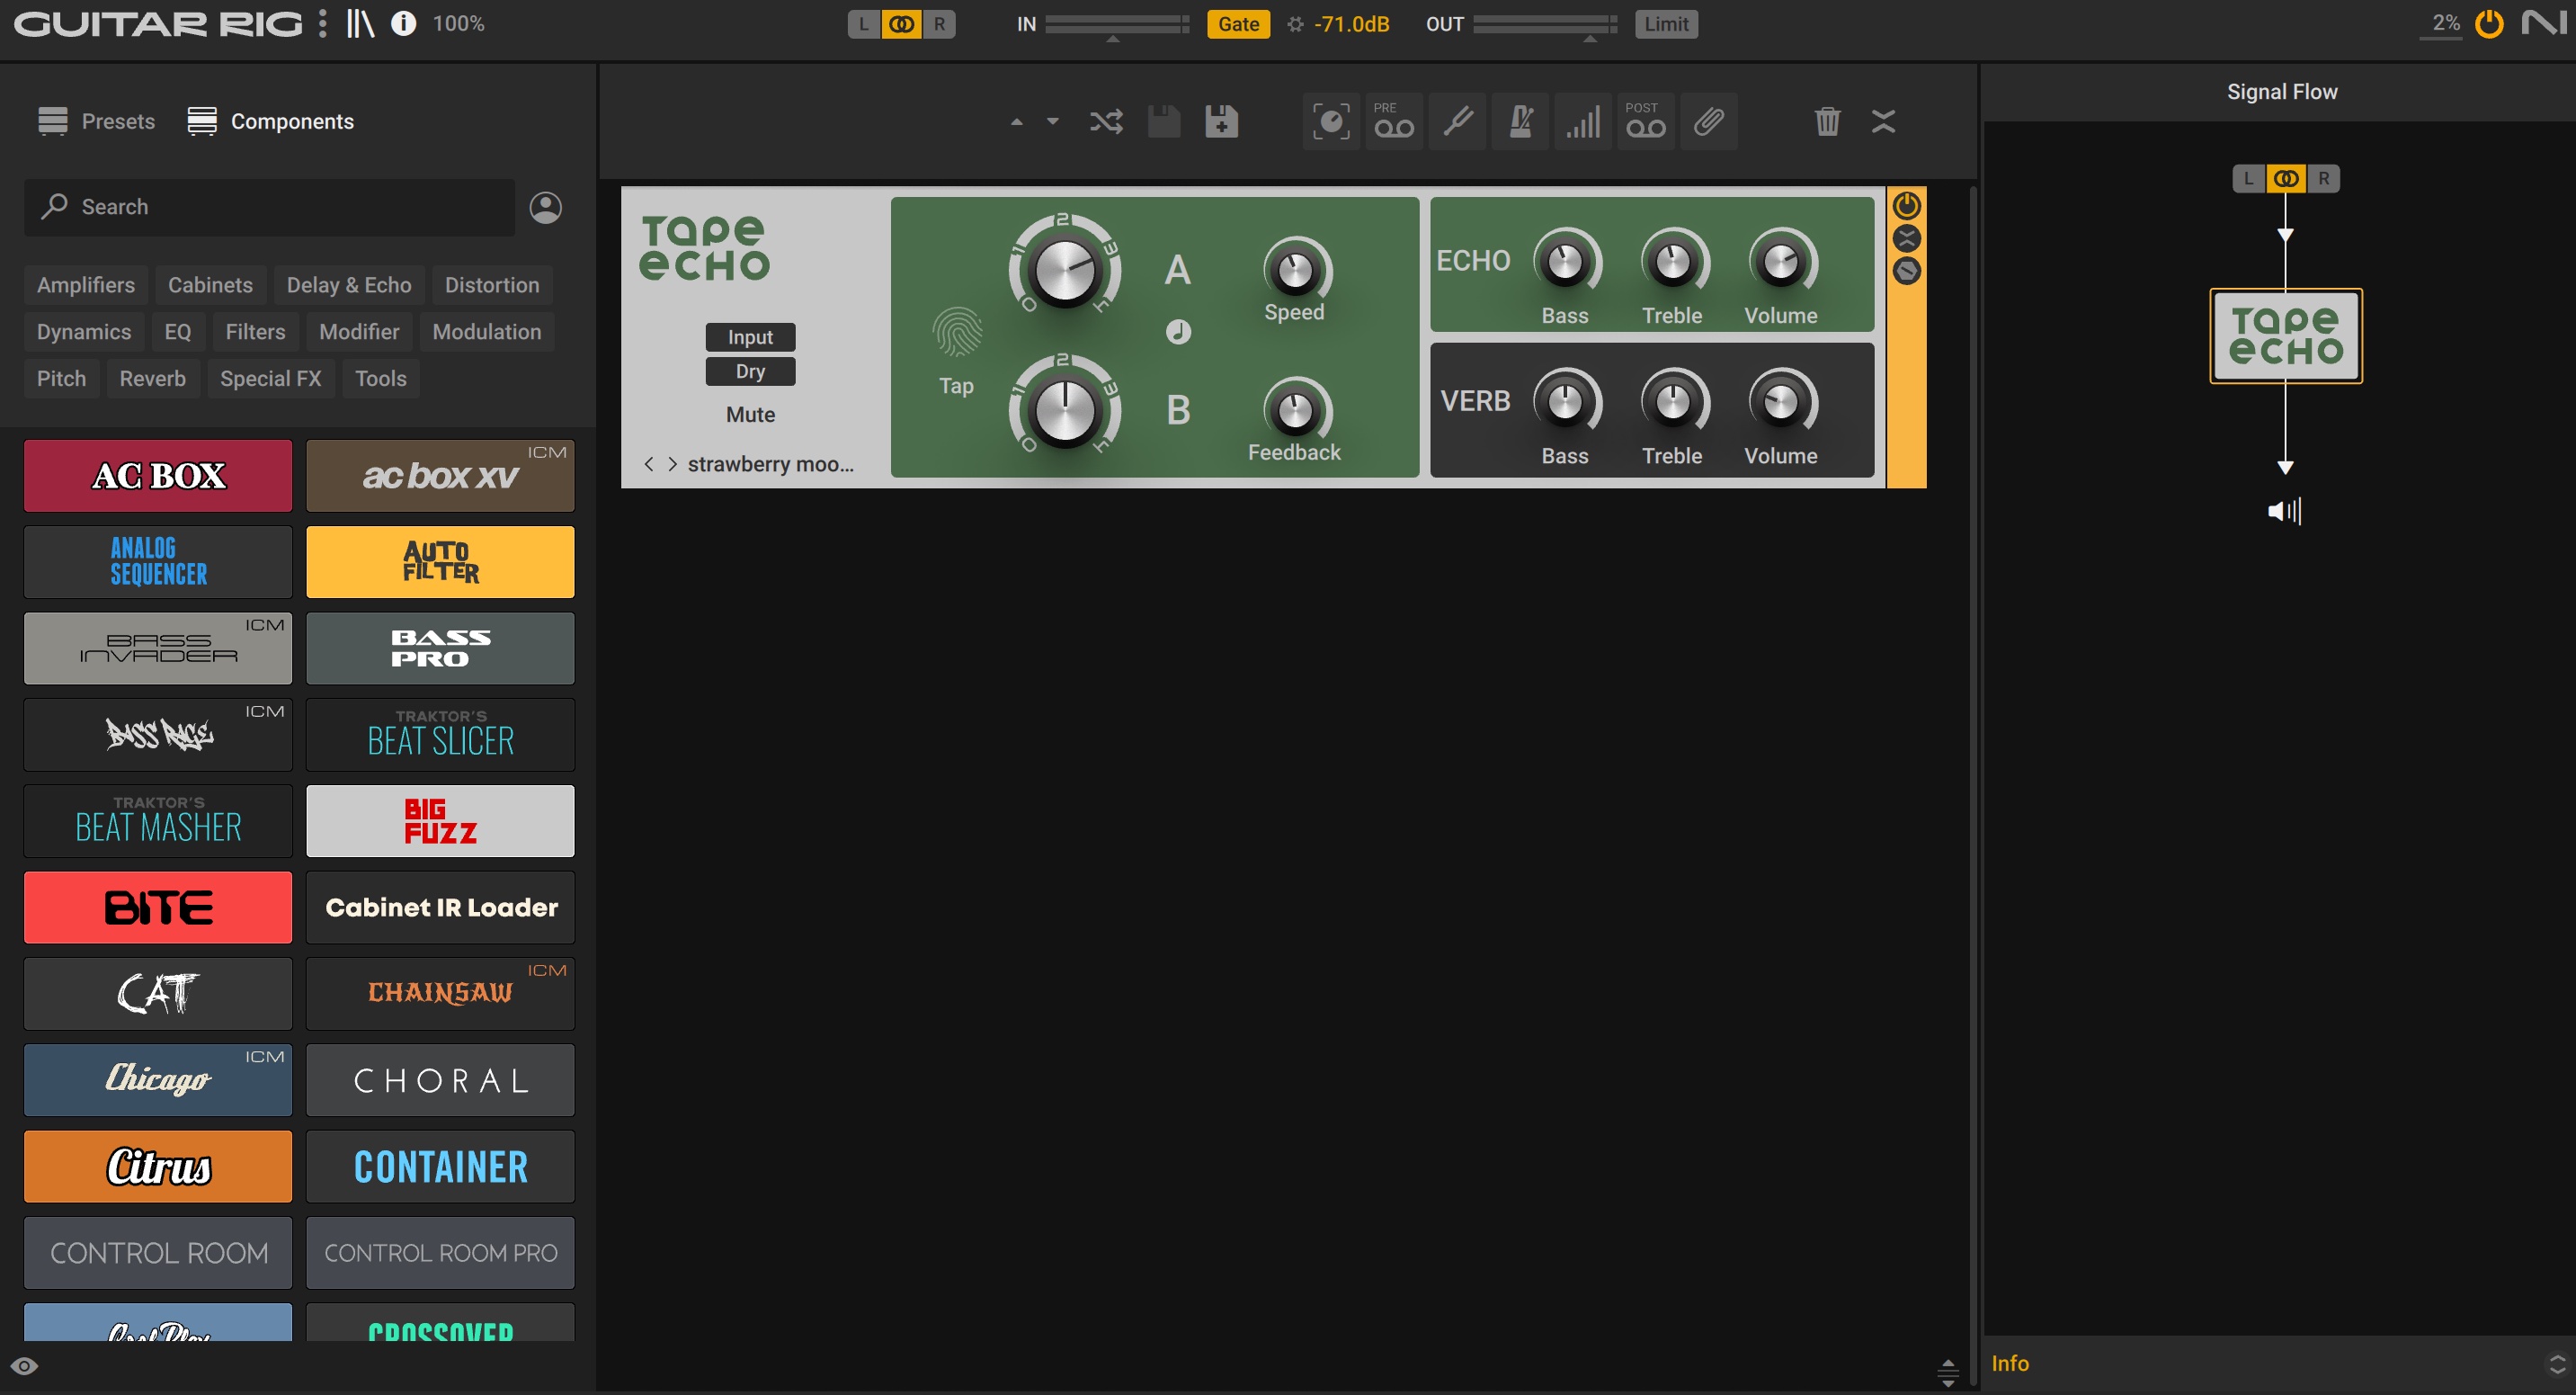
Modular plugin Guitar Rig interface
Searching the modules is as easy as typing what you want into the search bar. And, to your right, you’ll see a signal flow chart that handily displays your chosen processing path.
Now, let me show you some of my favorite things to do with Guitar Rig.
5 techniques for mixing with Guitar Rig 7 Pro
1. Augment your mix with delays and reverbs
Guitar Rig’s delays and reverbs have always been good—and with every iteration, they only get better. You will be astounded by the sheer number of time-based effects on offer, as well as how good the sound is.
In the previous section, I pointed to the effects I used on the vocal throws. That classy effect was made possible by these settings in Guitar Rig’s Tape Echo module.

Tape Echo in Guitar Rig
This is but one of the many delays on offer. The video below explores other powerful delays and effects at your disposal in Guitar Rig, including:
Delay Man: an emulation of a classic pedal prevalent in many a guitar player’s “memory.”
Psych Delay: a generator of diffuse delays that can be reversed and pitched to your liking for dreamy soundscapes.
Grain Delay: a glitchy delay based on repeating short snippets of the sound and manipulating them as need be.
Replika GR: An eminently useful powerhouse with multiple algorithms to give you wide delays, ping-pong effects, and multiple different saturation characters.
Now, delay modules aren’t the only tools on hand to play with time and atmosphere. Guitar Rig also hosts a number of reverbs that sound absolutely gorgeous.
This next video covers some of my particular favorites, including:
Spring Reverb: my go-to for when I want a verb that connotes a spring tank, but offers a larger than life stereo sound.
Vintage Verb: my go-to for mono-spring reverbs occasionally popular in throw-back retro genres.
Tape Echo: Tape Echo also has a spring tank algorithm that has its own warm—and slightly warped—tone.
Studio Reverb: perfect for atmosphere, this verb can achieve that “i want it to sound like it’s in a place but i don’t want to hear the reverb” sound.
Ice Verb: a starkly beautiful and cold effect perfect for Radiohead-style verb modulation.
Replika Shimmer: a fantastic octavized reverb for that Electro-Harmonix sound.
You can also find famous digital reverbs of yore in Guitar Rig. These are great for adding period-appropriate flourishes to eighties-style synths.
Observe this synth line, in which yours truly attempts to rip off Bladerunner’s vibe. The before example sounds fine, but the lead synth is way too try. So, we add a little RC 48 for modulation, and some RC 24 for a hall sound that figures prominently in the vocabulary or “lexicon” of many a mixing engineer.
Synth with RC Reverbs from Guitar Rig
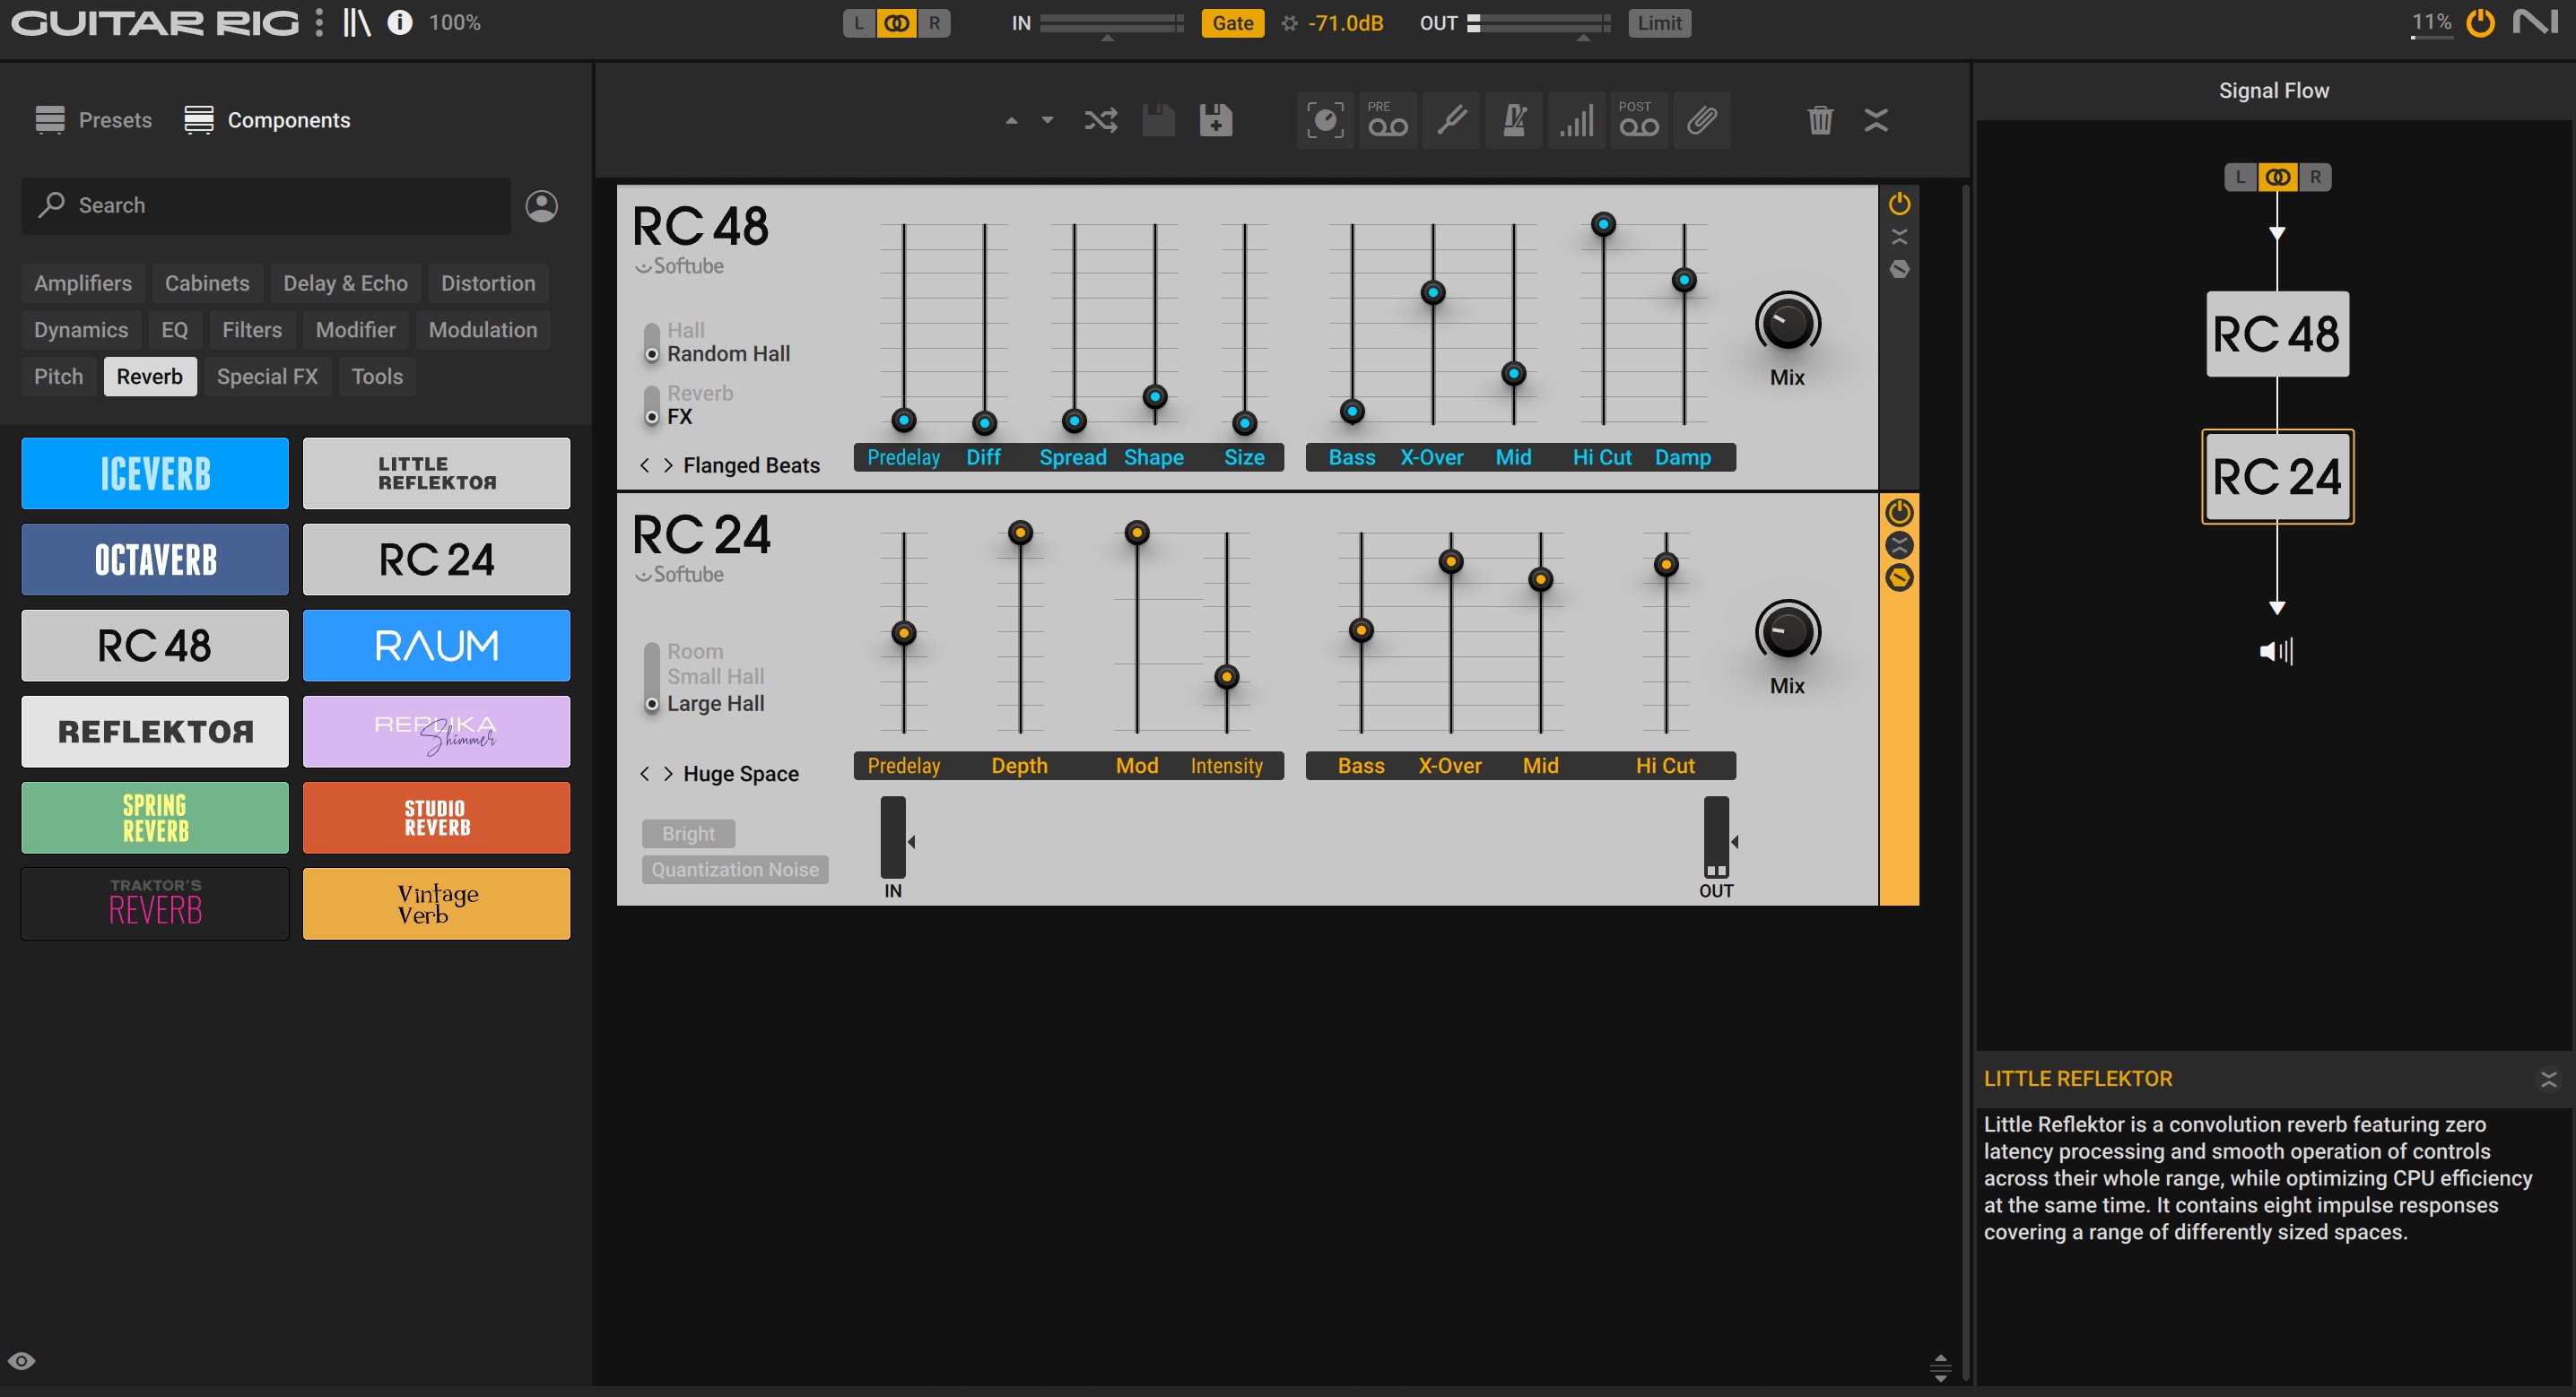
RC 48 and RC 24 reverbs in Guitar Rig
2. Access top-notch compressors
This section should go a long way in convincing you that Guitar Rig 7 Pro hits hard beyond the realms of stringed instruments. To show you how hard it actually hits, we’re going to the various compressors found within the plug-in.
Here’s our exercise: we will take a drum set, apply some minimal EQ and gating to get a nice initial balance, and then use the compressors in Guitar Rig to get a bigger, bolder sound.
Here are our drums:
Let’s start by smashing our room mics with the VC 2A module, which emulates a classic optical leveling amplifier.
Smashed Room Mics
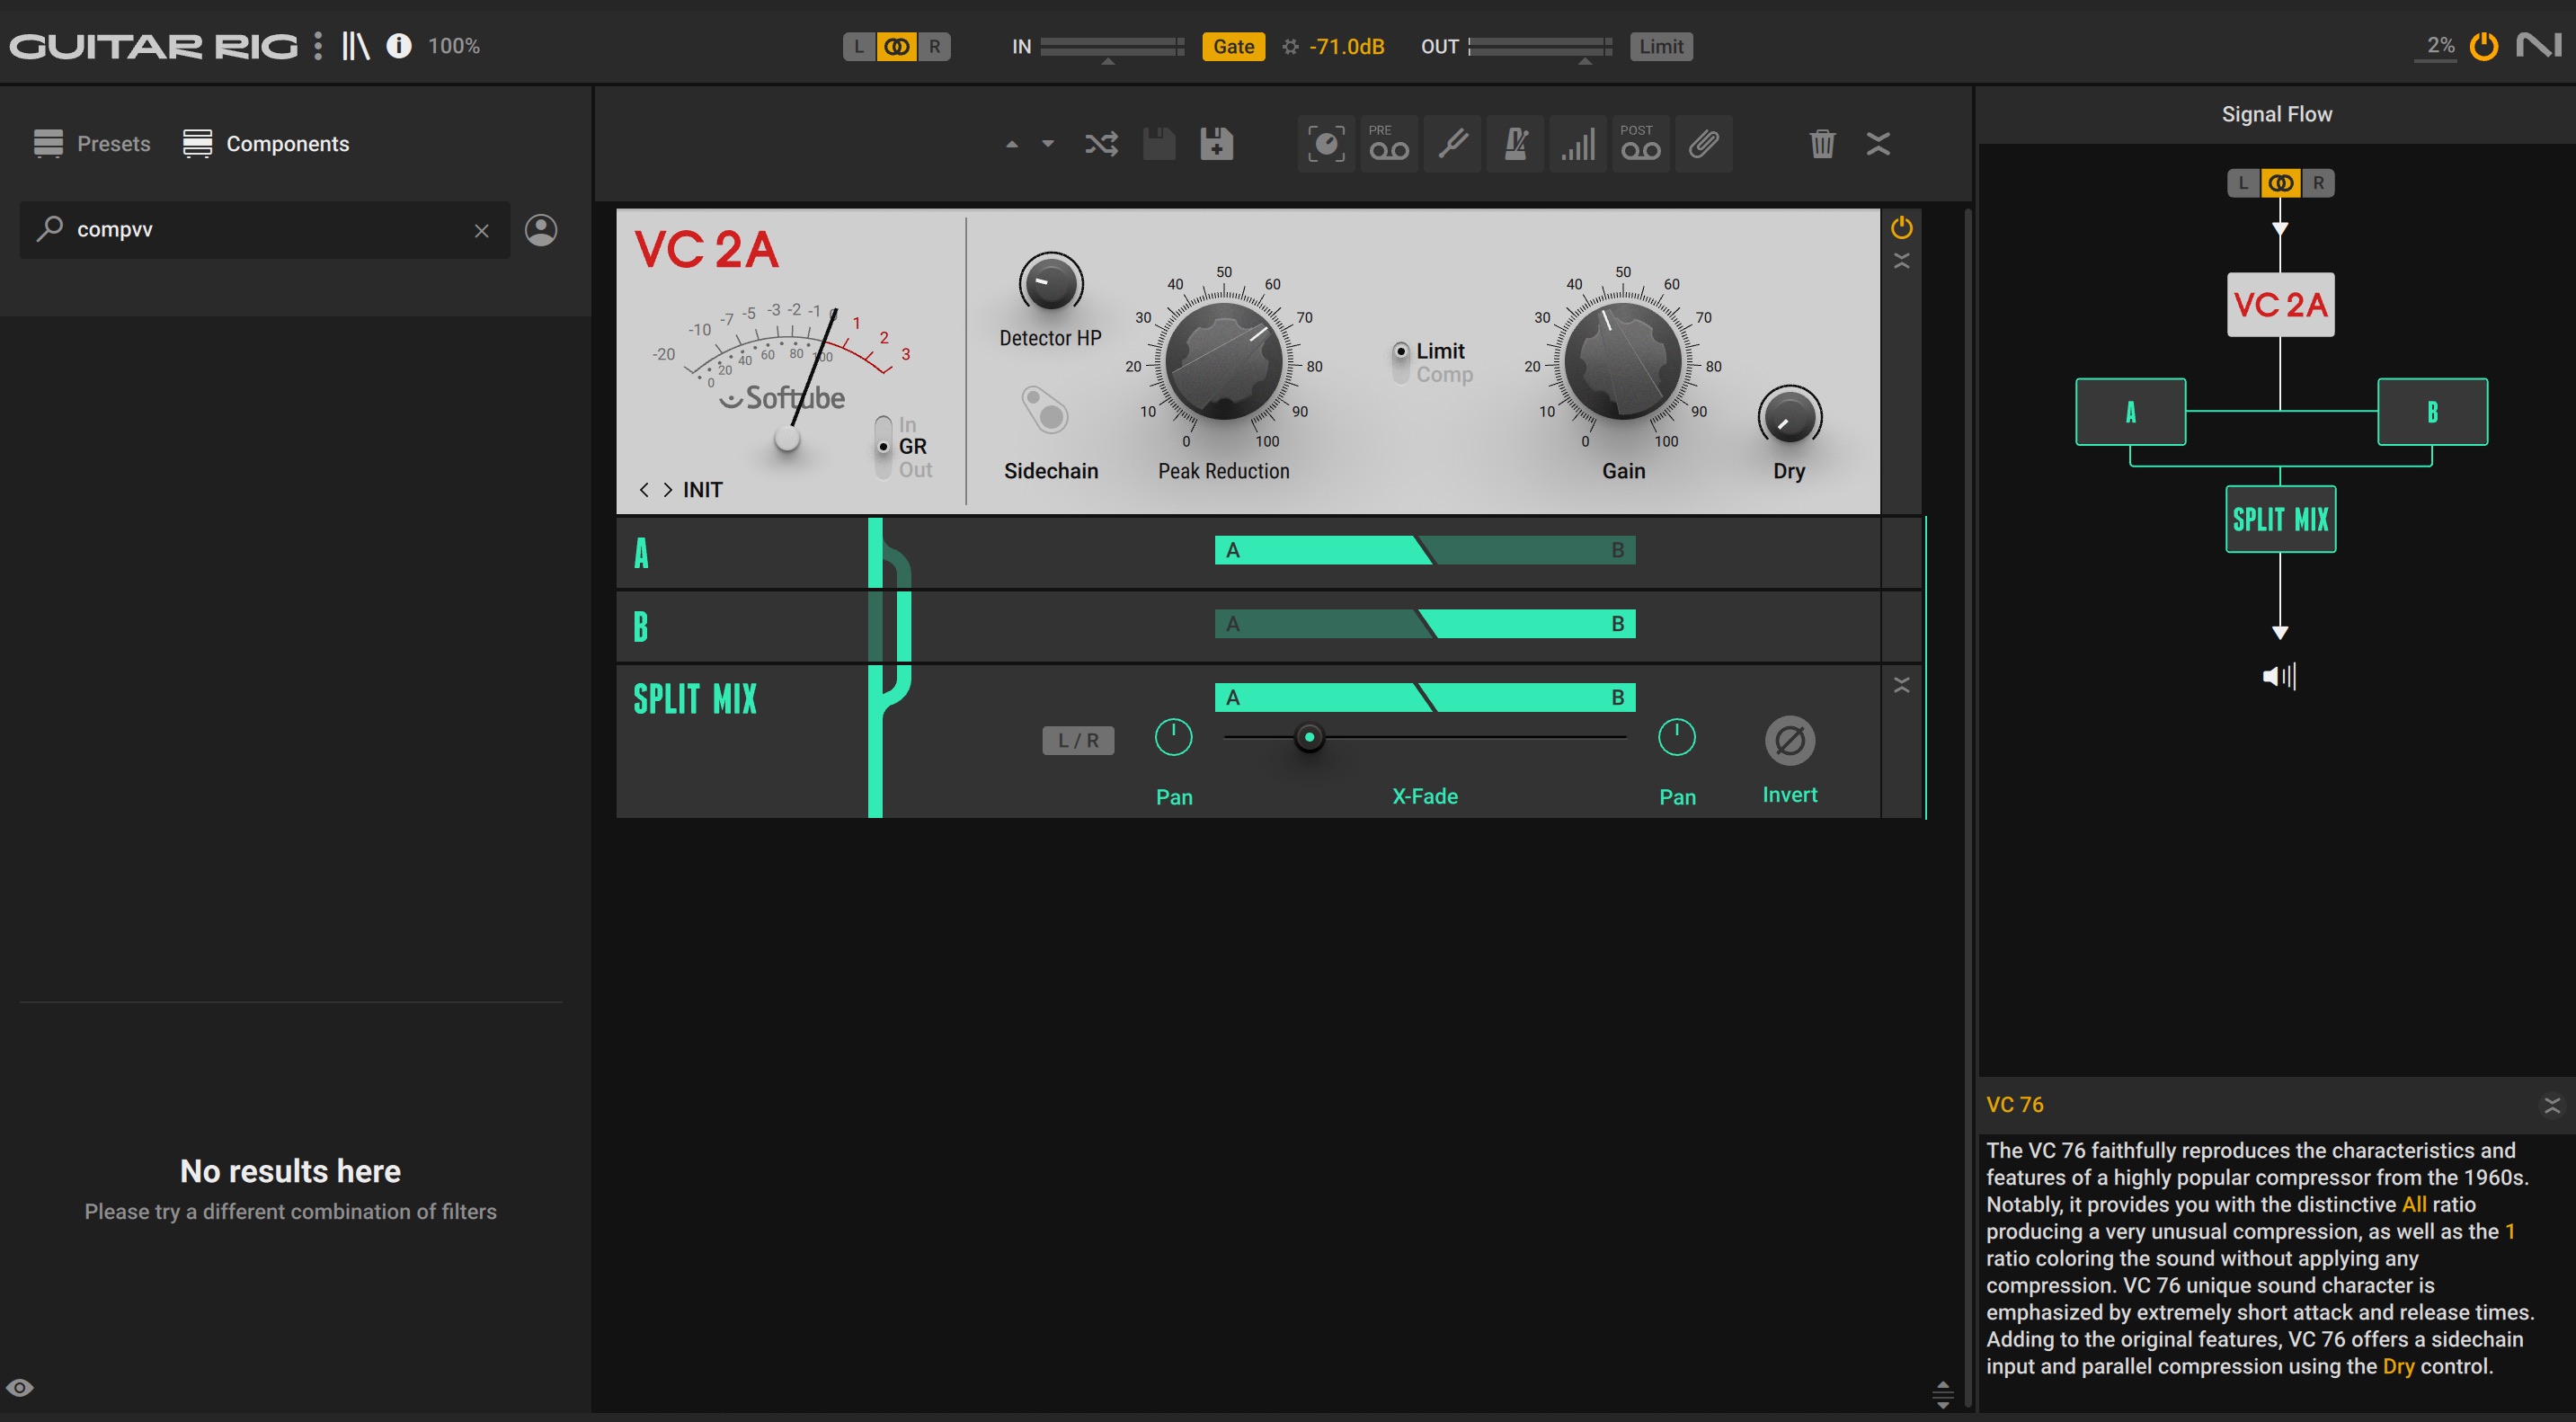
VC2A optical compressor/limiter
Next, let’s use Supercharger on the Overheads with parallel compression. This compressor excels in adding personality alongside dynamics control. Here, you’ll note it aids in achieving a tube-like, glassy character.
Overhead Drum Mics with Compression
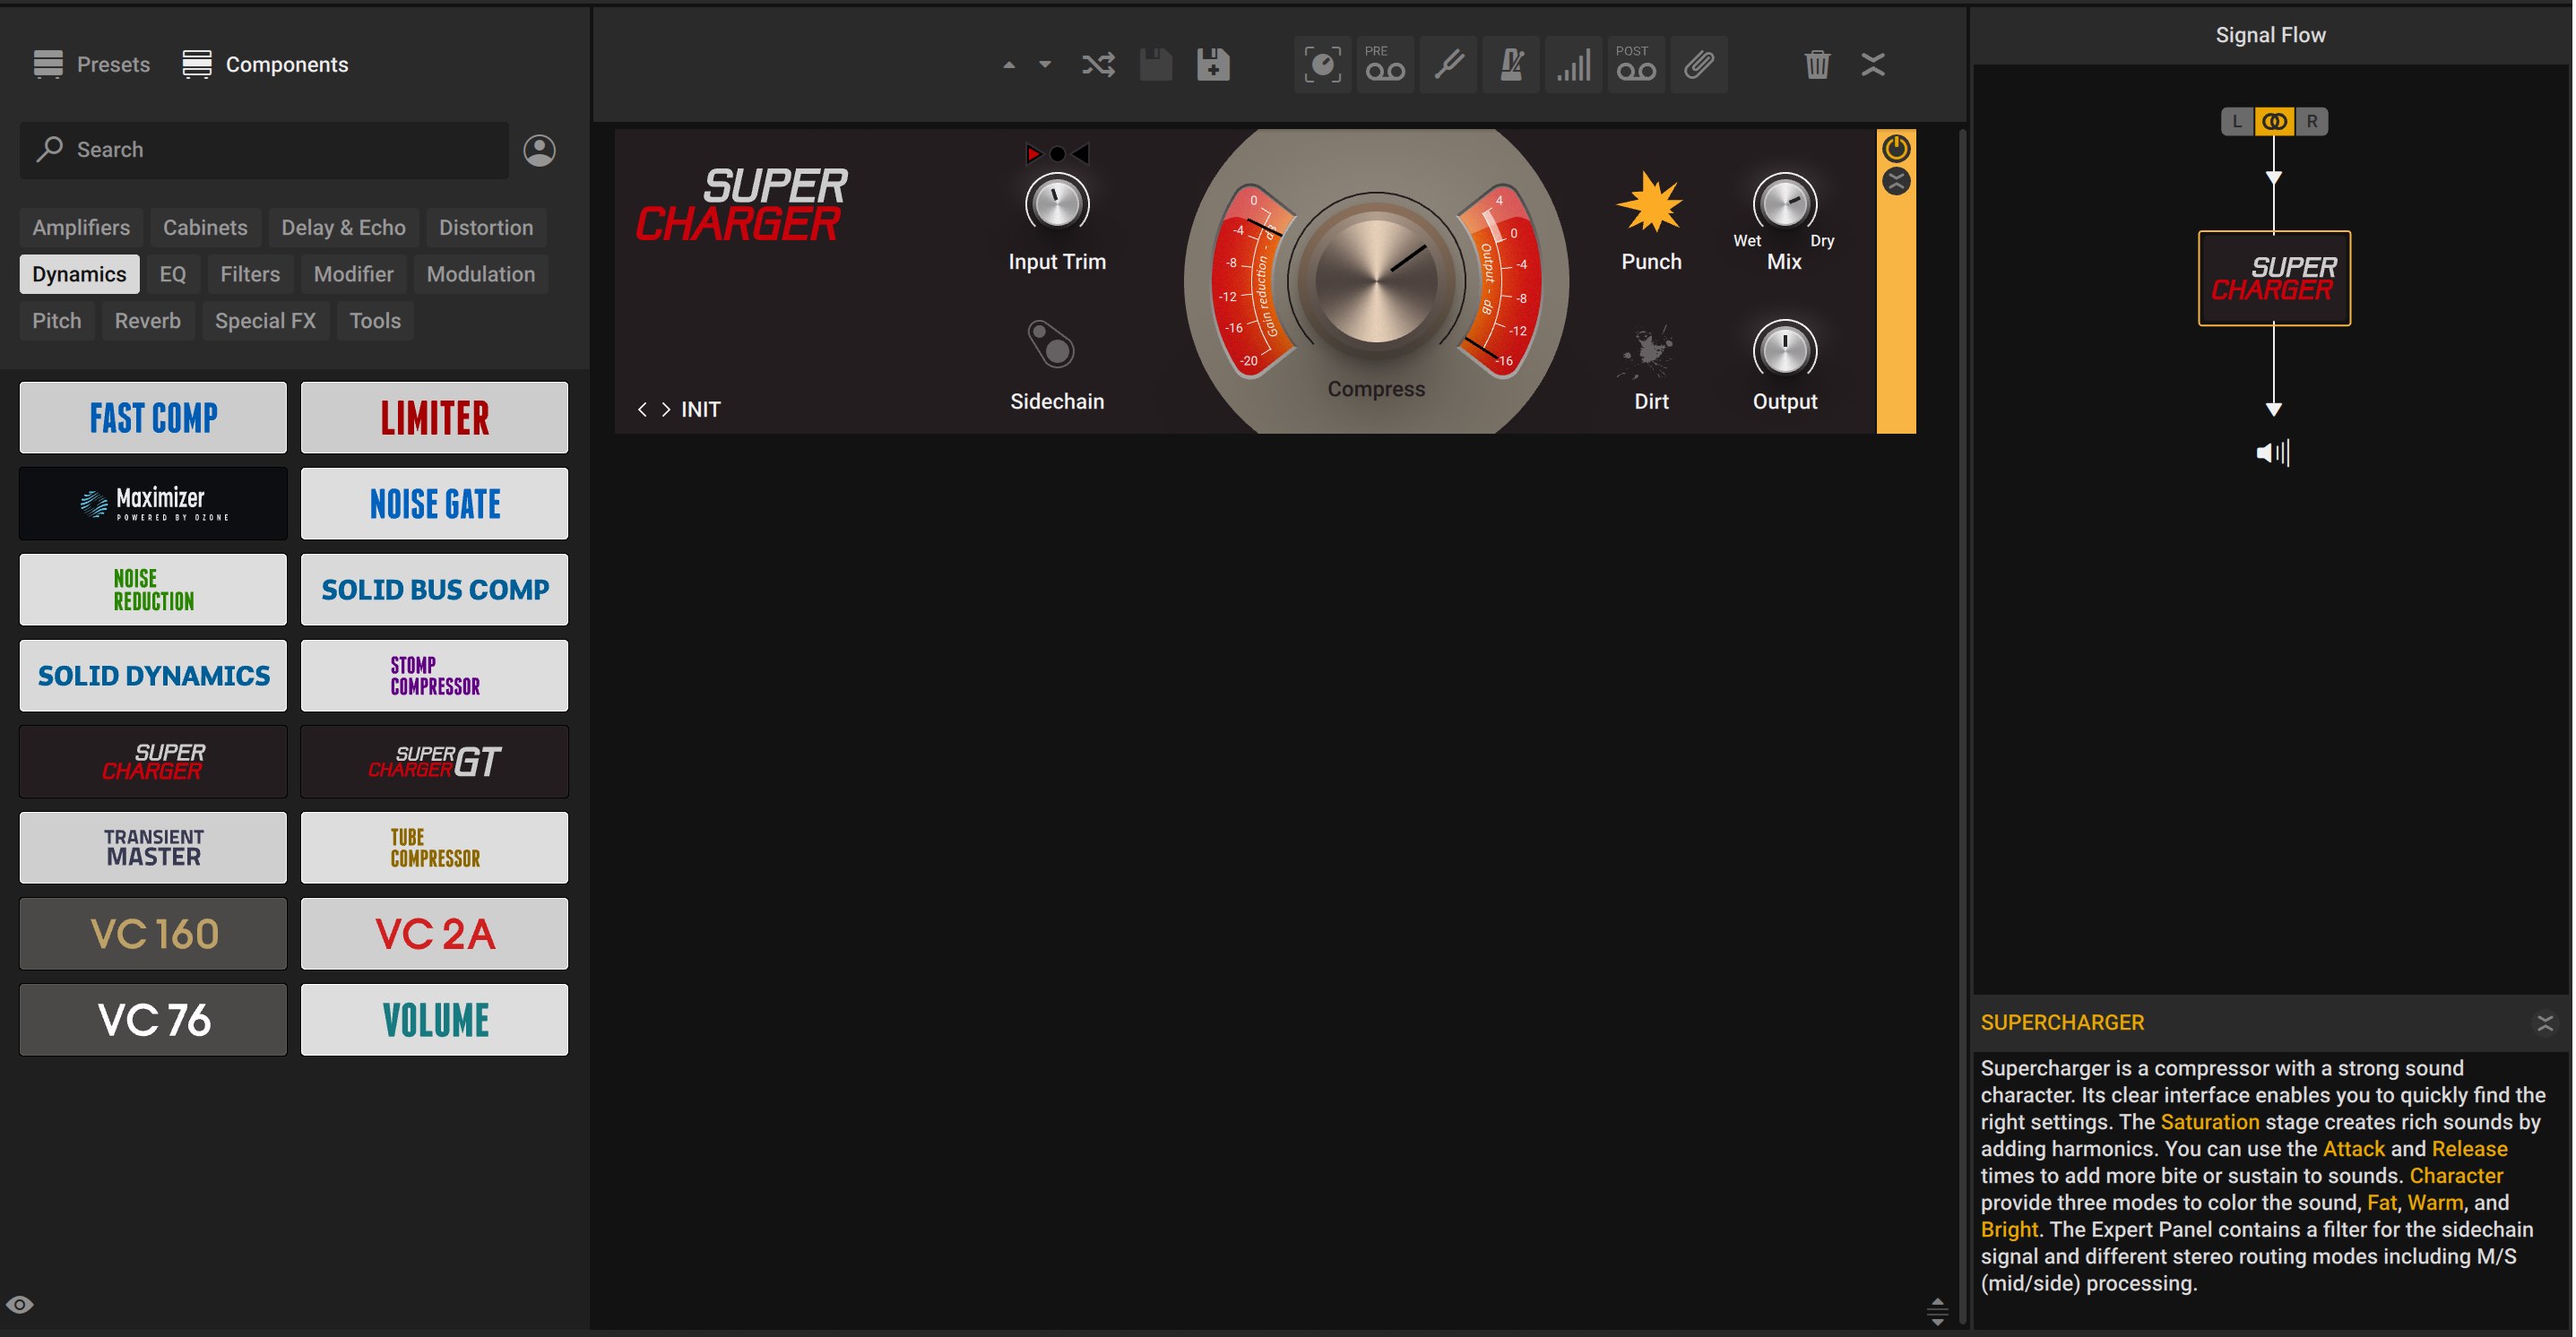
Supercharger in Guitar Rig
The toms come next, with Solid Dynamics for gating, and the VC76 in all-buttons-in mode across the tom bus to smash them to high heaven.
Toms Smashed

Tom gate with Solid Dynamics

Tom bus smash with VC 76
Next, the snare, which gets some serial and parallel treatment. The VC 160 will add some thwack, and the Fast Comp—blended in parallel with the Split Mix module—will enhance the ring.
Snare Drum Processing
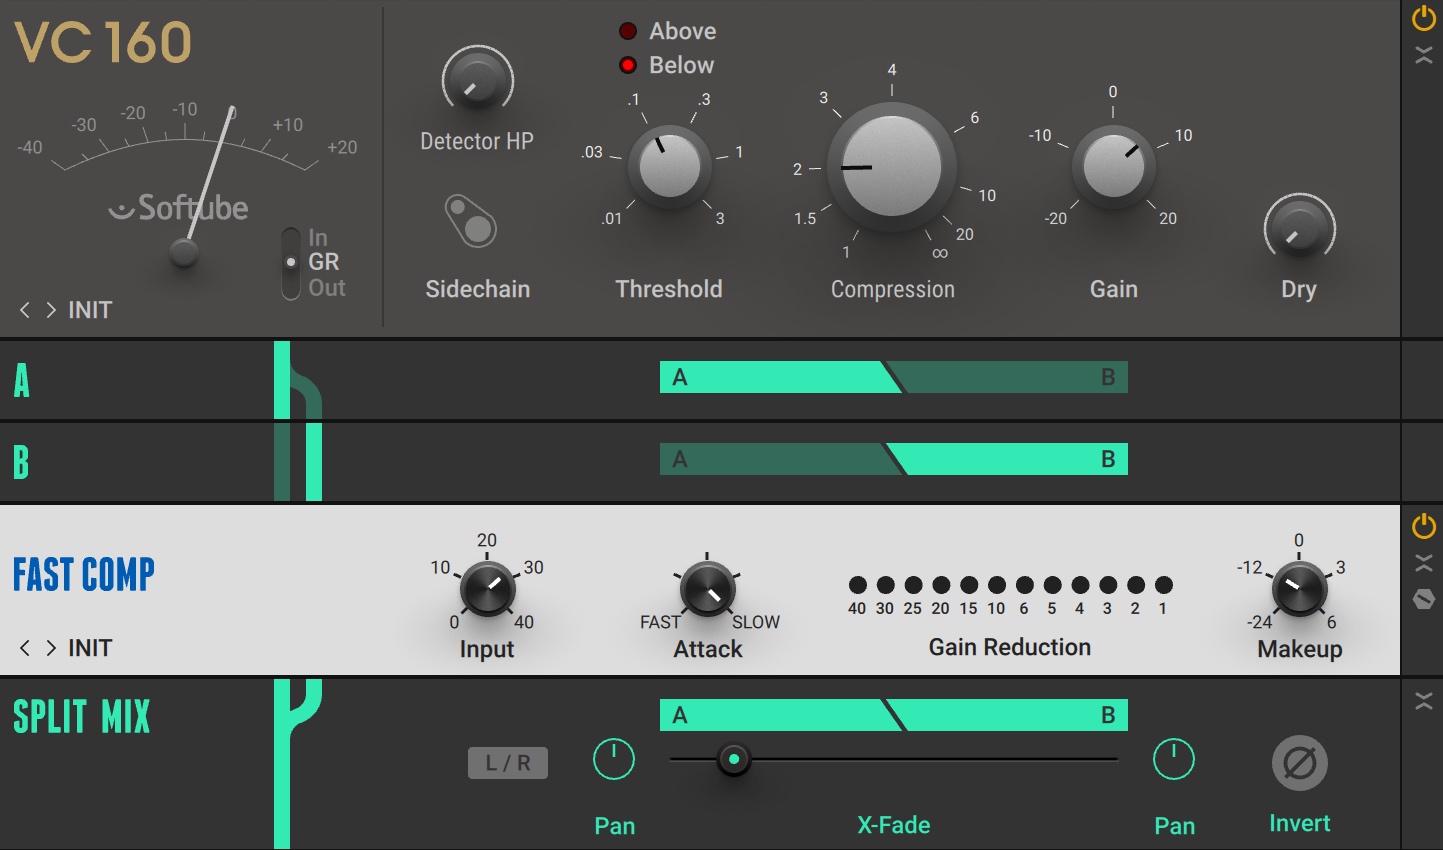
VC 160 followed by Fast Comp
I won’t compress the kick itself, but kick and snare will go to a parallel compression bus with the Tube Comp on it.
I cannot emphasize enough how awesome this comp sounds on parallel drums. Definitely use it.
Finally, the whole kit will get some compression as well. The setup will look a bit complicated.

Drum bus in Guitar Rig
Thankfully, Guitar Rig Pro has a handy signal chart on the right of the GUI, which can show you what’s happening here:
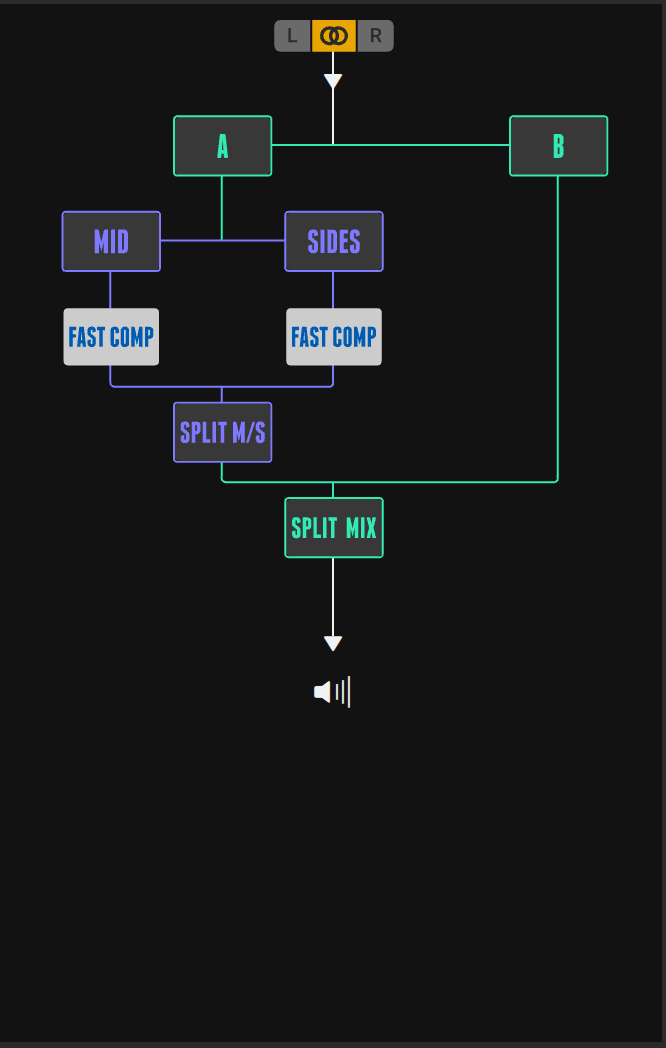
Signal flow chart
I’m compressing the drums in mid/side mode to get a widening effect that can (sometimes) sound fantastic on rock drums. However, I’m only using about 10% of this compressed signal, as it’s very aggressive, and has been known to smear the stereo image too much.
All of the processing we’ve applied thus far adds up to this:
It’s a beefier sound, with a lot more character.
Please note: in a real mix, I would never do this. Do not solo your drums and slap compressors on every bit of the kit unless you have a reason for it. This is merely an exercise to show off the compressors in Guitar Rig Pro.
3. Create dynamic soundscapes with modifiers
Guitar Rig offers a plethora of effects that can shape the character and movement of any sound. Flangers, phasers, choruses, doublers, ring modulators, and unclassifiable modules—there’s more than I can list here.
These modulators can help provide movement and flare to any drab sound. But they only tell part of the story. You see, Guitar Rig offers a way of controlling parameters that I find truly amazing. You can use LFOs, envelopes, sequencers, and input signals to change the operation of every control of every module in Guitar Rig. This is done with the modifiers.
Long before DAWs like Bitwig were but a gleam in their creators’ eyes, Guitar Rig had its modifier modules, which offer insane manipulation over any part of any module’s controls.
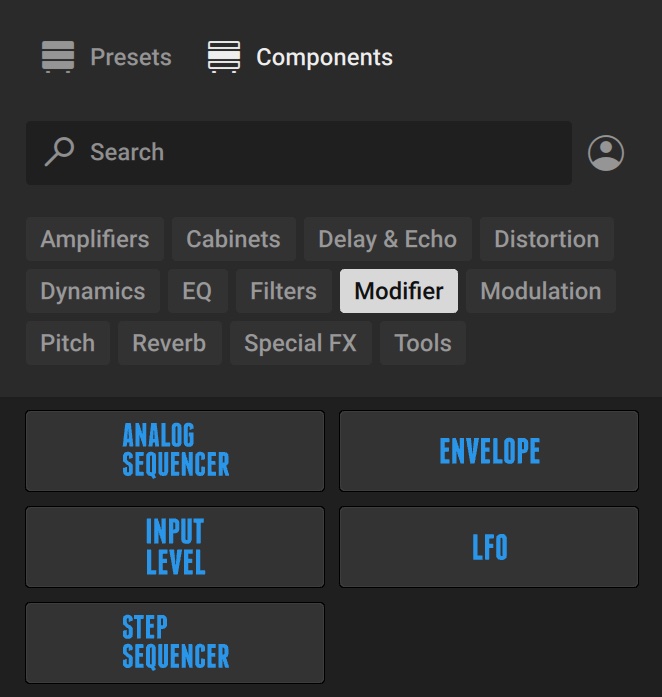
Let me show off modifiers rather simply.
First, I’ll play the following example.
It’s just a quirky drag-and-drop MIDI groove with sampled drums, a synth bass, and an electric piano.
Let me draw your attention, however, to a little tom loop in the background.
This element is a bit boring. We’re going to make it more interesting with Guitar Rig modifiers. First, let’s take a look at this module right here.

Split Mix
It’s called Split Mix, and it splits the signal path in twain. In path A, you can put one set of modules, in path B you can put another, and you can blend between the two.
You can also situate path A anywhere in the stereo field, and do the same with Path B.
With Split Mix and a modifier, you can create your own bespoke auto-panner. Here’s how:
In this screenshot, I’ve not inserted any effects on Path A or Path B, but I’ve panned A all the way left and B all the way right. Now, I’ll add a modifier. This one is called LFO.

LFO modifier
This LFO can be assigned to influence the blend parameter in Split Mix—effectively creating an auto-panner that can bounce around the stereo spectrum in a variety of ways.
I’ll show you how you can use this modifier simply in the following video. First we’ll cover creating an auto-panner, and then we’ll get into weirder effects.
4. Re-amp that DI bass
Now we move closer to Guitar Rig’s intended purpose: the re-amplification of electronic stringed instruments. Let’s start with the bass.
Here’s an example of a DI bass part. Sounds fine, but it’s missing the feel of a real bass amp, as well as the room a bass amp is recorded in. This is why we often re-amp the bass.
Guitar Rig has two great bass amps, but my personal favorite is Bass Invader. Here’s a setting I could choose for this part.
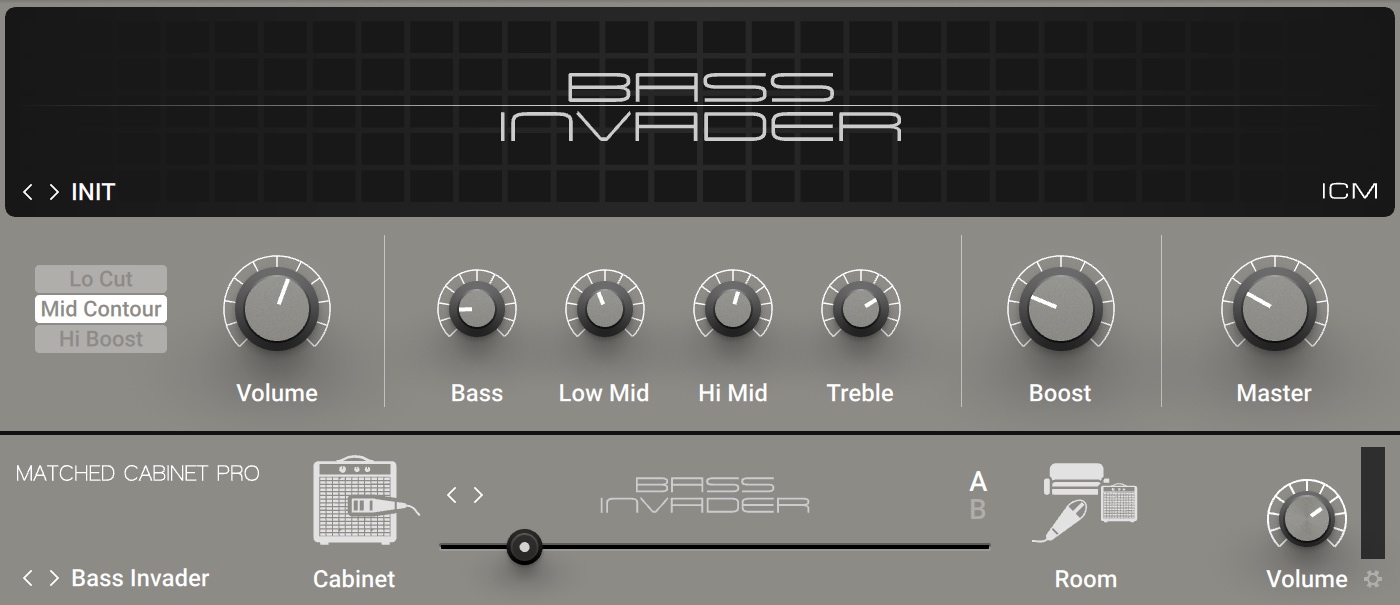
Bass Invader in Guitar Rig
This is a good bass tone. But I like to take it further. I’ve found that this bass tone works quite well when paired with the sound of an emulated Ampeg B15 amplifier. So here’s what I do:
- Mult the bass to two tracks.
- Put Guitar Rig Bass Invader on track 1, favoring the room in the cab emulation slider.
- Put on my favorite Ampeg recreation on the other track.
- Flip the polarity on one of the tracks (usually this is required to preserve the low end)
- Blend the two together.
In this case, the whole process sounds like this.
This is a more growling, mid-forward tone. It has more girth and is far less clean. But it tends to work in rock tracks.
5. Don’t sleep on those guitar tones
I can’t write so extensively about Guitar Rig without showing off what it actually sounds like on guitars, can I? Because this is nominally a plug-in for guitar re-amplification. And yes, it works quite well for that: simply track your guitars DI and use Guitar Rig Pro to achieve realistic and vivacious recreations of many amped tones.
I’ll return to the song “Strawberry Moon” for my examples. This is the lead guitar part, played by Rileyann direct into an audio interface.
I was provided with a reference—a guitar emulation by way of Logic Pro’s stock offerings.
The song, however, demanded more. So, I came up with the following crazy chain in Guitar Rig.

Guitar Rig processing
We have a fuzz pedal emulation, and then I’m running an amp model right into another—in series.
Folks, it shouldn’t work. It should be too heavy handed. But this is what it sounds like.
And of course, here’s how it sits in the mix.
Pretty epic. But everyone knows that a true measure of any guitar amp emulation is how it handles cleaner tones—tones that need to sound big and warm, but not obviously broken up. Those are harder to fake.
So, again, here’s a DI guitar, this one from a different song.
And here it is with an emulation from Guitar Rig Pro.

Plex guitar amplifier in Guitar Rig
That is a lovely, barely-overdriven sound for sure.
Go forth and mix with Guitar Rig Pro
By now you should be a convert to all the things that Guitar Rig can do for you. So what are you waiting for? Demo it now, or pick up a copy a la carte or part of the Music Production Suite. That’s all for now. Happy mixing!