Creating a Cohesive Sampler Drum Kit
The drum kit you create for your track has a massive impact on its overall success. In this article, we discuss how to create a cohesive sampler drum kit.
This article references previous versions of Ozone. Learn about the latest Ozone and its powerful new features like Master Rebalance, Low End Focus, and improved Tonal Balance Control by clicking here.
Drums are a major aspect of most tracks, dictating groove and pulse. The sonic character of the drum kit can also dictate a track’s overall aesthetic. This is huge, as the “wrong” drum kit could cause listeners to interpret your track differently than you’d like.
In this article, we discuss considerations when creating a drum track, from sample choice to mixing. We cover how to find drums that already work together, ways to put the drums in the same space, and mixing techniques to glue your drums together.
Sample choice
Sample choice is arguably the most important step when creating a custom drum kit.
There are plenty of effects and mixing techniques you can use to drastically change a drum sample. But as the saying goes, “you can’t polish a turd.” It’s better to minimize additional processing and find samples that work well right off the bat.
This starts with using high-quality samples. Regardless of whether your drum samples make sense together or not, the drum kit as a whole won’t sound impressive with subpar samples. Packs from well-known sample distributors or sample databases like Splice Sounds are great resources to find these high-quality samples

Splice Sounds main browser
Assuming you have access to good samples, the next step is to choose samples that work well together. It’s perfectly normal to have a sample or two that stand out as unique from the rest of the kit, like an interesting snare or percussion sound. However, in order to create a specific and consistent aesthetic for the track, the majority of your drum samples should work together.
A good place to start is with one of the main drum sounds—the kick or snare / clap. These drum sounds will provide much of the sonic character for your drum kit, and in turn your track. Having these decided will make choosing hat, cymbal, and percussion samples much easier.
I personally like starting with the snare / clap. The backbeat often stands out in the groove, so the sonic character of the snare / clap is usually quite audible in the final mix. Therefore, it can have a bigger impact on the track’s final sonic aesthetic than the kick will.
How to choose a kick
With the snare chosen, the kick is next. You can take one of two approaches here:
- Pick a kick drum of the same “world” as the snare / clap that you’ve chosen. This creates a solid base for the kit, which will already start to sound like a coherent group of samples. From here, you can fill out the rest of the kit with hats, cymbals, and percussion that reference the theme you’re going with.
- Pick a more subtle, round kick that allows the snare to stand out. While this won’t create the cohesiveness of the previous approach, this will allow for an interesting snare sound in your track. This can be a cool effect, almost making the snare another instrument. The remaining samples can be chosen according to the kick or the snare, depending on what the track calls for.
Keep in mind that the same approaches are available for selecting a snare sample if you pick the kick first.
So we know the drum samples should sonically “work together,” but how do we accomplish this?
A good test is to find one or two adjectives that can describe every sample in the kit. If you’re able to do this, your drum kit has a common characteristic and should sound pretty coherent. Some common descriptors might be “lo-fi,” “acoustic,” “synthesized,” etc. You can even pick an adjective before building the kit for some direction when choosing samples.
This keyword method is especially useful when using a sample database to find new drum samples for a track. Many of these databases have filters you can use to find the samples you’re looking for.
Splice Sounds has a powerful filtering system, making it extremely easy to find samples with a particular characteristic. If I wanted to create an acoustic kit, I could search for acoustic drums or individually search for acoustic kicks, snares, etc.

Splice sample search
One of the main obstacles when creating a drum kit is that the process can feel somewhat abstract, like it’s detached from actually making music. Drum samples will never be isolated in the full track, so it’s tough to know whether they really work together or not if you’re just clicking through samples.
Any method that allows you to hear the drum samples played together in a groove is much better.
If you’re in the search for new samples and you’re using Splice Sounds, there’s an easy way to do this. The Beat Maker on Splice allows you to drag samples into an eight-cell sampler. This can be played with your computer keyboard, or you can set up a groove with the built-in sequencer. By playing a simple drum groove, you should be able to tell whether you have the right samples or not.
Color-coded session

Splice Beat Maker
Note: This has the added benefit of only buying the samples you need.
If you’re working with samples you already have, it can be helpful to use a blank sampler when choosing drum samples. Set up a MIDI clip to play a drum groove (either a simple one or the groove for your track) and drag samples in and out. Again, within the context of a groove, choosing samples should be easier.

MIDI drum groove
You can also play this sampler with a MIDI controller or your computer keyboard for added flexibility with the groove. This can be better than simply setting up a MIDI clip, as some samples naturally sound better within different grooves.
Some samplers (like Ableton’s Sampler plug-in) have a selector feature that makes sample choice a breeze. Multiple samples can be stored on each individual cell, with a “Selector” parameter that scans through the samples on each cell.

Ableton Sampler selector
With a sampler like this, it’s quite easy to create a “Selector Kit." One Sampler instrument can be dedicated to each drum sound—kick, snare, hat, cymbal, tom, percs, etc. Within each Sampler, up to 128 samples can be stored. We could put 128 kicks in the kick Sampler, 128 snares in the snare Sampler, and so on.
The selector parameter can be mapped to a Macro knob, which in turn can be controlled with a MIDI controller. Each Sampler is placed in one cell of a Drum Rack (Ableton’s grid-based drum sampler), allowing us to play the full kit and browse samples without even looking at the screen.
Mixing considerations
Through sample choice alone, the drum kit should already be about 80–90% finished. However, there are effects and mixing techniques we can use to take it across the finish line.
The end goal is to have the drum kit sound like one element, rather than a series of individual drum sounds. To do this, we have to give the drum kit itself its own sound.
We can do just that with some subtle processing of the drums bus / group. All drum sounds will receive the same processing, therefore coexisting in the same space and making the “drums” seem more like one entity in the mix.
Any type of processing done to the full drum kit will theoretically do this, but there are a couple standard effects that work well.
Compression
One of the more common routes is drum bus compression. “Bus compression” in general is the concept of compressing several sounds, or even the whole mix, with one compressor.
Compressing the drum bus—the drum kit as a whole—is a tried and tested method to “glue” the drum samples together.
Compressors, whether analog or digital, often differ in their circuitry or algorithms respectively. These differences give each compressor a “sound,” based on how the compressor reacts over time and potential subtle harmonic distortion that enhances certain areas of the frequency spectrum.
In drum bus compression, the entire drum kit is compressed when the overall drum signal crosses the compressor threshold. The consistent sound of the compression will create a sonic similarity between the drum samples, making the kit sound more cohesive.
Any compressor can theoretically be used for bus compression, but we want to make sure we have the ability to preserve the transients of our drum samples. With the right settings, compression can completely destroy transients.
Many modern software compressors have variable attack and release times, like those found in Neutron and Ozone. These compressors offer the most flexibility, as you can set these parameters to allow transients through.
We can set a long attack time to allow transients through. After the transient activates the compressor, it will take longer for the signal to be compressed. This prevents transients from being squashed.
We can also set a short attack time. In this instance however, we can set a longer release time so that compression lasts longer. This will cause the tail of each drum hit to be compressed a bit as well. With both the transient and tail being compressed, the transient will still sound relatively punchy, and the sense of a transient will be mostly preserved.
Some compressors––especially analog compressors and their software emulations––may have built-in or semi-variable attack and release times. Some of these compressors, due to their design, can be great for drum bus compression. Three varieties worth mentioning are VCA, FET, and Variable Mu compressors.
VCA compressors
VCA, or Voltage-Controlled Amplifier compressors make up the majority of compressor designs. Even hardware and software VCA compressors without variable attack and release times are great for controlling transients, taming them without distorting. This is possible due to very fast attack and release times. The SSL, API, and Neve bus compressors are all famous examples.
FET compressors
FET, or Field Effect Transistor compressors are very similar to VCA compressors. They also function on a fast attack and release time, but add a bit of warmth to transients. A VCA compressor will preserve the timbre of the drum kit more than an FET compressor will, but this change in timbre can sometimes be another nice way to process the drums similarly. One of the legendary compressors in modern music, the UA 1176, is an FET compressor.
Variable Mu compressors
Variable Mu compressors make good drum bus compressors. In contrast to VCA and FET compressors, Variable Mu compressors have slower attack and release times. This makes them good at sustained compression, which round out drum transients and glue the samples together. The Fairchild 670 and Manley Variable Mu compressors are classic examples.
The overall benefit of bus compression led to the creation of dedicated bus compressors. Bus compressors like the Stereo Bus Compressor found on SSL consoles (especially those found on the 4000B series, first launched in 1978) have become legendary pieces of audio engineering equipment.
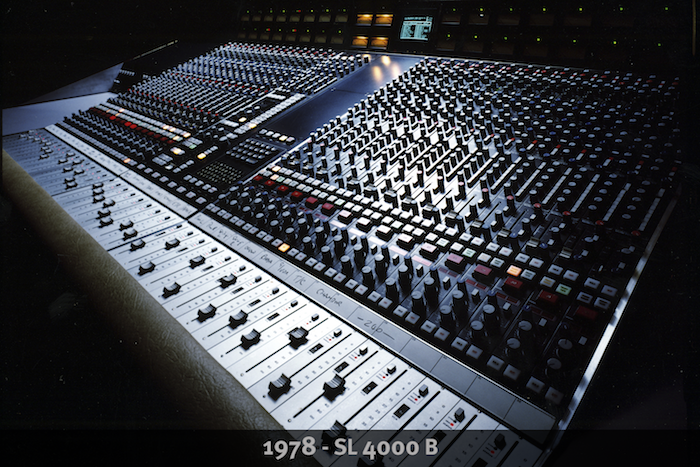
SSL stereo bus compressor
The SSL compressor has even been modeled for several software bus compressors. SSL released its own emulation. Cytomic’s The Glue and Ableton’s native Glue Compressor (created in conjunction with Cytomic) were also modeled after the SSL Stereo Bus Compressor.
When in doubt, anything categorized as a dedicated bus compressor is a good option. But keep in mind that compressors “have a sound,” which should be a factor in deciding which compressor to use, how to set it, and whether to use it as an insert effect or in parallel.
Drum bus compression can be done as either an insert effect or in parallel.
As an insert effect, compression can be done at any intensity, from subtle to harsh. We’ll demonstrate with this dry acoustic drum loop:
Subtle settings, in which only the loudest drum sounds like kick and snare cross the threshold and activate compression, can create a pumping, almost sidechaining effect (listen to the hats and cymbals). Compression occurs to the entire kit when these louder sounds occur. The pumping effect can be adjusted with the compressor release time.
A moderate setting, in which all sounds cross the threshold and activate compression, will have a gluing effect. The sound of the compression affects each sample, causing the kit to sound more like one element. With make-up gain, the quieter sounds in the kit will also become a bit louder.
Keep in mind that louder drum sounds (kick and snare) will naturally hit the threshold before hats and percussion. If we drop the threshold low enough so hats and percussion activate the compressor, the kick and snare may be getting compressed so hard that distortion occurs.
If this is happening, your kick and snare are probably too loud to begin with. You can still maintain a wide level difference between kick / snare and hats / percussion, just try to find a balance that allows all elements to be compressed without distortion.
Harsh settings, in which the threshold is dropped low enough to heavily compress all sound, can be used for effect. This makes the kit sound aggressive, almost destroyed.
Based on the attack setting, the compressor may let transients through while squashing everything else. This makes the drums sound “clicky,” and can cause a pumping effect based on the release setting.
Parallel compression on a drum bus provides a nice happy-medium. The drum kit can be sent to a return channel, where it is compressed and mixed with the dry signal. This has the added benefit of being able to EQ the compressed drums as well.
Since we’ll be mixing the compressed signal with the original signal, we can use harsh compression settings on the return channel. Using the return channel’s level fader, we can find the perfect balance between the hyper-compressed drums and the dry original drums.
This allows us to add the sound of the compression (to make the kit more coherent) without jeopardizing our drum kit’s dynamic range.
Here are the dry drums, the overly compressed return channel, and the mix of the two:
Reverb
Another effect that we can use is reverb.
We use reverb to put a sound in a certain “physical” space. In nature, this space applies to all sounds that happen within it. This is the reason that, in a full mix, we usually only use one or two reverb spaces. More than that can cause elements in the mix to sound disjointed, like they’re physically in different spaces.
We can use this same philosophy to glue our drums together. If we process all the drums with one reverb, the whole kit will sound like it is in one space.
By all means, you have the option to use a big space with a long reverb decay. However, long reverb on the drums is a very specific sound, and might not be the one that you’re looking for.
In most projects, a reverb with a short decay time (< 1 sec.) can help to make the kit seem more coherent without being too distracting. This short reverb is the natural effect that we hear in live drum recordings due to the drum booth.
By adding a short reverb to our sample-based drum kit, we essentially emulate the sound of a drum booth. We can lower the level of this reverb so that it isn’t distracting in the mix, while still giving the kit a consistent space.
Whether you choose to have a long or short reverb on the drums, it’s best to use a return channel to introduce the reverb. This will preserve the dry signal of the drums while giving you more flexibility to process the reverb signal.
You have the option to send the entire kit at one send level or send each individual drum sample at different amounts. Either way, be sure to EQ the reverb. Low and low-mid reverb from the kick can potentially add mud, and should be handled according to the rest of the mix.
In the following audio examples, I’ve demonstrated poor sample choice and created a drum kit of mismatched samples. I have a strange resonant stomp as my kick, a relatively acoustic snare, a lo-fi hip-hop hi-hat, an udu percussion hit, and a percussion loop. Without any reverb, this sounds like a mess of drum sounds:
Using reverb, I can place these samples in a similar space. I chose to create a small room using a short reverb delay time (only 329 ms), using an EQ to get rid of muddy reverb signal.
I place this reverb on a return track and send the entire drum group to it. I then used the return track’s level fader to balance the reverb signal with the dry drums. This adds enough reverb signal to put samples in one space without being too distracting.
Conclusion
With a bit of intention, smart sample choice, and a few mixing techniques, your drum kit can become more of a consistent sound palette than a mess of drum sounds. This will help to define and solidify the overall aesthetic of your tracks, and will make your drums sound more professional and interesting.