What’s the Difference between Compression and Limiting?
Should you use a compressor or a limiter? Learn the difference between audio compression and limiting, how each tool affects the dynamic range of audio signals, and when to use them in mixing and mastering.
Audio compression and limiting are used to achieve a polished sound. But what exactly is the difference between compression and limiting, and when should you use them in music production?
Every person on the planet seems to have their own definition of a limiter. It always starts the same way, with the engineer in question saying something like, “a limiter is just a compressor with a really high ratio.” Next comes the part where everyone disagrees: some engineers say a ratio higher than 10:1 is limiting. Others take the ratio way higher (20:1, 100:1, infinity:1). Others still bring time-constants into the definition.
In this article we’ll explore the compressor vs. limiter debate and look at the best scenarios of when to use each tool. And as we explore these differences, it’s essential to keep this in mind: the difference between a compressor and a limiter lies in what you’re intending to do with them.
Follow along with this article using iZotope


Neutron


Ozone Advanced
What’s the difference between a compressor and a limiter?
A compressor is used for shaping dynamic range of a signal by attenuating the loud parts and boosting the quiet parts, while a limiter is designed to catch peaks, prevent audio clipping, and preserve sonic integrity.
Let's expand on compressor vs. limiter a bir more: When a compressor shapes the dynamic range of a performance, it often colors the sound while doing so (though not always). A limiter is designed to keep a signal from overwhelming the last part of the audio signal chain. Usually a limiter tries to avoid coloring the sound.
This was true in the 1950s, and it’s true today; take a look at the GUI (Graphical User Interface) of any modern plug-in, and you’ll see what I mean:
A compressor’s GUI, with all its varied controls, is suited toward shaping the dynamic range of the performance. A modern limiter’s GUI, with its considerably different control set, is geared for shaving off peaks as transparently as possible.
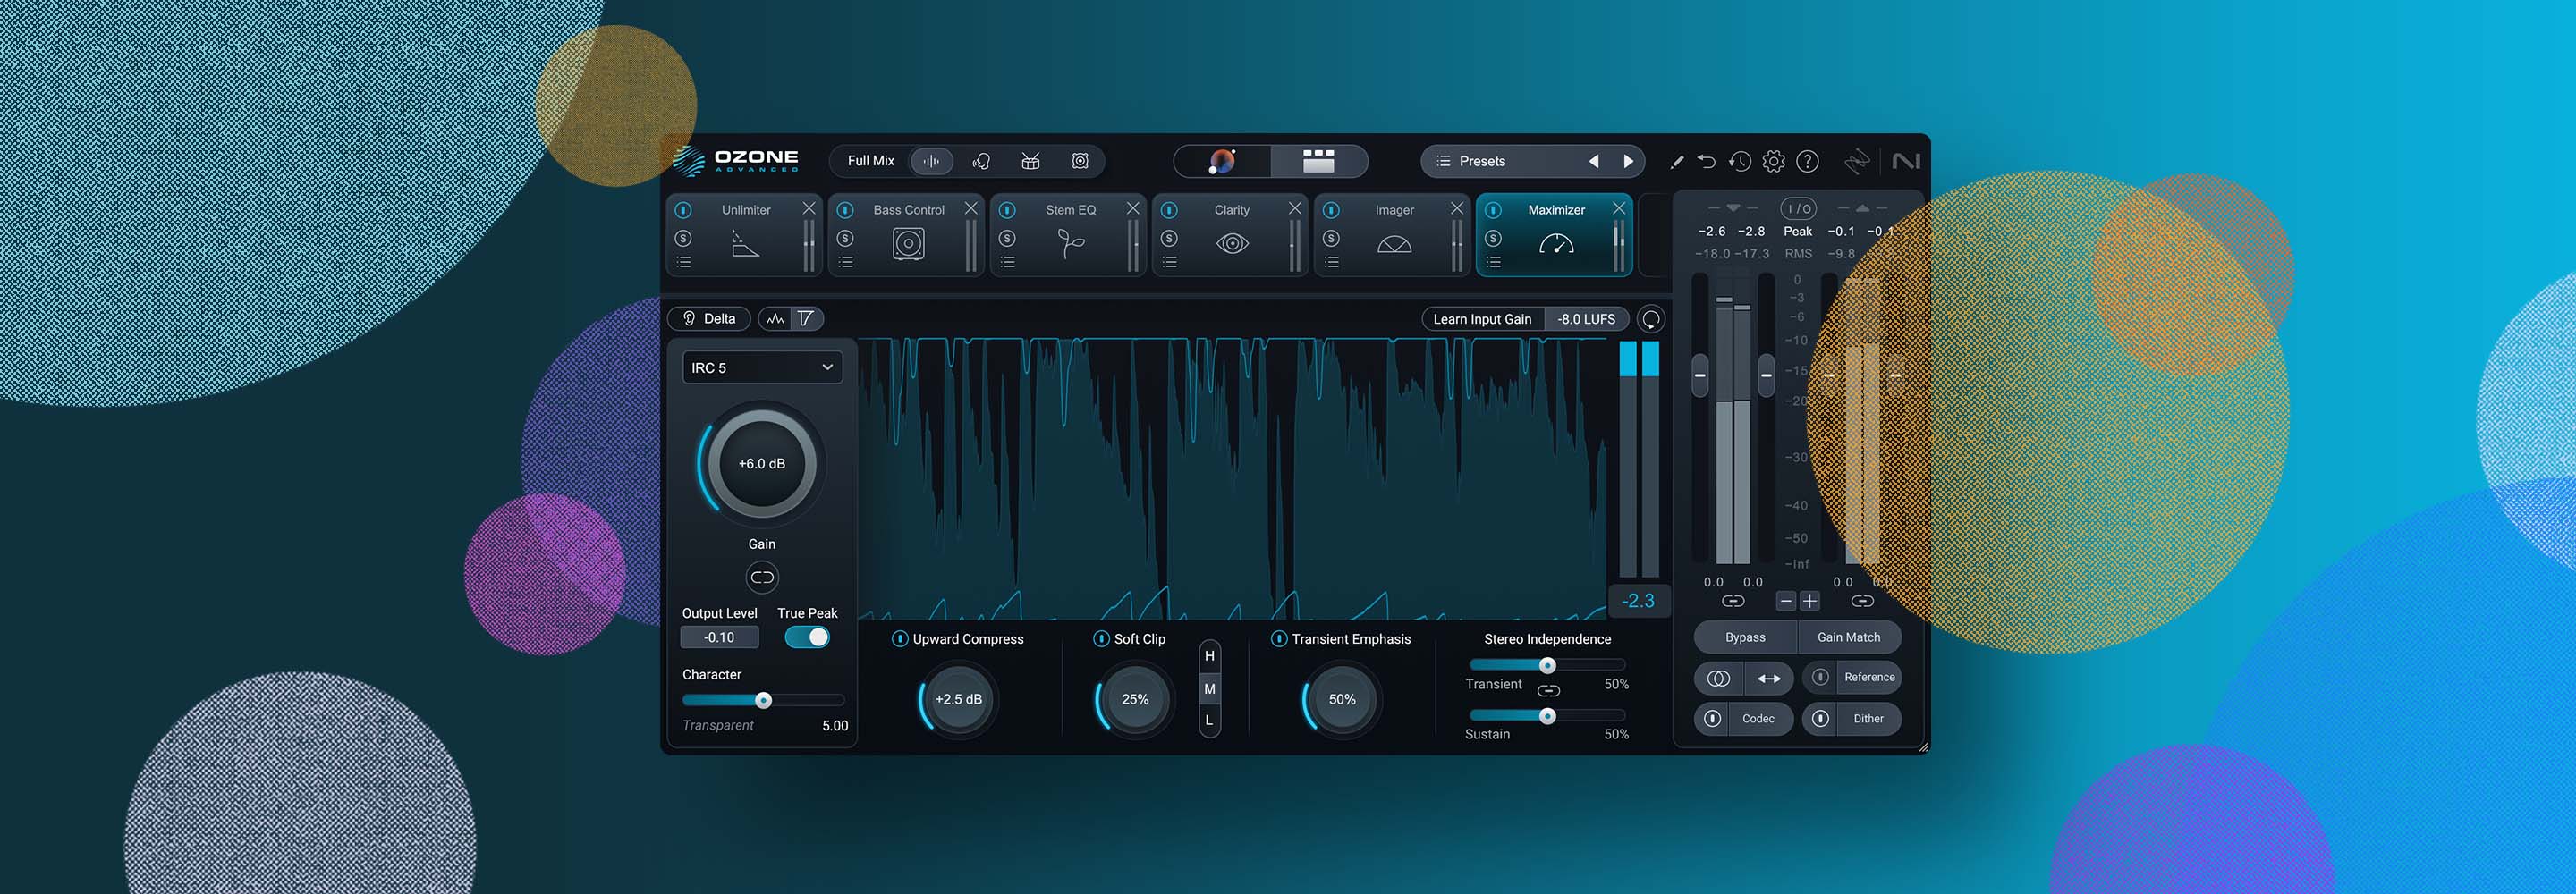
There is an exception to this rule: Ozone 10 has a Vintage Limiter that is designed to add nostalgic color and character to your master, if you so desire.
So to sum up: yes, a limiter is technically a compressor with a high ratio. But this misses the entire point of why we might use one over the other.
Compressors and limiters: a history
Both limiters and compressors restrict the dynamic range of material—so yes, a limiter is a kind of compressor, in much the same way that a square is a kind of rectangle.
But if you dive into the history of limiters and compressors, you’ll quickly find a palpable difference between the two. I’ll condense the history (though I do encourage you to look into it for yourself):
The dynamics-control processor has its roots in modern warfare—specifically in the need for communication across distances: in the age of radio, it was vital that no part of a broadcast message become unintelligible. You’d need a compressor to even the signal.
Dynamics control was also important in deciphering an enemy’s coded transmission. Say you intercepted a radio signal from the foe, but there was too much background noise to really hear it. You’d need a device to compress the signal into intelligibility before it could be decoded.
Against this backdrop, dynamics-control devices were invented, given names like compressor, limiter, leveler, leveling amplifier, and more.
Fast-forward to peacetime, and we no longer need these devices for war. They’re quite useful to the entertainment sector, so companies pivot and start marketing to studios and networks and the like.
Now we begin to see a delineation of intent. The word “compressor” starts to attach itself to operations involving smoothing dynamics of a voice or instrument. The classic example would be TV presenters trailing off in volume at the end of sentences. Such diction isn’t good for communicating the news, so we bring in a compressor to restrict their dynamic range.
In these postwar times, terms like “broadcast limiter” and “peak limiter” also start popping up. They apply to different scenarios, usually around regulations of systems and standards: these devices are on hand to make sure the material doesn’t overwhelm, distort, or clip the ultimate delivery system (i.e., radio and network television).
To be sure, I’m giving you a very compressed and limited history on the subject. But it illustrates the most helpful way to differentiate compressors and limiters:
The practical difference doesn’t come down to ratios. It comes down to intention.
How does a compressor work?
Using a compressor starts with an input signal—it could be bass, drums, guitar, voice, etc. We call it the input signal because it feeds the input of the compressor.
When this input signal exceeds a certain level, which we call the threshold, the level of the signal is compelled to decrease in amplitude.

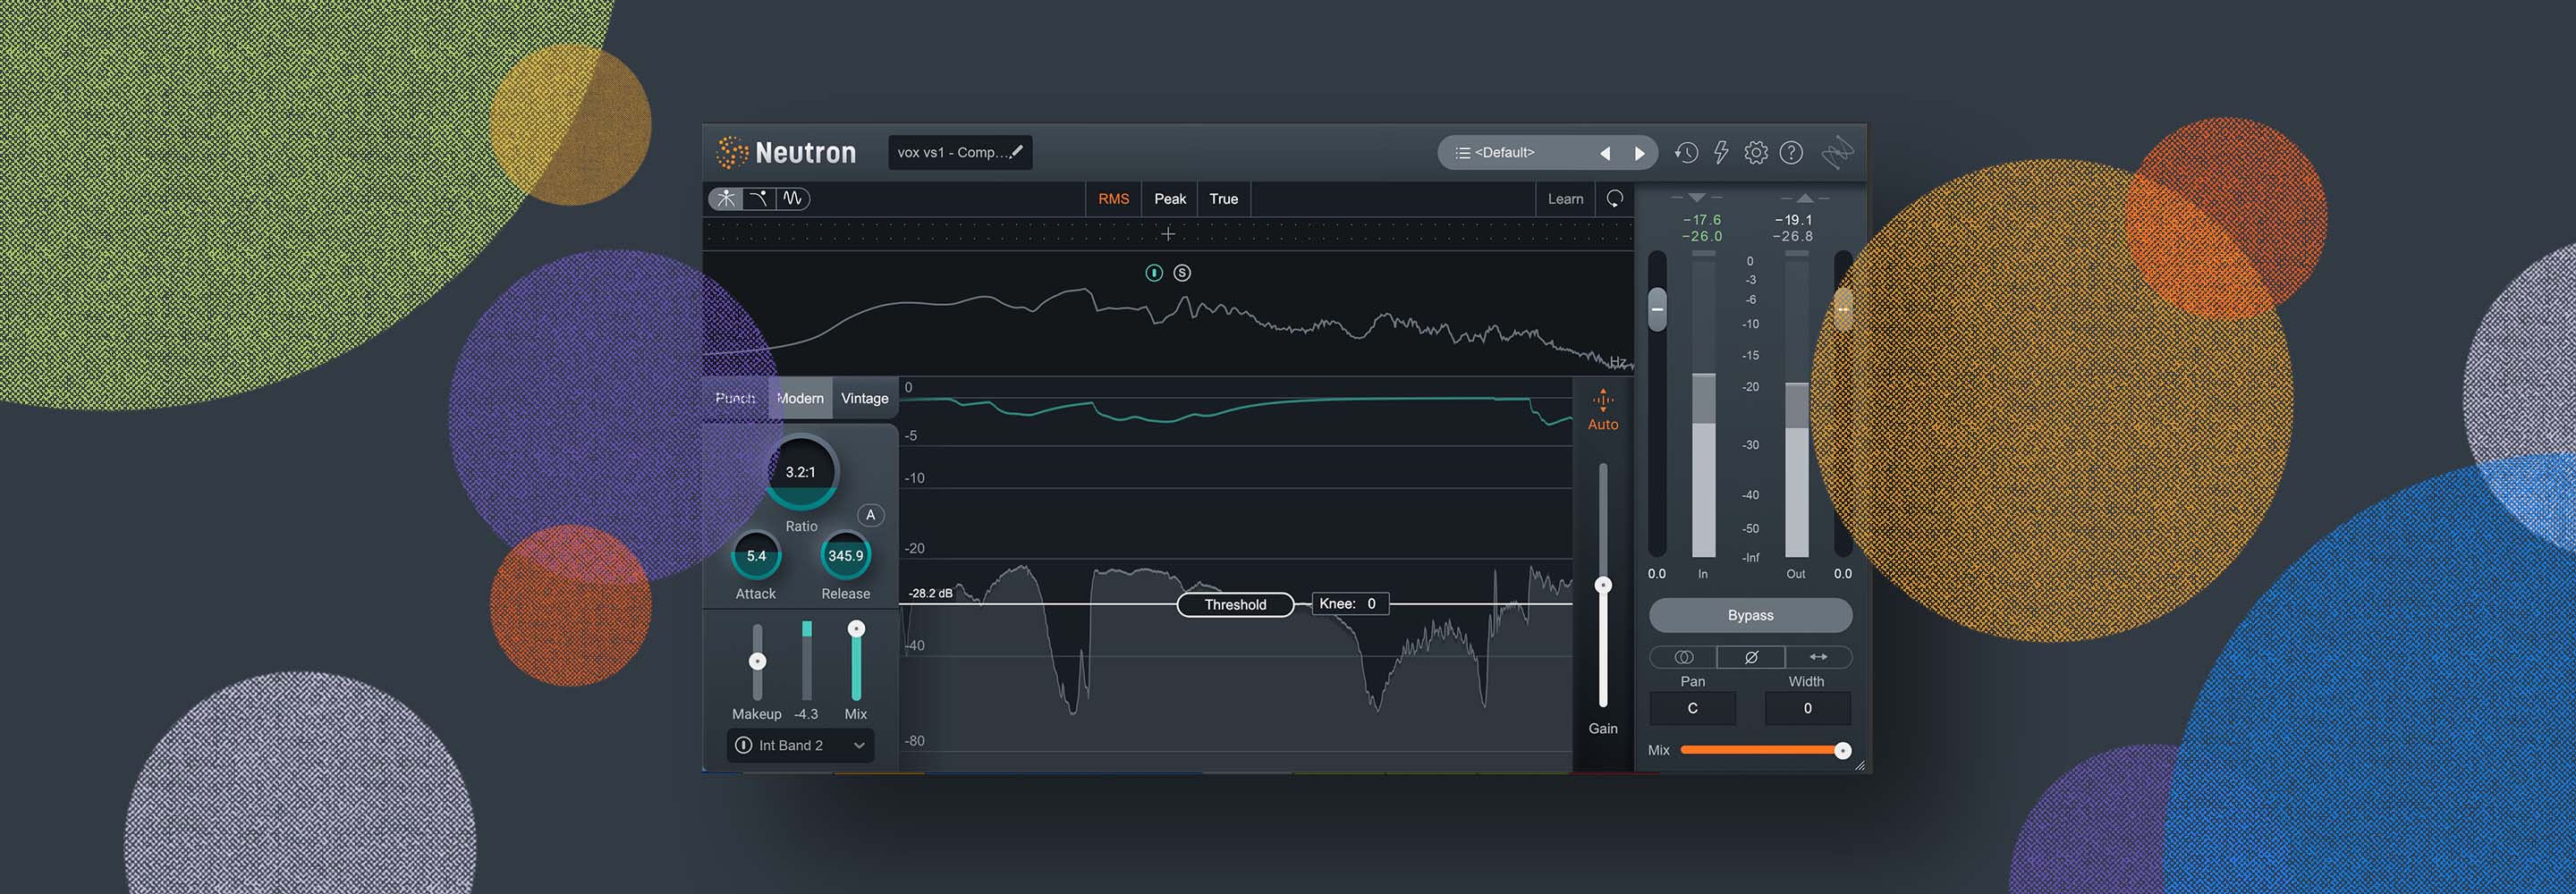
Threshold setting in Neutron compressor
The amount of gain reduction is generally dictated by the ratio control. Say your ratio is 2:1. This means that for every 2 decibels the input signal goes above the threshold, the corresponding output signal will only go up 1 decibel.
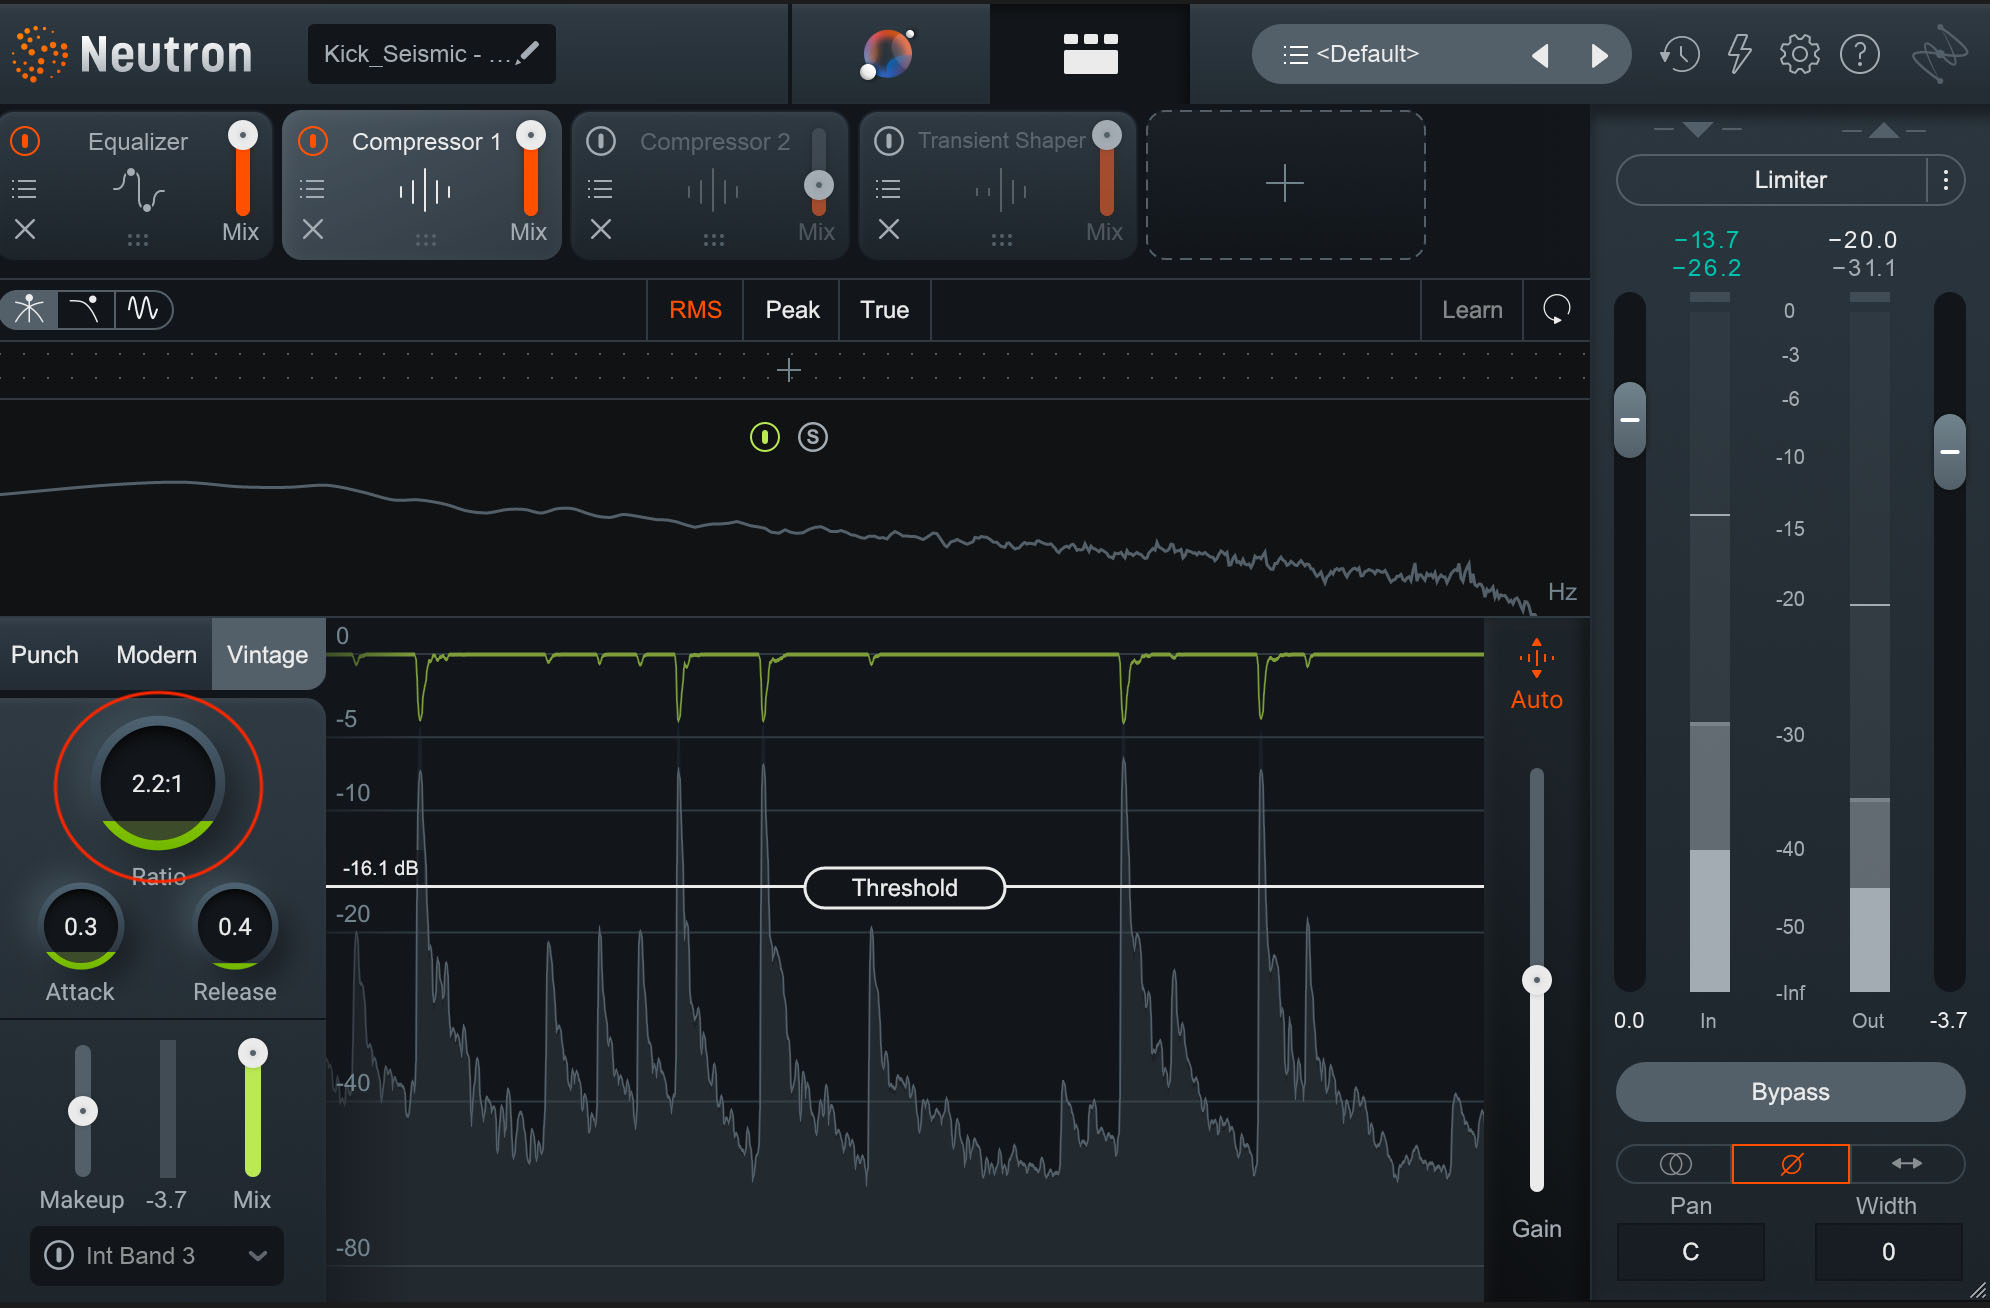
Ratio settings in Neutron compressor
The higher the ratio, the heavier the compression:
4:1 takes an input signal 4 dB over the threshold and raises it only 1 dB.
6:1 takes an input signal 6 dB over the threshold gets you a 1 dB boost.
And so on.
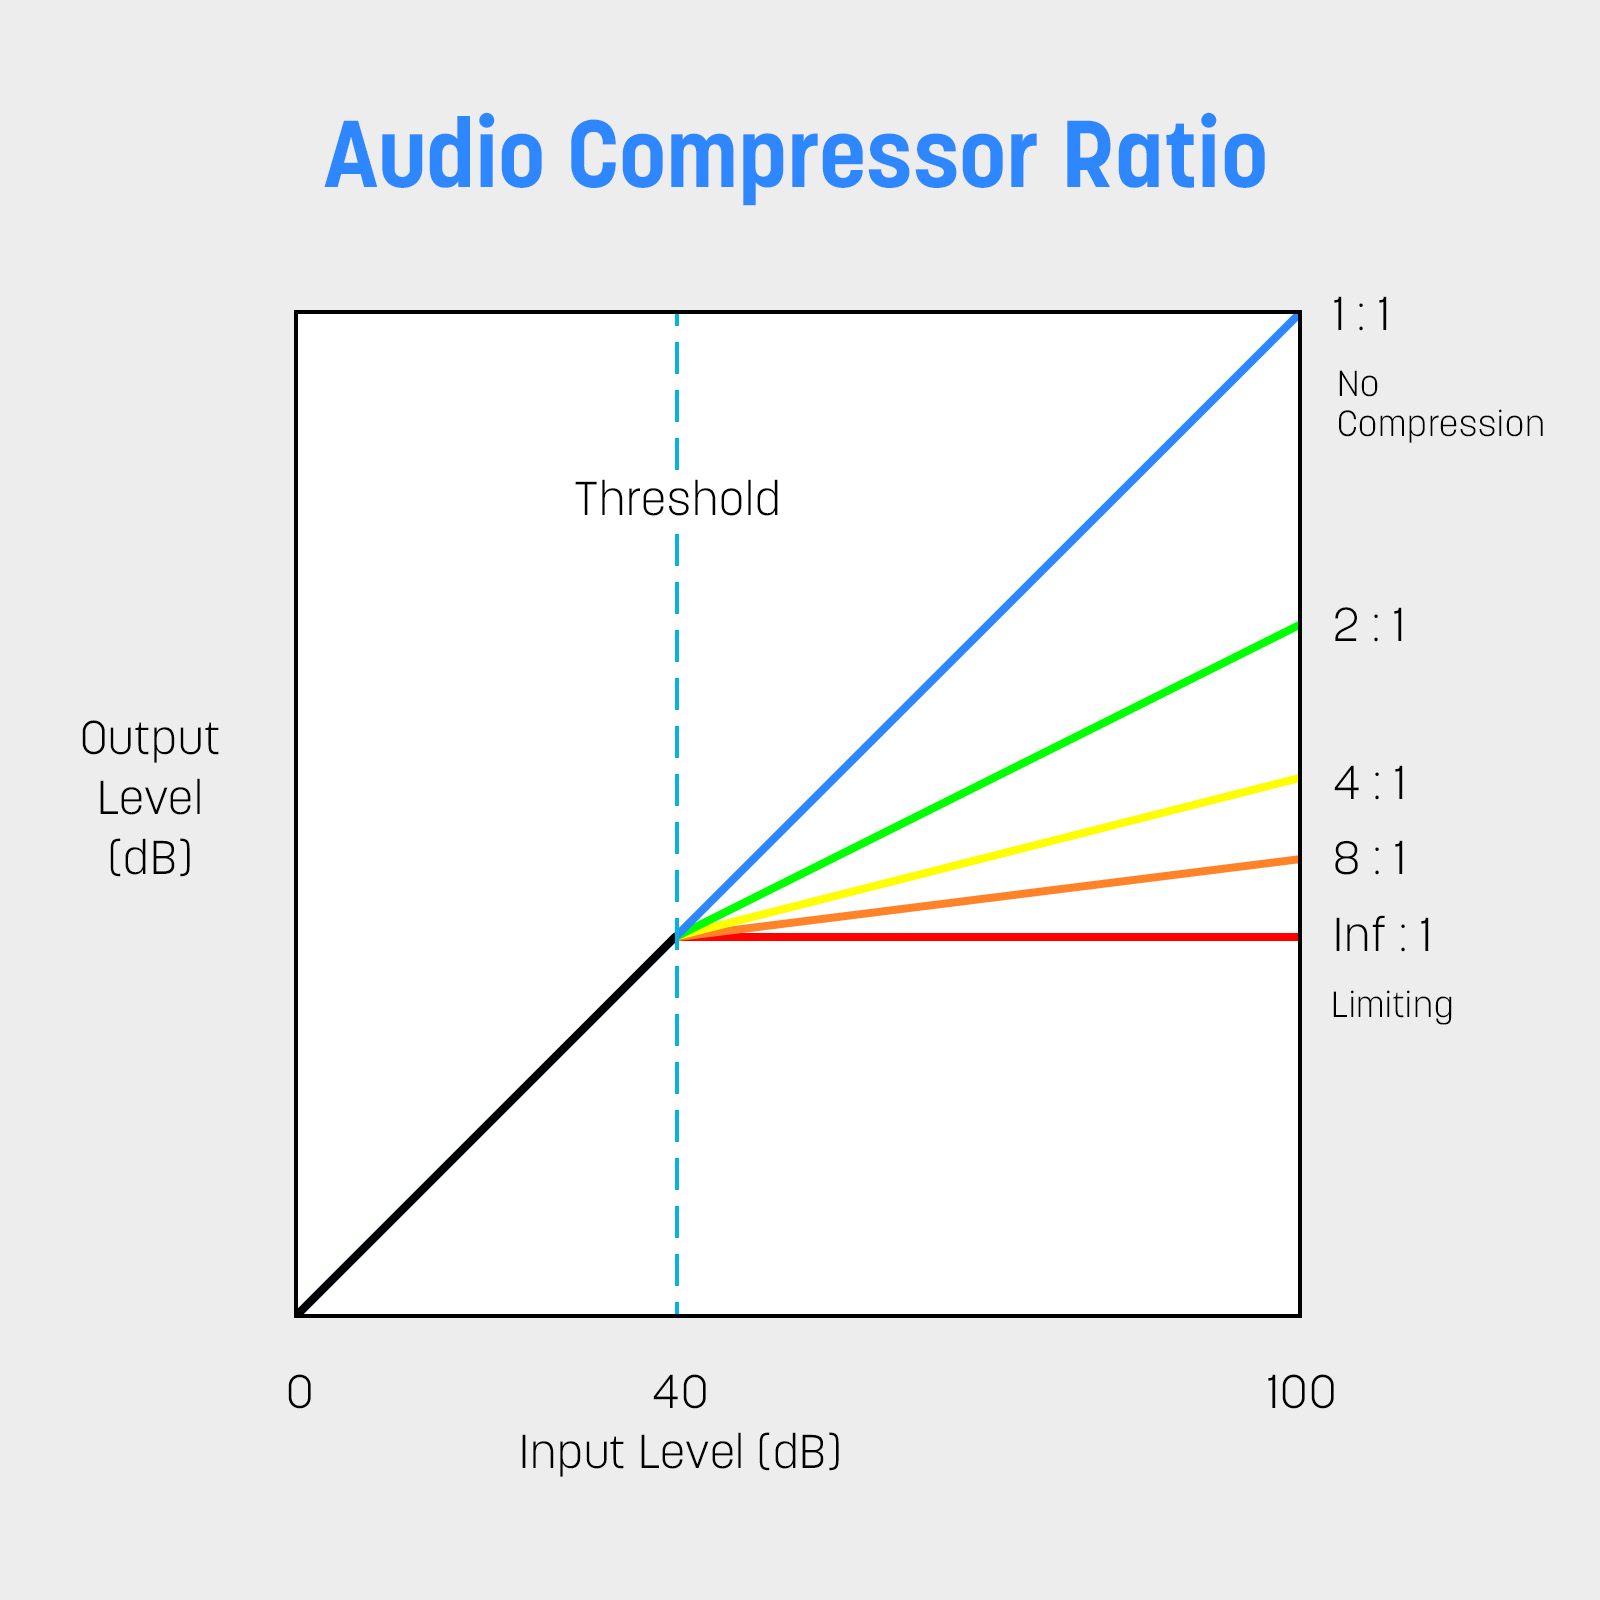
Audio compressor ratio
Compressors often have attack and release controls. These are speeds, dictating how quickly the input signal will be trounced by the ratio, and how quickly the signal will lighten up once it’s down below the threshold again. A fast attack means the compressor will full gain-reduction more quickly; a slow attack means it will take more time to get there. Same goes for the release: a fast release means the gain reduction will cease quickly after the signal goes below the threshold; a slow release will take more time.
Many compressors have other controls, such as the knee. The knee defines how sharply the circuit goes into compression right around the vital threshold point.
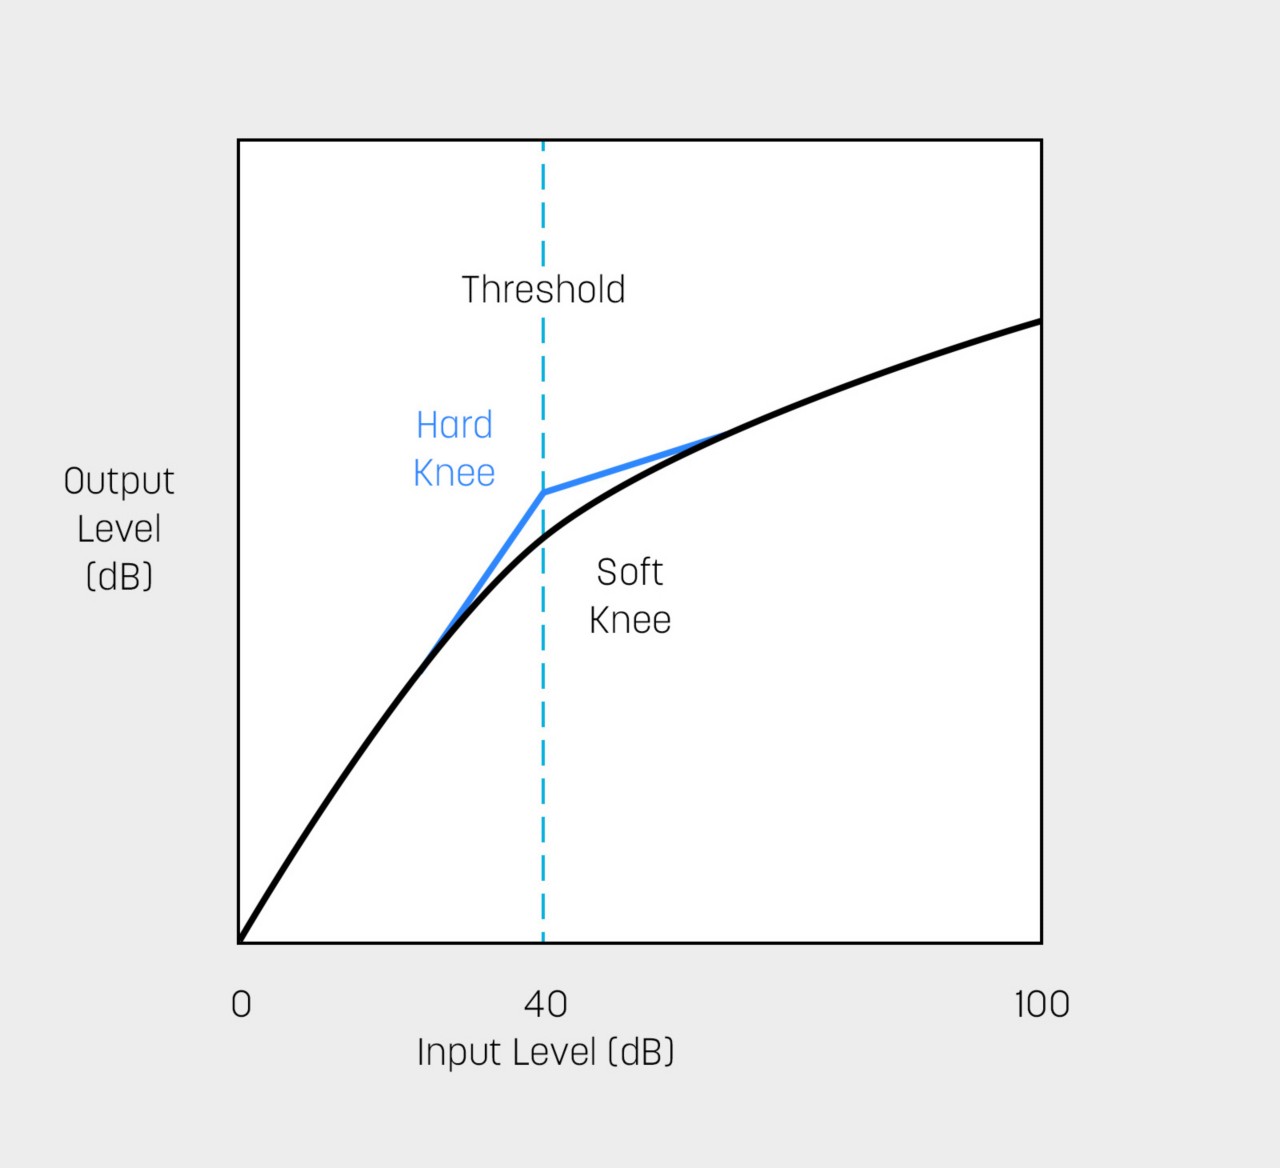
Hard knee vs. a soft knee
It’s a little confusing, so I tend to think of the knee as a sort of attack parameter for my ratio control, even if that isn’t technically correct; a higher knee means the ratio will be lower for longer, before the signal rises above the threshold area—its envelope will be different. Basically, the knee is yet another control for fine-tuning how quickly the compressor will go into full-force as the signal crosses the threshold.
The sidechain detector is another interesting facet of the compressor, as it allows for frequency-based control.
You can think of the sidechain detector as a muted copy of the input signal telling the compressor what to do. You don’t hear it, but it’s calling the shots. Why would you ever need such a thing?
Say you’re compressing a drum bus with a really, really loud kick. I can tell you two things without even listening to the signal: the kick is going to have a ton of low-end information, and the kick is going to heavily dictate when the compressor launches into action.
Here’s a drum bus before and after we've heavily compressed it:
Drum Bus Compression
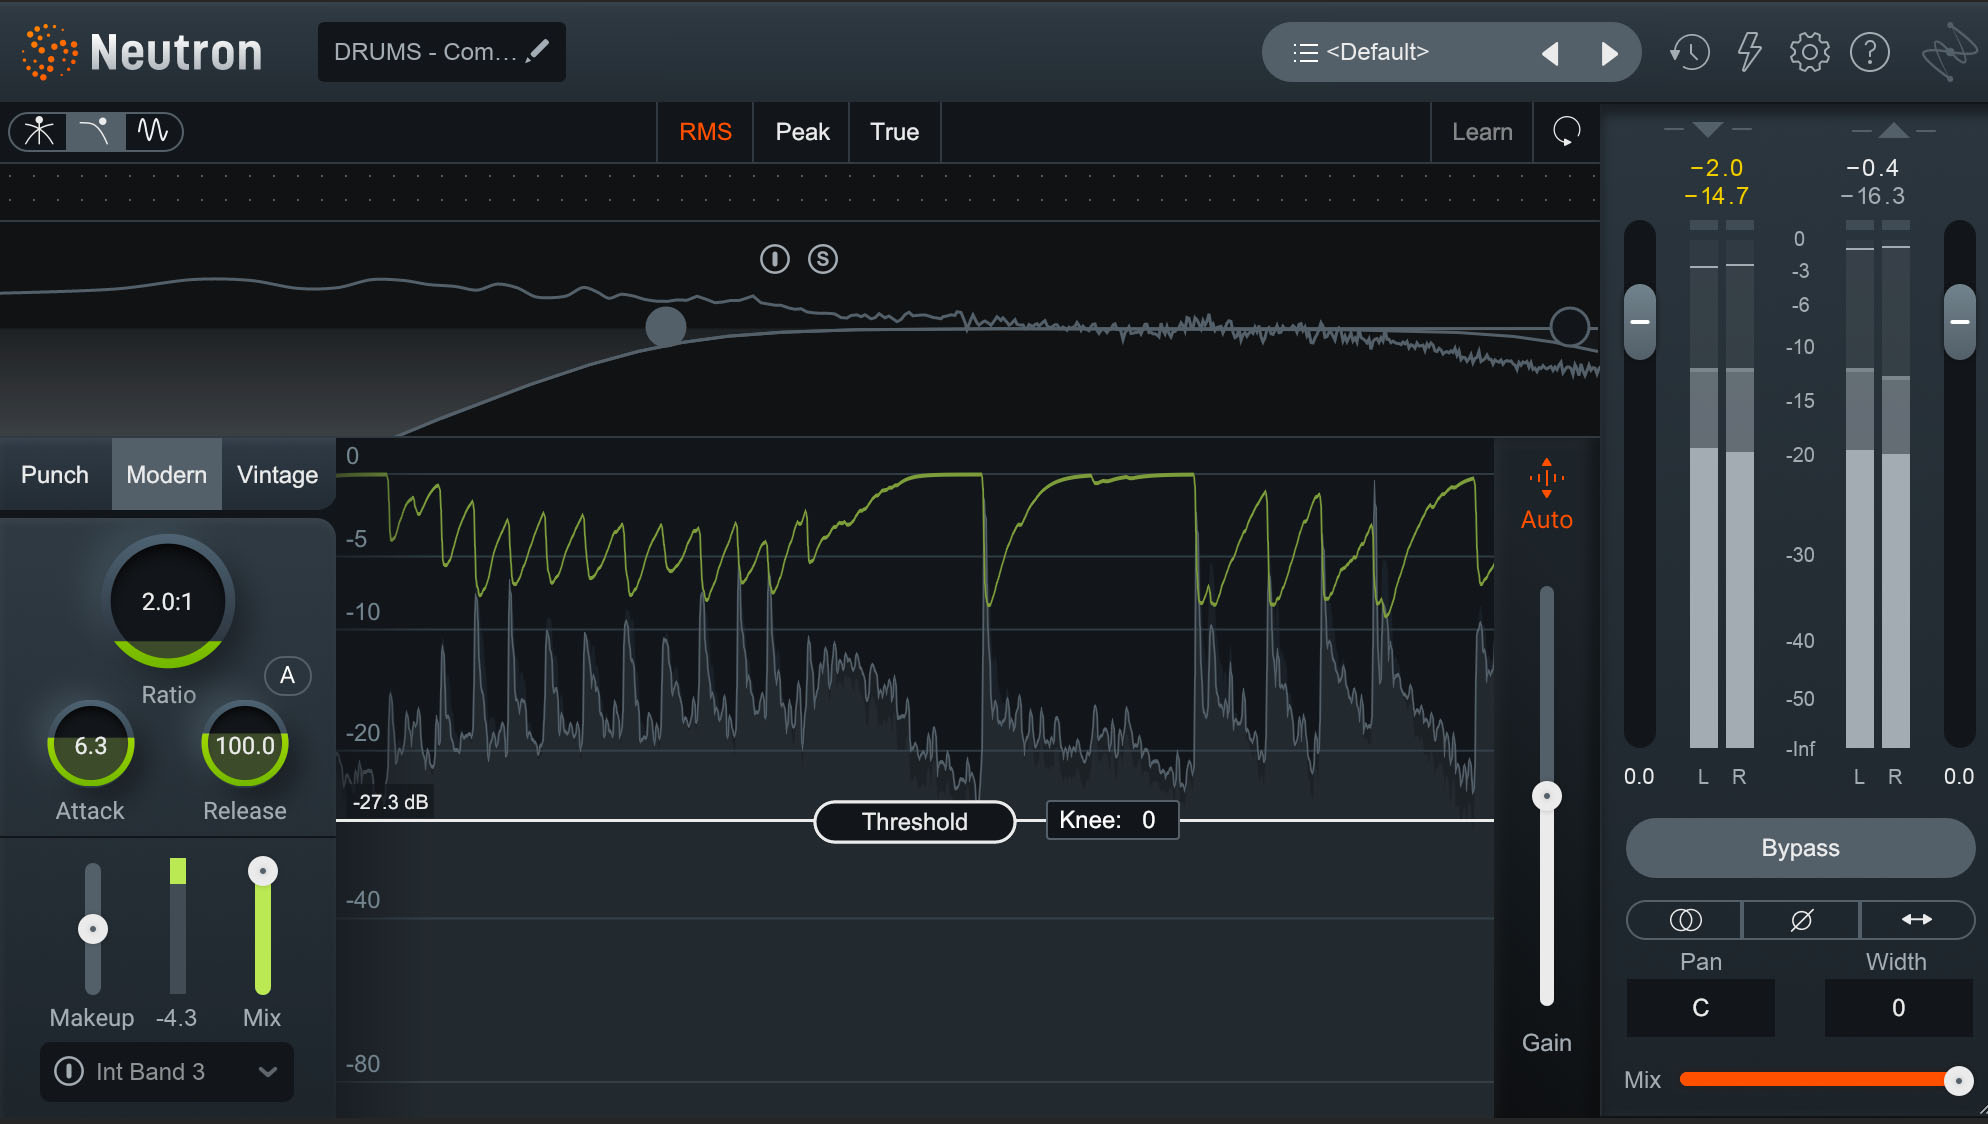
Compressor working too hard in Neutron
It sounds much smaller now, and way more processed, largely because the kick is having an undue effect on the compressor.
We can fix this problem by filtering the signal in the sidechain detector.
A compressor like Neutron gives you this ability, like so:

Sidechain detector in iZotope Neutron
Cut the bass out of the sidechain signal, and the compressor won’t react as much to the kick’s overwhelming low end, even if we leave the other settings alone.
Drum Bus Compression, Sidechain Filtered
To sum it all up: all of the controls we’ve listed, from threshold to sidechain detector, allow you to shape the compression into something that perfectly suits your goals when it comes to compression. You’ll notice all these controls are found on the compressor in Neutron. You’ll find many of them in Nectar as well.
However, most of them are conspicuously missing from Ozone’s limiting modules—the Maximizer and the Vintage Limiter. We’ll get into why that is when we talk about limiters in depth.
When to use a compressor
We use a compressor for many reasons. If we want to preserve the intelligibility of a vocal performance, a compressor comes very well in handy. If we want to enhance the groove of a bass part, a compressor can help us do that too. We can add smack and punch to drums, changing the shape of the transient response of each drum hit with a compressor. We can glue multiple parts together, giving them a feeling of coherence with just a little dab of compression. And, due to the way certain iconic vintage typologies work, we can add quite a bit of color too, all with compression.
We have tons of articles about when to use compression. I’ve linked some of them above. But this article is all about binary choices. You need to know when to use a compressor and when to use a limiter. To answer that question in the simplest way, it’s best I begin to cover limiters now.
How does a limiter work?
A limiter works preserving the integrity of the sound while keeping it from clipping the final device in the chain—be it analog or digital.
Like a compressor, a limiter clamps down on a signal above a given threshold.
Limiters can come with attack and release controls, but not all of them do. As a matter of fact, their GUIs can appear vastly different depending on the brand. I’ll show you what I mean. Here’s Ozone’s Maximizer:

Ozone limiter used on the drums
And here’s another limiter from Brainworx:

bx_limiter True Peak from Brainworx
Some controls are the same, others are completely different.
Attack isn’t found on either of these limiters, neither is a ratio control or a knee; the GUI expects different things from you, especially when compared to a compressor.
Some limiters, like Ozone, threshold sliders dictating the level at which gain reduction begins; these sliders also affect the corresponding output gain, and as such, the signal seems louder the more you pull these sliders down. Other limiters, such as the bx_limiter above, ditch the threshold control altogether, showing you only input gain.
The mechanics of your limiter may vary, but the overall tools are the same:
A parameter dictating your highest possible level in dBFS (commonly called the “ceiling”), a control that determines the amount of gain reduction (usually gain or threshold, depending on the company), and some kind of time-constant for the release stage.
Many limiters stereo linking controls, the manipulation of which can have an effect on the width of your mix. Left totally unlinked, both channels will be limited independently, causing one channel or the other to dip in level at various times. This can create an interesting sense of width, because each side of the stereo image is reacting differently to the limiter, drawing the ear in different, less uniform directions. When pushed too far, unlinked limiting can cause the stereo image to wander in distracting and unpleasant ways.
Conversely, you can often opt to link the left and right channels, in which case the louder one, regardless of its stereo placement, will trigger gain reduction across the board. This creates a more uniform stereo image, because you aren’t hearing those variances in the left and right channels. Often degrees of linking are provided, usually in percentages. Your ears will ultimately be the judge of what sounds best here.
The generation of limiters being offered today tend to provide dedicated controls for transient preservation as well. These controls help guide the limiter in the quest to preserve the more punchy, rhythmic elements of your mix, which can frequently feel rounded off or squashed in the limiting process.
When to use a limiter
The main point that limiter vs. compressor presents has to do with the master bus: limiters are ubiquitous at the end of the mastering chain. Limiters are there to catch peaks as the material approaches the digital ceiling (0 dBFS, over which undesirable distortion can occur). They are designed to do this without unduly changing the preceding signal. Preserving the original sound—rather than shaping it—is the name of the game.
Mixers also use limiter for a variety of reasons, such as giving themselves a real-world look at how their work translates at common mastering levels. Sometimes they use limiters on the mix bus to intentionally kneecap the mastering engineer, for its hard to do anything with a limited mix besides change the EQ (though this doesn’t stop bad mastering engineers from trying, in my experience).
Limiters can be used on instrument submixes too, especially if achieving loudness and aggression is a concern at the mix stage.
Heavy metal and EDM mixes come to mind: put a limiter on the drum bus, and you can catch the peaks of those hard and fast transients without negatively impacting the original balance of the drums.
This, in a curious way, gives you the ability to deliver a louder mix. If the drums aren’t spiking a ton of transients—yet sound proudly punchy—you’ll have more room to push the entire mix louder.
Observe a quick, grimy loop I made. There’s no mixing on this, just raw sounds fed into a limiter:
This unmixed loop is coming in around -13 LUFS short term, with 1 dB of gain reduction on the mix bus limiter.
However, if I make submixes out of the drums and bass parts, I can apply a little limiting to these submixes. Now I can push the whole mix 1.8 LU higher without incurring any more limiting on the master bus.

Ozone limiter used on the drums
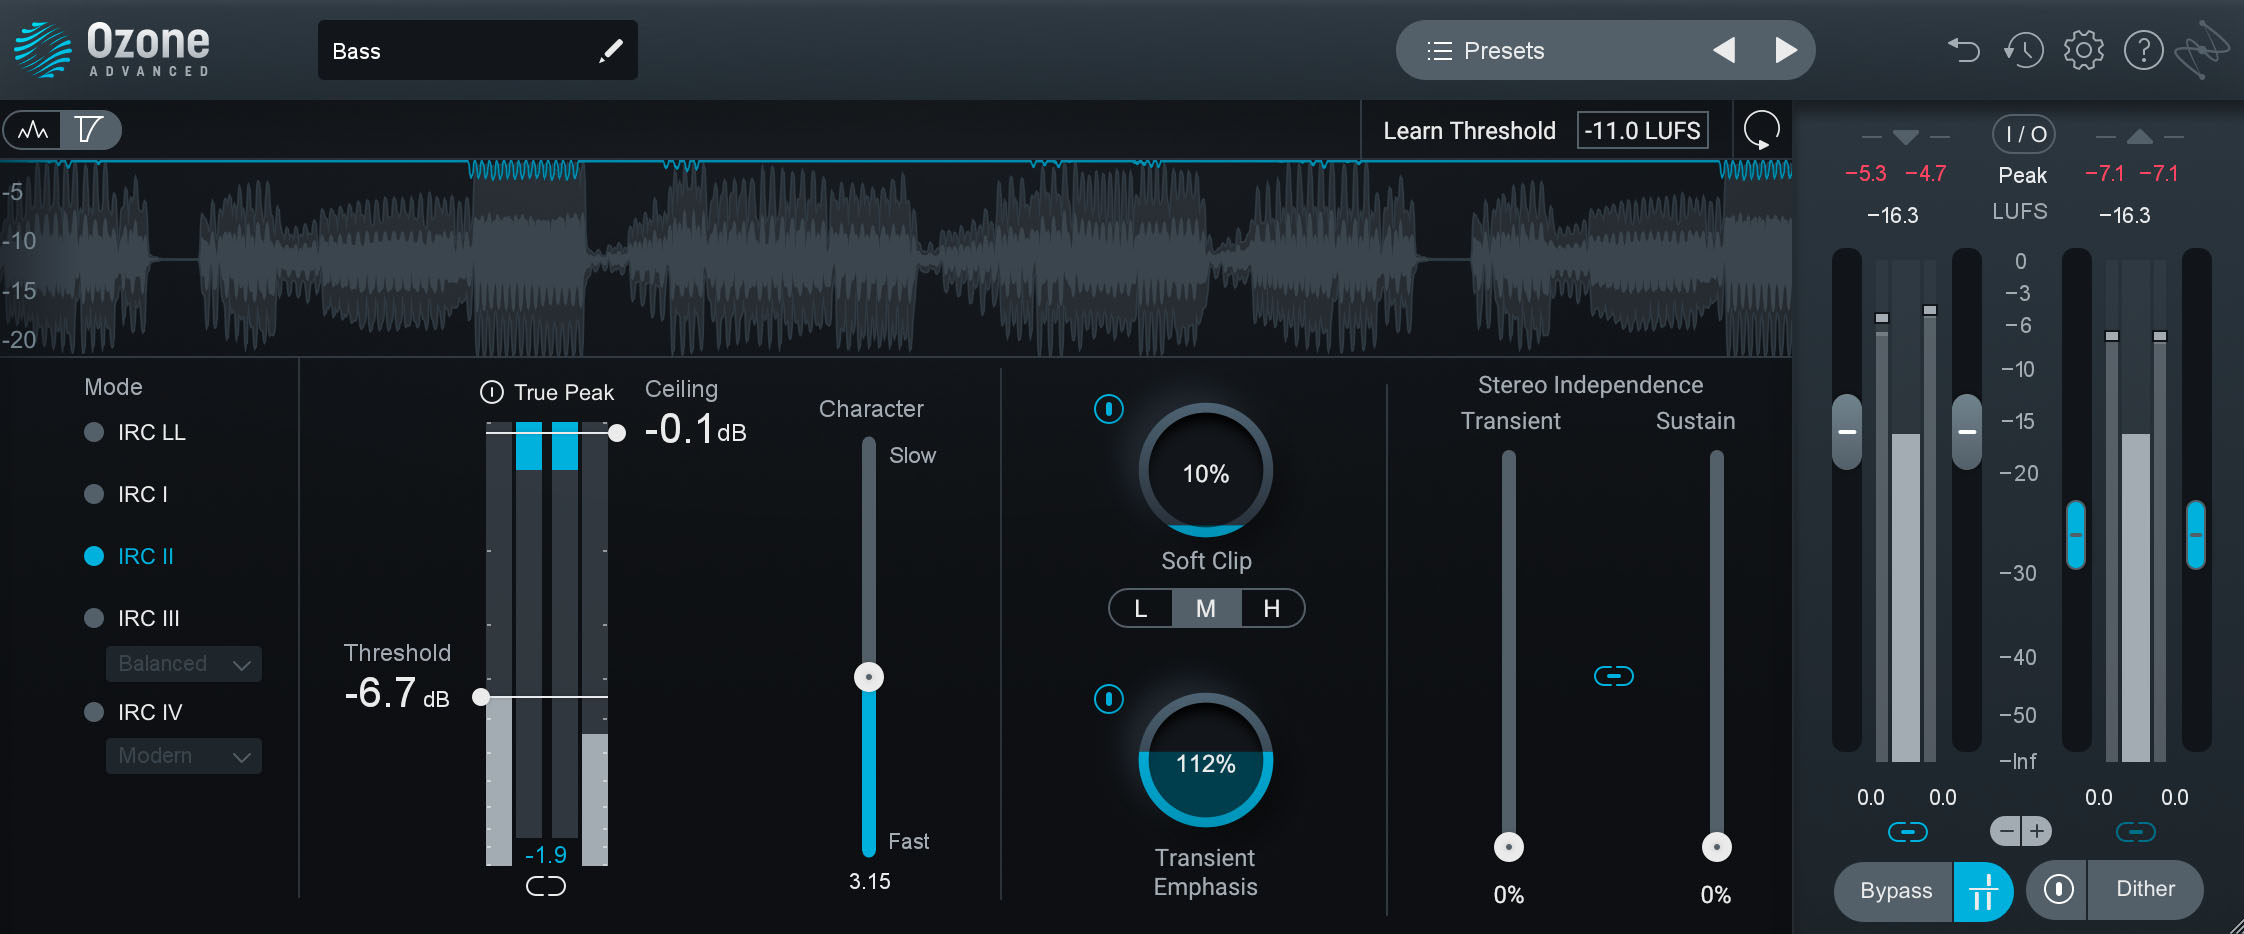
Ozone limiter used on the bass
If anything, the mix sounds a tad cleaner now, because the master limiter is working less hard.
Please note: this is an advanced use of limiters, bordering on dangerous, and you need both experience and a well-treated listening environment to understand how to do this with minimal compromises.
Limiters can occasionally find their way onto individual instrument tracks to catch peaks—particularly on bass and drums in metal subgenres, and sometimes on lead vocals. This is why Neutron and Nectar both sport limiters.
Again, if you’re using limiters for this purpose, please exercise caution!
In all operations, think of a limiter as the bouncer standing just outside the door, keeping the harsh digital overtones outside of the proceedings, and doing so with the force of a brick wall.
Its job is not to add character, but to catch the loudest moments of a source, bringing them down in a way that protects against unwanted distortion, while maintaining the integrity of what’s fed into it.
To put a button on it: Your 1176 emulation is capable of reaching ratios over 10:1. But would you put it on your master bus? Usually not.
Can you use a limiter as a compressor?
If you want to shape the dynamic range of performance, a compressor is the tool for you. If you want to catch quick, errant peaks so as not to eat up headroom on your way to a loud and balanced mix, consider the limiter instead.
It's also important to consider that not all limiters are of the brickwall, mastering-grade variety: colorful limiters do exist in the realm of mixing!
Look at a diode-bridge emulation, and you’ll see it has a limiting mode:
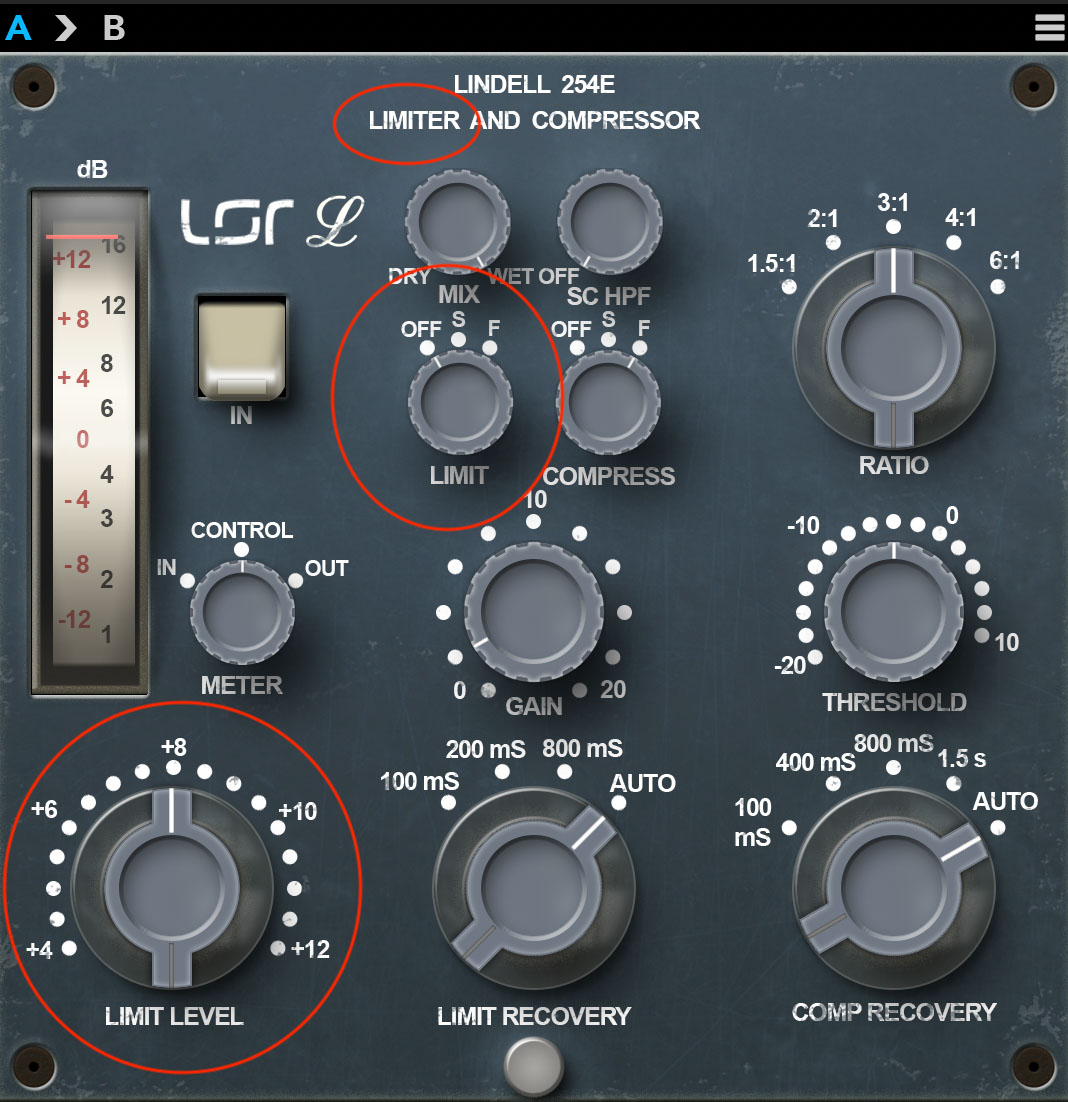
Lindell 254E Limiter and Compressor
The same is true for 2A-style optical compressors and many variable-mu compressors: they have limiter switches, which instantly change the characteristics of the processor.
These are not brickwall limiters. Think of them as color limiters—processors with features approaching limiting, but not without distinct character all their own.
As a rule, color limiters like these are based on hardware. This hardware didn’t set out to be colored.
An example: the manual for the original UREI 1176 compressor deemed its high-ratio performance suitable for catching peaks on stereo program material (i.e., limiting), but engineers quickly found this not to be the case. The compressor had too much of its own sound when pushed into this purpose—but sometimes that sound was quite pleasurable on individual instruments.
All of this is to say, you ought to avoid using brickwall limiters like compressors. Colorful limiters, on the other hand, can be part of your arsenal.
Take your mixes to the limit
We’ve spilled a lot of digital ink to make a simple point: compressors are for shaping dynamic range, and limiters are for catching peaks while preserving sonic integrity. We’ve dove into the history, the control set, and the use-cases. We’ve even spent time talking about the exceptions to the rule (color limiters).
Now, you should have enough knowledge to practice using compressors and limiters with authority. So what are you waiting for? Go out there and take your craft to the limit!
