Cleaner, easier stem separation with Music Rebalance in RX 12
Flawless stem separation is here. Learn how to use the rebuilt Music Rebalance in RX 12 to isolate vocals, bass, and drums for cleaner remixes and better mixes.
Have you ever had a vocal that was too quiet in a mix but didn't have access to the multitrack? Maybe you need to remove an unwanted sound from a percussion loop in a completed master, or perhaps you just want to prep a favorite track for a remix.
The Music Rebalance module in RX 12 is designed to solve these specific problems. Rebuilt with improved neural nets and upgraded offline processing, it offers some of the most transparent source separation technology available. In this guide, you’ll learn how to use Music Rebalance to split stems out of a completed mix, improve your balance with gain adjustments, and bolster individual elements within your production.
What is Music Rebalance?
Music Rebalance is a powerful module in RX 12 that identifies and separates elements of a song – like vocals, bass, percussion, and other instruments – into individual tracks. This allows you to process or relevel them independently even if you don't have the original project file. While Music Rebalance is a standalone tool within the RX application, it is also available as a real-time plugin for use directly in your DAW.
What’s New in RX 12?
Stem separation technology is moving at a lightning pace. To stay ahead, the Music Rebalance module in RX 12 has been significantly improved over previous versions.
- Upgraded neural nets: The underlying machine learning has been retrained for pinpoint stem isolation and fewer artifacts.
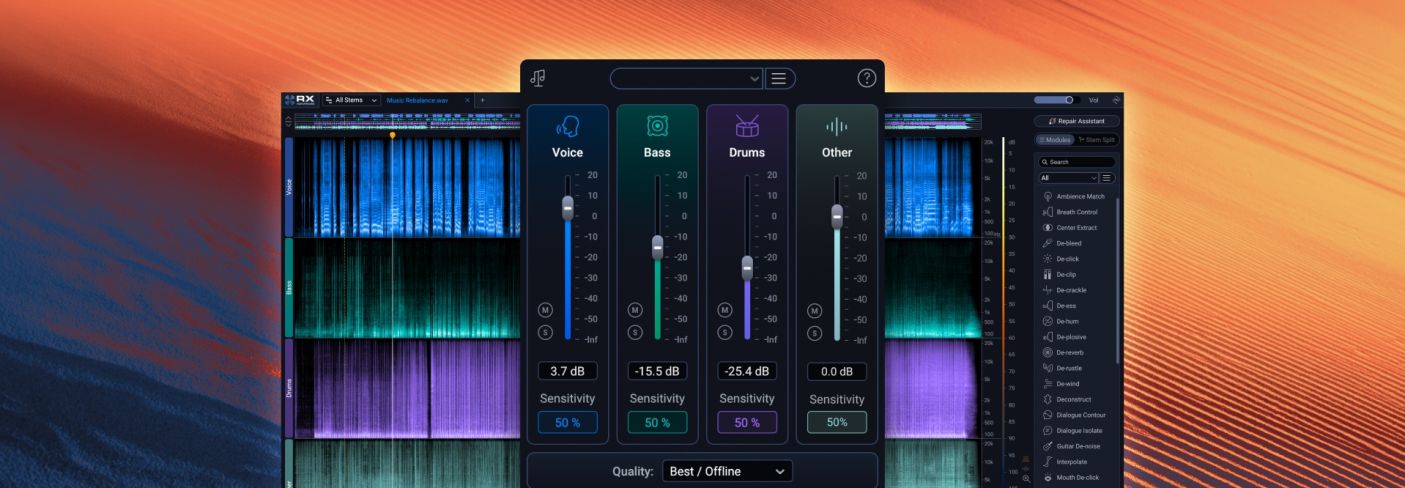
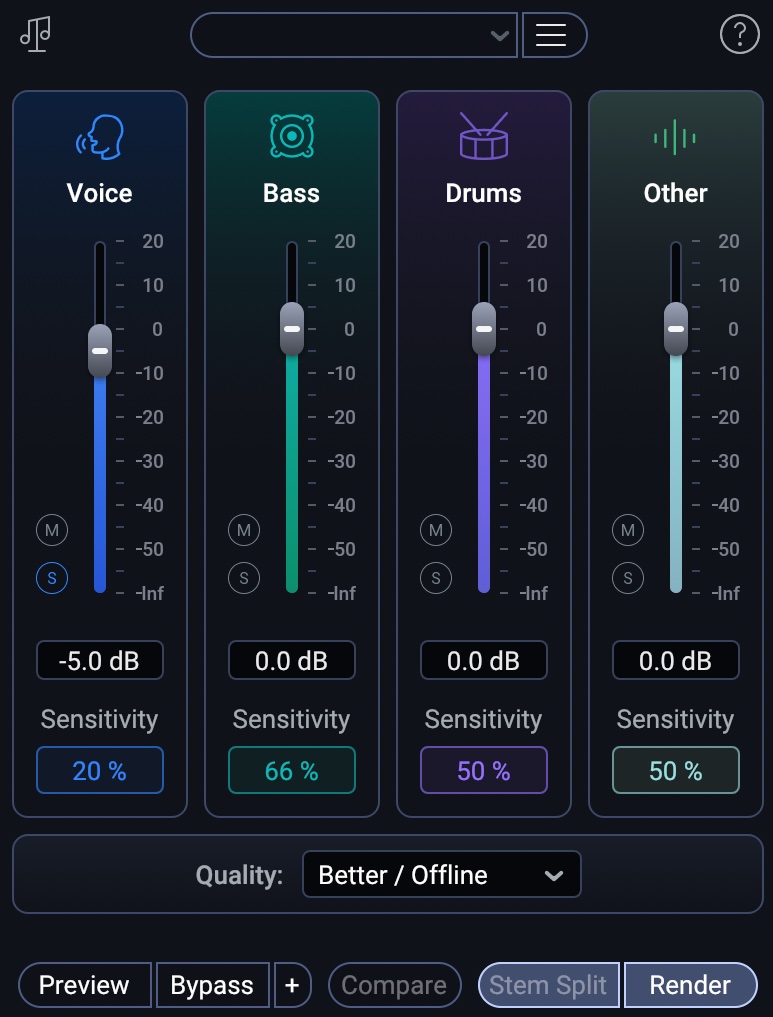
- Streamlined interface: The GUI is now cleaner and easier to read, replacing old sensitivity knobs with clear percentage indicators.
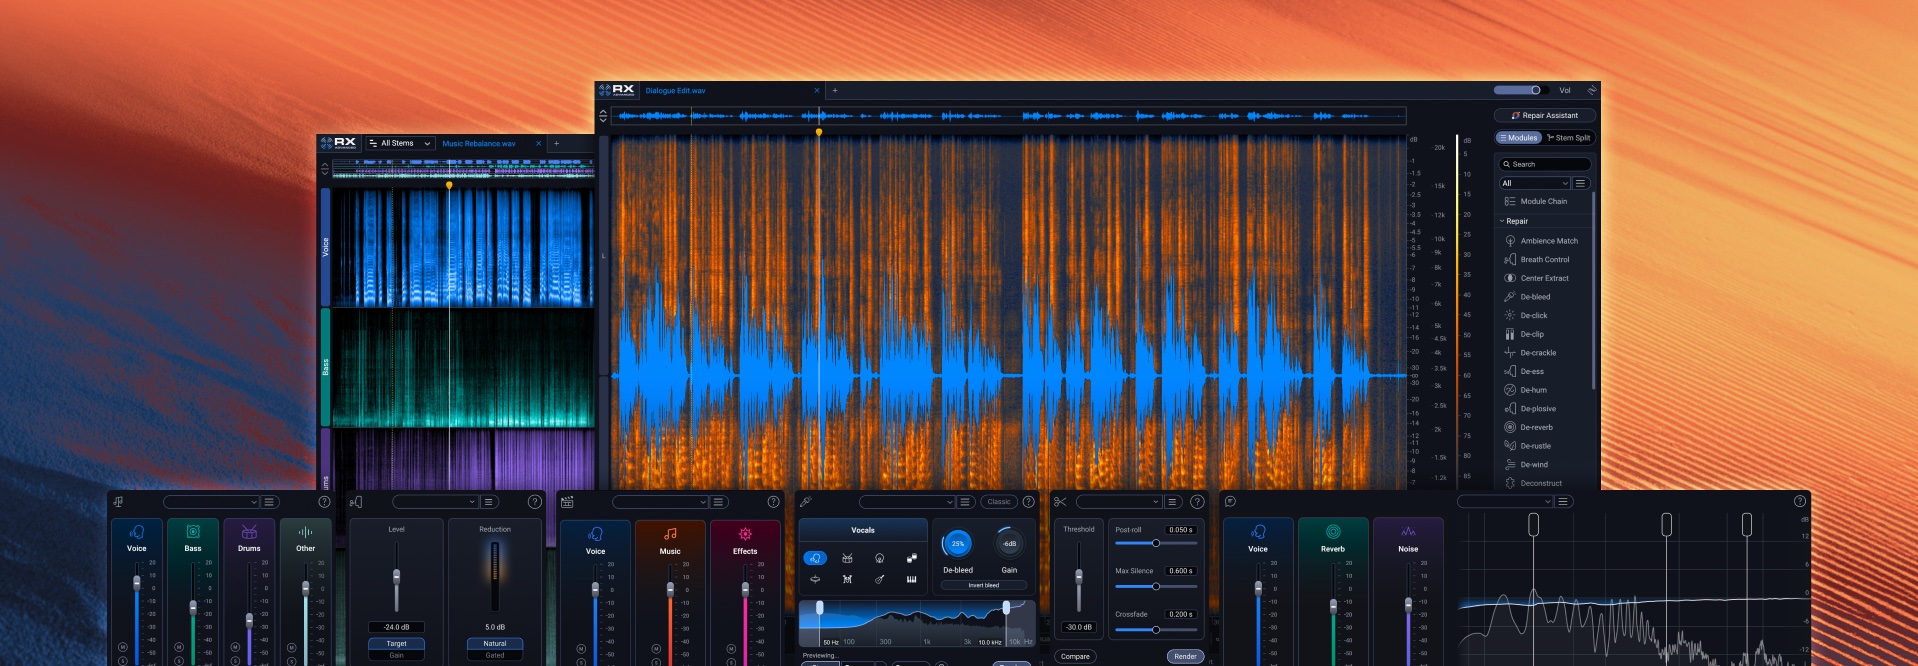
- Stems View: You can now visually split your audio into a track-based workflow, allowing you to use the full RX toolkit – like De-hum or Spectral Repair – on individual stems before bringing them back together.
Music Rebalance now looks like this:
Music Rebalance in RX 12
By way of example, here’s a video and audio examples showing off the difference between RX 11 stem separation, and RX 12.
How to split stems in RX 12
Splitting a full mix into stems is a straightforward process that saves you hours of tedious editing.
- Load your mix: Open your audio file in the RX 12 standalone application.
- Open Music Rebalance: Locate the module in the list or use the new module search to find it fast.
- Choose "Stem Split": Click the Stem Split button to begin the separation process.
- Process and export: RX will generate four separate stems (Vocals, Bass, Percussion, and Others). These stems, when played together, will null against the original file, meaning they perfectly recreate the original mix without adding unwanted coloration.
Here’s a visual and audio example of how to split stems. Here's the original excerpt from the artist N A E.
I pull it into RX Music Rebalance and hit Stem Split.
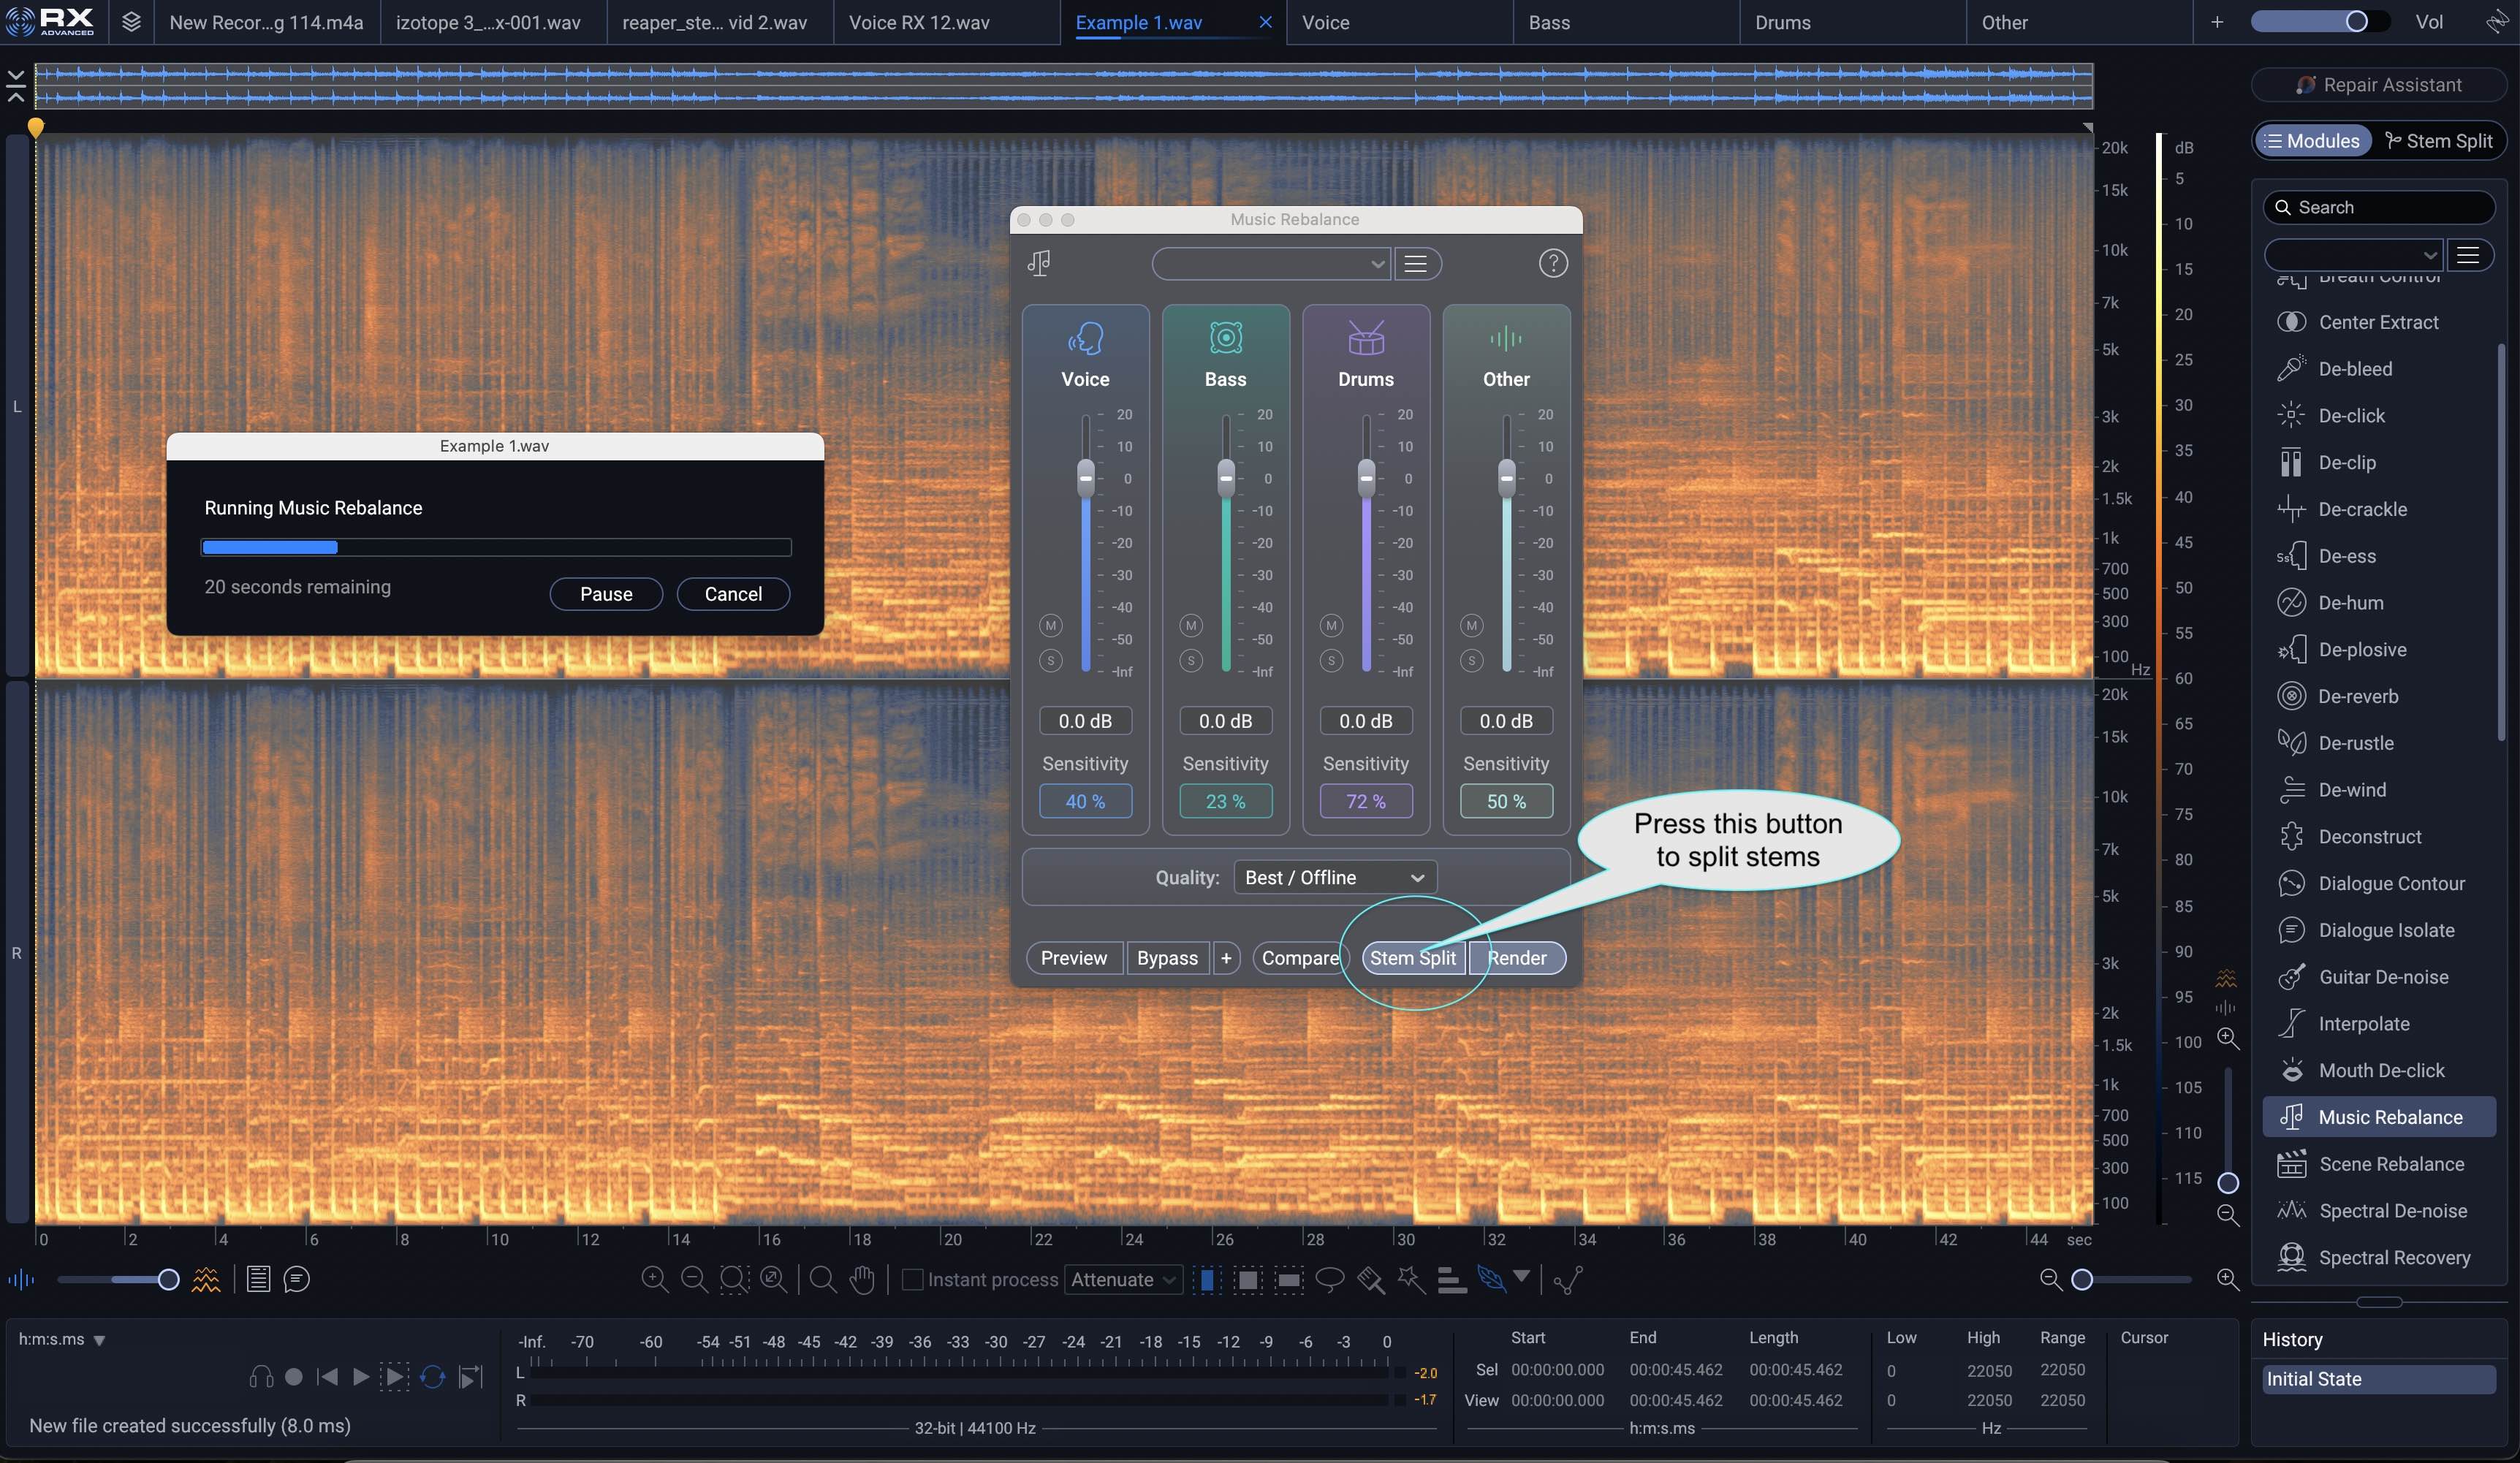
Music Rebalance processing with Stem Split
I’m then left with four stems, which will be visualized in RX this way:
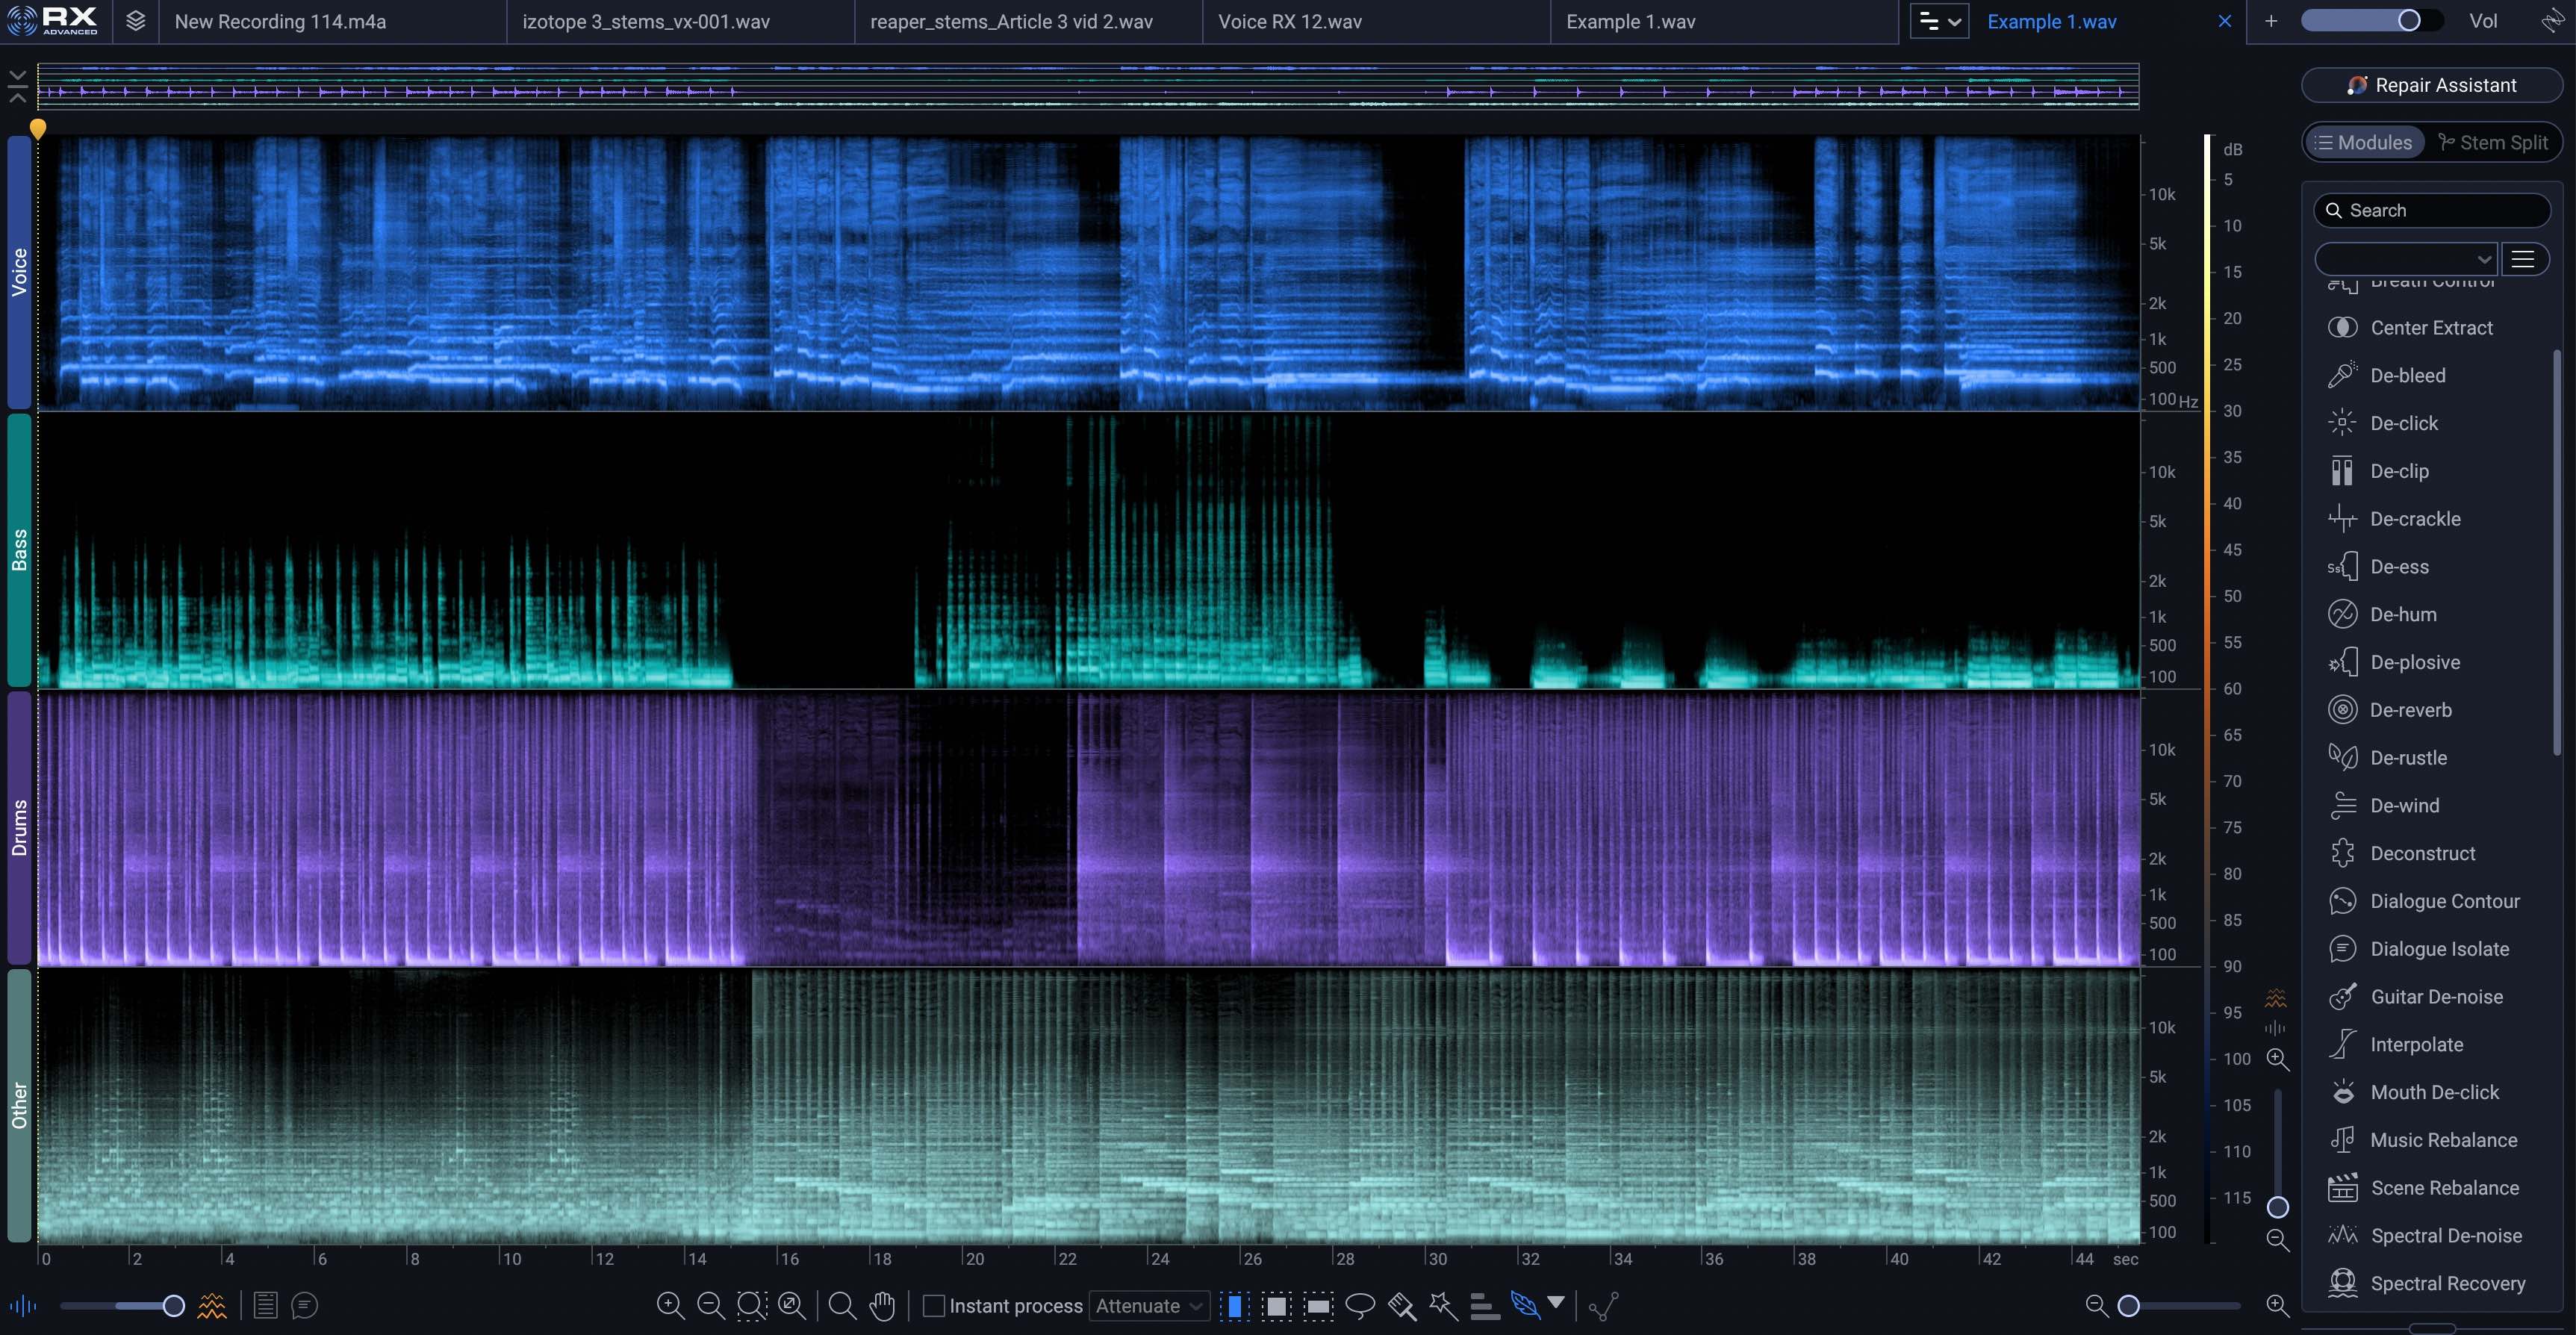
Stems View in RX 12
I hit export, like so:
I’m then left with four stems:
As we can see in the following video, any stems you make in RX 12 will null against the original file. The stems, played together, sound exactly the same as the original file.
4 ways to use Music Rebalance in your workflow
1. Adjust mix elements in real time
If you’re working on a tight deadline and a full remix isn't an option, you can use the Music Rebalance real-time plugin to adjust the volume of specific elements. Whether the drums are too loud or the vocals feel thin, you can tweak the gain of each stem instantly to fix the balance.
Let’s put it to the test. I’ll open up a mix on my computer by Pete Mancini and excerpt it, like so:
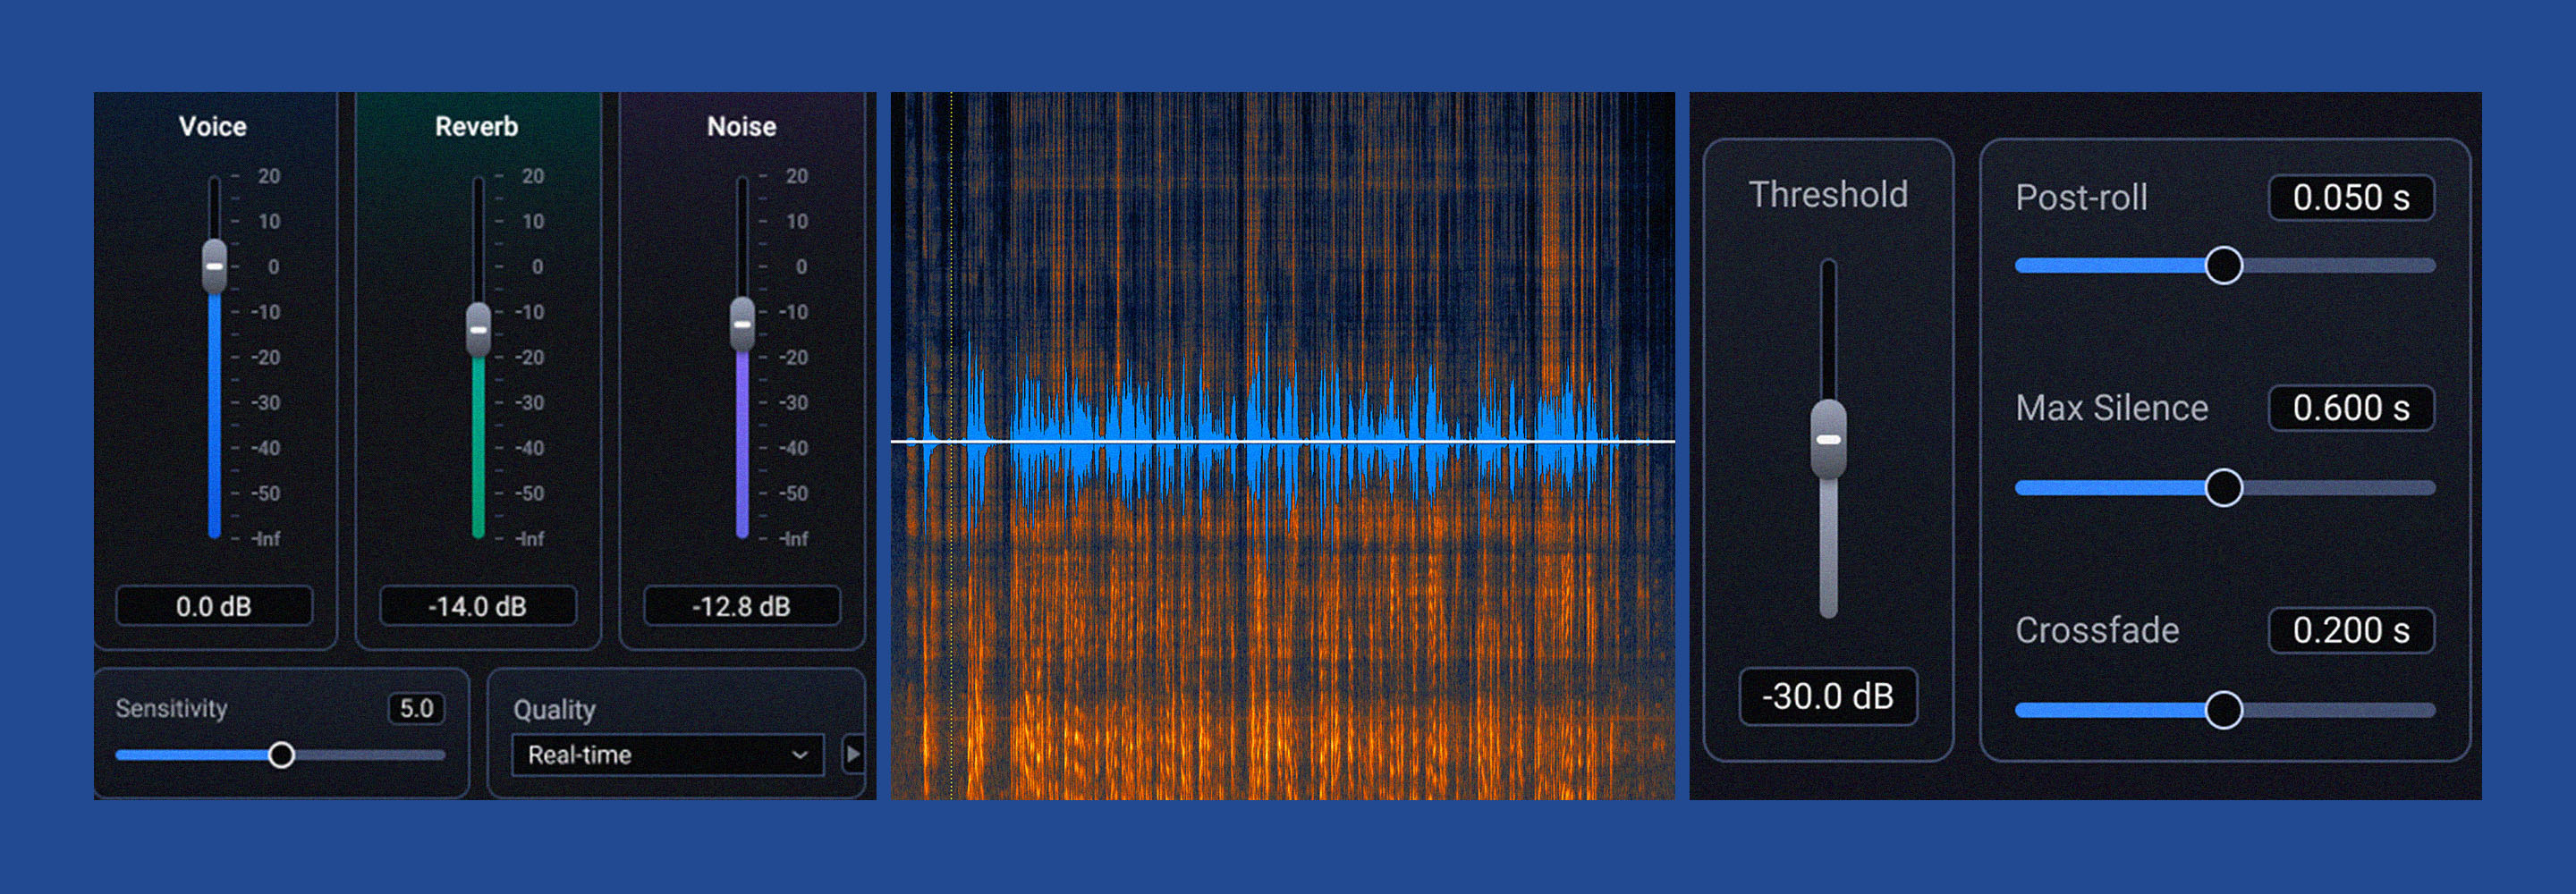
Let’s pretend that Pete wants the vocals down 1 dB. I’ll do that the normal way, in my mix, using a VCA to control my lead vocal bus, background bus, and vocal effects return bus.
I’ll also use RX Music Rebalance with the following settings:
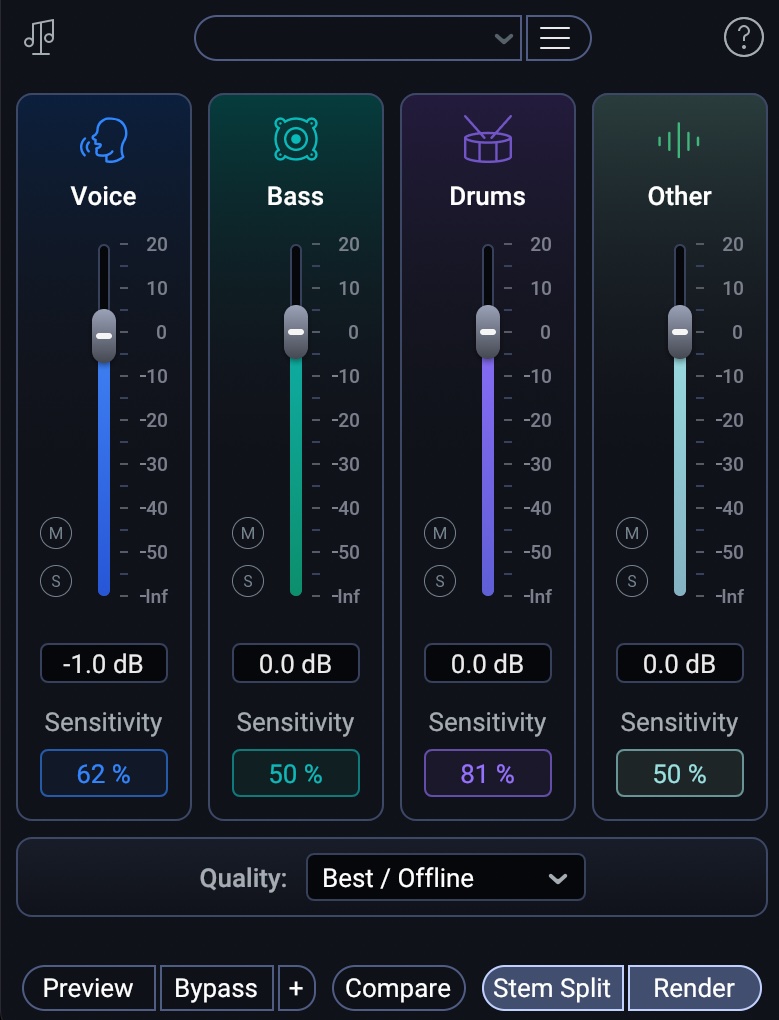
Music Rebalance settings in RX 12
Now, can you tell me which version was handled in the original mix session, and which was handled with Music Rebalance?
Guessing is harder than you’d think, right? I’m not going to tell you the answer, but I will you play you the difference between these two files – their null, which will show you something interesting:
This difference is particularly telling. You’re hearing modulated effects, reverb effects, and maybe the ghost of a vocal. Remember, these bounces are taken from two different prints. Because of that, the modulations and reverb effects do not cancel out; they are randomized. Effectively, the only actual difference is the slight ghost of a vocal you’re hearing.
That’s the verse. In the chorus we have something different.
You can clearly hear a harmony vocal – but guess what? This is also a modulation issue: I have this particular vocal going through a randomized flutter effect, so it would never null; you’re hearing the difference between the modulation there, not the difference in stem tech.
This is actually pretty impressive when you think about it: the differences are so minimal that only the randomly modulated vocal jumps out.
2. Isolate and fix individual problems
Sometimes you need to treat one specific part of a mix without affecting the rest. By using Stems View, you can isolate the bass stem to fix low-end flabbiness or use a transient shaper on just the drum stem to tighten up a kick drum. This "surgical" approach ensures your processing only hits the intended target.
I’ll volunteer a mix that’s entirely too bassy:
This is not the final version of this tune – this is a rough mix I did along the way with entirely too much low end. The final can be heard here.
Anyway, we have our overly bassy mix.
I’ll stem separate the mix in RX 12 with the following settings:

Settings for bass manipulation in RX 12 Music Rebalance
Leaving us with this picture of the whole track:
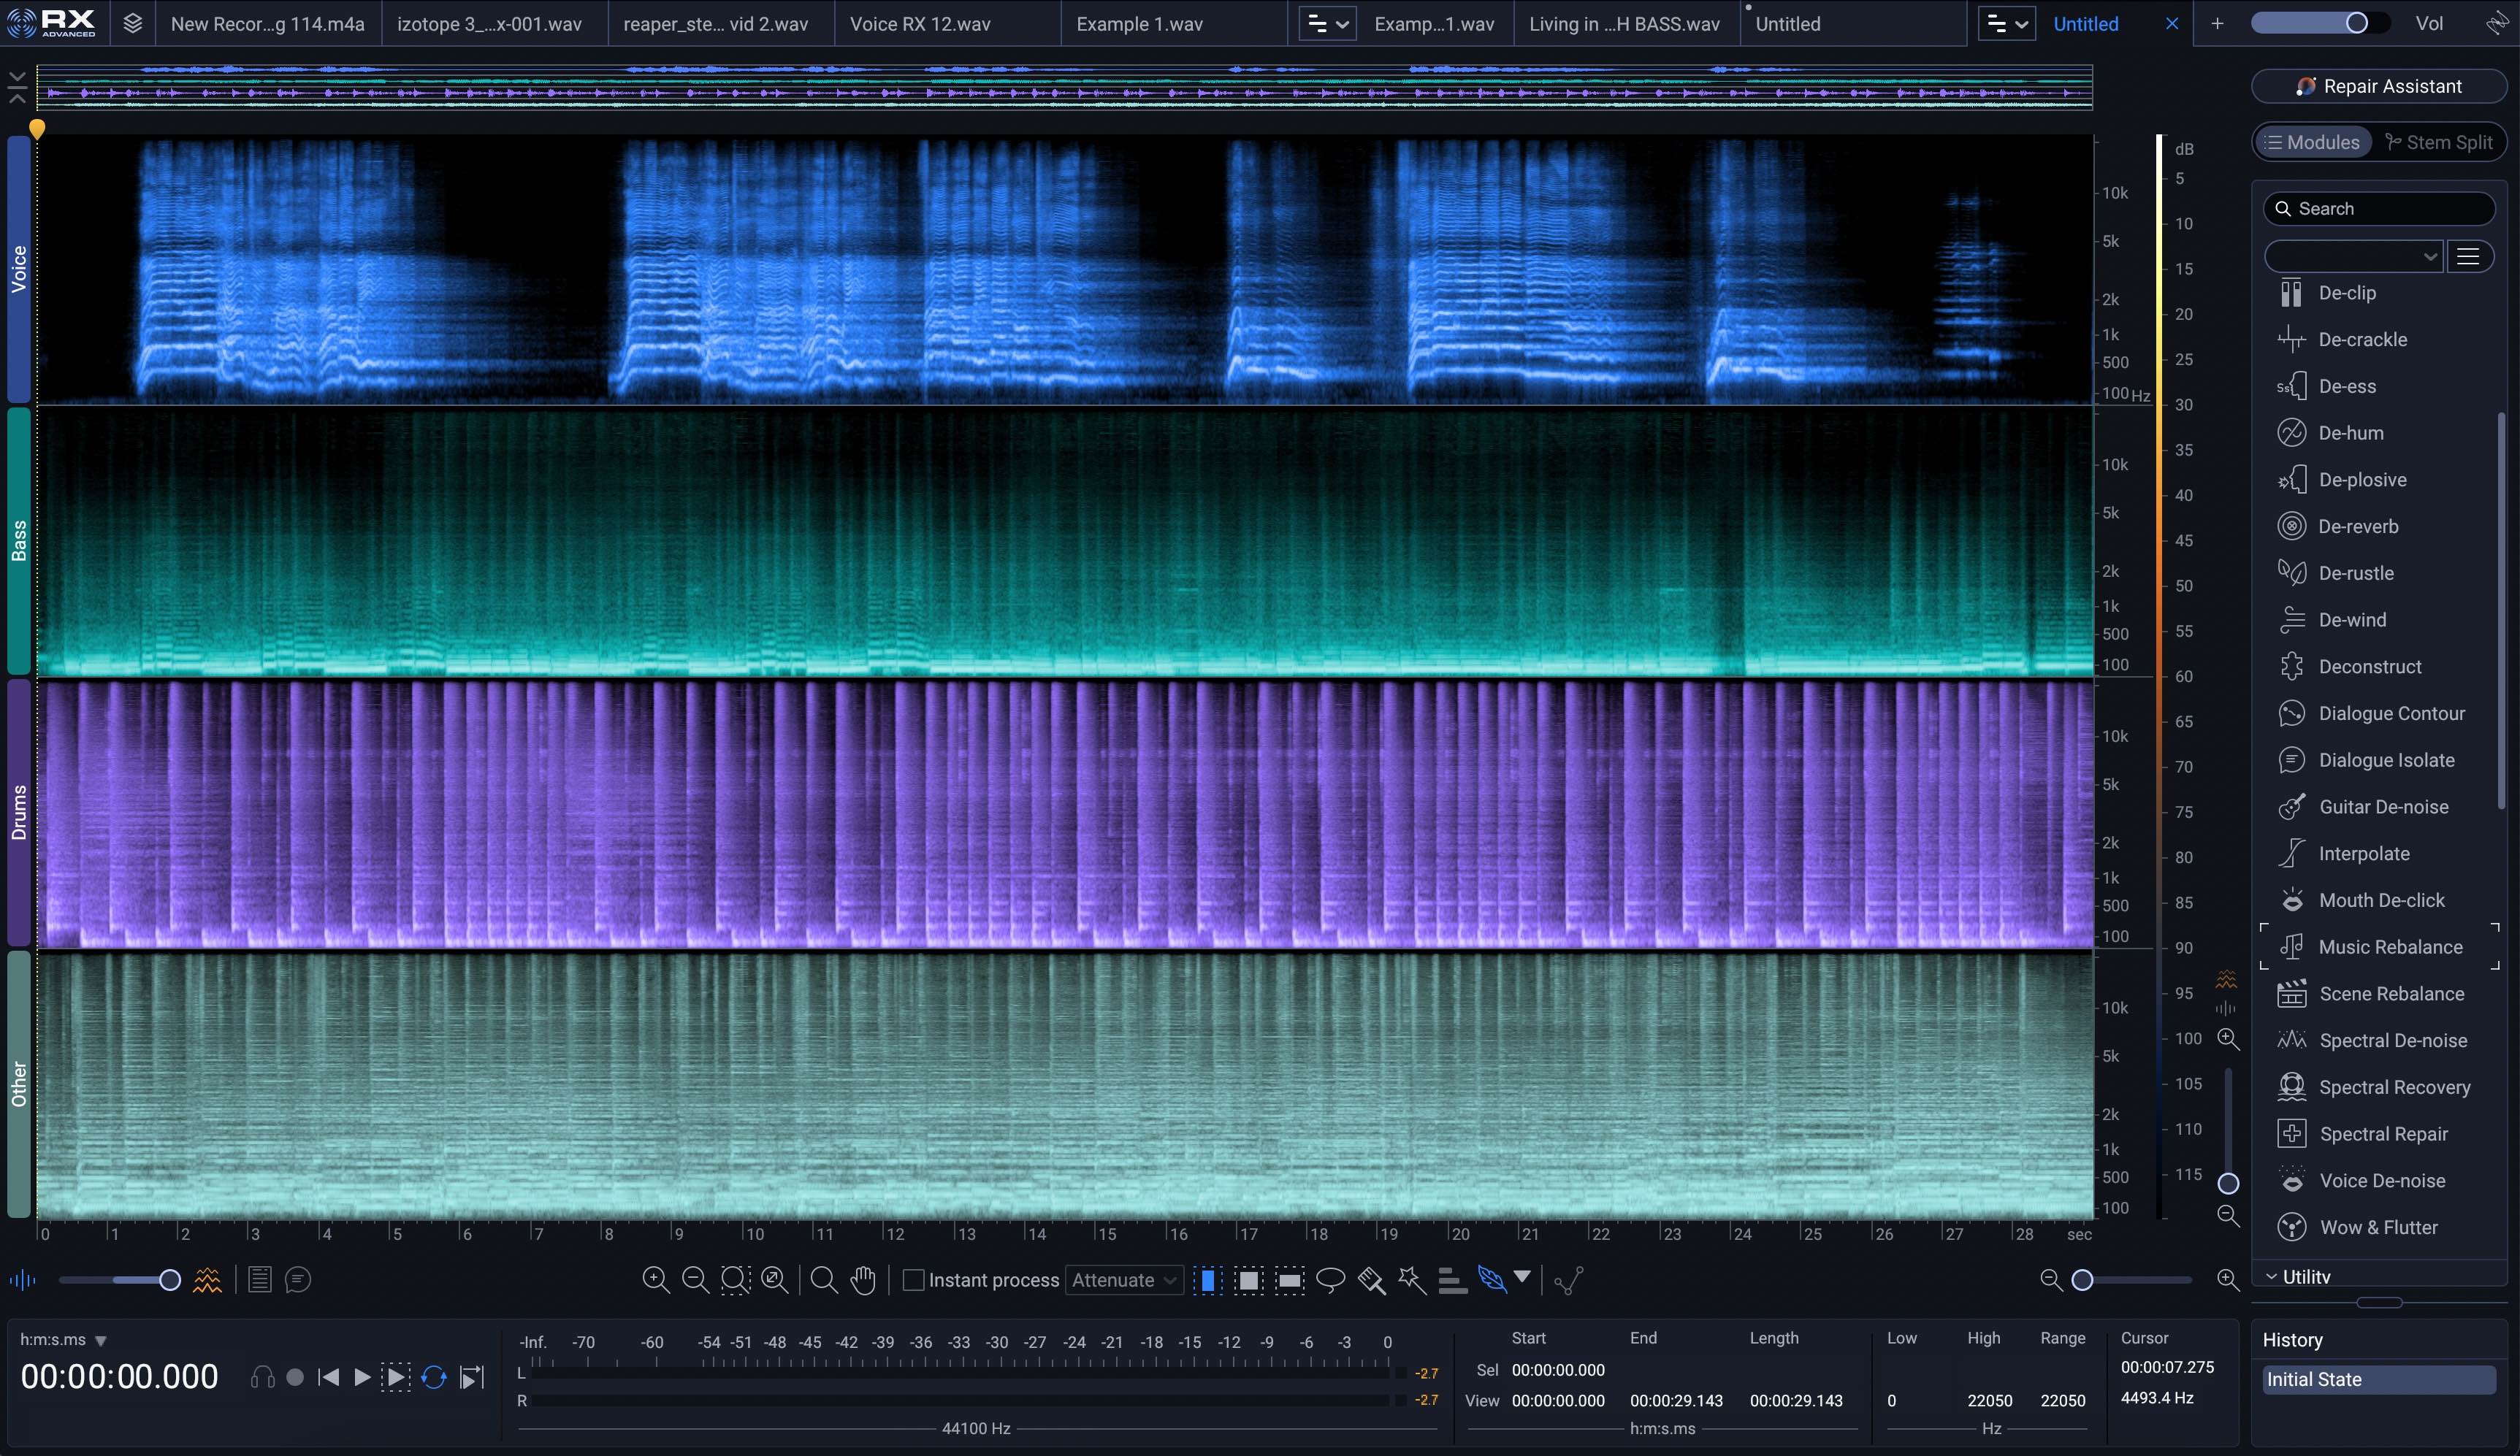
Stems view in RX 12
As we know, the stems will null. So I just have to do careful processing to the bass stem to make the low end less flabby and more present.
I’ll select the bass stem, alone, within RX, and I will apply the following Ozone 12 settings inside the plugin module, which lets me choose any third-party plugin I desire.
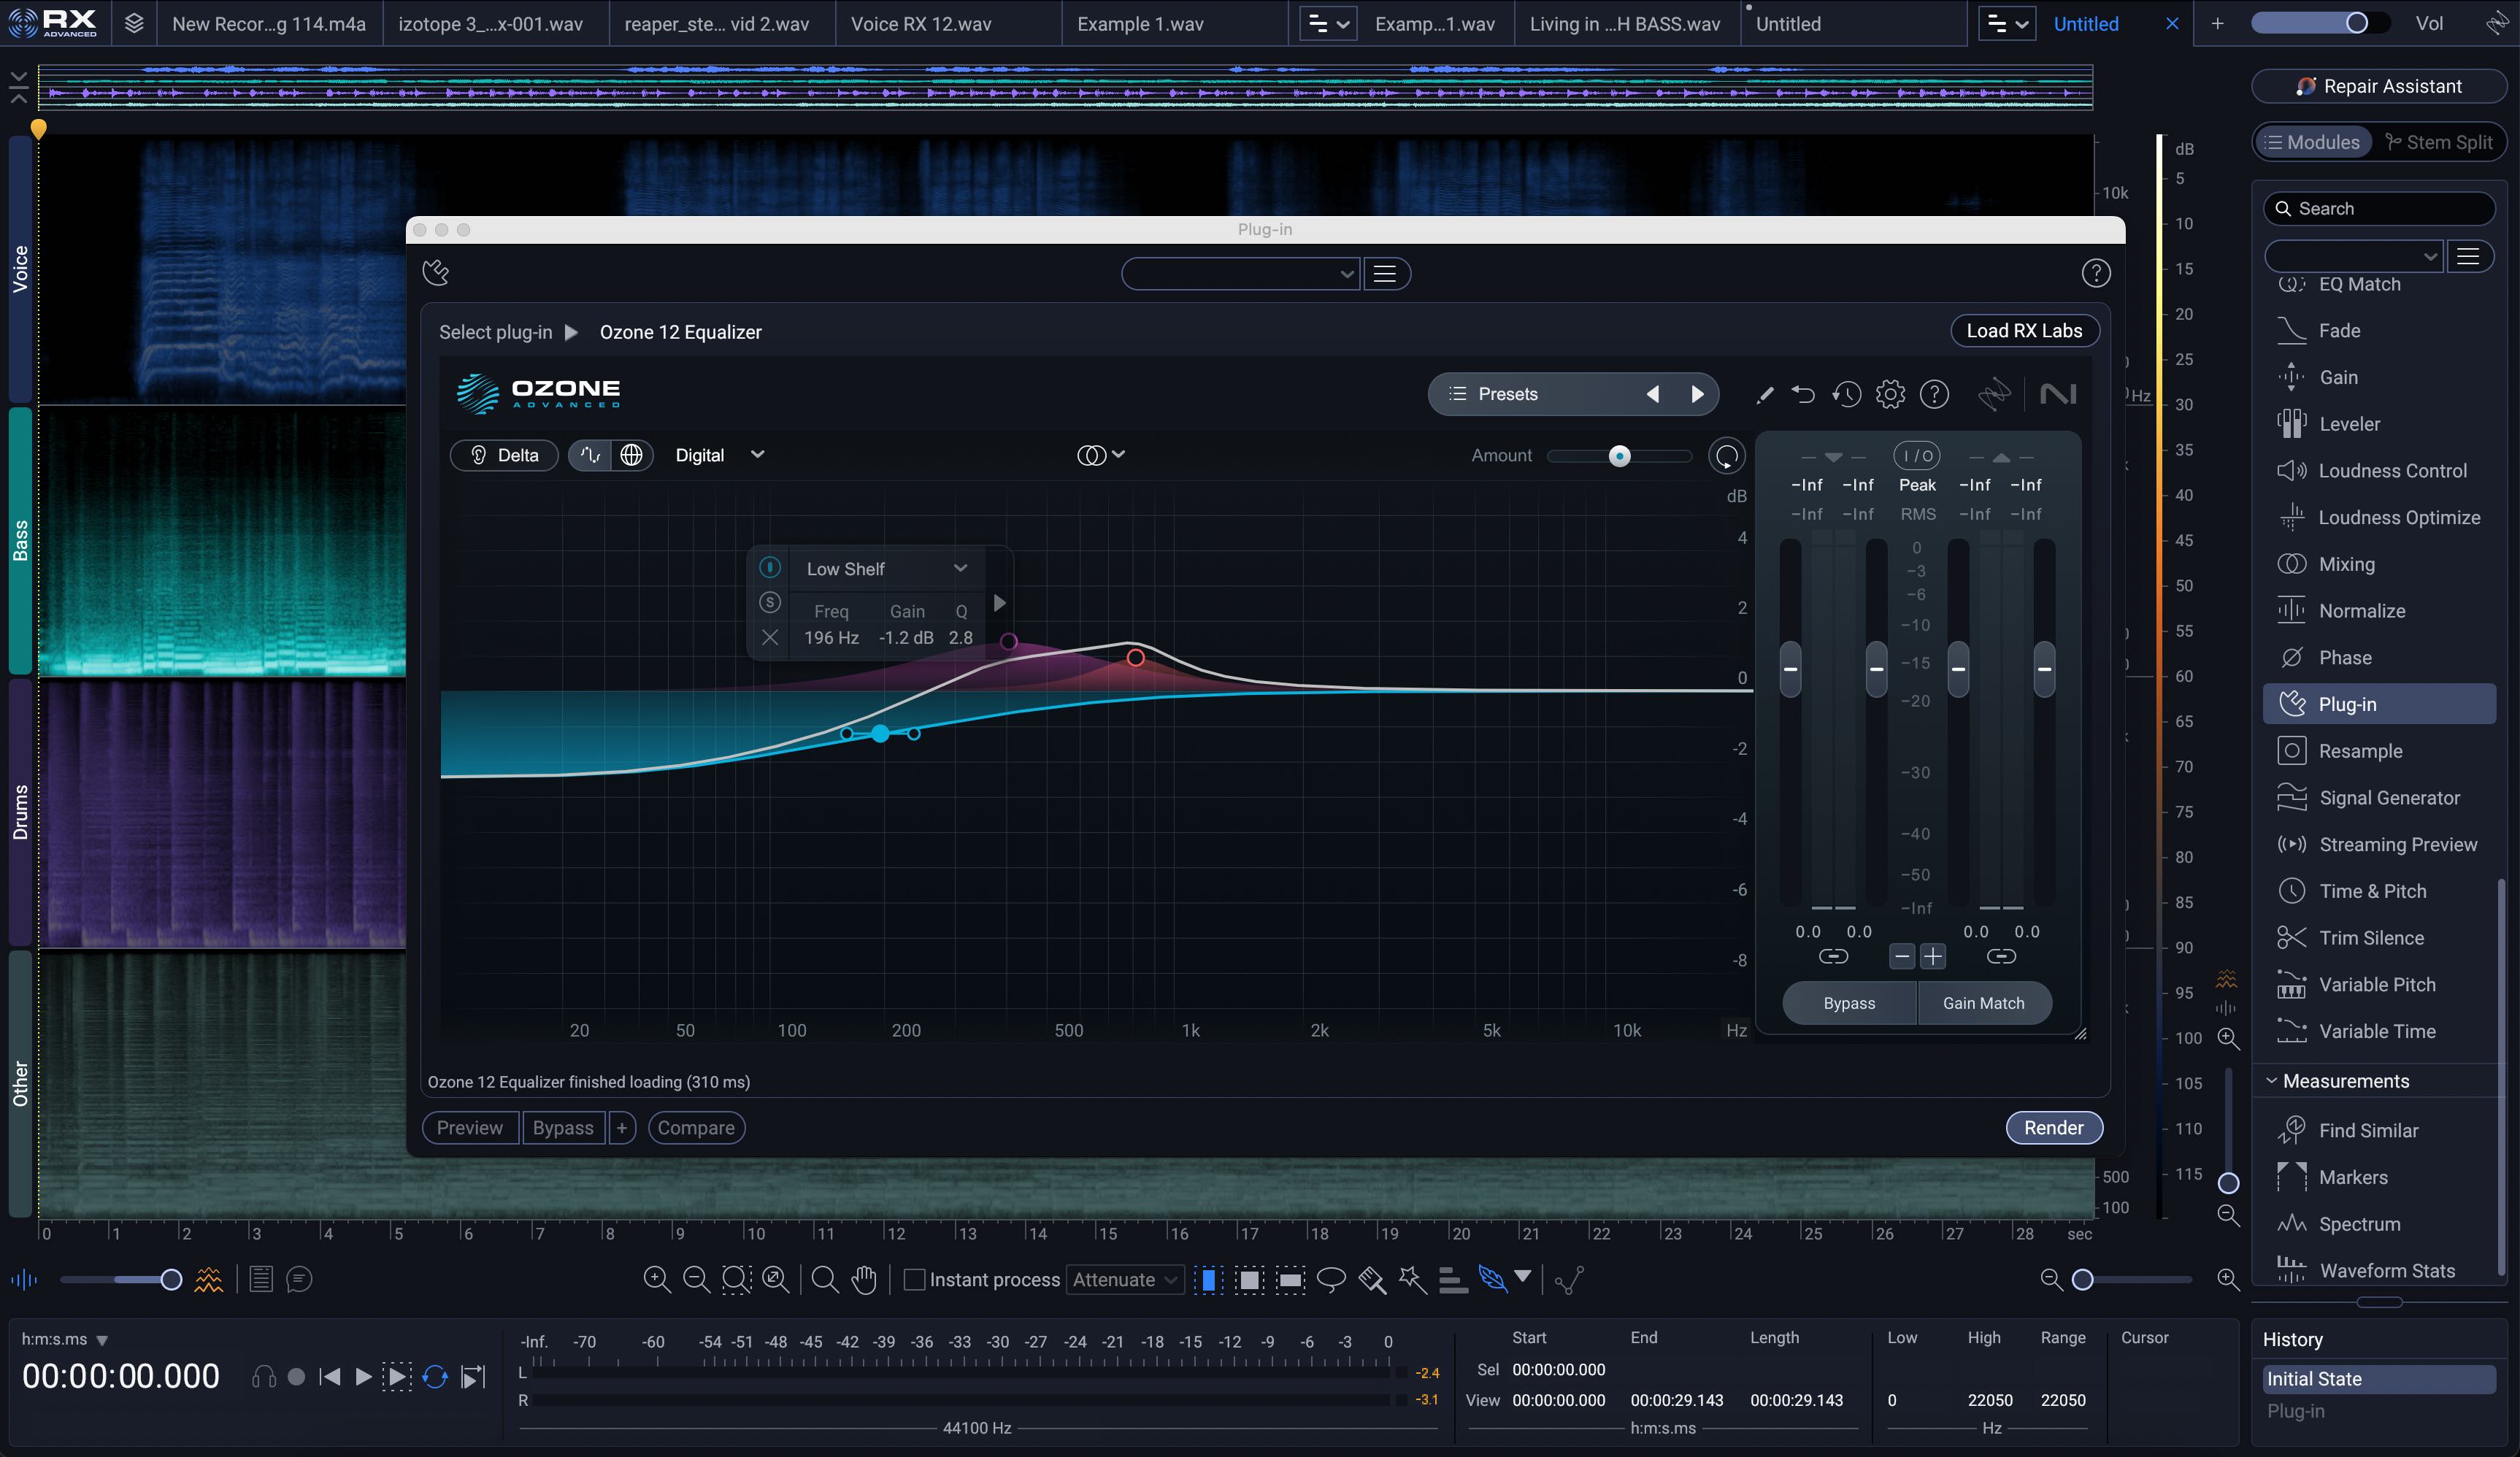
Ozone in RX 12
I apply the results to the bass stem alone, and we can hear the difference:
That takes care of the bass issue – but we also have a kick resonance issue. Here, I’ll use Neutron’s Transient Shaper on the drum stem, but only below 100 Hz. I’ll bring the sustain slider down ever so slightly.
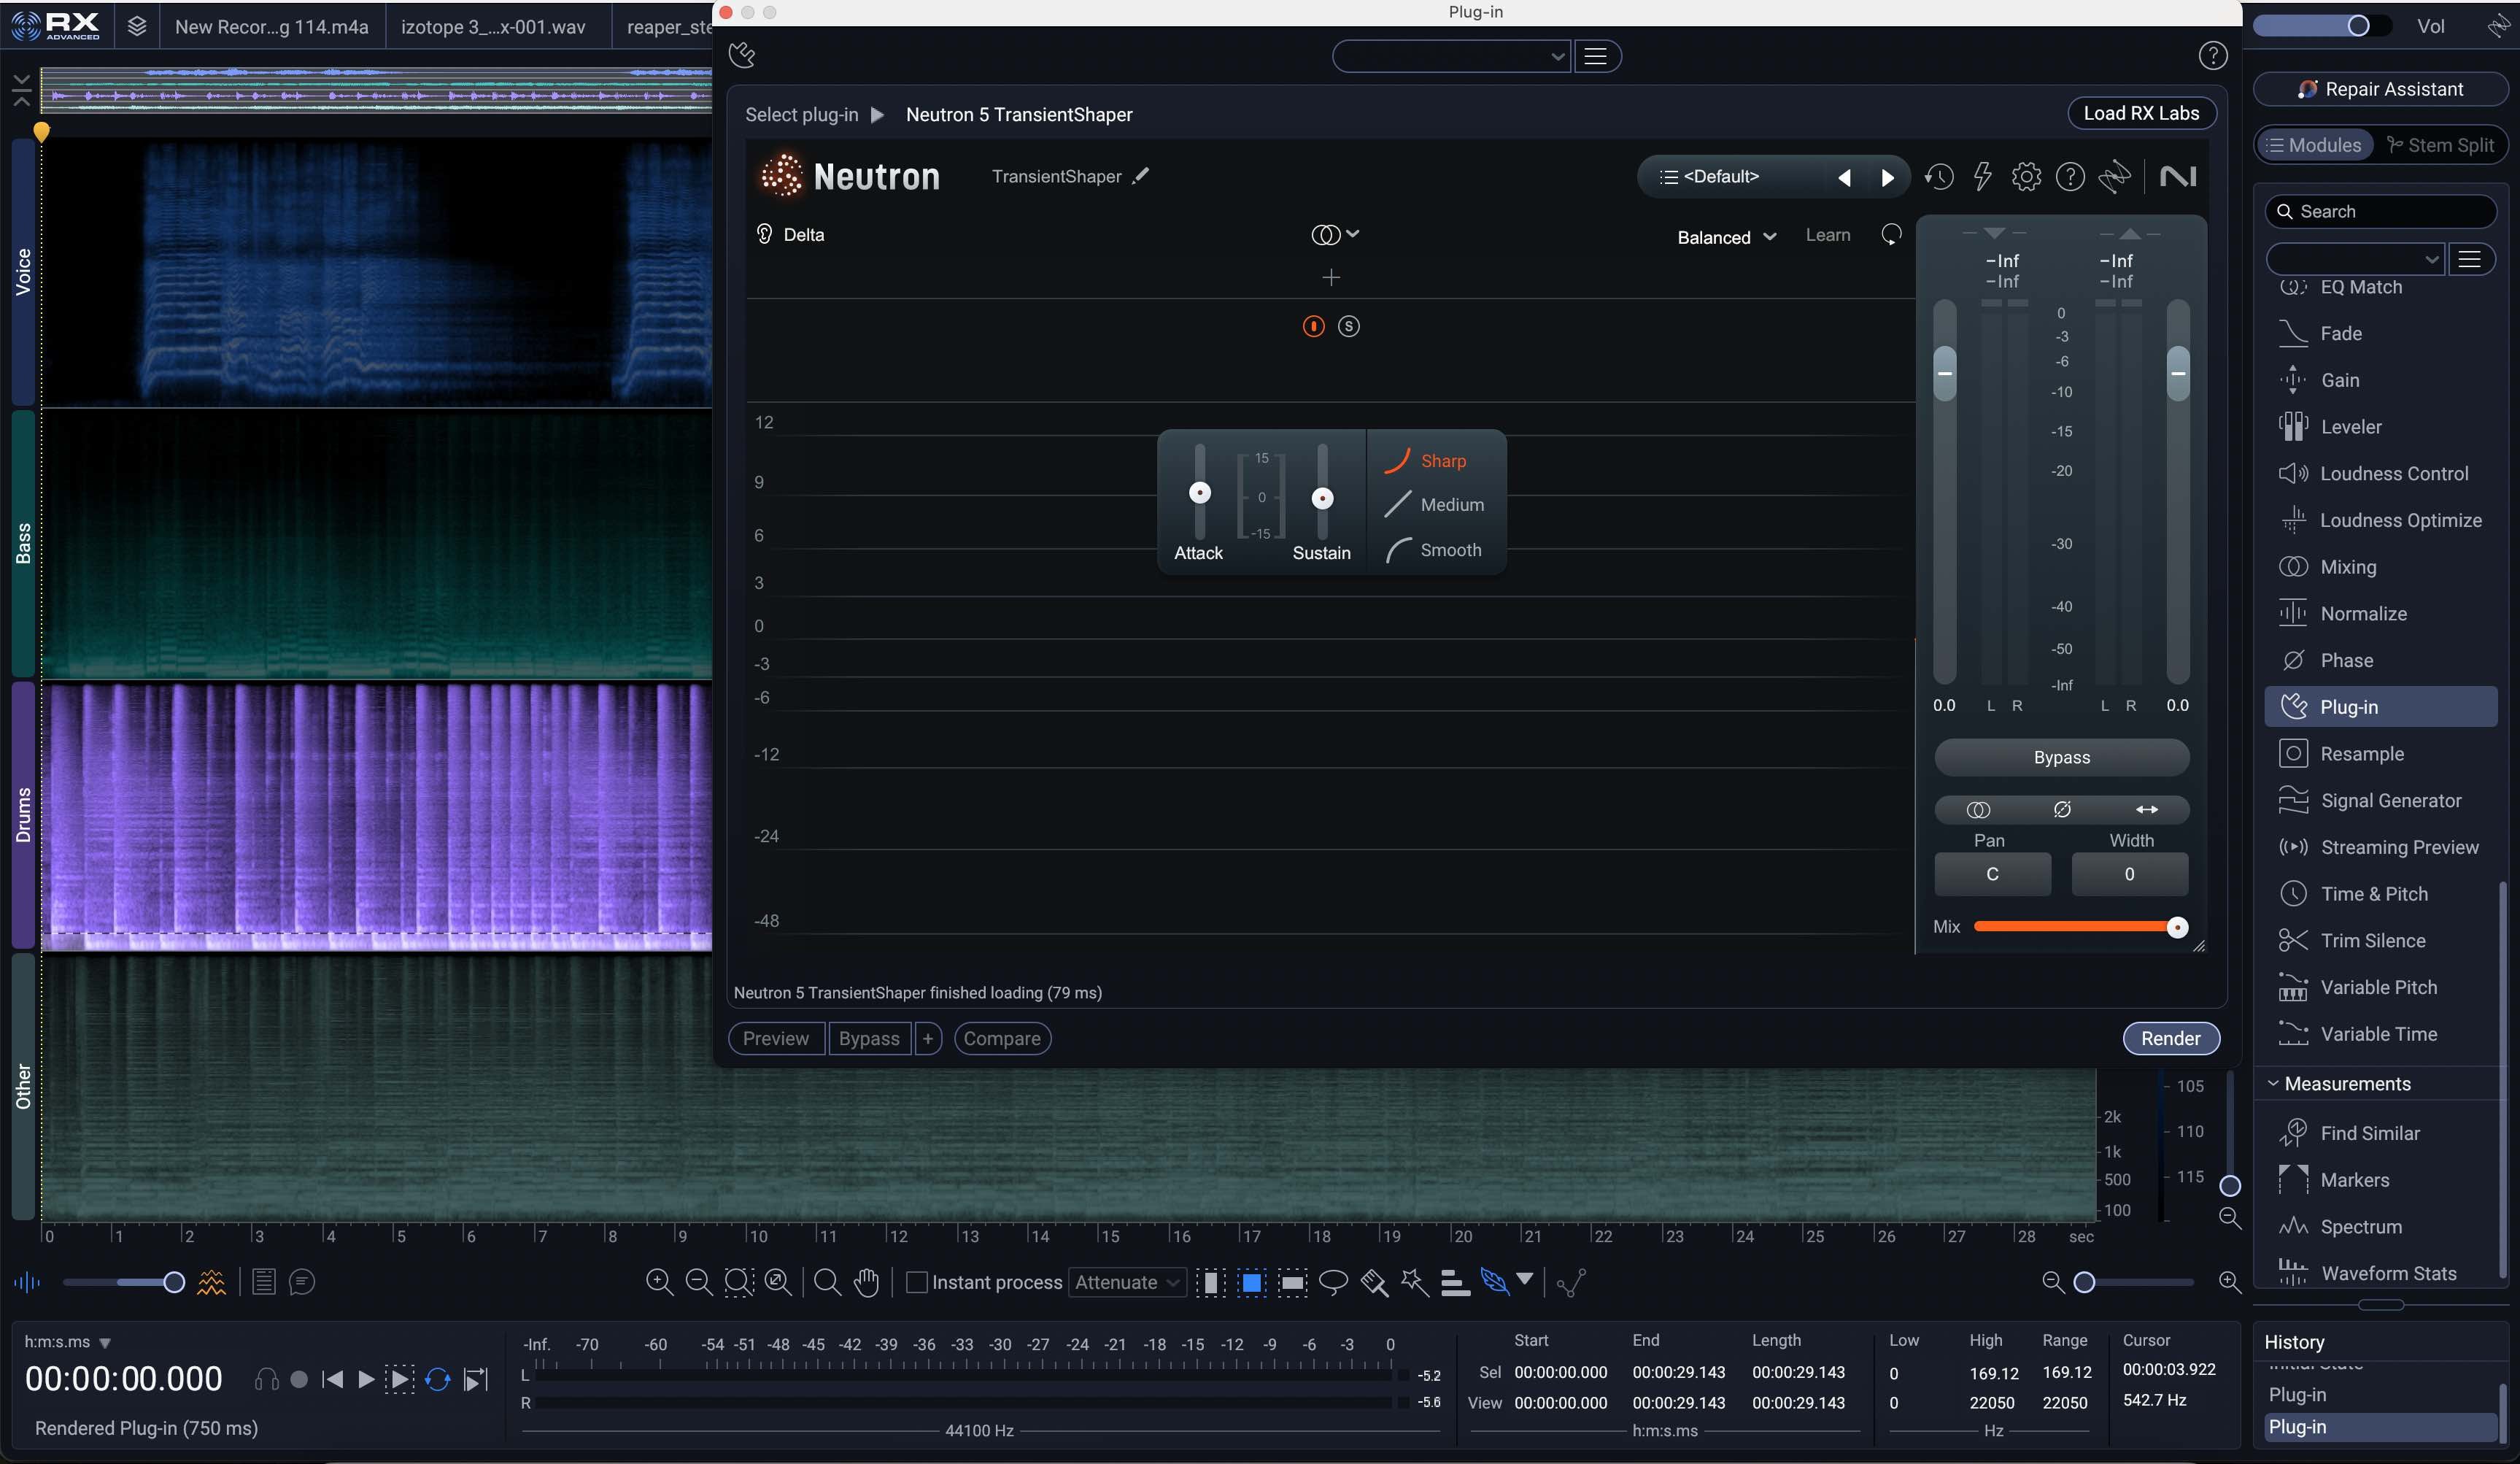
Neutron Transient Shaper in RX 12
Now, we have this:
Remember: we have to be careful here with this kind of processing, or else we can incur artifacts.
3. Bolster elements during mastering
This is a favorite technique for mastering engineers. Instead of completely replacing the original mix, you can use the separated stems in parallel. By adding a subtle amount of a vocal or bass stem alongside the original mix, you can add presence and body without creating the uncanny valley effect that can happen with heavy-handed processing.
Observe the following example, where I take an indie mix supplied to me by Adjective Animal from their back catalogue, and see if I can bolster elements in just this fashion:
In a little under 15 minutes, I was able to put the drums in an atmosphere, add bass presence while cutting mud, add vocal body, and more.
4. Perform complex restoration in the Stems View
One of the most significant updates in RX 12 is the Stems View. As demonstrated earlier, you no longer have to process your file as a single flat waveform. Instead, you can access a dedicated view that displays each separated stem in its own spectrogram.
Because you can work on a frequency-selective basis on each individual stem, you can use the full power of the RX toolkit – like Spectral Repair or Voice De-noise – without affecting the other elements of the mix.
I’ll use Music Rebalance to separate the stems:
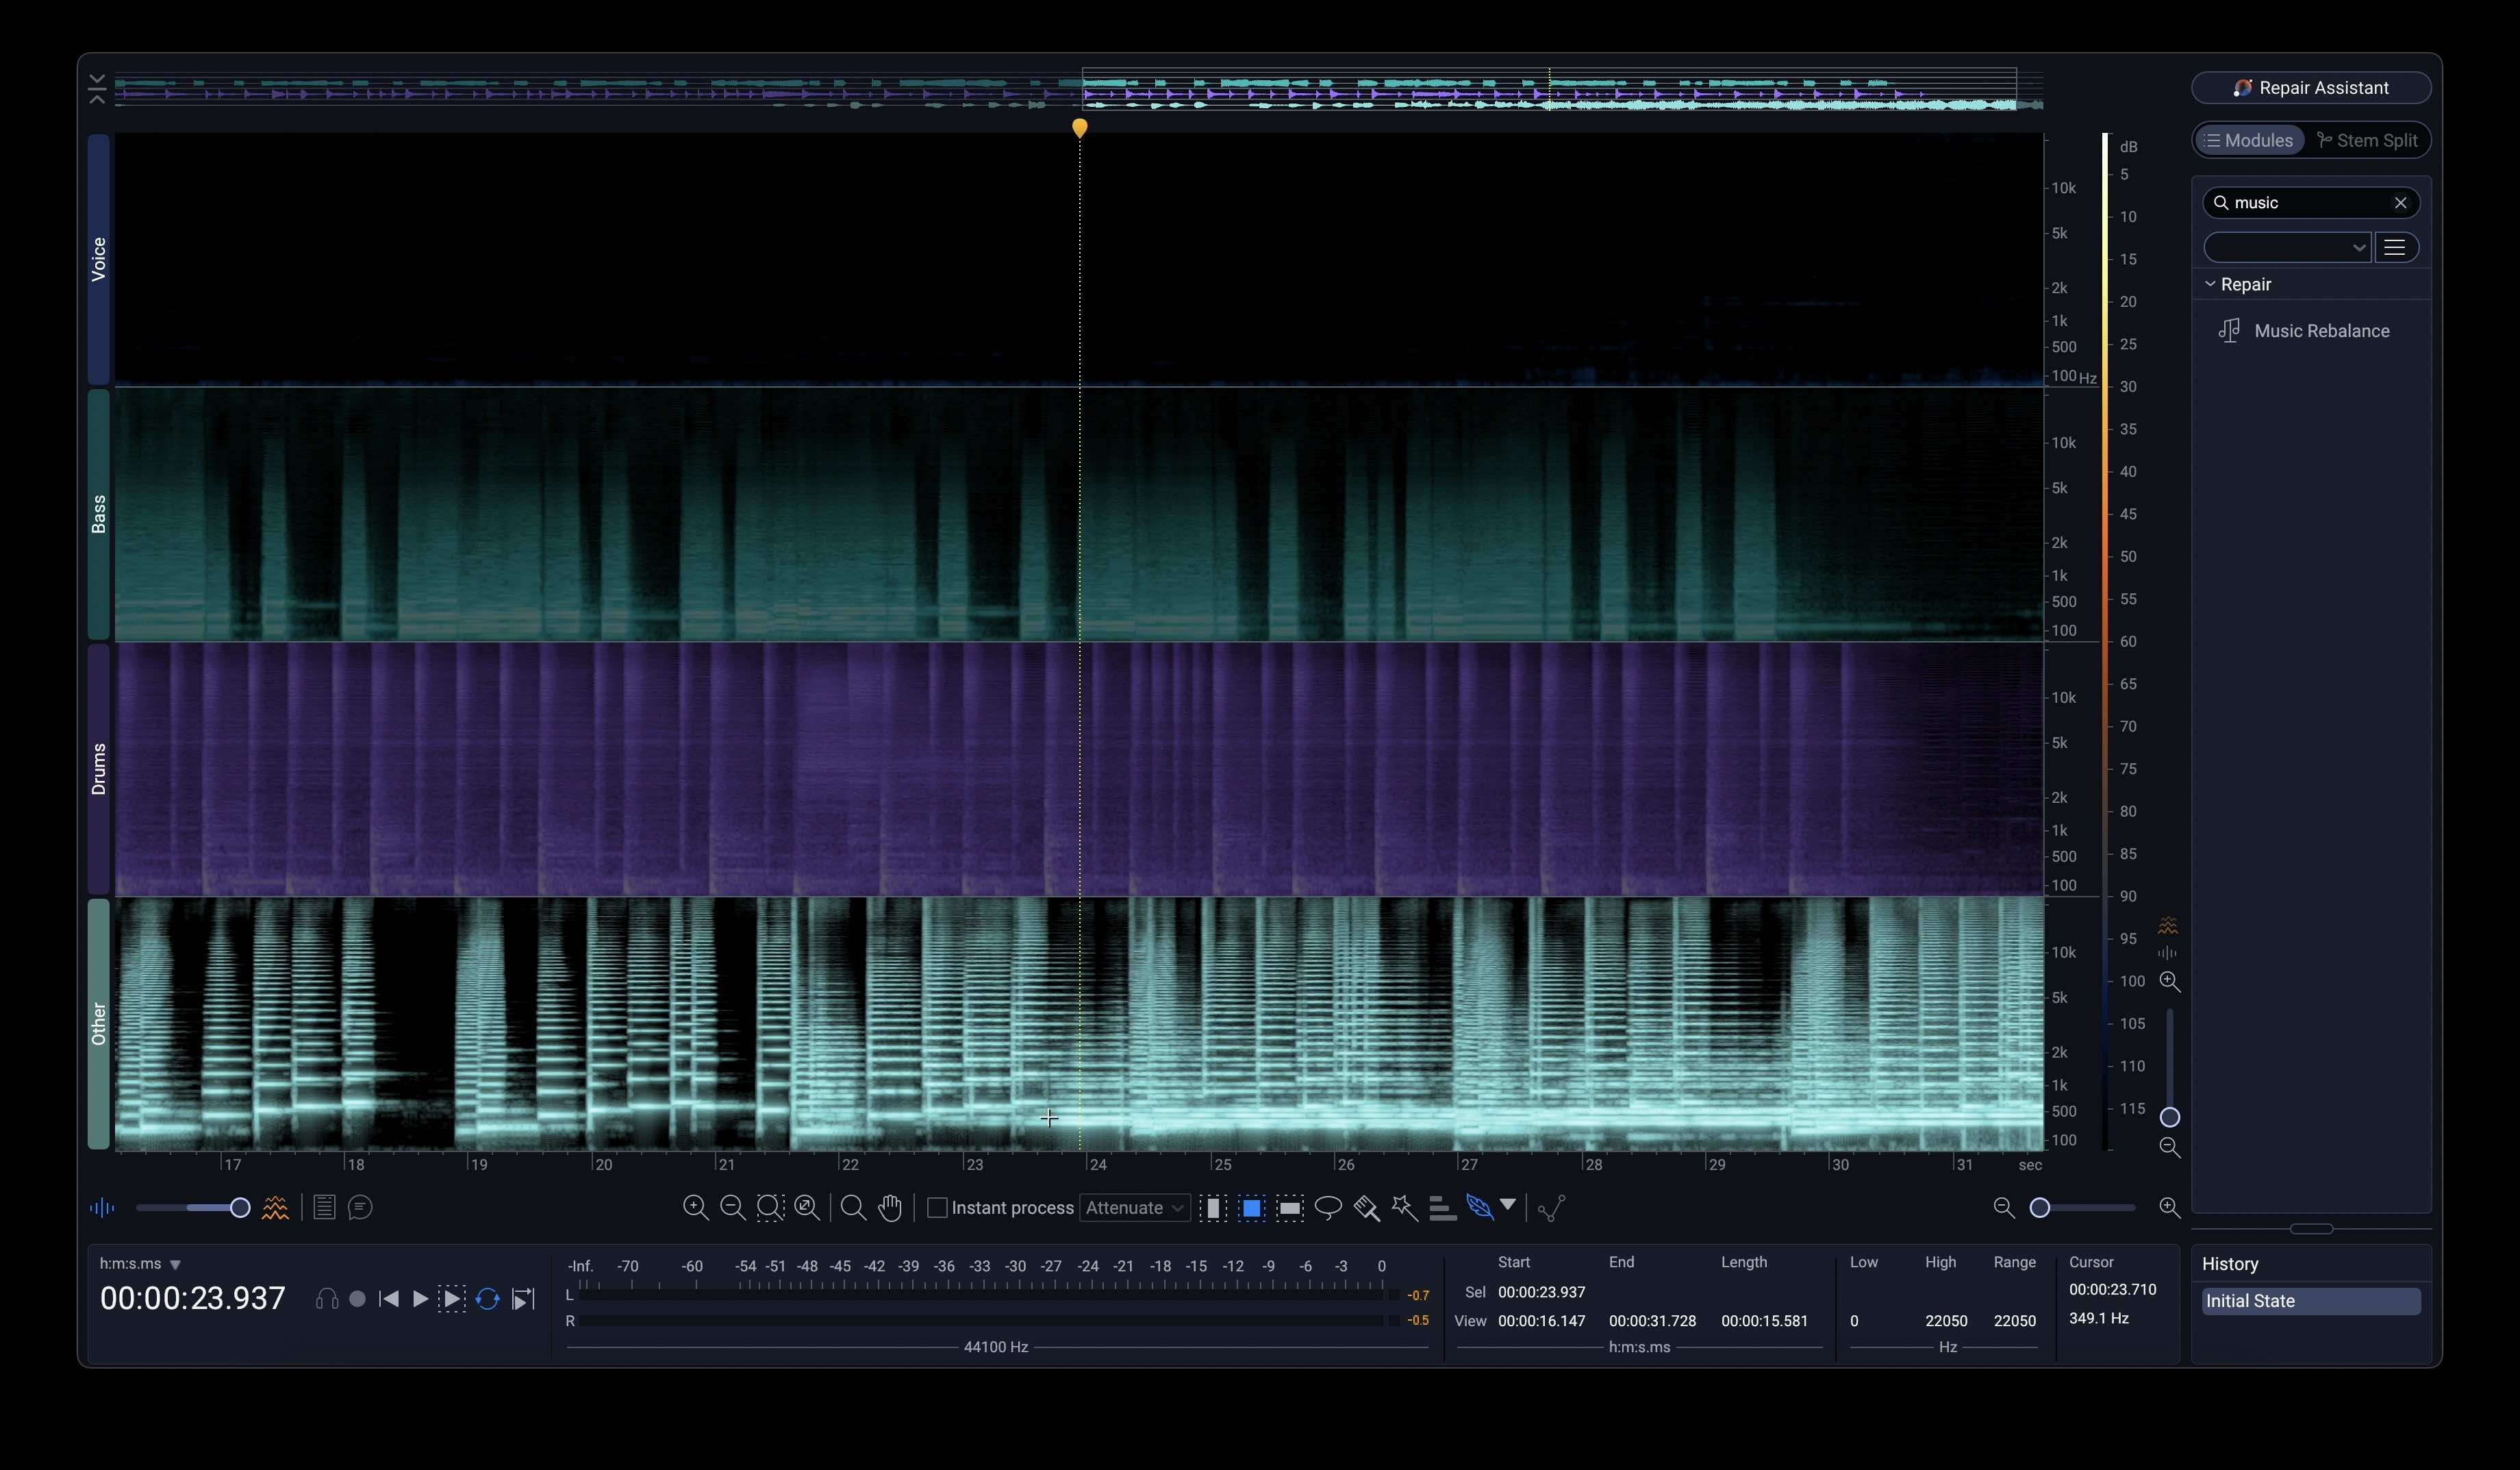
Stems View in RX 12
Because this song has three synths and one drum set, the vocal lane is empty. Also, we’ve got melody and harmony playing in the “other” lane.
Well guess what? I can hunt for the sustained harmony parts at the end of this selection in the “other” spectrogram and paste them into the vocal section!
Now, I can bring each stem into my mix, and go from this mono presentation to something much better:
That’s a pretty bold advancement in the mix right there – made possible thanks to RX 12.
Start using Music Rebalance for your productions
Now that we’ve shown you around the tech, the time has come for you to use Music Rebalance for your own creative purposes. Have fun with it – this is a brave new world.