Top tips for sound mixing in film
A post-production pro shares what she wishes she had known when first getting into post production, from workflow tips to meeting loudness specs and everything in between.
Mixing for post production is one of the most time-consuming processes in the audio industry. With projects ranging from short films under ten minutes to feature-length movies with tons of sound effects, knowing how the pros handle these projects can save you some serious time and energy. Here are some of my favorite post-production tips for sound mixing in film.
Follow along with this tutorial using RX 11, the industry standard for audio repair.
What is post production?
Mixing in post production is balancing volume between dialogue, music, and sound effects. It also involves cleaning up dialogue that was recorded on-set, recording ADR to fix what can't be cleaned up, creating sound effects and recording foley, and exporting audio mixes in various formats.
Although there are so many moving pieces, the most important part of post production is to create a mix that keeps the listener completely immersed in the film. If there's extraneous noise or a poorly recorded line of dialogue that is unintelligible, it takes the viewer out of the story. With that in mind, let's take a look at some tips from post-production pros to help you create an effective mix without wasting time.
Tips for improving your post-production skills
Estimating a project timeline
Before you even start the project, it's good to get a realistic idea of how much time will go into it. You'll need to budget time for de-noising dialogue, editing out extra material, volume-balancing, recording ADR and foley, etc.
I estimate the amount of time by assuming I'll spend on average about 1 hour per minute of audio for films that are less heavy on the sound effects such as documentaries. So, for an hour-long dialogue-based film like a documentary, plan to spend about 60 hours working on it depending on the quality of the audio you're receiving from the video editor. For films with lots of sound effects that need to be synced with the visual such as gunshots, or extended fight scenes with lots of action, you may need to double (or even triple!) that amount of time.
Pro tip: Early on, you should communicate that you need the film to be picture-locked before you start working on it. Picture-locked means that there will be no more edits that affect the timing of the film. If the film isn't picture-locked, a lot of your hard work on the audio will become out of sync or you will have spent hours working on a scene only for it to be cut. Working on films that aren't picture-locked is the biggest time-suck to avoid.
Begin with the end in mind
After the film is picture-locked, the editor will provide a .MOV of the film and either an .OMF or an .AAF file that can be opened in your DAW. OMFs and AAFs are basically an audio-only version of the video edit that you can open in your DAW, allowing you to adjust edits or automation that might have been done in the video editing phase. However, there is often a lot of extra audio such as camera audio that is included that you'll need to sift through. As you go through the audio, I've found that it's helpful to mute any audio you don't need rather than deleting it from the session. You may need to reference it later on and unmuting it is much easier than trying to recover something you've deleted.
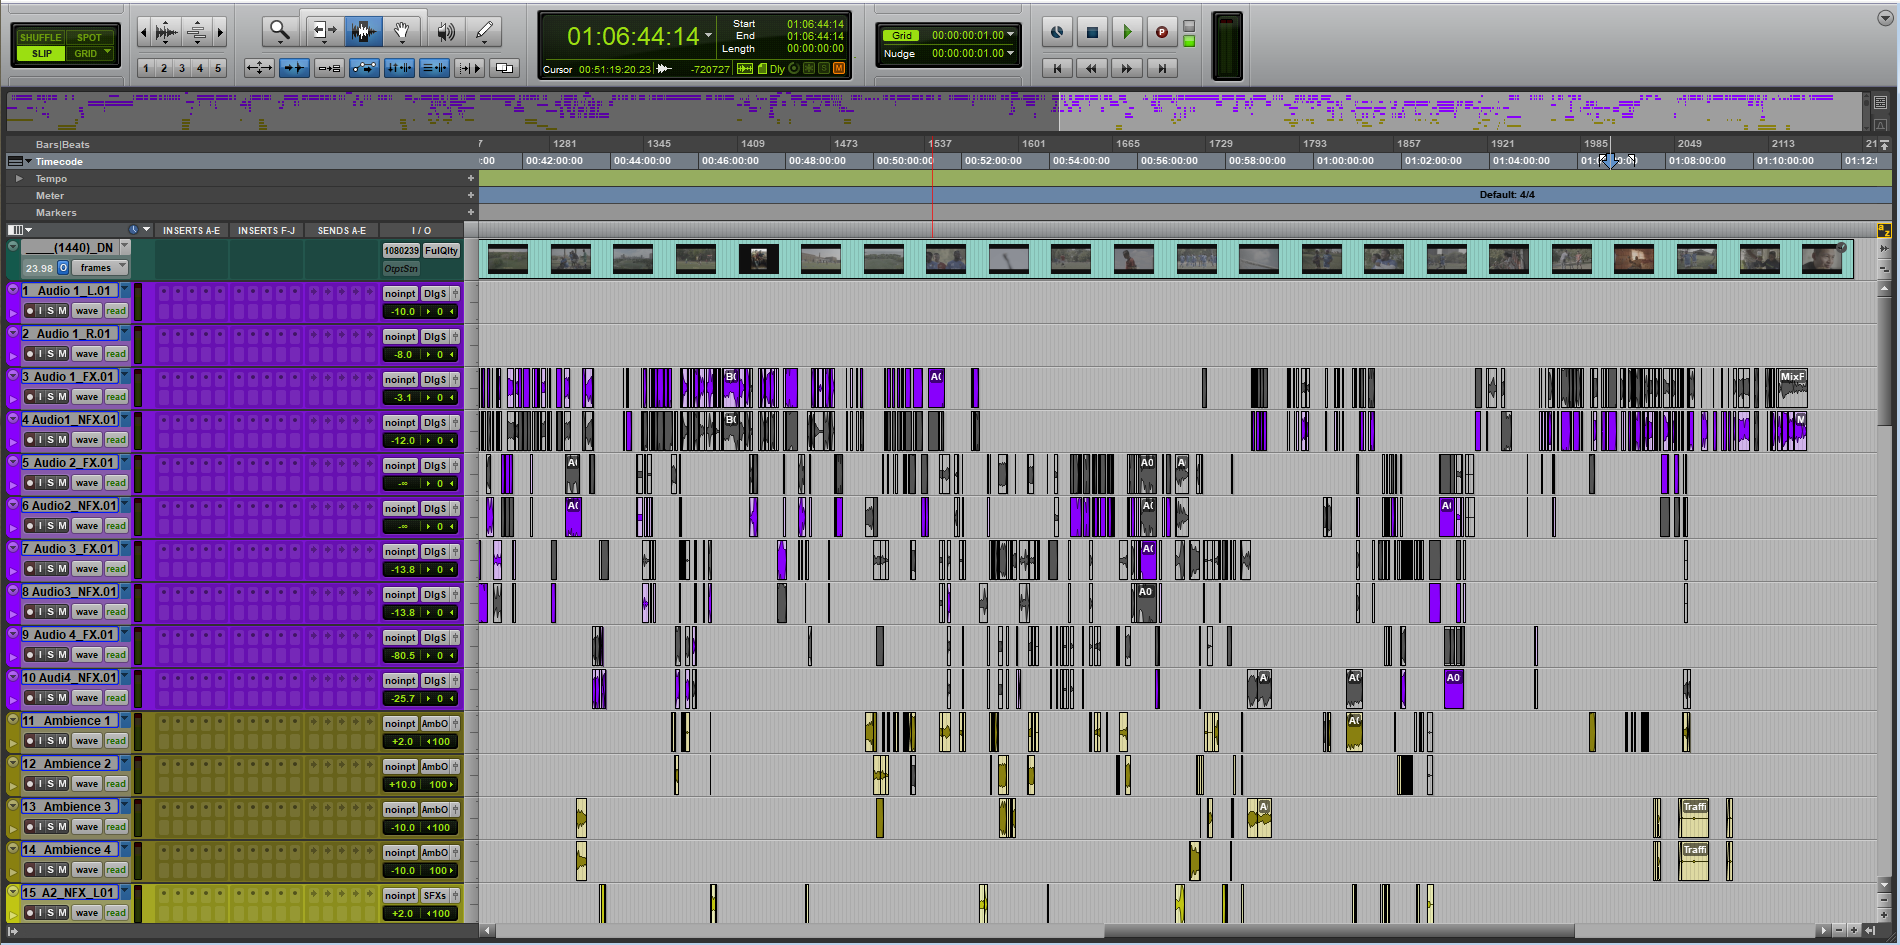
An AAF file opened in Pro Tools that has been organized with color-coding
As you sort through the audio, muting what you don't need and roughly balancing the material you want to keep, you should also separate dialogue, sound effects, and music onto separate tracks. Eventually, you may need to export different stems so the video editor can create a trailer or so the film can be dubbed in another language. Usually, you'll need to provide a dialogue stem, an optional dialogue stem (containing gasps, laughs, screams, and other vocalizations that aren't specific to a certain language), a sound effect stem, and a music stem. When all these stems are added together, the sum should be the final mix.
Pro tip: Ask the director what formats they expect you to deliver – for example, stereo vs. surround – and create submixes and print tracks that are compatible with the chosen format(s). And beginning with the end in mind means that as you organize your audio, you should organize your session in a way that will make the exporting process easier.
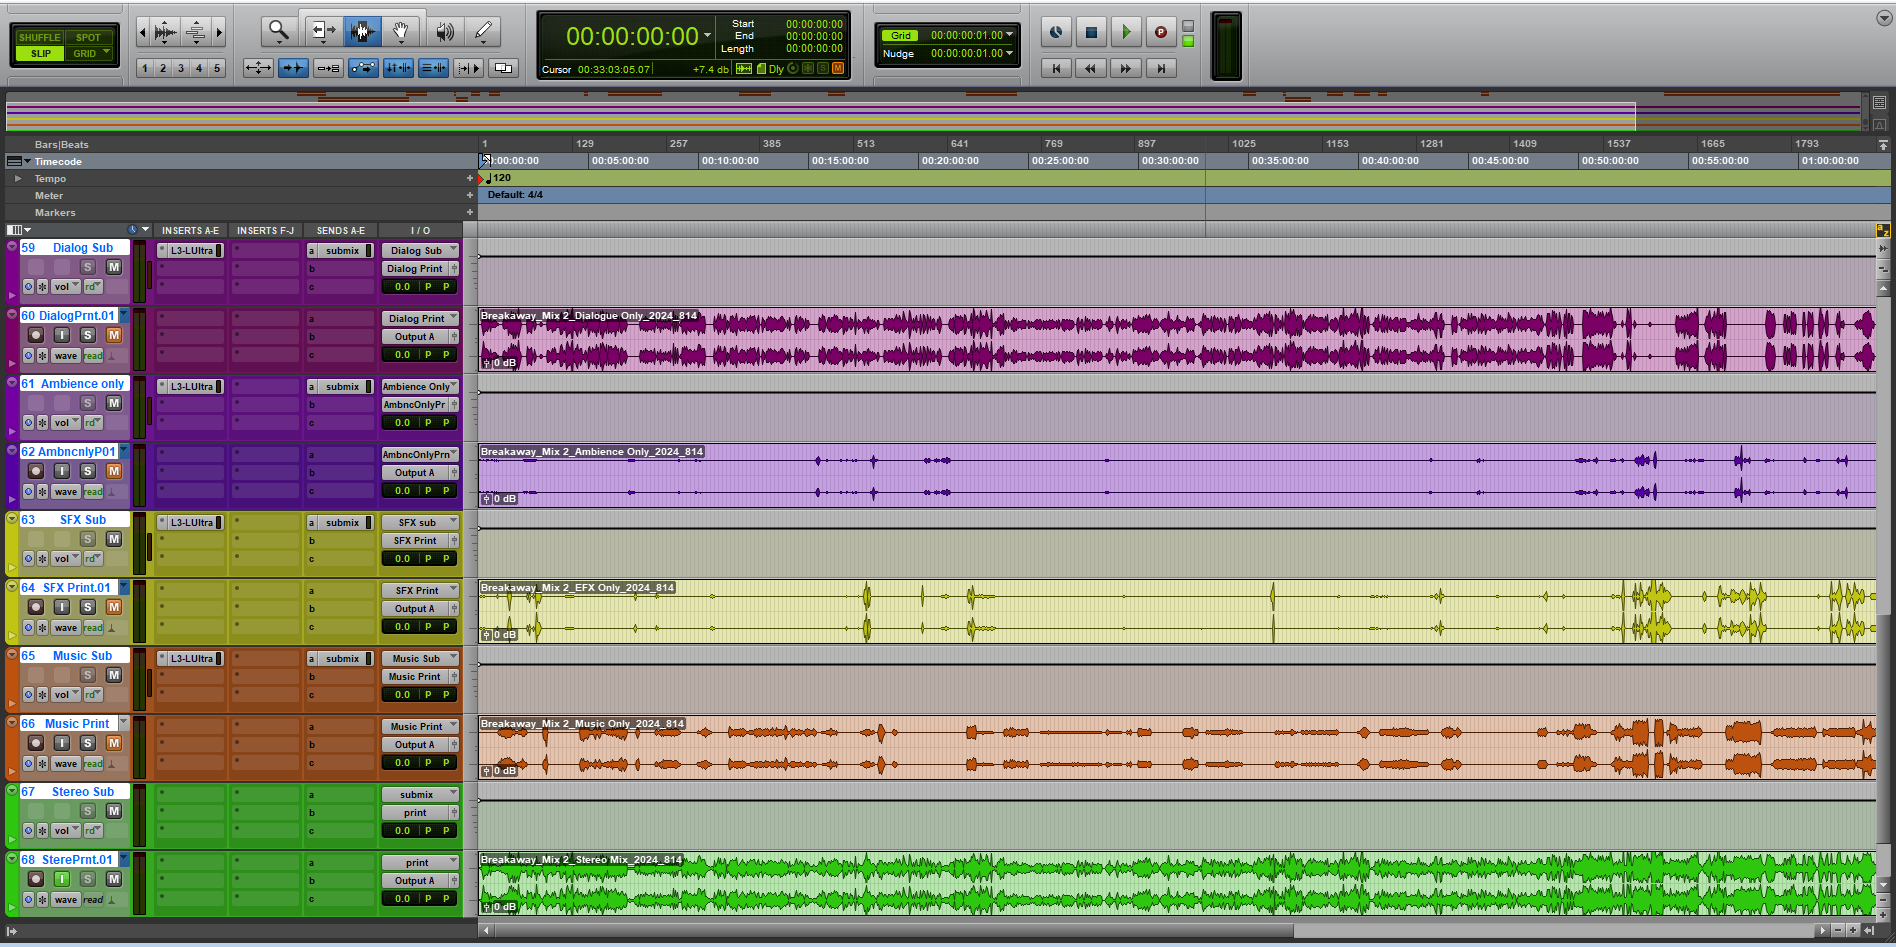
Dialogue, music, and sound effects tracks routed to different tracks for easy separation
Automation is usually best
With big projects like post-production projects, it can be really tempting to throw a compressor on every track and rely on the plugin to manage the dynamics for you. However, this can present some issues in post production. For example, compression can highlight background noise, making it more apparent. You're much better off automating volumes of tracks so that every word is heard rather than hoping a compressor will do it for you.
Another temptation would be to batch fade every clip. With batch fading, hundreds of fade-ins, fade-outs, and crossfades can be created with a single click. However, these fades all have the same length and shape so a fade that might work in one spot may not work as well in another. It's best to create fades as you work through the clips and audition them instead. It takes more time, but the end result is much better. Think of automation like a custom-fit rather than a one-size-fits-all solution.
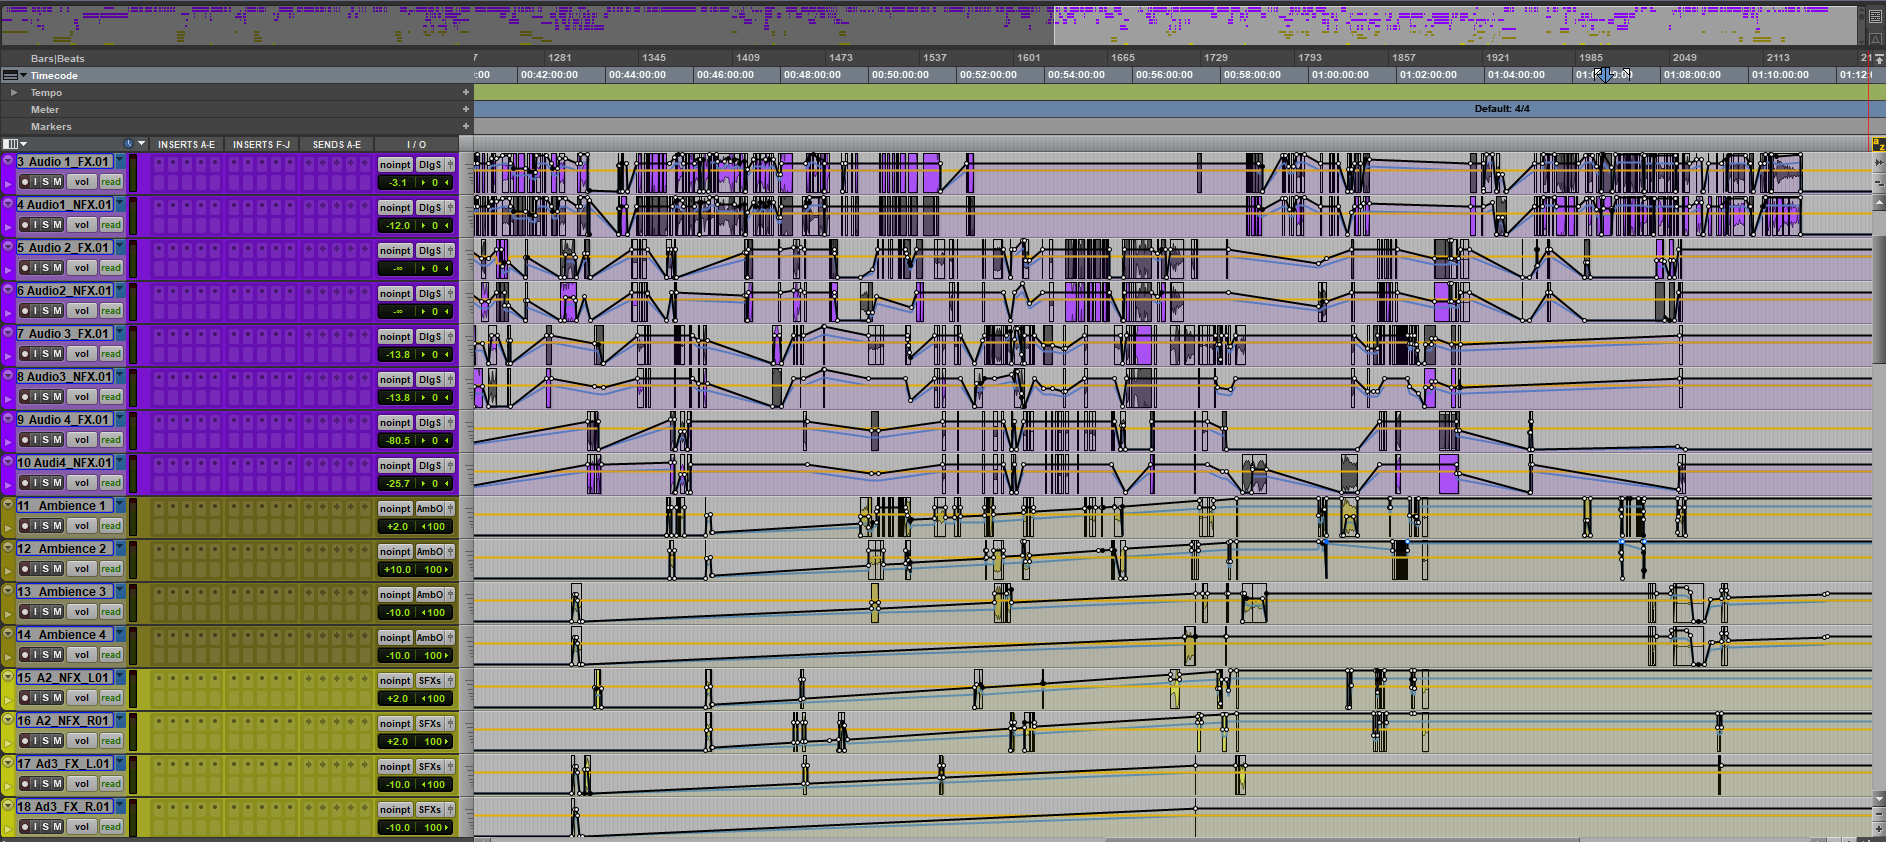
A look at volume automation for a feature-length documentary
Watch your meters
You should also have an understanding of where the film will be distributed when it's finished so that you can meet the loudness standards of that platform. For example, most commercial films are mixed to meet broadcast loudness standards. Loudness standards ensure that viewers have the same experiences from TV shows to commercials to film, even across different channels. There are different loudness standards for broadcast vs YouTube and Netflix. For broadcast, we usually aim for -24 LUFS, YouTube is -14 LUFS, and Netflix is -27 LUFS. With these different standards, a loudness meter like Insight 2 is crucial to your mix being within spec.
Pro tip: To ensure the mix is balanced well and is within spec, try starting the mix with one of the loudest scenes of the film, then balance everything else to that scene. Starting with a louder scene gives you an idea of how loud the dialogue should feel in relation to that. A common mistake beginners make is to begin the mix at the beginning of the film, often not leaving enough headroom for the louder parts of the film so by the time they get to those sections, their volumes are way out of spec and they need to redo the beginning.
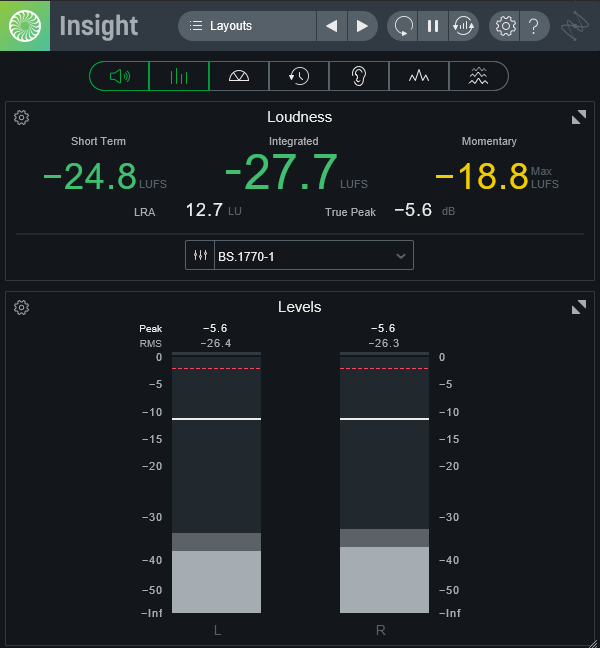
iZotope Insight 2 measures the loudness of your audio to ensure compliance with broadcast standards
Use high sample rates to record foley
One of my favorite parts of post-production is adding sound effects and recording foley. Foley, when performed well, is in sync with the video and adds a layer of realism to the scene. However, sometimes it requires a bit of nudging to get it just right. This is where recording foley with higher sample rates is really helpful.
Pro tip: While most films require delivery of a 48kHz file, if you record foley with a sample rate of 96 kHz or even 192 kHz if your system allows, the resulting files will have extra data allowing you to do more to them such as slowing them down without hearing artifacts being introduced. Try this with ADR as well!
Keep frequently used plugins handy
When working through a post-production project, you'll find it's a lot of de-noising of dialogue. I recommend working with at least 2 video monitors so you can see the edit window of your DAW, the video, plus keep a few of your most-used plugins ready to go. In the screenshot below, I have Insight 2 visible so I can keep an eye on loudness, Dialogue Isolate which works really well at removing background noise from dialogue, a low cut filter to get rid of things like plosives or rumbling wind, and RX 11 Connect so I can send any audio over to RX for some spectral repair or de-clipping or whatever I may need.
Pro tip: Keep these plugins open and ready to go, rather than closing them and opening them each time you need them. This will save a lot of time over the course of a project.
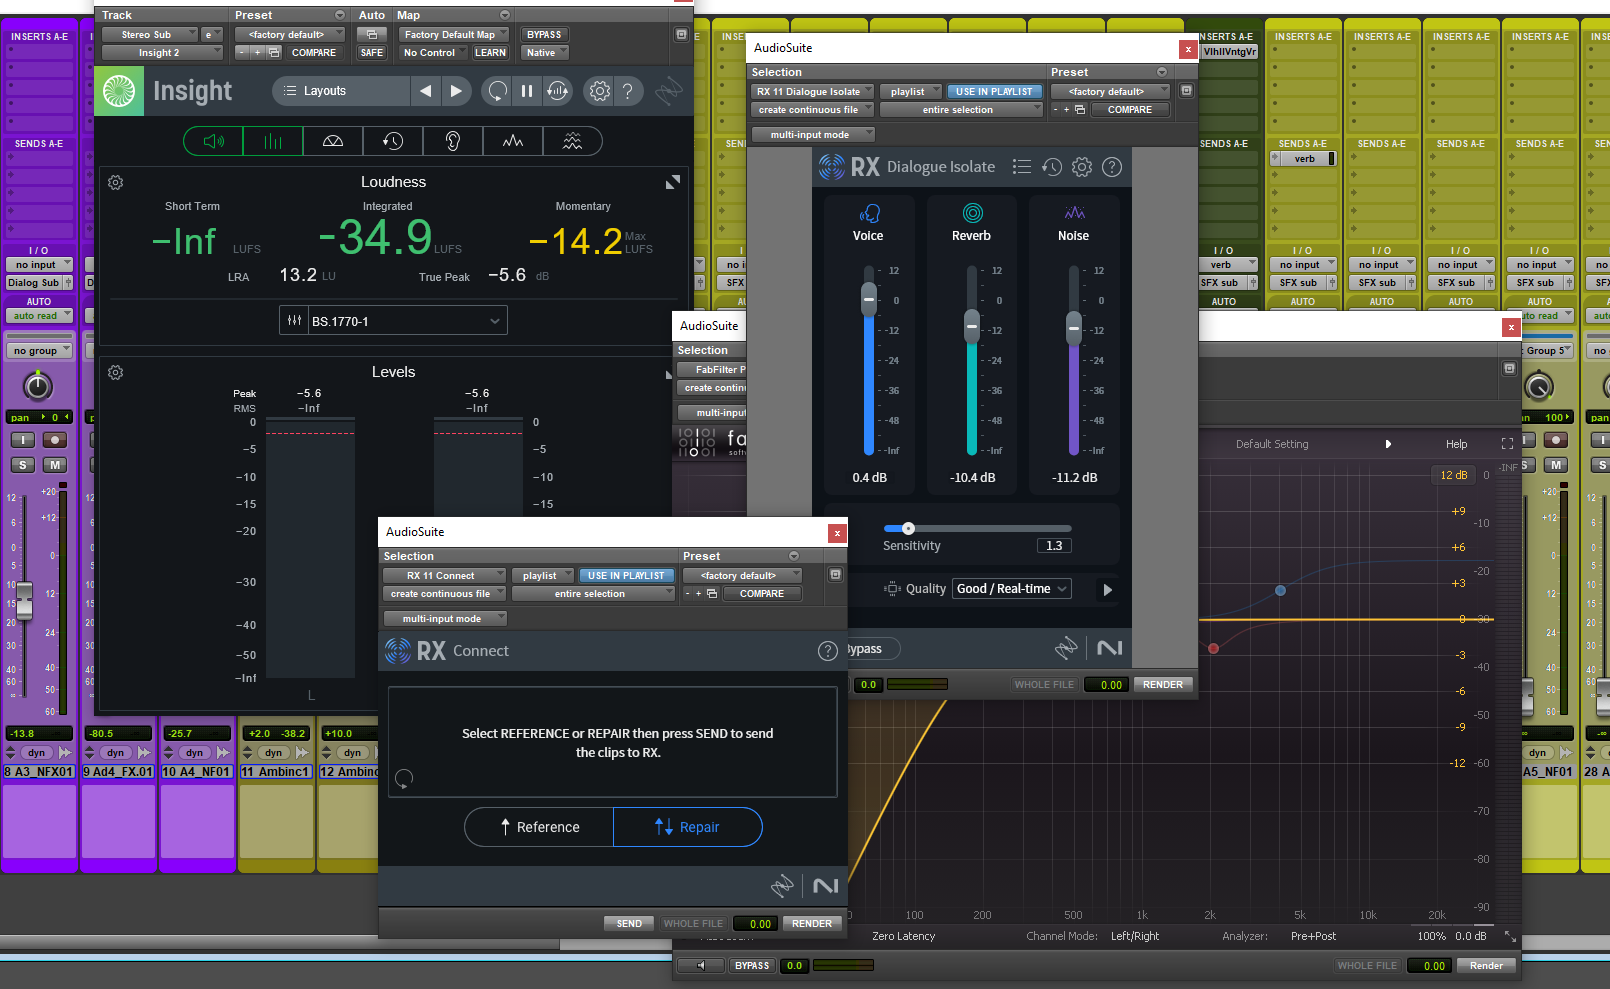
Frequently used plugins stay opened and ready to use in post-production sessions
Start mixing audio for film today
This is a fairly zoomed-out glimpse into the world of post-production, looking mostly at things pros have told me they wished they had known when first starting out. Always get clarity on deliverables from file formats to how the director will want their stems split up and which loudness standards to meet.
Getting a rough mix on the loudest parts of the film first, then balancing quieter parts in relation to that will get you to a well-balanced mix faster. For a more in-depth look at sound mixing in film and post-production, check out Audio Post Production 101.
