
If there’s a topic in audio engineering more shrouded in mystery than audio mastering, it’s got to be remastering. What is remastering? How does it differ from mastering? And how do you remaster a song?
In this article, we’ll pull back the curtain and chat with world-class mastering engineer Adam Ayan about his remastering work. Adam is based at Gateway Mastering in Portland, Maine, and has remastered records for the likes of Pearl Jam, Journey, Edward Sharpe and the Magnetic Zeros, The Rolling Stones, Bruce Springsteen, and REM to name a few.
Adam and I chatted at length, and there was much more than we could reasonably include in this article about remastering music. If you’d like to listen to our whole conversation, you can find it below.
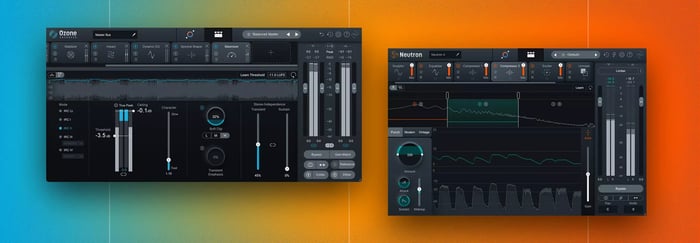
Follow along with this tutorial using iZotope RX and iZotope Ozone , two powerful plug-ins that can help you remaster your tracks.
What is remastering?
Remastering is the process of taking a previously released piece of music—whether a song, EP, or album—and applying new mastering processing to it. This often involves the use of both standard mastering tools, like EQ, compression, and limiting, as well as specialized restoration tools, like RX.
We’ll get into some of the specifics of why and how this is done below, but the “what” doesn’t need to be much more complicated than that. It’s simply a new mastering of an existing release.
Why do songs need remastering?
This is where we start to get into the meat of it, as there are many reasons why a recording may be remastered. Very broadly speaking though, it is often to improve the fidelity using the latest state-of-the-art tools, and/or to optimize the release for a new consumer format.
For example, during the transition from vinyl to CD as the dominant format, albums were often remastered to take advantage of the increased dynamic range and frequency response. In fact, as more and more streaming services are providing hi-res, lossless tiers, we’re starting to see another wave of hi-res remasters. But before we dive into the technical aspects of why we remaster records, there are some important philosophical considerations. Adam explains it this way:
“What’s difficult about remastering is that oftentimes you get [an album] and the reason it’s being remastered is because it’s loved by many, many, many people, and the team that did the thing originally—producer, engineer, recording engineers, mix engineers, artists, mastering engineers—already did a killer job, so how do you improve upon that? And that is actually kind of where the rubber meets the road for me as a remastering engineer.
“How do I try to not only respect, but be able to at least closely approximate what was done before, and then make it better? That can be a pretty steep challenge, but I'm usually up for it.”
One of the key takeaways here is the idea of respecting the original master. The reasons for this are at least twofold. First, the original master is what was signed off on by the artist or producer. This doesn’t mean there’s no room for improvement, but it does at least mean there are some core elements that everyone involved was happy with. Second, consider the fans. There are potentially millions of people who know and love this music, and it’s important not to estrange them from it.
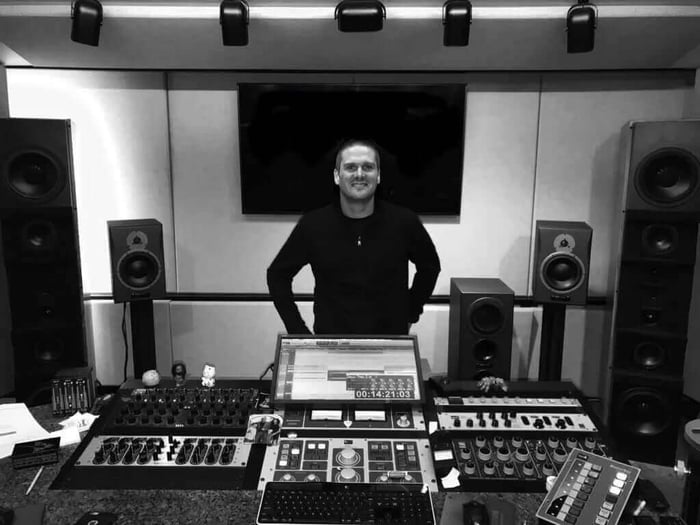
Adam Ayan in his studio
One of the primary ways to do that is to work with the stakeholders to establish the goals of remastering at the outset. Back over to Adam.
“Sometimes the goals are, ‘keep it as close to the way it was as possible’ but now with tools here in the 2020s, how can we get more out of that original mix tape? How can we get more out of the digitization of that mix tape, and the overall mastering, that exposes things that maybe just didn't show up because of the way the technology was the original time it was mastered?
“You’ve got to figure out from the hierarchy, that being the artist and the producer or the engineer, all those folks that really had their hands in it, what their goals are creatively. For myself, if for some reason I can't have that conversation or if it's left to me, the goals are to put an ear to the original mastering, see what was awesome and magical about the original sonics, and then try to improve upon them, both with the technology at hand and then just whatever direction I might want to go myself in the remastering that feels conducive to that recording.”
Adam touched on something else important in there, which is one of the key technical reasons music gets remastered: improvements in the mastering signal path. To make the most of these improvements, Adam likes to go back to the original mix tapes.
“In a perfect world let's go back to the original mixes because that's where you can start to glean sonics that maybe just didn't make it through the signal path with the technology that existed at the time [of the original mastering], and you can enhance the overall fidelity of what's happening with the remaster.
“You think, ‘Oh my gosh, so many people would just appreciate the flat transfer of this, let alone a remastering of it,’ and that again is because all of the sudden all those things in the signal path that are better now than they were 30–40 years ago, especially in the early digital era, are now revealing a heck of a lot more.”

Adam at the 65th GRAMMYs
Getting a great flat transfer is by no means easy or straightforward, and Adam went into this in some detail in our full conversation, but there are at least some objective metrics by which it can be judged. However, the next part of remastering—the “make it better” part—can get highly subjective. That’s where having some predetermined goals can come in handy again. Also important, though, is having an understanding of the historical context of the original master. Reflecting on this, Adam explained it as follows.
“What does making it better mean? If I think about that, for me, a certain era of albums—and certainly not all of them—but with a certain era of early digital, for instance, I find a lack of low-end response. It was like with early digital everybody really got into how bright you could make a record.
“There certainly have been instances where they said, ‘just take the tapes and transfer it, take the master safety tape and transfer it to digital for CD.’ That's why sometimes you get an old CD where you put it in and it’s 10 dB below full scale. It doesn't need to be compressed, but let's at least have the peaks come close to 0 dBFS. So those records, you can tend to be a hero because much more care is going into a remastering 20 or 30 years later than maybe went into the original run for one reason or another.
“[But] if I can find a way to get it to sound very similar to the way a listener was used to hearing it, but I can give it a little more body, a little more low-end; if it was lacking a little bit of level for it's time I can get away with that without it sounding compressed given new technology and limiting, and boom, now I’ve made something that's even more satisfying, is more enjoyable emotionally, and is shining even a little bit of a better light on something that already sounded amazing.”
How to remaster a song
Just as there’s no one way to master a song, there’s no one way to remaster one either. That said, there’s a lot of overlap in the use of standard tools like EQ, compression, and limiting. For that reason, in this section, we will focus more on the philosophical side of remastering along with some of the specialized restoration techniques.
Determining the goals of remastering
Again, a lot about how you’re going to remaster something hinges on establishing the goals of the remastering project. Adam makes this a standard part of his process, explaining, “For the creative side of it, in terms of how we're going to approach it, I generally want to have a conversation with somebody really close to it. If not the artists themselves, the producer that was involved in it, or occasionally the mix engineer, and that happens quite often. It really can set the tone for what the goals are for that remastering.
“Occasionally somebody might say, ‘Hey just start fresh and try doing it all over again,’ and I will do that, absolutely. But I always will put an ear on the original release or remaster if it's been remastered once already.”
Another aspect that may seem trivial or easily overlooked is ensuring you have the right mixes to work from. Adam provides some useful elaboration on this.
“Oftentimes you can get a compiled set of reels, like a side A and a side B, both on 15” reels with the appropriate mixes, the choice mixes, maybe even edits done to the tape itself if that was necessary back then, and work from them and that's awesome because that takes a lot of questions out of the equation. [But] sometimes you get the analog tapes and it's a whole bunch of [different] tapes and you’ve got to try to do a little research to figure out what the choice mixes were.
“Those tapes may be in dodgy shape, it really depends on the tape formula, the brand of tape and the era, but the first thing that always happens is those tapes will go up on a tape machine and you just wind into them a little bit and see how the tape is holding up—is its shedding? Is oxide coming off? If that's the case it goes into an oven to be baked, and then ultimately worked from and digitized at more than likely 192 kHz 24-bit for possibly the sake of that remastering as well as archival of the tape itself so it doesn't have to get played again.”
Now certainly, not all of us will have the equipment and expertise to do the kind of tape or perhaps even vinyl transfers that Adam is describing. If you’re asked to remaster something and that’s the case, there’s no shame in hunting out a transfer engineer to help you out. In Adam’s words, “You don't want to make a cookie out of somebody's precious master tape.”
The importance of historical context
Lastly, before we get into the nuts and bolts of restoration, let’s touch on the historical context element that I mentioned earlier. Aesthetic considerations certainly apply here, but another factor is that the mastering tools that may have been prevalent during the original mastering may sound quite different than their modern counterparts. Adam explains his process as follows.
“With remasters, what I will do is open back up into the analog domain whether I have tape or not. So of course, if I have tape, I'm going through my analog signal path, and I may even get some specialty EQs or compressors that we have that historically had been used in mastering and may have been used on those records, that in some ways become a real signature sound to the album and to the recording.
“Because it'll be like, when I dial a certain thing up on a Sontec analog EQ, nothing quite sounds like that. So it’s widening the toolset and in some instances thinking historically about a toolset, or tools that might really be important to how that record originally sounded. That goes back to that notion of respecting the way it sounded, so long as it sounded great—and a lot of those records did—and utilizing tools that I normally wouldn't utilize on a new record today.”
Using RX for restoration
Restoration isn’t necessarily part of every remastering job, but if your source is a less-than-ideal tape, or perhaps even a vinyl record, there’s a good chance that a little cleanup will be beneficial. That may mean just some gentle denoising or removing the stray click or pop, or you may really have to roll your sleeves up. We’re going to do the latter.
While many of the modules in RX can do a great job on their own, it’s when you start to combine them in unique and not necessarily intuitive ways that they can really shine. For our example, we’re going to use a transfer of an old Glenn Miller recording from a 78 RPM record. If you’ve never listened to a 78, they are noisy. Like, really noisy. At times, the crackles almost entirely swamp the music.
Going in, I know I’m not going to be able to make it sound like a nice, clean, big-band recording transferred from tape, so if I can get something where the noise sounds like it’s more in the background than the foreground, I’ll consider that a win. Setting those kinds of expectations can be important when tackling something like this. To start, here’s a before and after of the flat transfer and the eventual remaster.
"Tuxedo Junction" by Glenn Miller and his Orchestra
Not too shabby, eh? Now, let’s talk a little about how we got there. I’m going to be honest: I don’t remember every single step, and even if I did it would be a long, confusing list with undos and redos that probably wouldn’t apply to anything else out there. A lot of this type of work takes experimentation and iteration. However, there are some principles and techniques that can be very useful, so I’d like to approach it from that angle.
Start subtly
One of the pitfalls of restoration is trying to do too much, too quickly. You run the risk of introducing artifacts that can become exaggerated as you keep working. Some typical good first steps for a source like this are the Azimuth module—to ensure centered elements are truly centered—and a light pass with De-crackle—to clean up some of the worst of the offending clicks-and-pops.
Stereo thinking
Oftentimes with older sources like this, the noise will be highly decorrelated between the left and right channels, while the useful, musical signal will be much closer to the center. RX has two tools that can make dealing with this more effective. First, the Mixing module has an MS Encoder-Decoder preset that allows you to transform between left/right and mid/side. Sometimes this can do the trick, but if you’ve read my article on mid/side, you may remember that hard-panned signals end up in both the mid and side channels.
As such, RX’s Center Extract module can often do a better job of separating the phantom center from the panned elements. By keeping the center and reducing the sides, you can often substantially reduce the amount of “wide” noise. There’s even a dry mix fader that allows you to blend in some of the original signal and prevent things from getting too unnatural sounding.
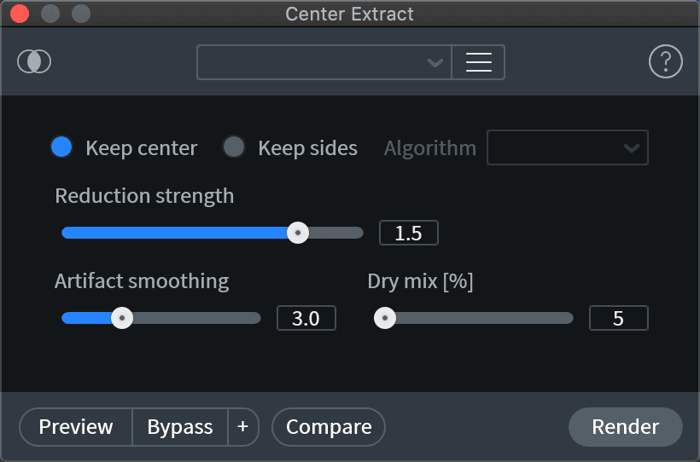
Using Center Extract to reduce decorrelated noise
In our example I used exactly this technique to create a more strongly denoised version. However, notice that it’s quite narrow and has lost a lot of its sparkle, which leads us to our next tip.
"Tuxedo Junction" by Glenn Miller and his Orchestra
Parallel thinking
Did you know that RX has paste modes that allow you to mix, or even invert and mix one sound with another? You can find them in the Edit > Paste Special menu, and I used them extensively on this example.
For instance, once I did the initial Azimuth and De-crackle passes, I copied the whole file, created a new tab, pasted it in, ran Center Extract and did additional denoising to get the “Denoised” example above, copied that, and used Paste and Mix to blend it back into the source.
I think I even used the Deconstruct module to isolate just the noise in yet another tab, adjusted the gain slightly, and then used Invert and Mix to cancel the noise out. In short, even though parallel mix controls aren’t available on all modules, there are creative ways around that by using the Paste Special modes.
Think beyond EQ
By using Paste and Mix we were able to recover some of the brightness and sparkle in the horns that we lost in the denoised version, but it still feels a little bit dull compared to the original. However, if we just use EQ to try to brighten things back up we can bring back a lot of the crackles and noise with it.
If we think about what’s missing though, it’s mostly the upper harmonics of the horns. What’s another way to get back harmonics? Saturation. By using the Ozone Exciter module in multiband mode we can focus in on the horns and add some saturation to brighten them back up without bringing up the noise as much.
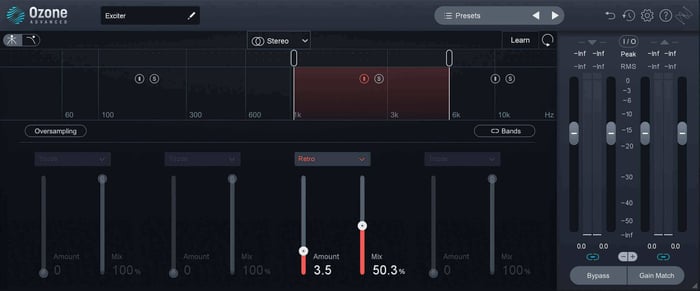
Using Ozone Exciter for brightness
There are other approaches too. By using linear phase EQ to high- and low-pass the azimuth corrected version, and a combination of Center Extract and Deconstruct to reduce the noisy components, we can create a signal that focuses on the upper harmonics of the horns and then can be blended in parallel. The “brightening recovery” signal might sound something like this.
Sweeten last
Only once you’ve got the source sounding the best you can should you move on to any sort of “sweetening.” This could be some little EQ moves to help reshape the tonal balance, or perhaps a slight tweak with Ozone Imager’s Stereoize feature to add some spaciousness if you’re dealing with a predominantly mono recording. Just don’t go overboard!
From there on out, things aren’t much different than a normal mastering job.
Start remastering
Ok, that was a lot! However, if there are only a few things you take away from all of this, I think they should be as follows.
- Establish goals for the remastering project early on, preferably with someone originally involved with the project.
- Proceed with respect and care. Really this is always true of mastering, but especially when you’re dealing with something that’s been living out in the world for years or even decades, and is loved by potentially millions of fans, you have to be extremely careful that everything you do is making an improvement.
To close out, I’m going to leave you with some thoughts from Adam, the maestro.
“Those are the things that generally go into remastering. Taking splices apart and re-splicing things and really paying attention to those sorts of things. You hear some thumps, or bumps, or clicks, that maybe RX or any other tool isn’t going to quite get out, but then you realize, ‘Oh, there's a splice there. Let's take that apart. Let's clean it up. Get the glue off of it. Let's re-splice it,’ and wow, magically it's playing that much better. It’s those kinds of things that aren't fun and sexy to talk about, but are the things that can go into a good remastering that really make a huge difference.
“Believe me, I've had instances where I'm holding some tape or something, and I'm putting it in our oven like, ‘Am I really doing this right now, with this classic relic of a piece of tape?’ And that's because that's what needs to be done. The oven is around the corner from my studio and every 10 minutes, even though I know it stays at a steady temperature, I can't focus on anything else but checking on it every 10 minutes. That's probably one of the most anxiety-inducing parts of it is something like that.
“One last note is that I've noticed that a lot of the streaming services now will have both iterations [of an album], which in itself is an education in mastering, to even just spend some time critically listening [to multiple masters]. I think that’s just something that's important that your readers should know. If they really want to spend some time learning about it, above and beyond you and I yacking about it, if they spend some time and listen, it's such a huge education.”
Good luck, and happy remastering!