🎉 Mix & Master Month is here! Save 50% now. Shop Deals

Cart

Learn Music and Audio Production | iZotope Tips and Tutorials

How to Master a Song in Logic Pro

by Chris Vandeviver, Guest Writer August 2, 2022
iZotope email subscribe

Never Miss an Article!

Sign up for our newsletter and get tutorials and tips delivered to your inbox. 

Ah, mastering. That last step between your mix and the world hearing your music. Many creatives think of mastering as some sort of black art. But if you think about it, the point of mastering is to provide a final check to make sure your mixes are the best they can be before they’re released.

You've written, recorded, produced, edited, and mixed your album in Logic Pro. So why not master in Logic Pro as well? When paired with Ozone, you can quickly and easily master your tracks in Logic Pro with satisfying results.

In this piece you'll learn:

  • Tips for getting the most out of mastering in Logic Pro by customizing the interface, Selection-Based Processing, and more

  • How to clean up and correct any issues that might have been missed at the mix stage using ARA and RX

  • How to use Ozone and Tonal Balance Control to guide you through your own mastering process

Follow along with this tutorial using iZotope RX, Neoverb, Ozone, and Tonal Balance Control. 

What is mastering?

Mastering has meant different things at different times in audio history. At one point mastering was a purely technical role of transferring audio from one medium to another. For example, transferring audio from tape to vinyl.

These days mastering can be both creative and technical. But in most cases the goal of mastering is to make sure your music will sound its best no matter where it’s heard. Whether on laptop speakers, a cell phone, headphones, or in the car.

You might be surprised to know that mastering engineers tend to use the same plug-ins you use to mix your own music. Equalizers, compressors, limiters, and even the occasional reverb are all regularly used. But instead of focusing on the individual elements of a mix, mastering engineers focus on the tonal and dynamic balance of the mix as a whole. 

Tips for mastering in Logic Pro

Apple's Logic Pro is a fantastic digital audio workstation (DAW) for capturing and arranging your creative ideas. Logic Pro gives you every tool you need to begin writing, recording, arranging, editing, and mixing your music.

While more specialized workstations exist for mastering, there's no reason why you can't master your own music in Logic Pro. So let's begin by importing a stereo bounce of a mix into a new Logic Pro Project.

Importing a stereo bounce of your mix into Logic

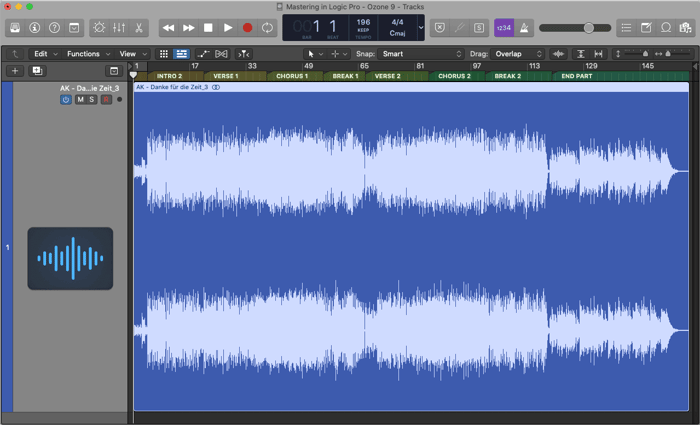
Importing a stereo bounce of your mix is simple. Navigate to the stereo file you plan on importing using your Mac's Finder. And then drag the file from the Finder directly into the Tracks Area in Logic Pro.

Dragging a stereo file from the Mac Finder to the Tracks Area in Logic Pro

When you import your mix, you may run into some pop-up windows during the process. That's because Logic Pro embeds certain metadata into audio files and bounces. If you mixed your song in Logic Pro, you can also import certain details from your original mix Project. For example, you can import the tempo track from your original track.

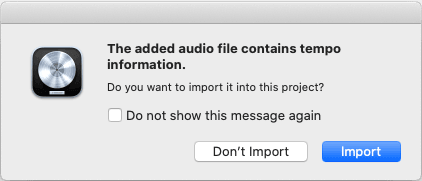
Import tempo metadata from your stereo files into your mastering projects

As well as any markers you may have used.

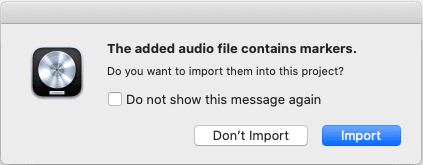
Import markers as well into your mastering project

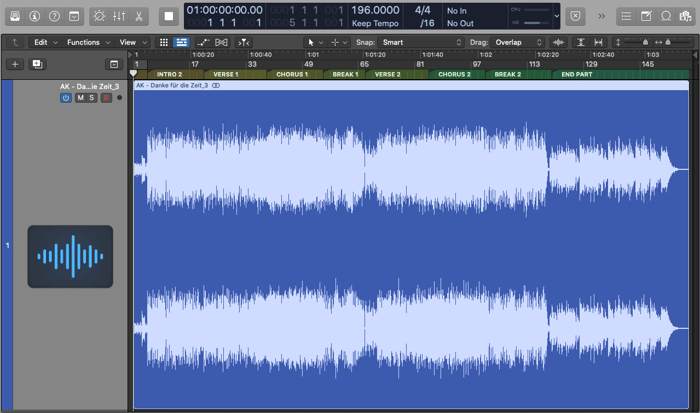
These details can be beneficial for navigating your session as you master your track. So let's import both the tempo and markers from this file.

The imported stereo file, markers, and tempo

Customizing the Logic Pro interface for mastering

From here let's customize the Logic Pro interface a bit. By default Logic Pro's timeline is measured in bars and beats. But sometimes it might be more helpful to see how long the track is using a time-based timeline.

So in the Tracks Area navigate to the View menu and select Secondary Ruler.

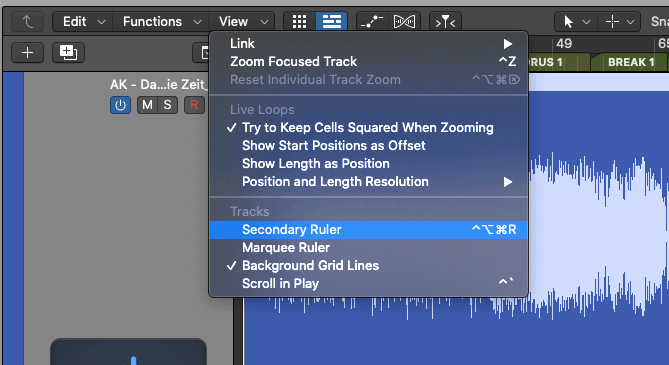
Adding the secondary ruler to the tracks area

Once enabled, the secondary ruler will now show a time-based ruler along the top of the Tracks Area.

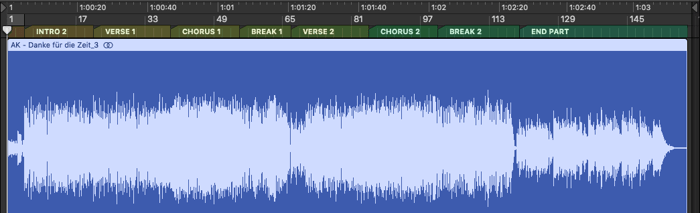
A time-based ruler now lines the top of the tracks area

Lastly, let's also customize the LCD in the Control Bar at the top of the Logic Pro window. By default, the LCD can provide some basic information about our Project. But again, more specific information about position and time can be helpful when mastering.

To customize the LCD, click on the dropdown arrow on the right-hand side of the LCD. From the dropdown let's select the Custom option.

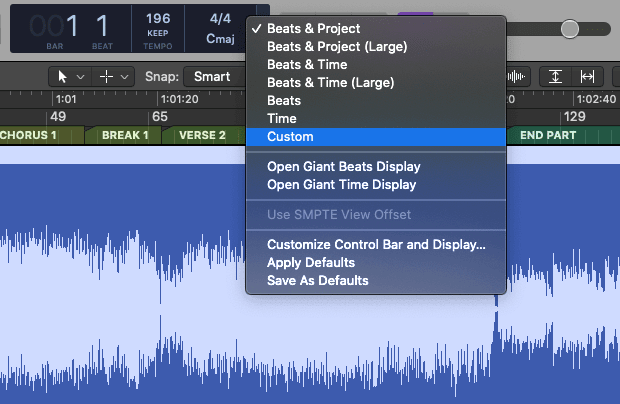
Clicking on the dropdown menu in the LCD to customize

Ah, much better! Now we can clearly see the details of our project, as well as where we are in our project.

The now customized and expanded LCD in the Control Bar

Adding tops and tails to a stereo file in Logic Pro

Next let's attend to some housekeeping details. We'll want to bring our attention to the "top and tail," or beginning and end of our stereo file.

You may find that your stereo bounce may have silent or "empty" bits at the beginning or end of your file. Your audience is not likely willing to sit through several seconds of silence to hear your song. So we need to trim this excess from our masters.

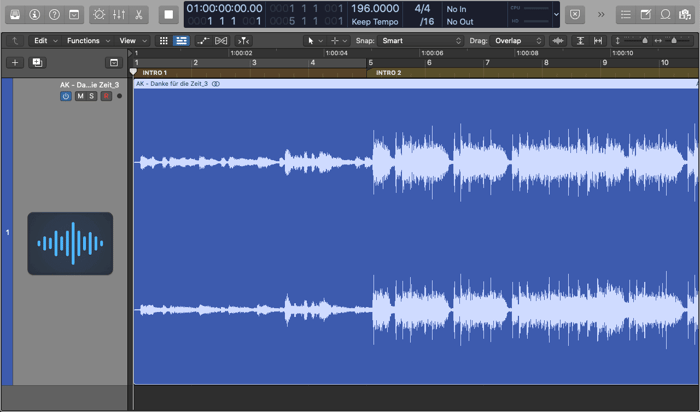
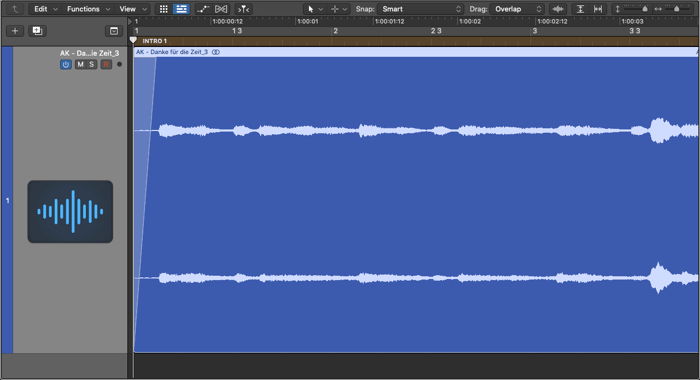
The beginning of the stereo file

In our example, my stereo mix has no empty space to trim at the beginning. So all is well, right? Well, even though we have no extra lead time to trim, we should add a fade-in as a precaution. 

You'd be surprised how often we fail to notice ambient noise or effects in the background of our mixes. This is usually due to noise from plug-ins that emulate analog gear. Or time-based effects that last far longer than we tend to notice. And if we don't add fades to our stereo files, we could end up with pops or clicks in our masters.

So to be safe, let's add a short fade-in to this mix. To do so, let's set the Mouse click tool to the Fade tool. You can access the Fade tool by heading up to the Mouse Tools at the top of the Tracks area and click on the right-hand menu.

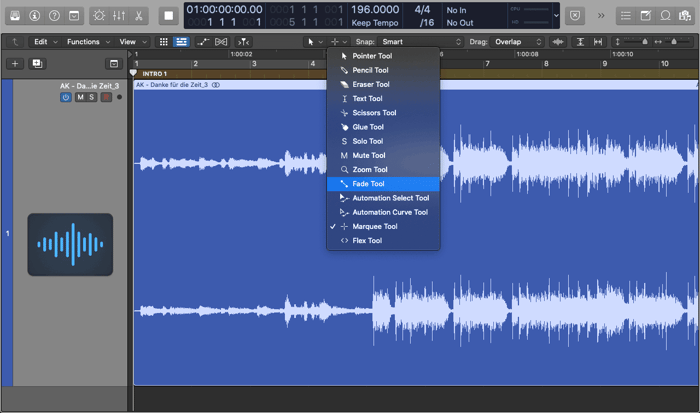
The mouse tools menu at the top of the tracks area

The right-hand menu is what we call the Command-click tool. Let's select the Fade Tool as your Command-click tool. Now hover your mouse over the left edge of your mix's region. Hold Command, click and drag from the left edge to the right.

A fade-in added to the beginning of the stereo file

Great! Now we know for sure this mix has a clean transition from silence into our song.

At the end of the song, there's a fade-out. But as it turns out, when I bounced my track I included too much silence at the end after the fade-out.

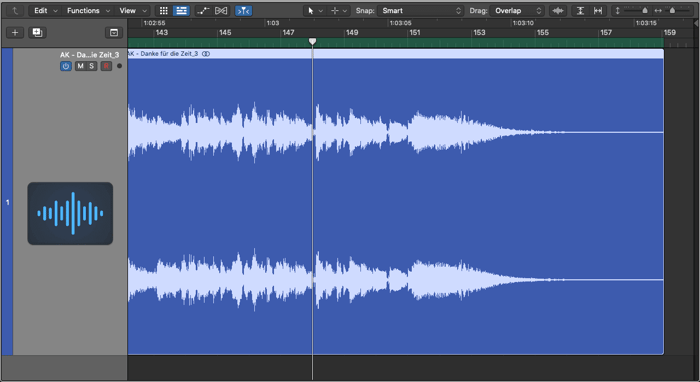
The fade-out at the end of the stereo file

Listen to the fade-out on this track as it is below. You’ll notice an excess of silence at the end.

Fade-Out in Logic Pro

There's really no purpose for all that extra silence. So let's remove it. To do so, hover your mouse over the right-hand side of the region until you see a bracket icon.

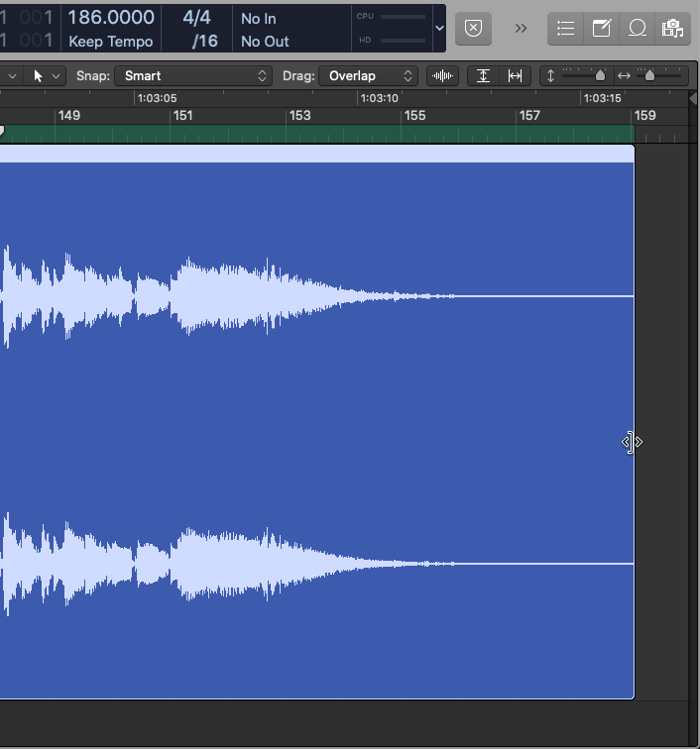
Trim Region tool for adjusting the boundary of the stereo file

Then click, hold and drag the right edge to the left to trim the tail of your stereo mix to your preferred length.

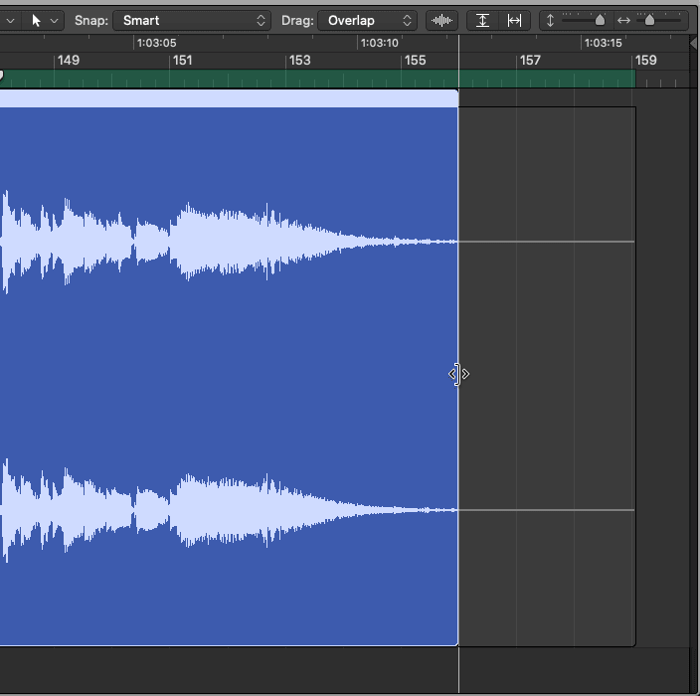
The adjusted region length

Now that we've adjusted the region length, let's add a fade-out. Once again hold Command, click and drag from the right edge of the region to the left to introduce a fade-out.
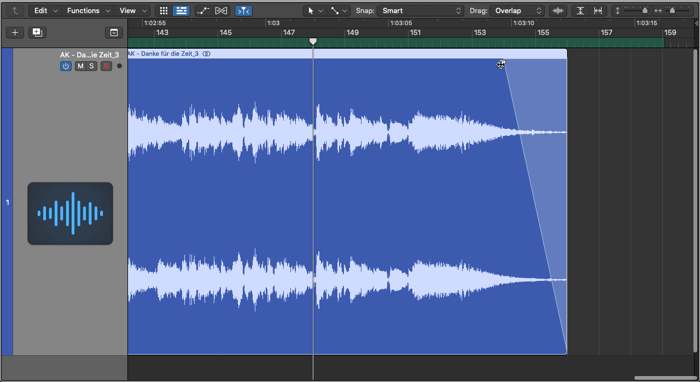
Adding a fade-out using the Fade tool

Let's take a listen now to the adjusted length of our stereo file:

Fade-Out With Adjusted Length

Perfect! With this mix's length fine-tuned, we can now attend to an issue related to the vocals using RX.

Using RX for cleaning up mastered tracks

There's much more to mastering besides EQ and loudness levels. In fact, mastering is also about listening carefully for sonic problems that weren't noticed at the mix stage. Issues like pops and clicks from poor edits, or background noise from the recording or processing. In this case, we'll be reducing the level of an aggressive consonant sound from the vocals during the chorus.

Let's listen to the second chorus of this track. Pay special attention to the "T" sounds of the main and backing vocals at around 00:03-00:04 in this audio clip:

T Consonant Sound

Do you notice how aggressive and bright that "T" is in the vocals? The vocals lurch out of the mix in an unpleasant way. While we could try to automate an EQ to reduce this issue at this one moment, let's instead use RX.

Another great aspect of mastering in Logic Pro is that Logic supports the ARA 2.0 protocol. ARA, or Audio Random Access, is a feature that allows audio to be instantly transferred from your DAW to a supporting application. Normally if you wanted to clean up this mix using RX, you'd have to:

  1. Import the stereo file into RX

  2. Clean up the audio in RX

  3. Export the edited stereo file out of RX

  4. Import the edited stereo file into Logic Pro

That's 4 steps between applications to clean up one small issue. And who knows if there are more issues to correct elsewhere in the file? 

But thanks to Logic Pro's support of ARA 2.0, you can instead do the following:

  1. Load the RX Spectral Editor (ARA) plug-in on the first Audio FX slot of the channel strip of the stereo mix

  2. Press play

The moment we press play, our stereo mix is instantly transferred to the RX Spectral Editor. No exporting and importing is required. And once transferred, we can use RX Spectral Repair’s Attenuate feature to reduce the aggressive consonants in this vocal.

RX Spectral Editor (ARA) waiting for audio to be transferred
RX Spectral Editor (ARA) with audio transferred from the stereo file

If we take a look around 1:45 in the RX editor, we can actually see 2 bright spots which make up those "T" sounds.

Aggressive consonant displayed in RX Spectral Editor (ARA) between 1:45:40 and 1:45:50.

Let's use the Time-frequency selection tool to select the first part of this T sound. You can see that this particular consonant starts to live around 7000 Hz and above.

First selected consonant in RX

Once selected, let's click on Attenuate to reduce the level of this first sound. Let's take a listen now and see if we've managed to reduce the level of the consonant so that it sits back into the mix:

Reduced T Consonant Sound

Definitely better! But the consonant could still use a bit more finesse. Let's select the 2nd brightest part of the audio using the Time-frequency select tool. This second part of the consonant lives around 5000 Hz and above.

2nd selected part of the aggressive consonant
Second selected part of the aggressive consonant

Let's now expand the controls of the Spectral Editor so we can fine-tune how much we attenuate this sound. Since this selection is quite large, we do have to be careful not to hurt the rest of the mix when we attenuate.

Let's reduce the Strength slider under the Attenuate function to about 2.53. Once adjusted, click Process to reduce the level of our consonant. With the second part of our aggressive consonant reduced in level, let's listen to the results:

Further Reduced Consonant Sound

Thanks to ARA and RX we successfully reduced this consonant to a more tasteful level. All without having to leave Logic Pro!

You can leave the Spectral Editor (ARA) plug-in on your channel strip for as long as you need to make corrections. Once all corrections are complete, I suggest bouncing your track in place to commit your RX edits. You can do this by going to File > Bounce > Track in Place.

Selection-based processing in Logic for mix rebalancing

Before we begin mastering our track using Ozone, there's one last housekeeping detail to tend to. Between the first chorus and the second verse there's a brief break section. This break serves as a short reprieve from the loud punk rock intensity.

Brief Break Section

Listening back to my original mix, I do wish I had added more reverb to this break for more space and breath. Of course I could go back to the original Project and adjust my reverb choices in the mix. But sometimes we don't always have the luxury to go back. So instead let's use selection-based processing in Logic Pro to "bake in" a bit of reverb.

Selection-based processing allows you to apply plug-in processing to a specific part of a track or region. You can completely replace your original region with the update processing. Or you can create a new take with the plug-in processing applied. In the case of a new take, Logic Pro will create a Take Folder. And from there you can comp together bits from the original mix and the newly processed mix.

First, select the mix region in the Tracks Area. Then head to Functions > Selection-Based Processing.

Selection-Based Processing is found under the Functions menu in the Track area menu

Once selected, the selection-based processing window will appear. You can even compare two different plug-in chains before committing your plug-in processing to your track. For now though, we'll load a single, stereo instance of Neoverb onto the "A" plug-in chain.

Neoverb loaded into Selection-Based Processing

Now using the Marquee tool, let's select the part of the mix we plan on rebalancing using Neoverb. Just like with the Fade tool, you can set the Marquee tool as your mouse tool using the menus at the top of the Tracks Area.

The Marquee Tool found in the mouse Tool menu
A marquee selection
A marquee selection
Previewing Neoverb using Selection-Based Processing

Once the track is playing, let's use the Reverb Assistant feature in Neoverb to quickly dial in reverb for this part. Clicking on the Reverb Assistant button in Neoverb offers various controls to fine-tune the Assistant's results. I'm going to leave the Reverb Assistant controls in their default states. Let's click Next.

Use Neoverb Reverb Assistant to get a great starting point for your reverb application

In seconds, Neoverb dials in a reverb sound for this break section. Click Accept to view the adjustments Neoverb has made. 

Reverb Assistant results

Of course you can fine tune the results of Reverb Assistant to match your own creative tastes. I'm happy with what Reverb Assistant has chosen for my mix. I'll just adjust the Dry/Wet slider to about 25%. This will add a tasteful, but subtle amount of reverb for our break.

Reverb Assistant Adjustments

With our reverb dialed in, let's apply our reverb to the mix. To be safe, select Create New Take in the selection-based processing window. Instead of replacing our original mix, Logic Pro will create a new take with Neoverb applied. This is great if you decide later you'd like to go revert back to the original mix. 

Let's also select under the Gain dropdown the option for Loudness Compensation. With Loudness Compensation, Logic Pro will adjust the level of our processing so the level of our break remains exactly the same. This protects the mix from any accidental boosts or cuts in volume. The volume will remain exactly the same for the break. The only thing that will change is the amount of ambiance. Let's click Apply.

Create New Take and Loudness Compensation selected

Logic Pro creates a new track with Neoverb applied to the break section of this mix. We've successfully rebalanced the ambiance of this break while preserving a copy of our original mix for safekeeping.

Master your track using Ozone and Tonal Balance Control

We've done a considerable amount of work to this mix! We began by:

  • Cleaning up the top and tail of this track

  • Adding fades to prevent pops and clicks

  • Used ARA and RX9 to correct issues with the vocals

  • Rebalanced part of this mix using Neoverb and Selection-Based Processing

Now we're ready to use Ozone to refine the tonal and dynamic balance of this mix as a final mastered track. 

Once finished, I'll load Ozone and Tonal Balance Control. With Master Assistant in Ozone, we'll arrive at a solid starting point for mastering this song. From there we'll fine-tune the results with the following Ozone modules:

  • Equalizer

  • Dynamics

  • Dynamic EQ

  • Vintage Limiter

I'll also use Tonal Balance Control to help identify potential tonal and dynamic issues in this mix. Thanks to the targeted metering system we’ll load a custom curve based on a set of references. And from there you're able to easily identify areas in a mix that need fine-tuning.

Start mastering in Logic Pro

As you can see, Logic Pro is a completely capable DAW for mastering your music. From the initial importing and fine-tuning of your tracks to forensic editing and even mix rebalancing. 

And when paired with Ozone, RX, and even Neoverb, you can get more out of mastering in Logic Pro.

Learn more about mastering

iZotope Logo
iZotope Logo

We make innovative audio products that inspire and enable people to be creative.