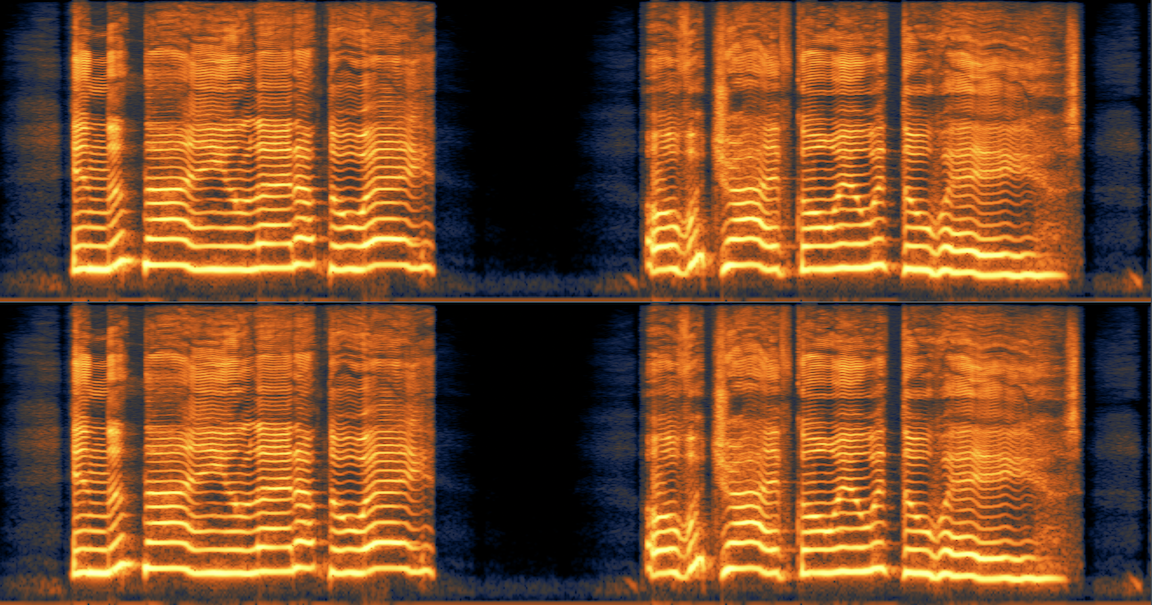
How to make vocals sit in the mix
How do you get vocals to sit in your mix? Explore vocal mixing tips using tools like EQ, compression, and reverb to get a balanced vocal sound.
No two singers sound exactly the same and every song is different, therefore there is no one-size-fits-all magic plug-in or preset that works for everything, therefore the more mixing tools and techniques that we know, the better prepared we will be for any situation.
For this reason, it is important to assess a vocal recording in the context of the track, the artist style, and genre, and to do this on a song by song basis. We should be able to hear what needs to be fixed, conceptualize how we think it should or would like it to sound (use commercial reference mixes!), and have the knowledge and tools to execute that vision.
As every mix brings its own unique challenges, I have decided to choose a random section of music with a raw vocal to work with. I will take you through my process step by step as I assess this particular recording and then apply a variety of techniques to polish it up and sit it in the mix.
What does it mean to have your vocals “Sit in the mix?”
This phrase gets thrown around a lot on the internet, but what does it actually mean? Is it a matter of adjusting the EQ to fix frequency masking issues? Is it taming vocal dynamics with compression? Is it gain-staging, adding effects, or embellishing the vocal with clever edits? The answer is all of these and none of the above, since as always, it depends. So, what do we do?
We need to ask ourselves all of these questions every time we work on a new song. For example, we may look into why our vocals sound muddy and find that they are being masked by instruments with similar frequency content. We may wonder why the vocals sound “detached” like they don’t belong in the song and find we need to “glue” the different elements of the mix together with bus processing. Alternatively, we may want the vocals to sound bigger, or distant, which would require the creative use of reverb and delay. The answers to these questions always depend on what it is we want to accomplish.
Mix dimensions
Think of it like this. The way that we “sit” vocals into a mix is the same way we fit any instrument into a mix; we “place” it somewhere in relation to the other elements. Okay, but what the heck does that mean? Considering our mix in three dimensions, we can place instruments from left to right across the stereo field with panning, we can create the illusion of length and height with sub bass and high frequency boosts, we push things back and away from us in a mix by making them quieter, rolling off high frequencies, or adding delay and reverb, or conversely we can pull things towards us in a mix by making them dryer, louder, boosting mid-range frequencies (1 kHz – 5 kHz), or applying fast and aggressive compression (shout out to the blue-stripe 1176_rev.A, all buttons in mode on that one!)
Steps to sitting a vocal in a mix
In an attempt to demonstrate this somewhat “ambiguous” topic, I have chosen a random audio sample and vocal to work with. In the steps that follow I will take you through my process as I work to sit the vocal into the track. What will be important to take away from this is not the exact steps, plug-ins, or plug-in settings, but rather the thought process that goes into the selection and application of each tool and technique.
Step 1 - Forensics
In this first step, let’s listen to the raw vocal in solo to assess whether there are any technical issues with the recording. This would include things like headphone bleed, background noises, lip smacks, pops, clicks, digital clipping, electrical buzzes, electrical ground hum, etc.
It’s not terrible. You should hear some of the track in the background that is bleeding into the microphone from the headphones. I hear a tiny bit of the room's reflections in the vocal as well as a funny “chirp-like” sound at the very beginning of the first word. Small sounds and anomalies like this may not seem like a big deal, but once you start adding heavy amounts of compression, they become relatively louder and potentially problematic. In this particular case, the issues are so extremely subtle that they likely would not be perceivable even after the vocal is processed and in the track, however, just to be safe, let’s clean it up anyway!
For this type of work I use iZotope RX. It’s true, RX is an extremely powerful application and when first learning to use it, may seem a bit daunting, but it truly is quite intuitive and very easy to learn. Once you discover what iZotope RX can do, you’ll wonder how you ever lived without it!
To speed up the process, I’ll use RX, “Repair Assistant.” To do this, I simply select the audio that I want to correct in the RX edit window and then click “Learn” in the Repair Assistant module. RX will analyze the audio and suggest correction settings for you. From here, you will likely want to further tweak the settings to taste, but in general, this is a great place to start. For more specific fixes or advanced settings, RX offers a variety of specialized, task specific repair modules.
One thing to note, when you start using RX, you will want to be careful not to damage the original audio by over processing it in an attempt to fix it. There is always a trade-off.
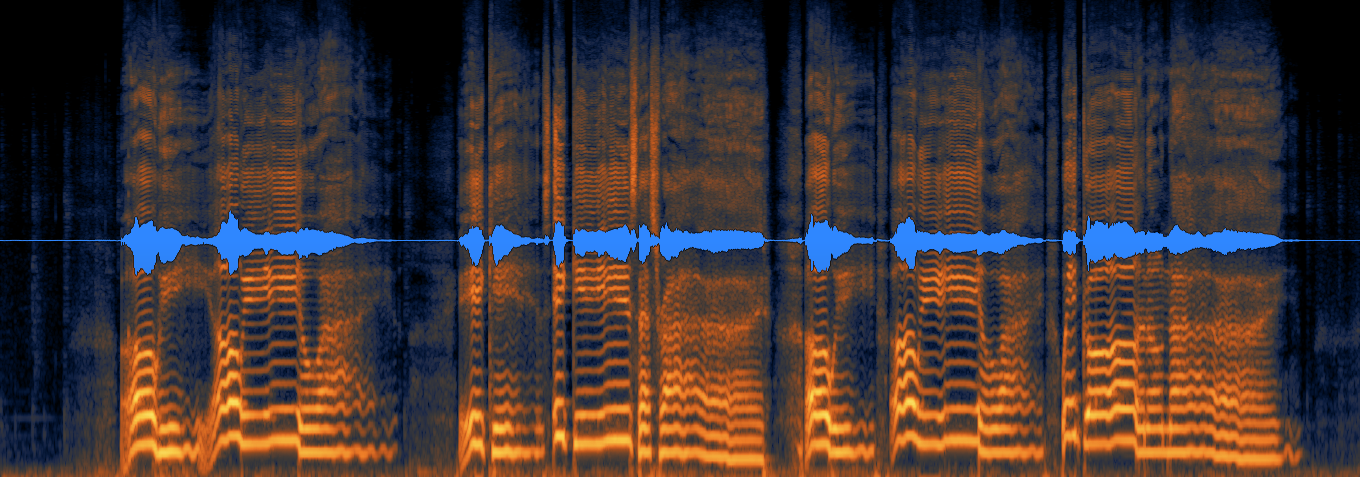
Raw vocal - before Repair Assistant
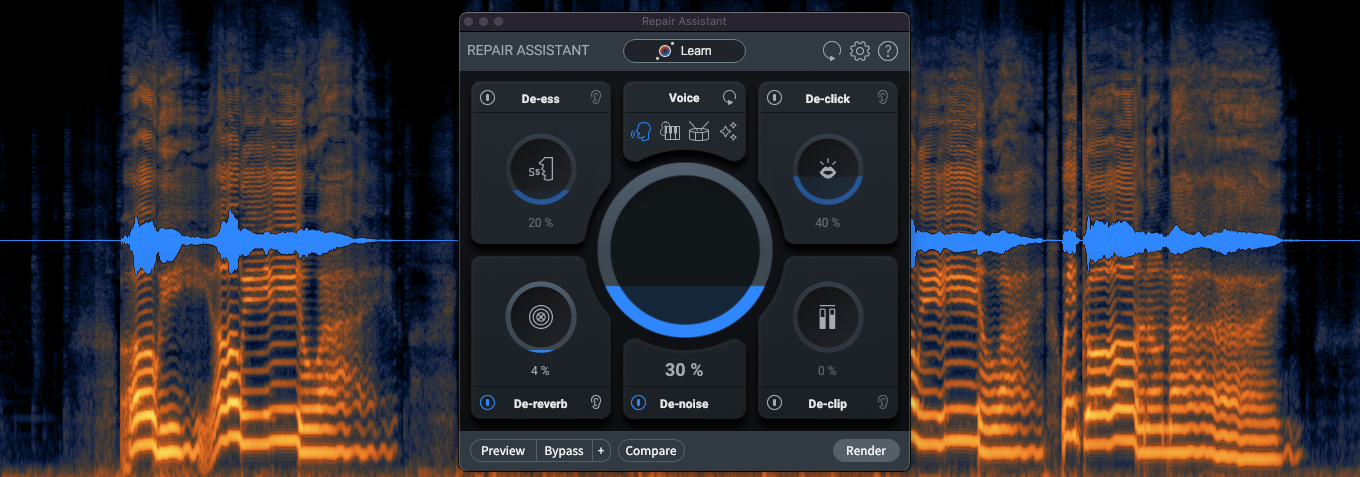
Raw vocal - after Repair Assistant
In addition to running “Repair Assistant” and then tweaking the settings, I also trimmed the dead space at the top and bottom of the clip, and in between the lyrics to clean it up even more.
Let’s hear how we did…
You’ll notice that the headphone bleed is completely gone in the spaces between the lyrics and a little bit less underneath the lyrics. You should also notice that the chirp at the beginning of the first word is gone and overall the vocal is a touch dryer than the original.
Step 2 - Level balancing
Because they emote emotion, vocal performances are dynamic, however any single word or phrase that is too loud relative to the rest of the vocal phrase can poke out of a mix in a distracting way. Conversely, any single word that is too quiet can get lost in a dense mix. Of course, we have compression to help us with this, however, by doing some of the level balancing manually, we can start shaping the dynamic timeline of the vocal exactly how we like, while also catching any level extremes before the compressor. This usually results in a smoother, more natural and controlled sound.
Although, as I just mentioned, I like to do a fair amount of the preliminary vocal leveling manually, iZotope Nectar has an amazing module called, “Auto-Level,” that can do a great deal of the work for me, leading to a faster, more efficient workflow, and an even tighter vocal performance. I find myself using it more and more. Sometimes, I use it to do all of the leveling for me, other times, I add just a touch of it to help smooth out the leveling I did manually.
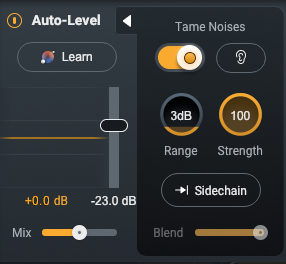
Nectar 4 - auto-level
Let’s listen to the vocal before and after applying Auto-Level
You should notice that the dynamics of the vocal performance are a bit more consistent, yet still have dynamics and still sound natural.
We can also see visually what Auto-Level has done to the dynamics of our vocal. Notice that the quieter parts have been brought up a bit and the peaks have all been reduced a bit.

Audio clip - before Auto-Level

Audio clip - after Auto-Level
As I set the Auto-Level settings somewhat conservatively, the difference is subtle, yet still noticeable.
Step 3 - Corrective EQ
By “corrective,” I mean an initial layer of EQ (often a combination of dynamic and static) dedicated to removing things like low-end rumble, low-mid frequency mud, distracting mid-range resonances or upper mid-range harshness.
Let’s first listen to our vocal, as it is up to this point, but with the track.
You will likely notice that there are a couple of resonances in the low mids that swell on some words, as well as a bit of harshness in the upper mids.
To thin out the low-mids without removing the vocals body and warmth, I added dynamic EQ. Dynamic EQ allows me to duck frequencies only when they are too loud. For the mid frequencies, I added small static cuts at key frequencies to smooth out and reshape the tone of the vocal. Finally, I added another dynamic EQ to duck some of the harshness in the upper-mids.
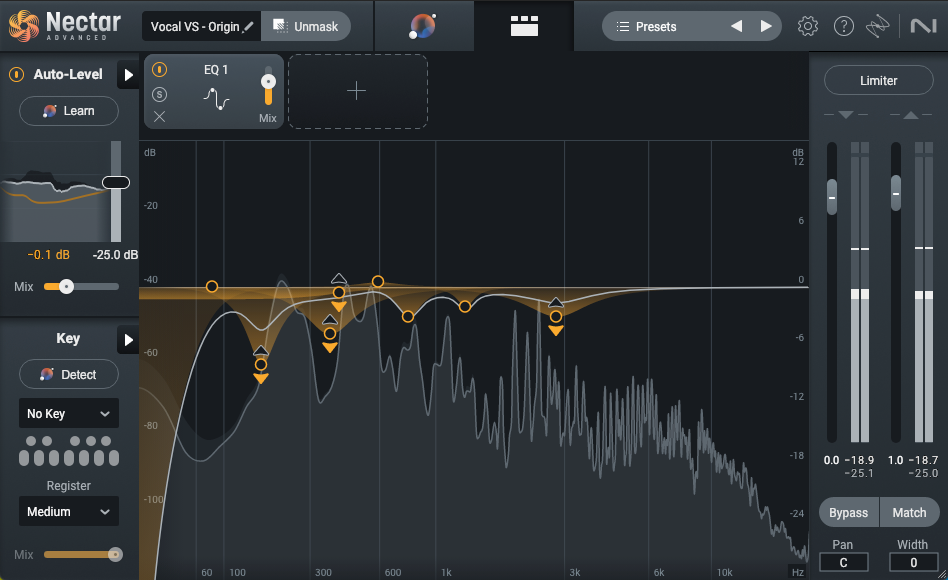
Nectar 4 - EQ
Let’s listen to the vocal before and after applying “corrective EQ.”
You should notice that the low-mid warmth of the vocal is still there, however, it’s now more controlled and blends in better with the rest of the track. Overall, the frequency of the vocal feels more balanced to me.
Step 4 - Transparent compression
Next, I’ll add a bit of light compression; something subtle and transparent. I often like to put a fast compressor with a fast attack just to grab any loud dynamic peaks first, followed by a slower compressor for soft level balancing of the meat of the vocal. More aggressive or character driven type compression is typically processed in parallel, (more on this coming up).
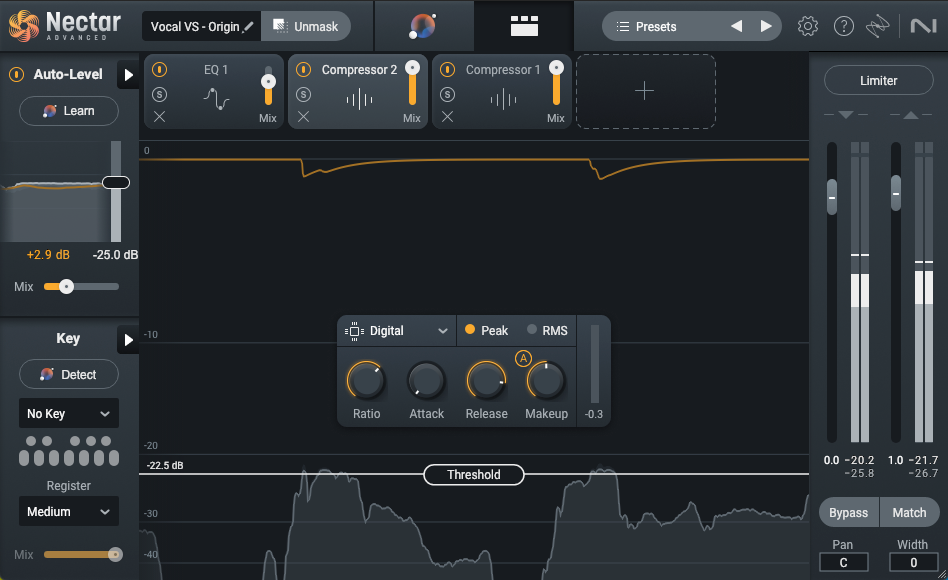
Nectar 4 - peak compression
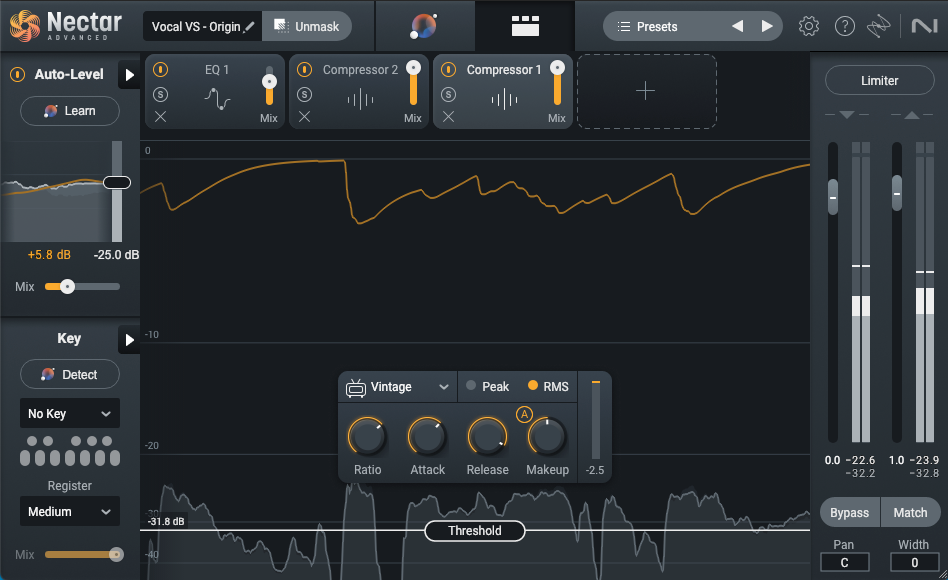
Nectar 4 - RMS compression
Let’s listen to the vocal before and after applying “compression.”
It’s important to remember that a great deal of modern music (for better or for worse) tends to be dense and heavily compressed. Therefore, if the vocal is too dynamic, it will feel disjointed from the rest of the track, only to likely suffer later from heavy amounts of compression and peak limiting during the mastering process. For this reason, using manual leveling techniques as I mentioned earlier, as well as multiple layers of compression, is one strategy for reigning in a vocal, while still sounding natural.
Step 5 - Saturation
It is at this point that I “might” consider adding a bit of harmonic distortion. Depending on the type of saturation and how much we apply, harmonic distortion can add warmth and character to a vocal, help it to cut through a dense mix, or add thickness and evenness across frequencies.
The vocal that we are working with in this particular exercise already feels a bit saturated to me, however, I will add just a touch of Nectar 4 Analog saturation to create even more thickness and even out some of the harsher frequencies. This will make the vocal a touch thicker and with a small 0.5 dB cut of top-end even a bit darker. I know what you are thinking, don’t worry, we will balance this out later with parallel processing and a final instance of EQ.
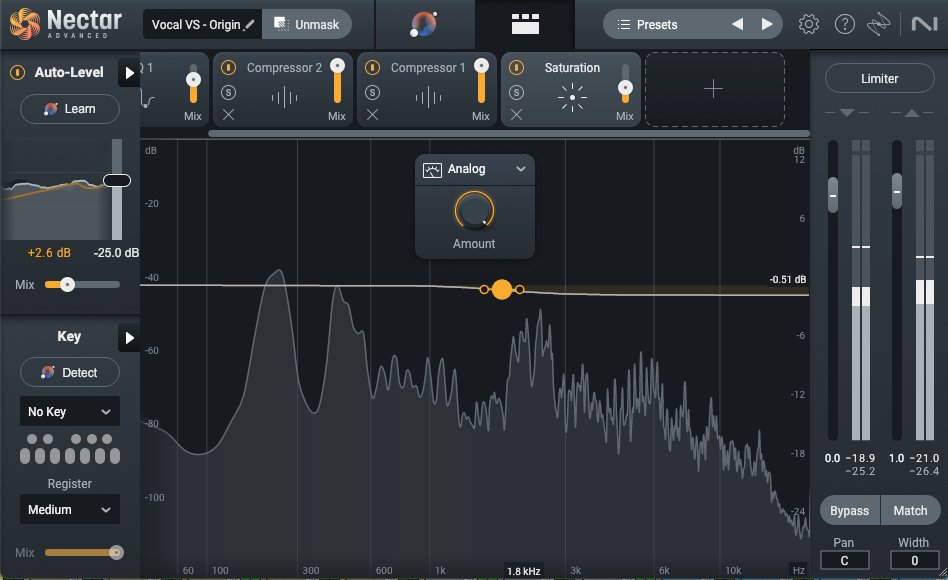
Nectar 4 - saturation
Since the vocal did not need much, the effect in this example is very subtle, so don’t feel bad if you can’t hear any difference at first listen.
Let’s A-B the before and after with the vocal in solo.
Step 6 - Parallel processing
As I just mentioned, you may have noticed that the vocal at this point is quite dense and fairly dark. This is fine. Now that we have a more controlled and rich vocal, we can add parallel processing to bring back some of the presence and clarity that we may have lost.
By using an auxiliary send, I can bus a copy of my vocal to an auxiliary track. On the “parallel” auxiliary track, I will over emphasize the frequency area of the vocal that I want to highlight (typically anywhere between 1 kHz – 8 kHz depending), compress it aggressively, and with a second EQ, add back in some of the frequencies I removed with the first EQ. I will then mix it back in with the original vocal to taste. What this does is squeeze those upper-mid frequencies that I boosted and compressed so tightly, they stay consistent throughout the performance and cut through the mix like a laser.
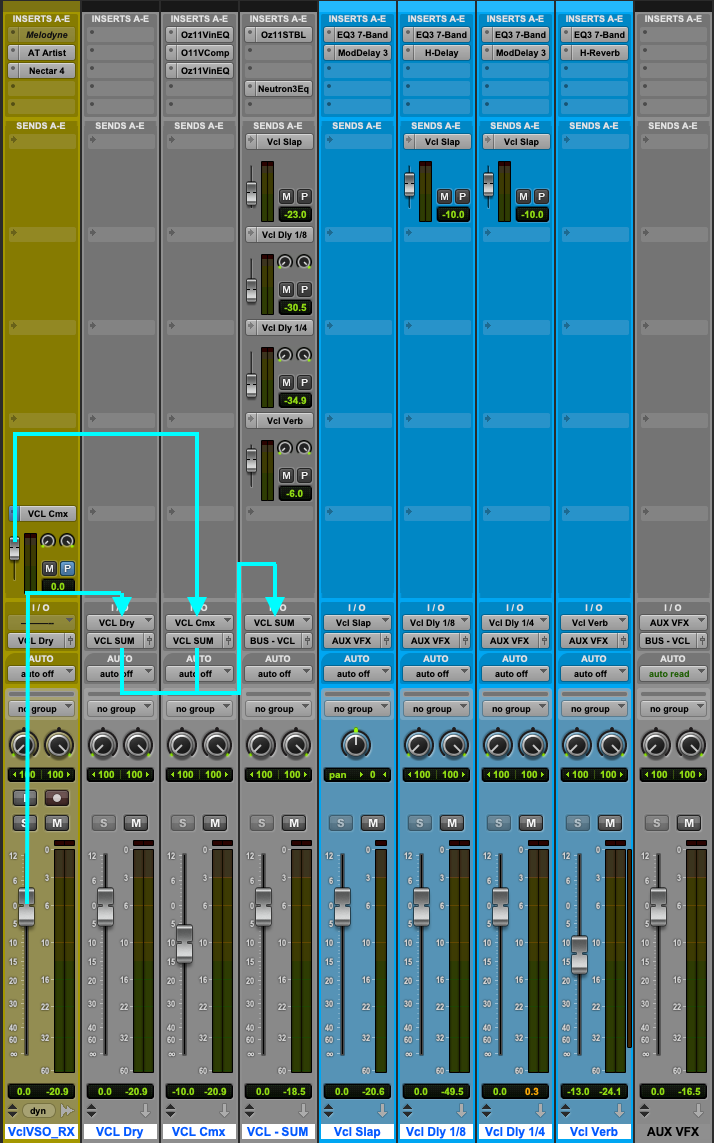
Parallel processing
Let’s listen again to the vocal, as it is so far without the track.
Now, I will use EQ to emphasize the presence and top end of the vocal…
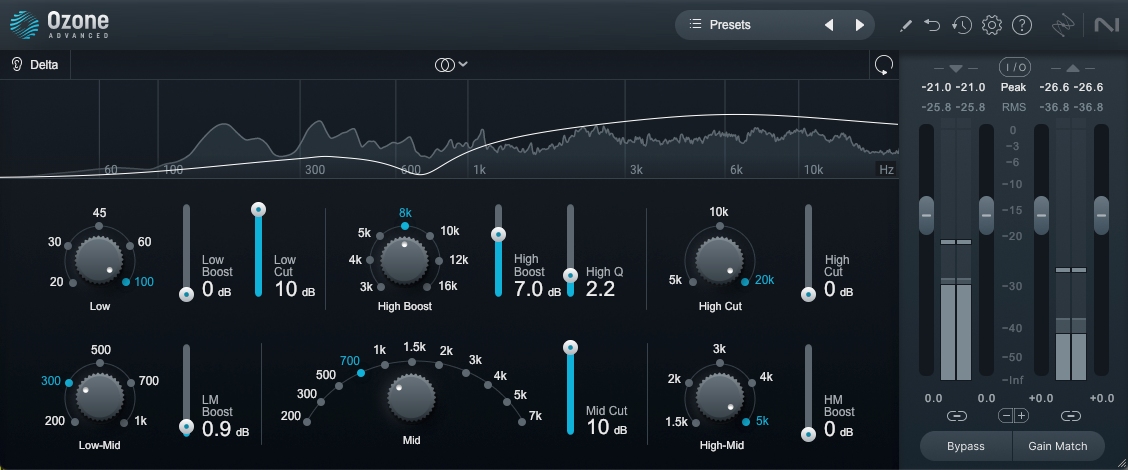
1st - parallel EQ
Now, I will compress the vocal
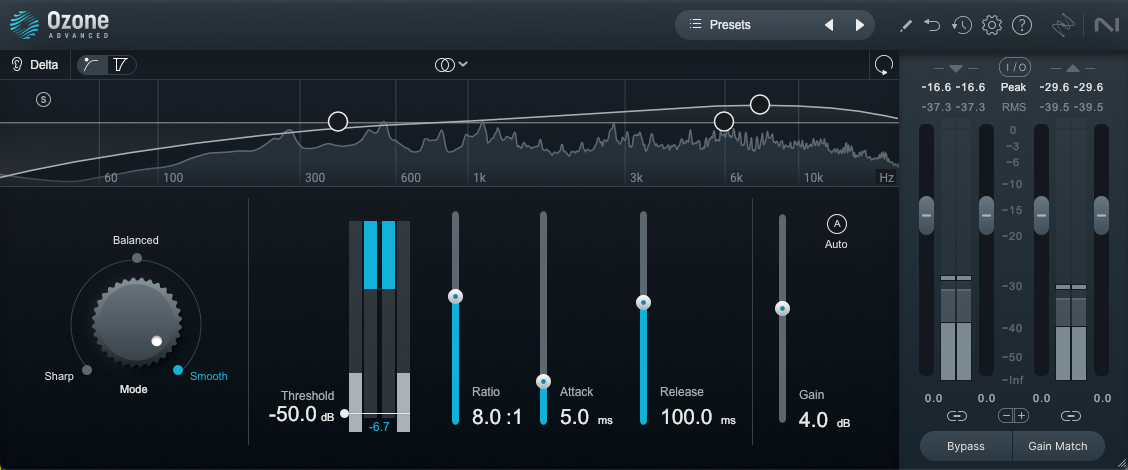
Parallel compression
Finally, I will use another EQ to bring back some of the body and remove some of the harshness that we just added. How much I add back depends on how it blends with the original vocal in the context of the track.
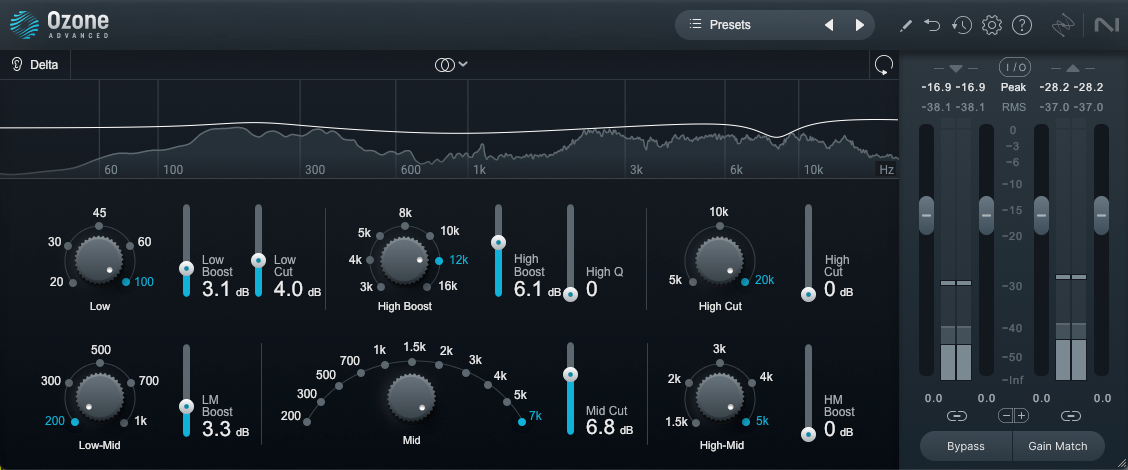
Parallel EQ
We now have two vocal signals. The clean warm vocal as well as the bright and edgy vocal. By blending them together, we can move the vocal backward and forward in the mix.
The more that the parallel processed vocal is added into the mix, the more forward the vocal sits.
The more the original warm vocal that is added into the mix, the more sat back and into the mix the vocal sits.
Let’s now compare the before and the after of the parallel processing with the track in…
Step 7 - Final layer of processing
With the original clean vocal and parallel processed vocal mixed together, the next thing I typically do is add a final layer of anything else I may want or need. To do this, the output of the clean vocal and the parallel vocal are combined to a stereo auxiliary track so they can be processed together. It is also from this combined auxiliary track that I do most of my volume automation and source my vocal FX sends.
This step often involves an EQ and some type of either traditional or multiband compression. In this particular case, however, the vocal is pretty solid as it is, so instead, I will use a combination of Ozone’s Stabilizer plug-in and Neutron EQ.
Stabilizer is basically an AI driven real time dynamic EQ. What did you say? Yes, a real time AI dynamic EQ. Based on the setting that you choose, Stabilizer will automatically apply “floating” EQ boosts and cuts to conform a signal to a target frequency curve. It is often used in mastering, but I also find it applicable on individual instruments and group buses. In this case, I only want Stabilizer to make tiny cuts where needed to smooth out the frequency spectrum of the vocal even more, catching any minor resonances that I may have missed.
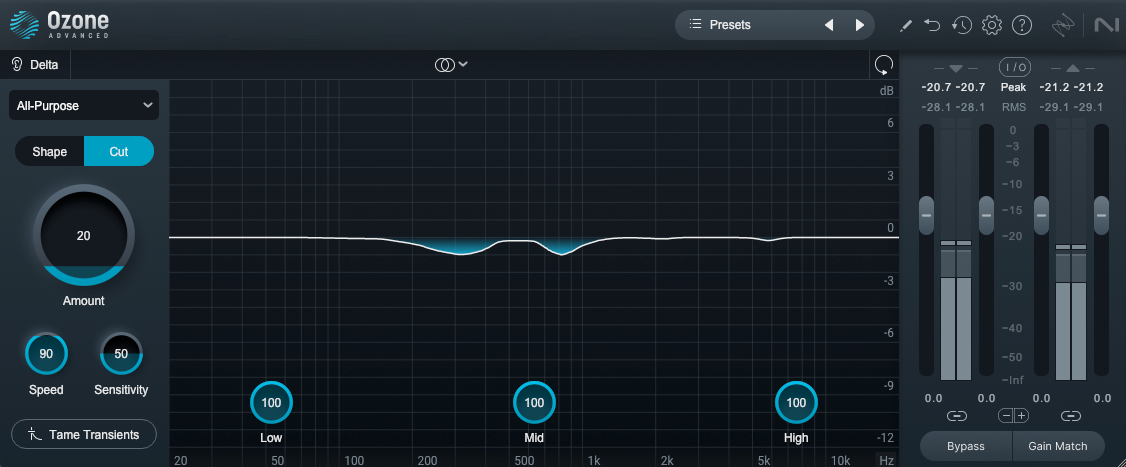
Stabilizer
Finally, and because I felt that the vocal could benefit from it, I added another layer of EQ; a final broad dynamic cut in the low-end and a small static boost of “air” at the top end.
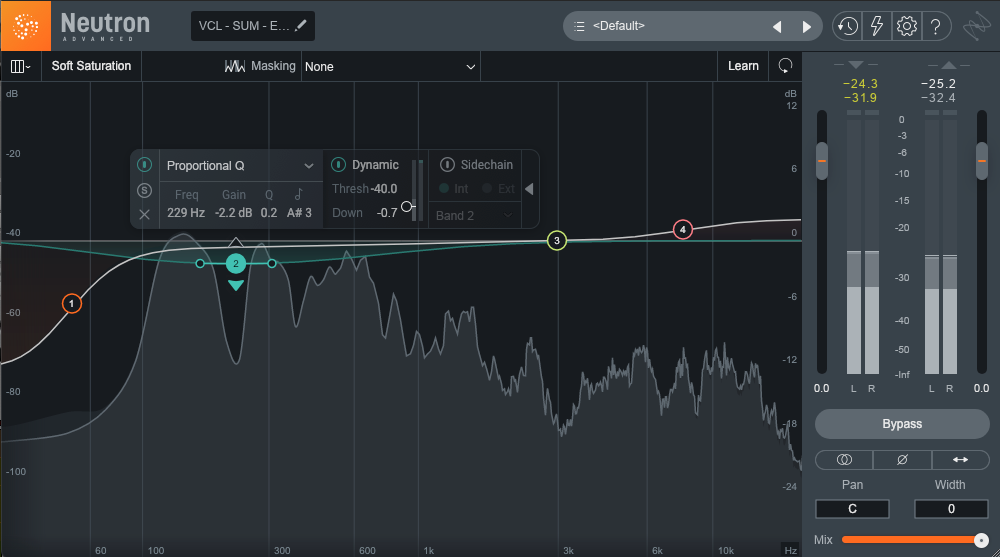
Neutron EQ
Let’s listen before and after…
Step 8 - Adding dimension with delay
Slap delay
Now that the vocal is controlled dynamically and has been smoothed out harmonically, it is time to add some depth by way of time-based effects. Time to play with delay and reverb!
One thing that I can honestly say I use on 99% of every vocal that I mix, is slap delay. You may be thinking “but wait! Isn’t that that old-timey flutter echo that I hear in old rock and roll records from the ‘50s?” It is, and using it this way is one strategy for giving your track a throwback feel. However for this track and most modern mixes, this is not what I am going to do. Instead, I am going to use it in a way that is so subtle, you don’t even hear it, but when you turn it off, you miss it.
To do this, I set up a single note delay (0% feedback), somewhere in the range of 80 to 100ms. I don’t use math for this, I just pay with it till it feels right. I then mix it in until I can just hear it and then back it off about 1 dB. What this does is put the vocal in some type of acoustic space. It pushes the vocal away from us and into the track ever so slightly. It adds what I like to call a slight, “halo,” around the vocal.
You don’t need any fancy or expensive plug-in for this one. Any stock delay will do.
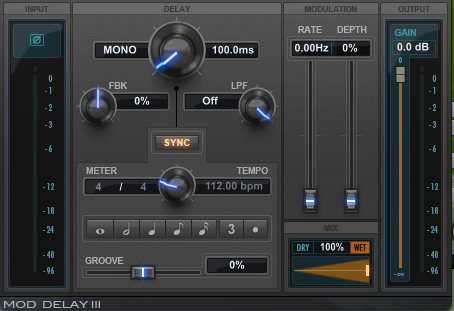
Mod Delay III
Let’s listen to the vocal before and after…
⅛ note and ¼ note delays
If I want to extend this same effect, I can do the same thing by adding an ⅛ note delay and a ¼ note delay. Just as I did with the slap delay, I will set these at a level so they are not noticeable, yet, when removed, they are missed.
Let’s listen before and after…
Using 2 or 3 delays in combination like this is a great way to place a vocal into a natural sounding space within a mix, without taking up as much space as a reverb might. This is especially useful for up tempo songs.
Step 9 - Adding depth with reverb
Last but not least, reverb! Yes, I did just mention that using delays is a great way to create space around a vocal without using a reverb, however, if we did want to add more space around the vocal, immersing it further into the track, we could.
Using the same strategy as the delay, I want the reverb to be barely heard but missed when it’s gone. I will typically set a pre-delay around 20 or 30 ms. The reverb tail depends on the tempo of the track. I adjust this by ear and it normally lands between 1.5 to 2.5 seconds depending on the arrangement and tempo of the song. Finally I also add an EQ before the reverb to filter out some of the lows to avoid mud and filter out some highs to help the reverb sit behind the vocal.
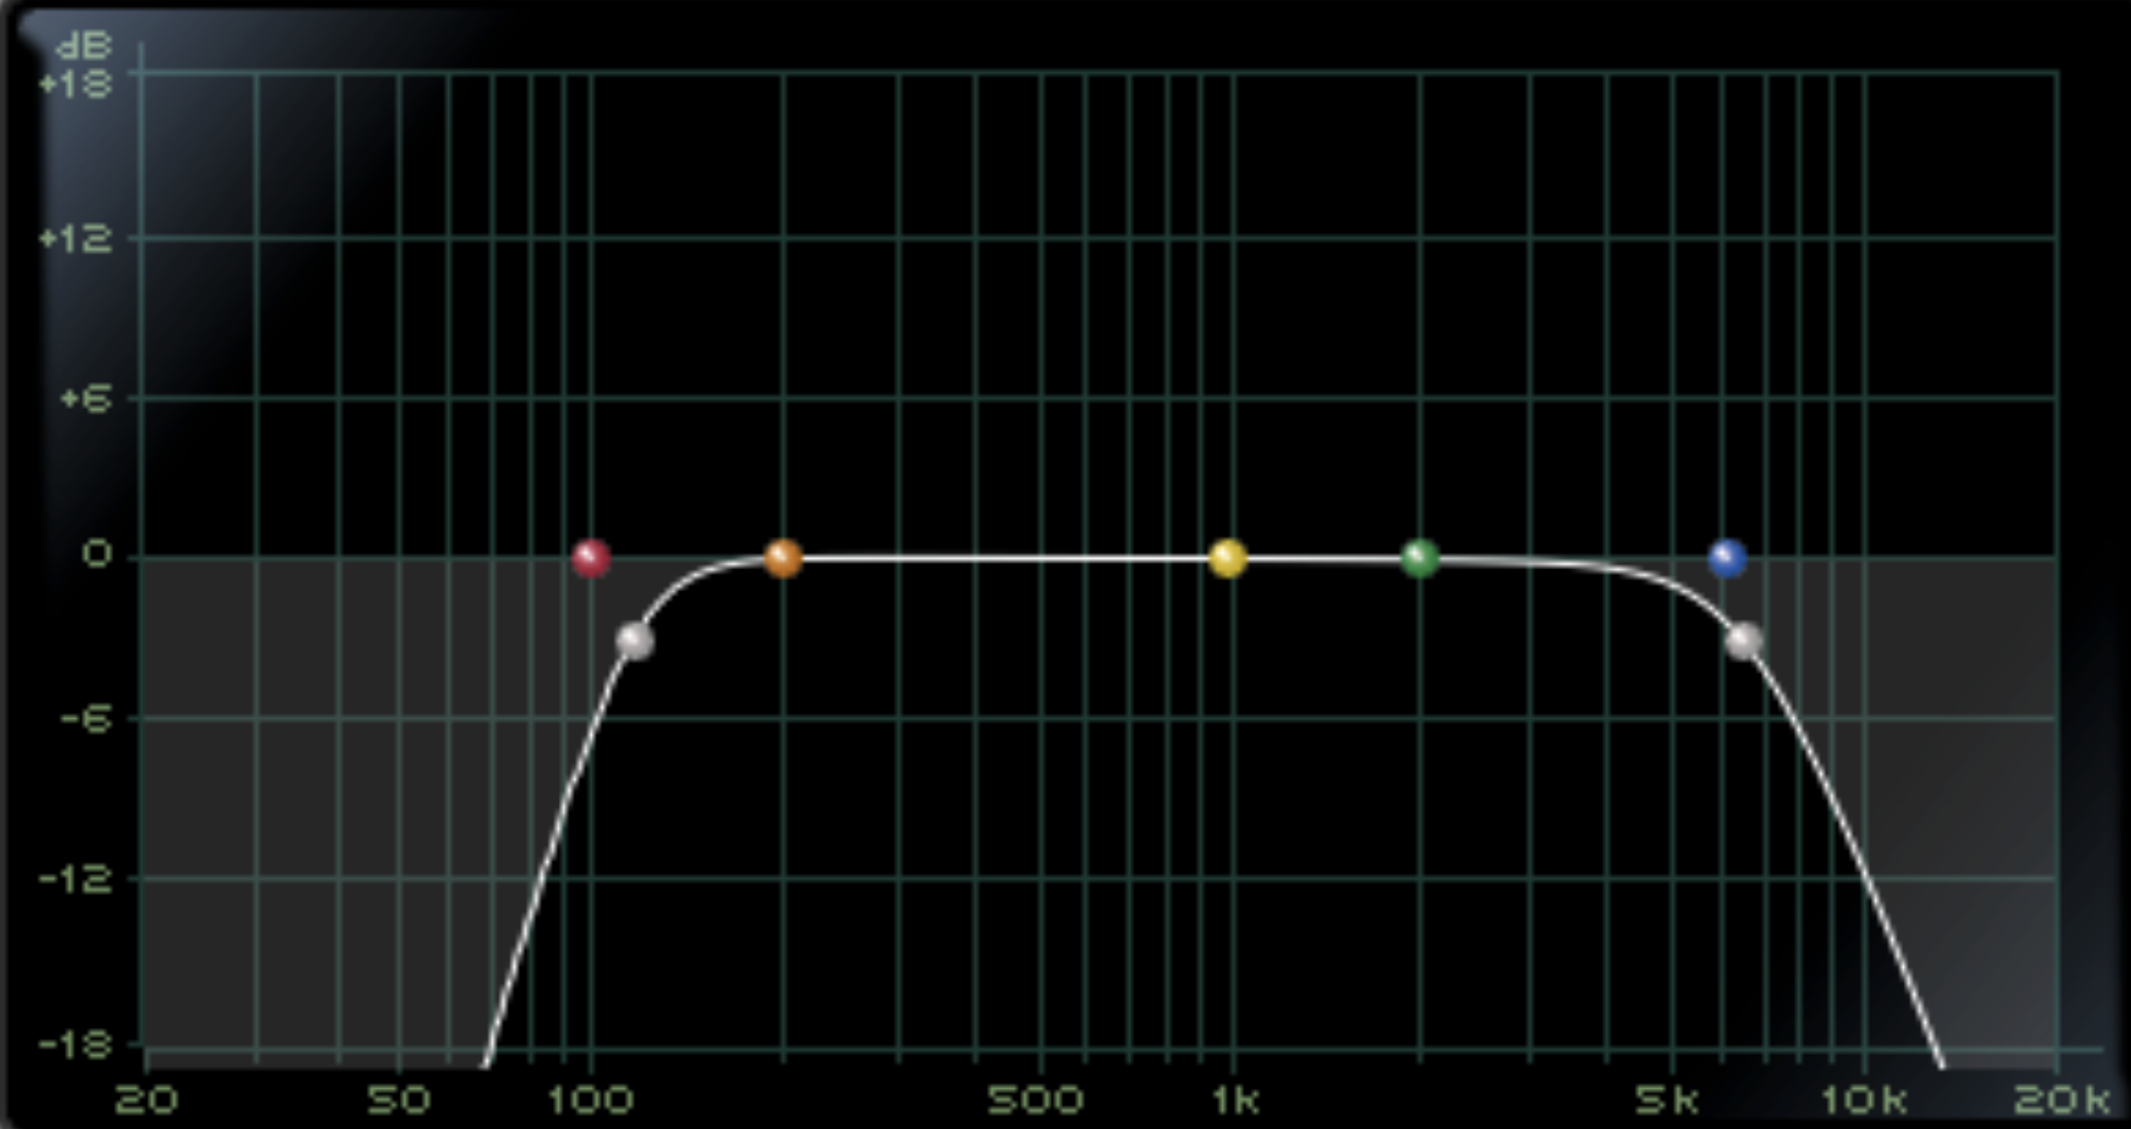
Filter EQ
Let’s add it into the track and take a listen before and after adding reverb.
For further emphasis, let’s listen to the before and after of the original unprocessed vocal and our final vocal with the track.
Now that I am at a place where I feel that the vocal is working, I can move on to other areas of the mix, however, it is important to continue asking ourselves; Have I made the vocal better or worse? Is it too bright or too dark? Does it feel like it is part of the track? Is there too much delay and reverb or not enough? As that perfect mix is somewhat of a moving target, you may need to further tweak settings as you move ahead.
Use these mixing techniques today
As I mentioned at the beginning of the article, no two vocals or songs are alike. It is true that the steps I took you through in this article are very close to what I do with a lead vocal every time, however, I skip steps that the vocal may not need and of course, the steps that I do take, the settings are always different from song to song. What I did in this article may work in the context of this track, but it would not be the right thing if this were a down tempo, piano and vocal love ballad. The important thing is to have all of the tools and know how to use them, so when a situation arises, you can formulate a strategy and execute it.
I hope you found this article helpful, and hopefully, I have inspired you to experiment with some new mixing techniques.
