
Everyone wants a wide, spacious stereo image in their mix—well, maybe not everyone, but I’m guessing if you’re here, you do—however, that’s sometimes easier said than done. Panning is a crucial part of mixing, and there are multiple approaches to panning, but often in modern productions, that can only get you so far. In this article, we’re going to take a look at six ways to use the free Ozone Imager plugin that will help you get spacious, wide mixes and masters.
Follow along with the Ozone Imager, a free stereo imager plugin that can adjust stereo image with simple controls, stunning visuals, and incredible sound.
What is stereo imaging?
Before we get started we should probably get some basics out of the way. Stereo imaging is the process of positioning sounds within the stereo field to create the perception of a sonic space, or soundstage. Building a good stereo image will help your mix sound wider and will give each instrument its own space in the mix. With standard panning, the speakers define the left and right limits of your stereo field. However, by using Ozone Imager you can push those limits beyond the edges of the speakers for an even wider and more spacious mix.
That said, caution is warranted! When pushing things too far, you can cause a mix to entirely fall apart in certain situations. I’ll give you some examples below, and tell you when to be careful, but if you feel like you need a little more background on stereo imaging, or are looking for additional tips and tricks, you can find plenty in these tutorials on stereo imaging.
Is Ozone Imager good?
Ozone Imager is free plugin that gives you the ability to:
- Stereoize mono sounds in multiple, mono-compatible ways
- Adjust the width of stereo sounds
- Meter the stereo field with three different tools, one of which has three modes
If that’s not good, I don’t know what is!
6 tips for using the free Ozone Imager
Let's take a look at how to use Ozone Imager to get a wider mix.
1. Stereoize a mono instrument
One of Imager’s neatest tricks is its ability to turn a mono source into a stereo one. Just flip on the Stereoize power button at the top-right, choose mode I or II at the bottom-right, push up the width, and adjust the time slider to taste.
Stereoizing mono sources
Neither mode will compromise the mono compatibility of the source as they both create pure side-channel content, each in their own way. I find myself favoring Mode II these days as it tends to sound a bit more natural, and can often accommodate greater width settings. Try sliding up the width to 50 or 60% and slowly adjusting the time slider. The right time setting can be very source-dependent, but when you find it you’ll know—the image will stay nicely balanced while also feeling luscious and wide.
Check out this little drum and rhodes loop. The rhodes was a mono recording, but Stereoize in Imager gives it an excellent sense of space without feeling unnatural or washed out in reverb.
Steorizing a Mono Instrument
2. Add width to backing vocals
Whether you’ve just got a single backing vocal that you want to widen behind the lead vocal, or you want to push the width of your stereo background vocals a little wider, Imager should absolutely be one of the tools in your arsenal. Here we’re taking a stereo backing vocal loop and using both Width and Stereoize to push its size a bit further.
Adding Width to Background Vocals
You could even add Imager to background vocals that only come in during a chorus or bridge to add an element of excitement when they do.
What does Ozone Imager do?
Imager essentially does two different things. The “Width” slider is simply a mid/side balance. From 0 to -100% it fades the side channel from unity gain down to -∞ dB, whereas from 0 to 100% it fades the side channel from unity gain up to +6 dB. If a signal is stereo—meaning there are differences of some sort between left and right—increasing the level of the side channel will increase its width while decreasing the level of the side channel will decrease the width.
Imager’s other trick is the Stereoize feature. This is a little more complex, but essentially it takes the mid-channel content and converts it to side-channel content using one of two techniques. Mode I uses Haas delay principles to convert mid to side, while Mode II uses Velvet Noise decorrelation and convolution to convert mid to side.
3. Widen FX returns
This one might be a slightly subtler use, but sometimes that’s all you need. Here I’ve got two FX returns, one with Neoverb and the other with the stock Ableton stereo delay, both routed to an FX bus.

Widening an FX bus
Then, on the FX bus, I’ve loaded Imager and pushed up the width a bit, leaving Stereoize off. This is a bit more exaggerated than I would normally go for, but I want to make sure to get the point across. Ultimately it can be a nice way to convey a larger-than-life space around the mix, and can also be an effective method to create elements that act in opposition or provide contrast to other sounds whose depth you want to accentuate.
Widened FX Returns
4. Widen an instrument bus
Not unlike an FX bus, an instrument bus can be a great host for Imager. A group of instruments that are just providing some ear candy can be a particularly good candidate. You should keep in mind that elements that you widen are more likely to lose some level when collapsed to mono. That, in part, is why I’m suggesting that if you use Imager on an entire instrument bus, it be one that’s not integral to the overall foundation of the mix.
Here, I’m using it on some guitars that are just backing up the main instruments.
Widening a Guitar Bus
5. Widen the master
Can Imager be used on a master or the master bus? Absolutely, but this is definitely a use case where you should proceed with caution. When you use Imager on an entire mix, you’re affecting just that: the entire mix! From the lowest low to the highest high, the width of every instrument in a mix will be impacted. For that reason, you should ensure you’re listening on a system with excellent imaging and spatial resolution when making this kind of adjustment. Also, bear in mind that this is the type of adjustment where less is more.
Widening a Master
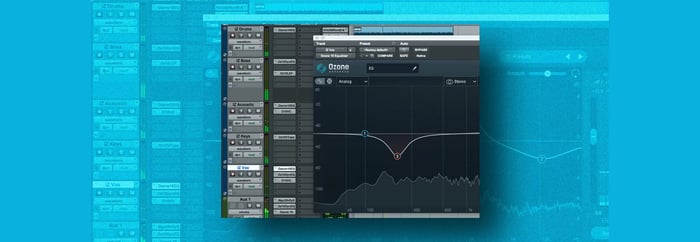
Here, I’ve kept Stereoize off—which is probably a best practice unless you’re trying to subtly spatialize a mono master—and pushed up the width to 25%. Like the audio in the third tip, this is a bit exaggerated to ensure it comes across on earbuds and the like. If you’re looking for more control over separate frequency ranges, the Imager module in the full version of Ozone gives you exactly that—plus more!
6. Add excitement with automation
Lastly, this one is a bit of a meta-tip. By applying automation to the Width parameter you can take any of the first five tips to the next level. Creatively automating the spread of the stereo image can add excitement and reward fans who listen in stereo by giving them extra details to discover in your music.
Remember that this doesn’t always have to mean making something wider. Maybe during a bridge, you could narrow things down for a more intimate sound before returning to full width on the final chorus. Let your imagination run wild!
Bonus tip: Don’t forget about the meters
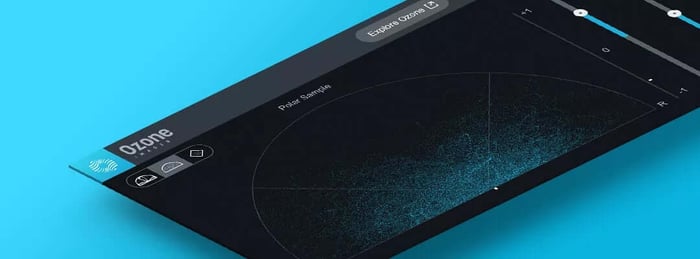
Imager also provides three excellent meters that are useful for keeping an eye on your stereo image. Heck, you might even choose to use Imager exclusively for some metering duties. Here’s a quick rundown of the meters and what they’re showing you.
Imager’s meters
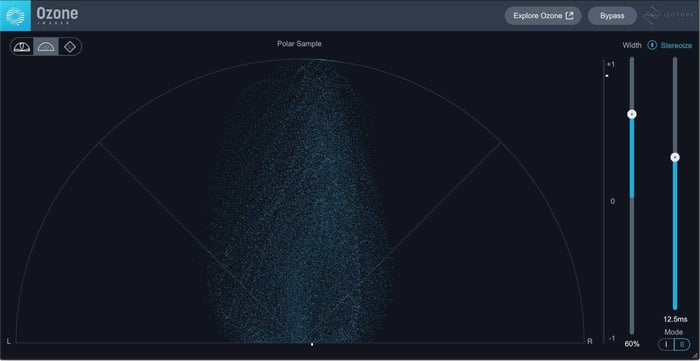
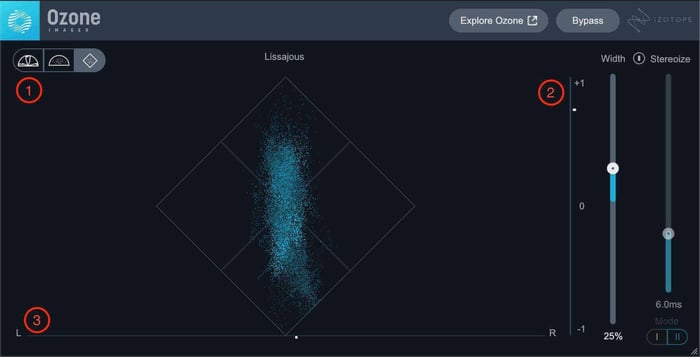
- Polar Level / Polar Sample / Lissajous Meter: This sets the mode for the main display in the center of the user interface. They present slightly different ways of looking at the same information and essentially show you the spatial distribution of sounds that you’re metering. Hover over the selector for tool tips about each.
- Correlation Meter: This meter shows you the correlation between the left and right channels. The white tick on the right moves up and down to show the current correlation. A correlation of +1 indicates a purely mono signal (which could include hard-panned sounds), while a correlation of -1 indicates a signal that is out of phase between left and right. Generally, you should aim to keep this in the positive half of its range.
- Stereo Balance Meter: This meter shows you the energy balance between the left and right channels of your mix. It’s normal for it to dance around quite a bit, but if you notice that it’s consistently leaning to one side or the other you may want to check that your mix isn’t skewed to that side.
Start getting a wide sound in your music with Ozone Imager
As we’ve seen, Imager can be used in a multitude of ways to manipulate and meter the stereo width of your music. Whether you need to turn a mono sound into a stereo one, manipulate the width of an existing stereo sound, or spice up buses—or in fact your entire mix—Imager is an indispensable tool.
If you’re looking for even more control over individual frequency ranges, the full version of Ozone can give you that, plus much much more. Lastly, if you’re interested in some additional ways to spice up the stereo image of your mix, we have an article with six more tips to do just that. Until next time, good luck and happy imaging!