What Is Soft Clipping? How to Use It to Get Good, Loud Masters
Learn what soft clipping is, how to use it, what the difference between hard and soft clipping is, and how Magnify Soft Clip in Ozone can help create a good, loud master.
Clipping, and particularly soft clipping, has been a tool used in mastering for many years. Whether it’s the magnetically induced soft clipping of analog tape or the slightly harder clipping of high-end analog-to-digital converters, it’s a sound we’ve all heard on countless records. Historically though, setting up the gain staging to get the best out of soft clipping and limiting has been a bit of a tightrope walk.
Now, Ozone not only provides you with multiple soft clip shapes right within the Maximizer module, but it also makes it easier to find the right threshold and balance between soft clipping and limiting. So let’s dive in and discover exactly what soft clipping is, how it relates to hard clipping, and how to use the new Magnify Soft Clip feature in Ozone’s Maximizer.
Jump to these sections:
Follow along with this tutorial using the new


Ozone 11 Advanced
What is soft clipping?
Soft clipping is a style of saturation—or distortion—characteristic of many beloved types of analog hardware. Analog tape, and tube processors like EQs, compressors, and limiters, all typically exhibit a degree of soft clipping when driven hard, however solid state electronics like transistors can also have soft clipping behavior. But this doesn’t tell us a lot about what soft clipping is, just where we might find it.
More to the point then, soft clipping is a type of non-linear behavior. If clipping is the ultimate non-linearity—where no matter how much the input increases, the output stays the same—soft clipping gently eases into this in a progressive manner. If you’ve ever used a compressor with a soft knee, the idea is very similar. In fact, let’s look at a few visual examples of soft clipping and compare it to hard clipping as that may clarify things greatly.
What’s the difference between hard and soft clipping?
When it comes right down to it, the difference between soft and hard clipping is the transition between the linear region—where the output is identical to the input—and the non-linear, clipping region—where no matter how much you increase the input, the output stays pinned at its maximum level.
On the graph below, the input level is shown along the horizontal x-axis, and the output level is shown on the vertical y-axis. The straight, diagonal line represents the linear region, while the flat horizontal line near the top shows the clipping region. Hard clipping is shown in green, and you can see how the transition from linear to non-linear is instantaneous. Conversely, soft clipping is shown in orange, and you can see how it gently transitions between the linear and non-linear regions.

An example of non-linear behavior in an exciter plug-in
There’s an important point here though. The moment that orange line veers off from the diagonal green line, it has technically become non-linear. However, although soft-clipping becomes non-linear at a lower level than hard clipping, the non-linearity is also much subtler—at least initially. And indeed, this is one of the benefits of soft clipping: it allows a modest increase in level while still preserving some of the dynamic shape of the peaks, and also adding some rich, harmonic color.
Here’s the key: hard clipping takes more level to drive into clipping, but the second you do, it pretty much turns any input into a square wave, adding tons of odd-order harmonics to the signal—after all, that’s what a square wave is. If this is only done for very brief intervals at the mastering stage—e.g. a few milliseconds off the top of a drum transient—you can just about get away with it. Push it too far though, and it can quickly start sounding very nasty!
Soft clipping, on the other hand, starts saturating and adding harmonics at a lower level, but those harmonics are also much lower in level, and—at least initially—tend to be dominated by lower-order odd harmonics—something we tend to interpret as warmth, and richness. However, once you push a soft clipping device into the full clipping region—where the orange and green lines rejoin horizontally in the image above—soft clipping has a tendency to sound much more aggressive—and this makes sense. After all, much more of the signal is being pushed into the non-linear region!
Ok, enough theory! You probably want to know how to use the new Magnify Soft Clip feature in Ozone, so let’s get into it.
How to use the new Magnify Soft Clip feature in Ozone
As I’ve started using Ozone’s new Magnify Soft Clip feature in my work, I’ve found there are two ways I typically approach it, and which sort of come at it from opposite directions. I think you’ll find they can both work well depending on where you’re starting from.
Scenario one is that I’ve got a master that I’m happy with overall and where the limiting is already working well, but where just a little more level is needed. Maybe this is because a client has asked that the master be just a bit louder, or because I’m trying to make it work better with other releases in their catalog. In either case, I’ll turn on the soft clip module, select one of the soft clip shapes—usually light or moderate—and dial it in to taste.

Adding in some soft clipped signal
Scenario two is that I’m starting with a song that I know—or at least strongly suspect—will benefit from some soft clipping. This could be because it feels a bit sterile and I think the added harmonics will benefit it, or because I’m starting with a very high crest factor and have a lot of peak level to shave off to achieve the ultimate level I’m after.
In either case, I’ll start by setting the threshold and ceiling to 0.0 dB, linking the controls, picking a soft clip mode, and setting it to 100%. I’ll then pull the threshold and ceiling down until I hear the soft clipper doing too much, and then back it off slightly. I might try this with the Low, Moderate, and Heavy shapes—more on these shortly—to find which works best for the song.

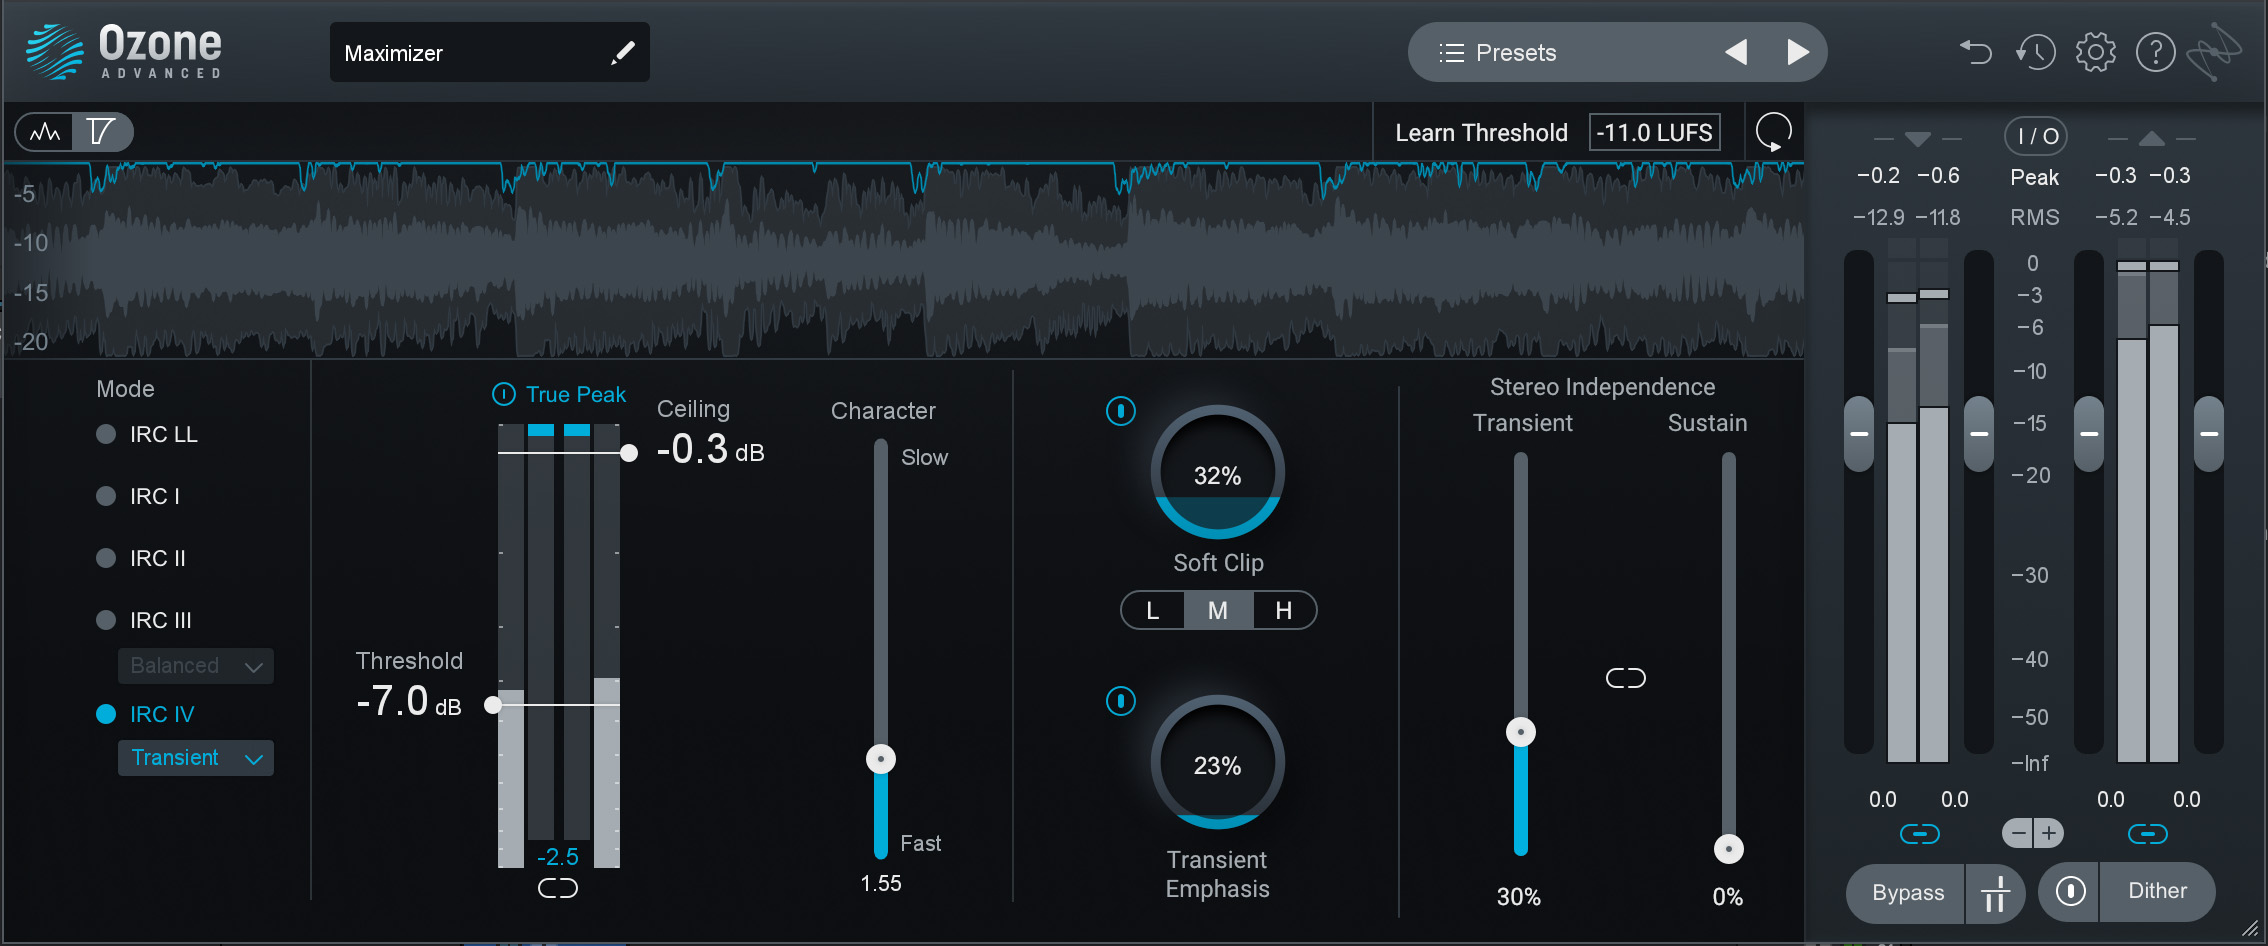
Ozone Maximizer
Once I’m happy that the soft clipping is working well on its own, I’ll bring the ceiling back up to a normal range and pull the Soft Clip percentage down a bit to balance some soft clipping with a little limiting, getting the best of both worlds. You’ll find you can very precisely set the maximum amount of limiting you want in this fashion by watching the Gain Reduction readout while reducing the Soft Clip amount.
A few technical details, for those who are interested: the soft clip module comes before the limiter in the signal flow, and the percent gauge indicates how much of the wet, soft clipped signal is being blended in with the dry signal. It shares the threshold with the limiter but includes a built-in level boost that corresponds to the soft clip shape you choose. Lastly, the whole soft clipping stage uses 4x oversampling.
Ozone’s soft clip shapes
As mentioned, Magnify Soft Clip includes three different soft clip shapes—light, moderate, and heavy. Each shape has its own characteristic transition from its linear to its non-linear region, as explained above and shown below. If you’re after a little harmonic color or have highly transient material, the heavy shape could work well—just be careful not to push it too far. If, on the other hand, you’re just after that last little bit of level, light or moderate might be just the ticket.

Magnify Soft Clip curves compared to hard clipping
Magnify Soft Clip examples
Last but certainly not least, let's give this puppy a listen! Today’s example is “What Are We Fighting For” by Saint Germain and the Violet Flame, released on Deep Stream Records. I chose this song for a few reasons which I think are important to share. First, it’s one of the louder masters I’ve prepared and I was curious to see what I could achieve if I swapped out the clipping and limiting plugins I used at the time with the new version of Ozone. I’m pleased to report it went very well.
Second, it’s important to recognize that arrangement, production, and mixing play a big role in the loudness that you can reasonably achieve in mastering—at least without pushing things into all-out distortion. So first, here’s the mix after it went through my analog chain—just a little EQ and compression—and you may notice it’s already pretty hot. A lot of that is thanks to the arrangement, production, and mix.
Next, here it is first with just limiting, and then with limiting and a little soft clipping. Notice that we’re both gaining a little level and that the drums feel just a bit punchier.
"What Are We Fighting For" Audio Example
That level difference may not seem huge, but when things are already that hot every half dB is a feat, and the fact that we get some extra snap and punch on the drums is nothing to sneeze at either! If you’re not already at blistering levels, you may get even more out of Magnify Soft Clip—the heavy shape can provide up to 6 dB of extra level!
Start using soft clipping
So, as we’ve seen—and heard—soft clipping can be a great way to increase the overall level of your music in a high-fidelity manner. It can add a sense of warmth and richness to your master, and help retain punch and snap in your drums. Just remember that with gentler soft clipping curves—like the heavy mode in Ozone—saturation sets in at a much lower level, so you’ll need to go easy.
That said, it’s never been easier to integrate soft clipping and limiting than it is now in Ozone, so download your free trial or get your copy today and give it a try for yourself. Good luck, and happy soft clipping!


