
Mixing a vocal track so that it sits perfectly in the mix is one thing that sonically separates a professional mix from a beginner’s. There are many tools to help you mix vocals but one of my favorites is Nectar 4 Elements because it allows you to do so much within one plugin. If you’re looking for easy vocal mixing, look no further.
Follow along with this tutorial using Nectar Elements, a powerful plugin that uses AI-powered assistance to give you a professional vocal sound.
People often ask “How do I mix my vocals?” hoping to learn the secret to getting professional-sounding vocal tracks. The truth is there is no one technique or quick fix that will get you there. Most often a combination of techniques is the way to go. So is having a clear picture of what you want your vocal to sound like, otherwise you’ll end up throwing a bunch of different plugins on a track with the hopes that something sounds good.
Being intentional about your choices is key to fixing problems you hear and adding creative effects to enhance the song. A great place to start is making sure you’ve created space in the mix for your vocal. But you’re here to learn about vocal mixing so that’s what this article will focus on.
How to mix vocals with Nectar Elements
Nectar 4 Elements is a comprehensive vocal mixing tool that provides a complete set of features for mixing, producing, and designing vocals. It’s the best of AI-based processing while still being able to manually control your sound. We can use it to analyze a vocal and Nectar 4 will recommend settings for EQ, compression, De-essing, reverb, and more to get your mix mostly ready. From there you’ll want to tweak settings to taste. Let’s get into how!
The thing that really sets Nectar Elements apart is Vocal Assistant, which analyzes your vocal track and generates a preset tailored to the unique qualities of voice and performance. Vocal Assistant provides an intuitive interface for making decisions for your vocal production without getting lost in the details of vocal mixing.
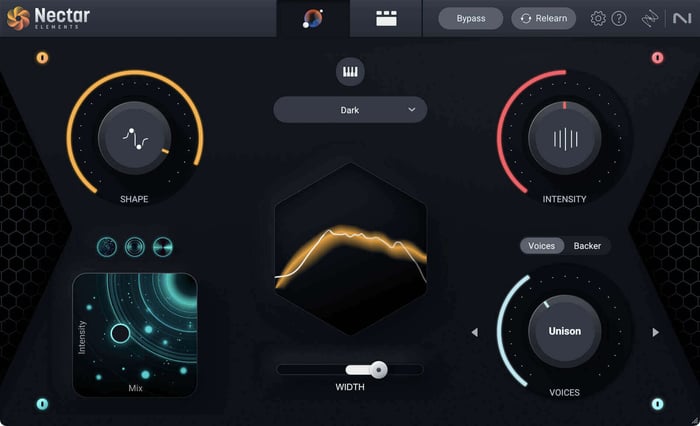
Nectar Elements interface with different processing options for your vocals
1. Use Audiolens to gather any references you’d like to use
One of the coolest new functions in Nectar is the ability to use Audiolens to capture the sonic thumbprint of reference material, then apply it to your vocal tracks. This allows you to tone-match any vocal sound and gives you a great starting point for your mix.
Here, I’ve referenced the vocals in "The Drama" by Kesha and applied to a song I’ve been working on, "Libra Rising" by Casey Bea. Here’s a little before and after so you can hear the difference:
Target Curve with Audiolens
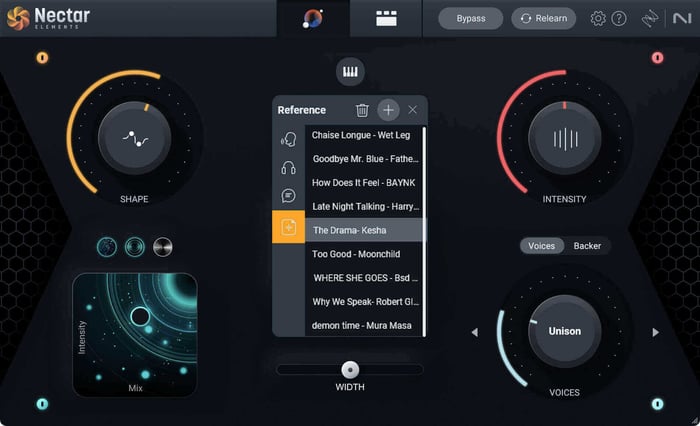
Nectar Elements references your favorite mixes using Audiolens
2. Add Nectar Elements to your vocal bus
Once you have Nectar Elements set up on a track in your DAW, play some audio for the plugin to analyze.
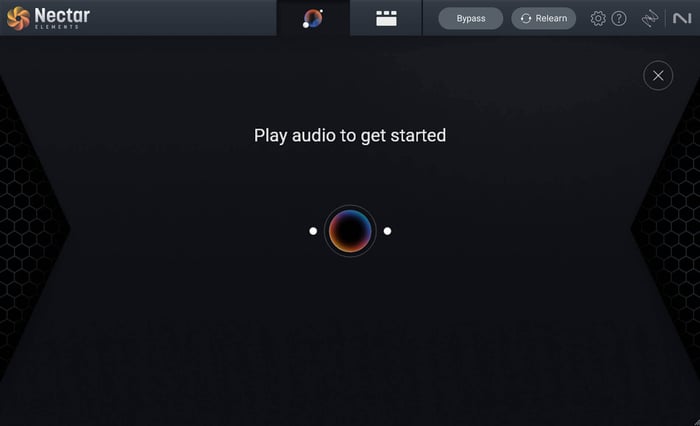
Nectar Elements is ready to analyze audio and suggest vocal processing
3. Get a starting point for your vocal mix
Once your vocal has been analyzed, Nectar Elements initiates processing that EQ and compress your vocal to give you a starting point that you can refine.
The window displays a few separate controls that you can tweak to adjust the amount and type of processing done to your track.
Nectar Elements suggests processing for a vocal mix
4. Dial-in your sound with processing
Now that you have a starting point, it’s time to customize your sound. Let's take a look at each of these controls and discover how exactly they impact your vocal mix.
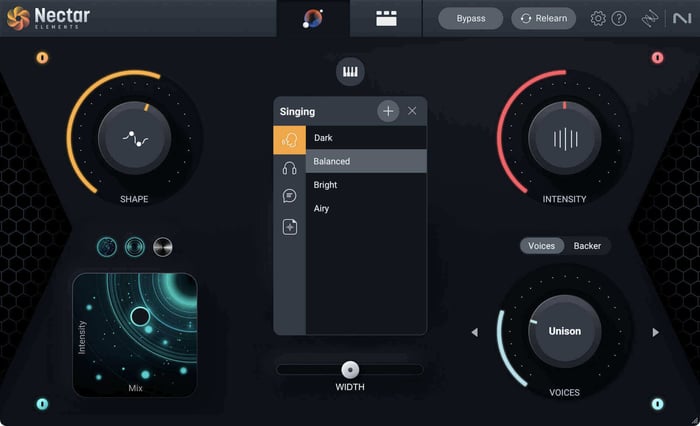
Shape
Shape adjusts the amount of tone-matching done to your vocal. With the Balanced preset, Nectar Elements isn’t really trying to add color to the vocal track but evens out the tone to a more neutral place. When I dial this up on this bright vocal, I can hear more mids being added to the mix to balance the highs. You can also go for Bright, Dark, or Airy presets or use Audiolens to capture the sonic character of a reference track and apply it to your vocal.
Intensity
Intensity adjusts the amount of dynamics processing applied to the track. Turning this up effectively lowers the threshold of the compressor, making it kick in and begin processing sooner. The higher the Intensity, the more compression is applied.
Width
When you initiate Nectar Elements on a track as a mono/stereo plugin, you get an extra Width control. This slider adjusts the stereo spread of your vocal signal across your left and right channels. When maxed out, it sounds like a gentle chorus effect, allowing your vocal to take up more room in the stereo image.
Reverb, delay, and dimension
The FX pad on the bottom left of Assistant View lets you dial in the Intensity and Mix of any effect. You can add Reverb, Delay, and Dimension which adds chorus, flanger, and phaser effects.
Key and range
You can select the key and range of the vocal you processed in Nectar elements, opening up a variety of voices in the Voices section of the Assistant that build vocal harmonies by creating pitch-shifted copies of a vocal track. Selecting the key and range also unlocks more options for the Backer section of the Assistant.
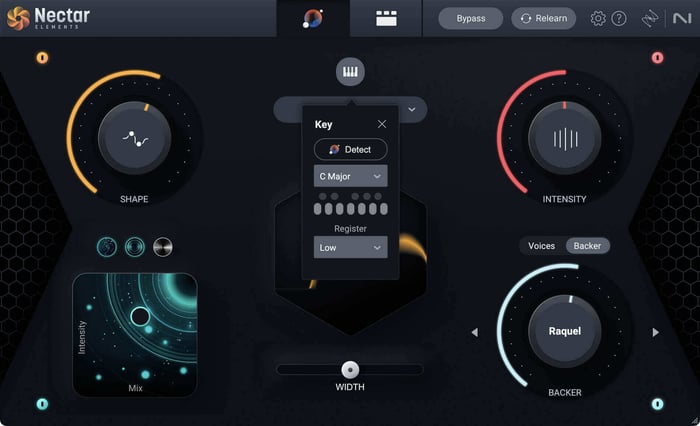
Select the key and range of the vocal you processed in Nectar elements, opening up a variety of options in the Voices and Backer sections
Voices
Voices is one parameter that isn’t turned on by default, but should definitely be experimented with! Turn it on and you can decide from 11 auto-harmonies to fit your style.
Backer
Backer uses singing voice conversion technology to transform the input vocal into a target (reference) vocal. Singing voice conversion is a technique employing artificial intelligence to capture and shift formants and sibilances.
5. Finalize your vocal sound
Using Assistant View gave us a very good starting point. We used the reverb, delay, and dimension dial to tweak our effects, the Shape and width to adjust the tone matching and dynamics processing of the track, as well as the width to increase the stereo spread.
Take a listen to what Nectar Elements can sound like.
Nectar Elements Processing on Vocals
For even more vocal mixing tips, check out the Ultimate Guide: How to EQ Vocals for Beginners and Mixing Vocals: What Makes a Professional Vocal Sound.
Start mixing professional vocals
Now that you’re familiar with the tools used in vocal production, you can use them to sculpt your vocal mix. Starting with a tailored preset that’s unique to the vocal you’re mixing will help identify and resolve problem areas, especially for beginners. Making adjustments with intention will help you reach the final mix more quickly and confidently. Bypassing each of the elements in the Vocal Assistant and reintroducing it to the mix is another great way to train your ear on how each processor is impacting your sound.
Happy mixing!