Essential Bass Compression Guide
Learn how to use compression on bass to create punchier, dynamic low end in your mix. In this guide, discover bass compression parameters, settings, and mistakes to avoid when compressing bass.
Learn more about Bass Compression in part 2 of this article.
Bass is an essential part of any mix, carrying the foundation of the entire track on its back. However, controlling the dynamic range and adding color to the bass can be a daunting task. This is where compression comes in. By applying compression to the bass, you can even out levels, enhance the groove, and add character to the instrument that will end up benefiting the whole mix. By the end of the article, you’ll know how to effectively use compression on bass to get the professional sound you’re looking for.
Follow along with iZotope
![]()
![]()
Neutron
What is the goal of compressing bass?
The goal of compressing the bass is to control the dynamic range of the instrument. However, bass compression is used to ultimately make the bass fit the arrangement or overall vision of the tune at hand. There are quite a few specific reasons for compressing a bass part. But these micro-reasons fit into the larger picture of servicing the entire track. Remember, as you begin your mixing journey, that everything serves the purpose of making the track achieve its vision.
Now, let’s move on to specific reasons for compressing the bass in a mix.
Why compress bass in a song?
The following is a list of reasons we might apply compression to the bass in a given mix.
- Even out the dynamics of a performance: sometimes an inexperienced bass player might be all over the place when it comes to their dynamics. One note might be too loud, while another is too quiet. In this case, compression can save the day, bringing a sense of evenness to the sound. Smoother settings, which will be described shortly, can work wonders on bass
- Enhance the sense of groove: sometimes we get a boring bass part that needs to be spiced up. The playing needs more attack, more bounce, more juice, or more groove. Here we can use compression to achieve that goal. There are a few ways to accomplish this goal. We can fine-tune the compressor’s attack and release controls to help the bass feel punchier on a note-by-note basis. If the groove at large must be corrected, we can sidechain the bass to another instrument, changing its overall feel in the process. More on this later.
- Add character to the bass tone: Sometimes the sound is too clean, and we want to add more of a harmonic flair. Several compressors are notable for their ability not only to shape the dynamics, but to impart their own specific tones to the sound. A FET ‘76 style compressor is a classic, for instance, as are certain optical tube compressors and vari-mu boxes.
- Even out a particular frequency/amplitude range on the bass itself: Some basses will resonate in certain frequencies or fret positions (hot spots), while other fret positions will sound dead and thin by comparison (dead spots). Compression can help ameliorate this phenomenon. You can use multiband compression to tamp down overly resonant areas, and parallel compression to reinforce quieter dead spots.
- Keep the bass out of the way of the kick: The kick and the bass traditionally occupy similar frequency ranges (the low end). This can cause problems when trying to balance these two instruments, for one can obscure the other. A common way to solve this problem is to duck the bass with compression whenever the kick hits.
How to dial-in bass compression settings
Dialing in bass compression requires a working knowledge of both the bass instrument, as well as a compressor’s key parameters and settings.
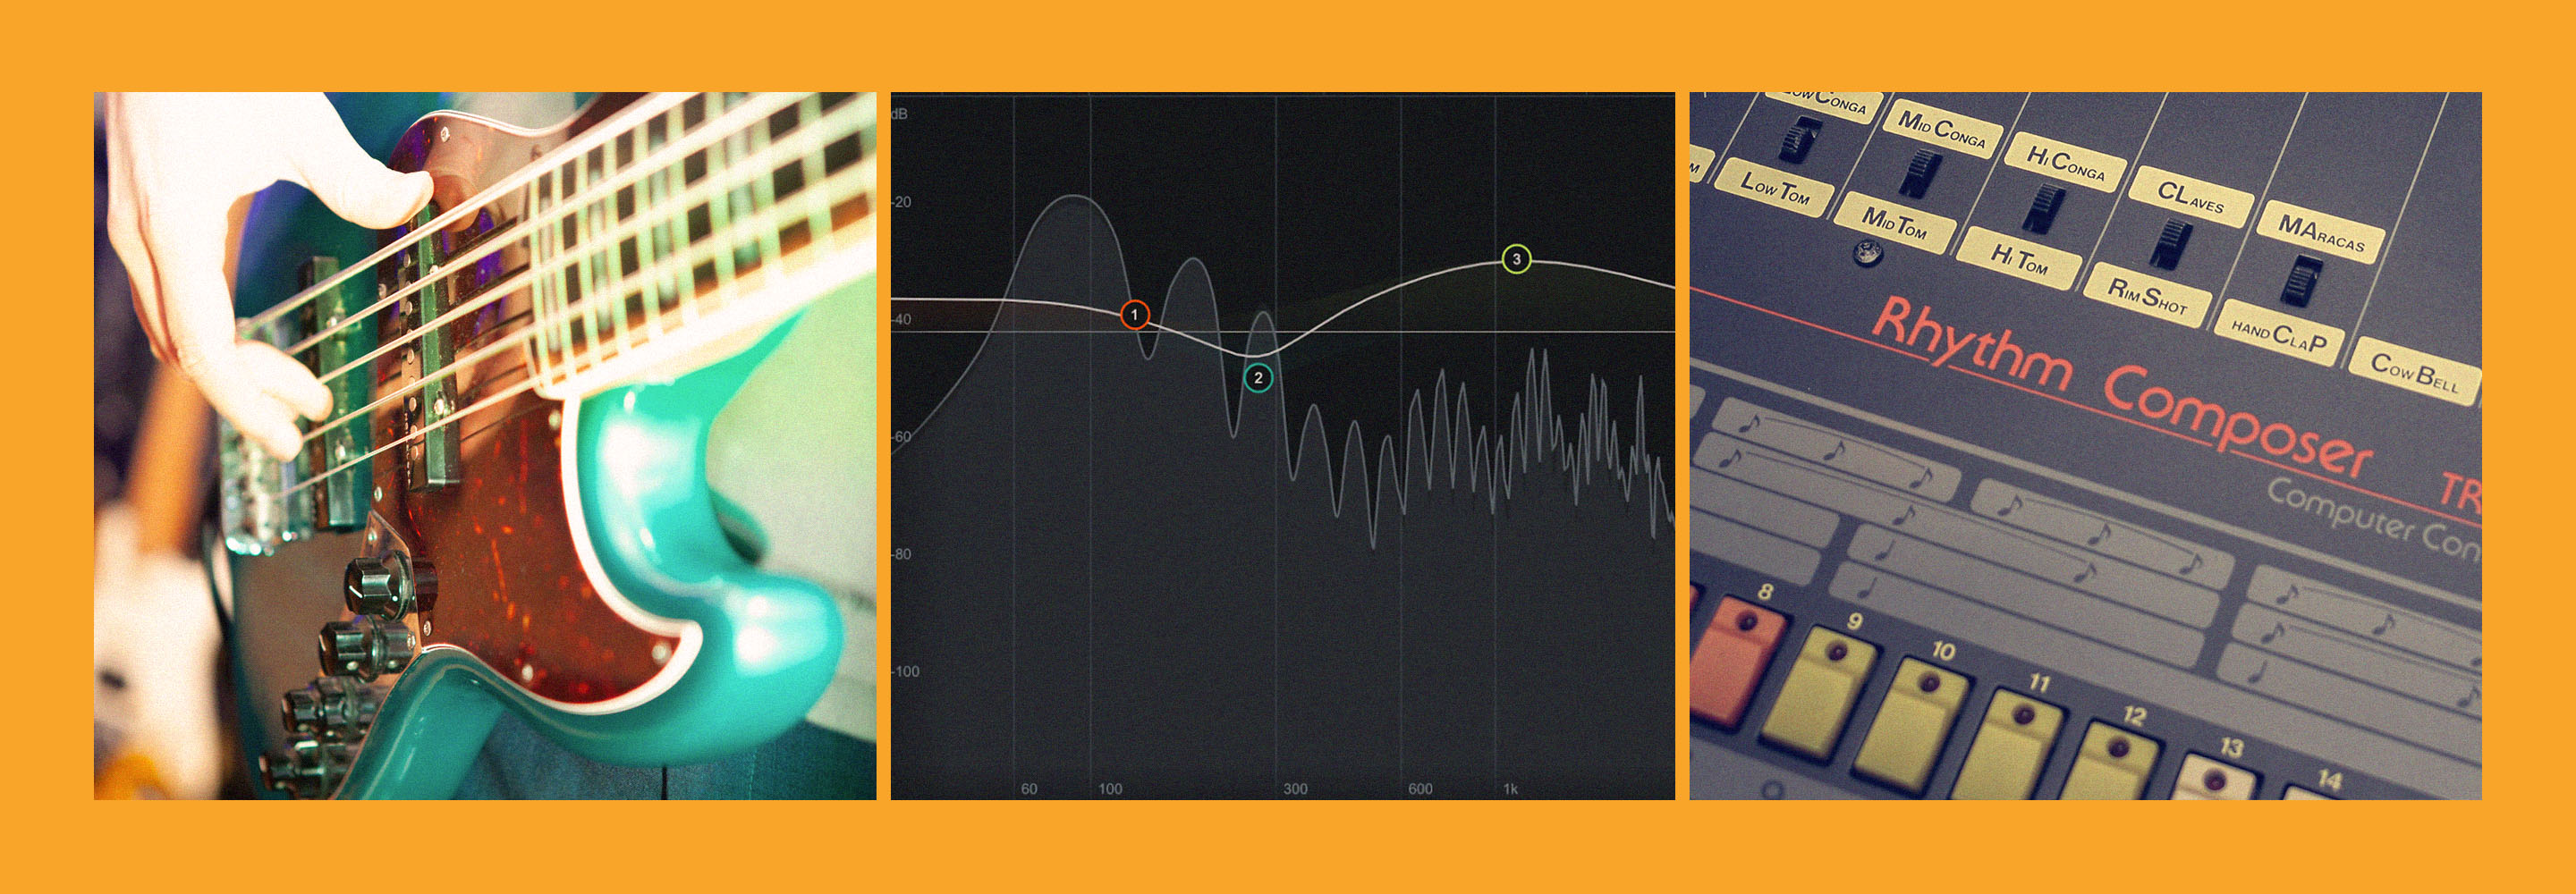
Bass frequency
First, it helps to know which frequency ranges are important to the bass. The heft of the sound is usually found around 120 Hz and below, and we often like to hear what’s happening in the 700 to 1200 Hz regions, as the attack of the notes usually resides there. Keep this in mind as you set your compressor settings.

iZotope Carnegie Chart
Compressor parameters
It's important to know compression controls. Threshold, ratio, attack and release are the main ones, followed by the knee. The sidechain detector is also important. For more information on what each of these parameters do, visit our comprehesive compression guide for beginners.
Let’s start at the top: When compressing bass guitar, the bass feeds the compressor’s input. When the bass exceeds a level that we’ve determined, the compressor will begin to do its job, attenuating the signal down. This level is called the “threshold.”
I can give no hard and fast rule about how to set your threshold. It depends on the bass in question—how loud it is, how bassy it is, and how dynamic it is.
The ratio control will help determine how much compression is applied to the signal. The higher the ratio, the more drastic the compression effect will be. 2:1 and 4:1 are common ratios we use in compressing the bass.
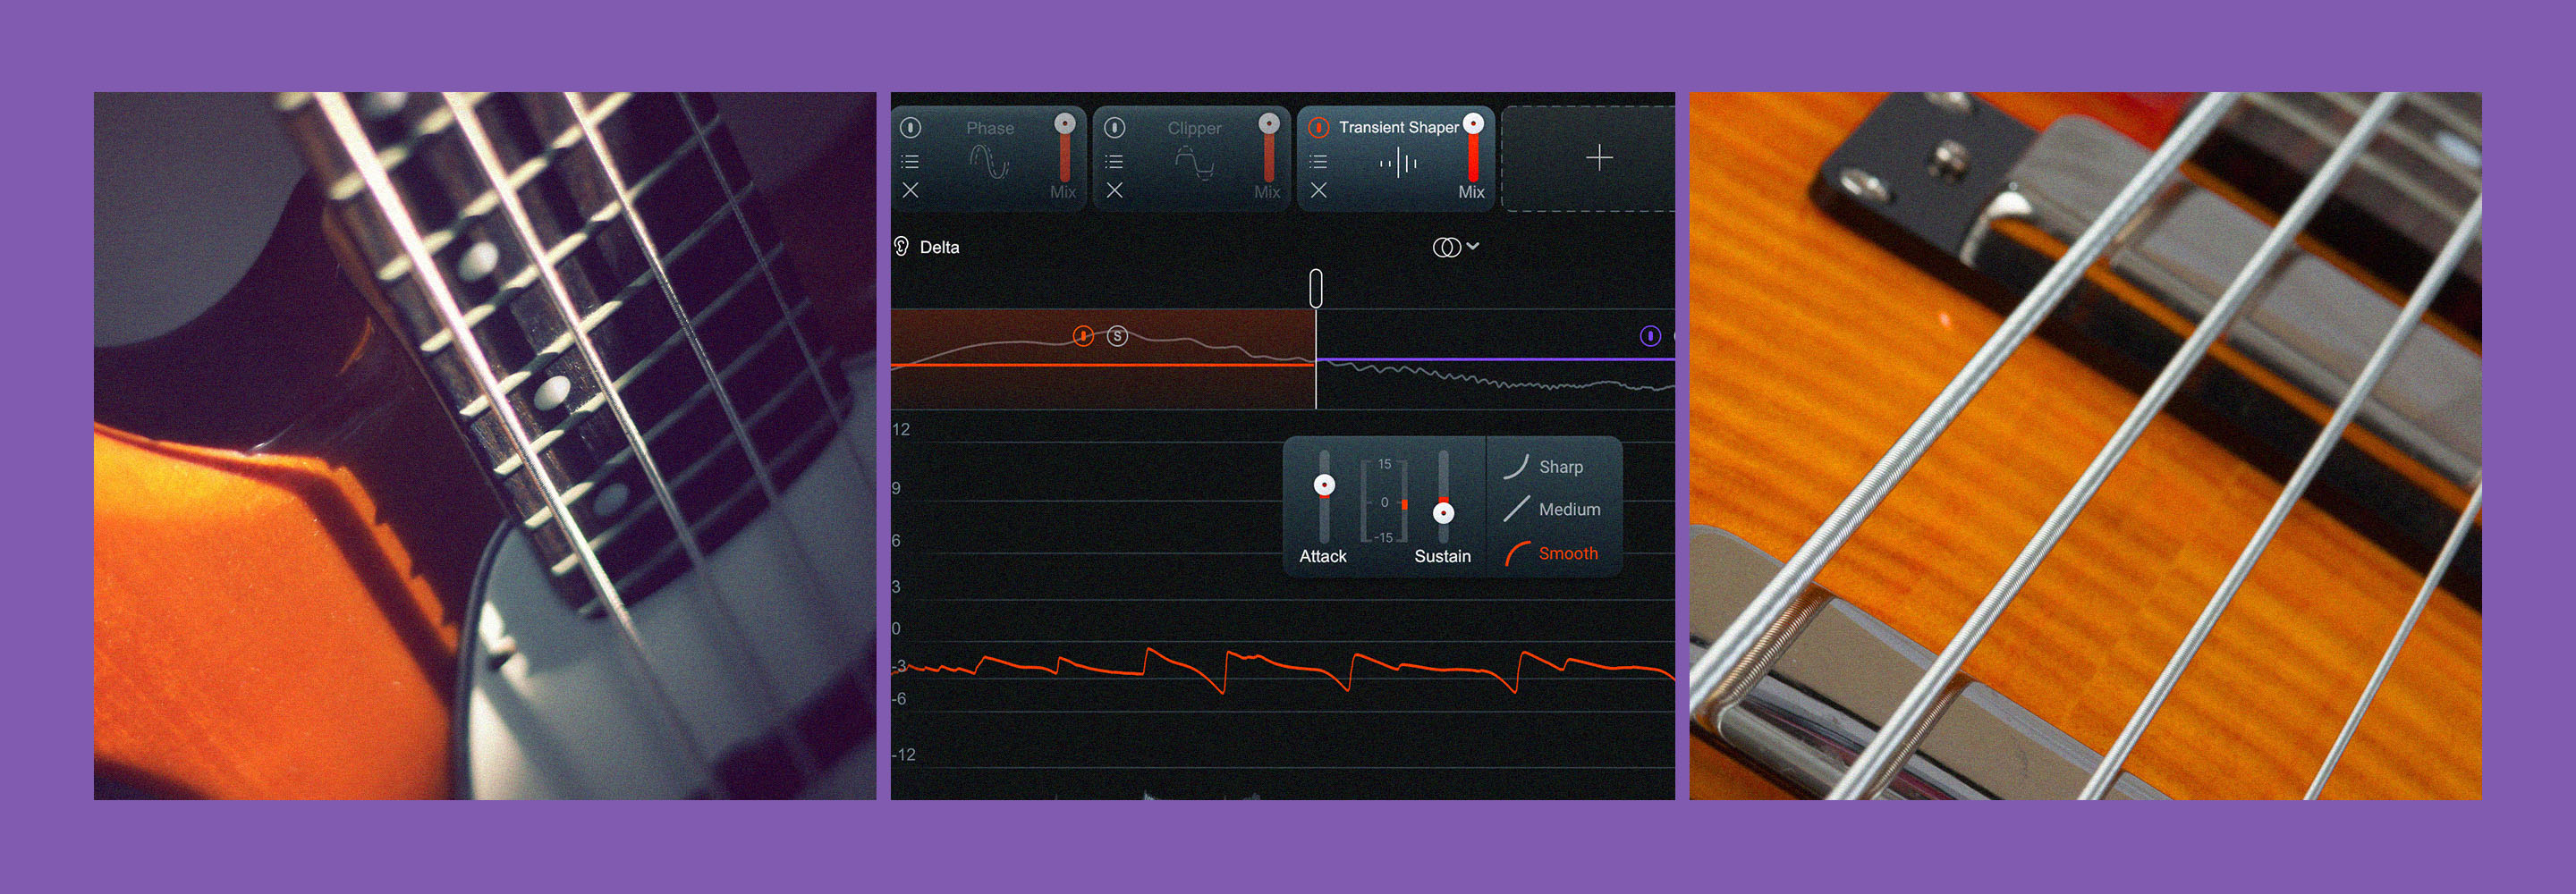
Attack and release determine how quickly the bass will be tamped down by the compressor, and how quickly the compression will ease up once the level is back below the threshold. I’ll show you how vital these controls are with the following example.
Here’s a bass part from a tune I recently mixed for Pete Mancini, called "Golden Hour":
If I choose a medium-fast attack with a slow release, coupled with a relatively high threshold, I can smoothen that sound out a good deal:

iZotope Neutron bass compression, medium attack and a slow release for a smoother sound
However, if I go with a slower attack, a fast release, and a lower threshold, the sound will be noticeably more punchy.
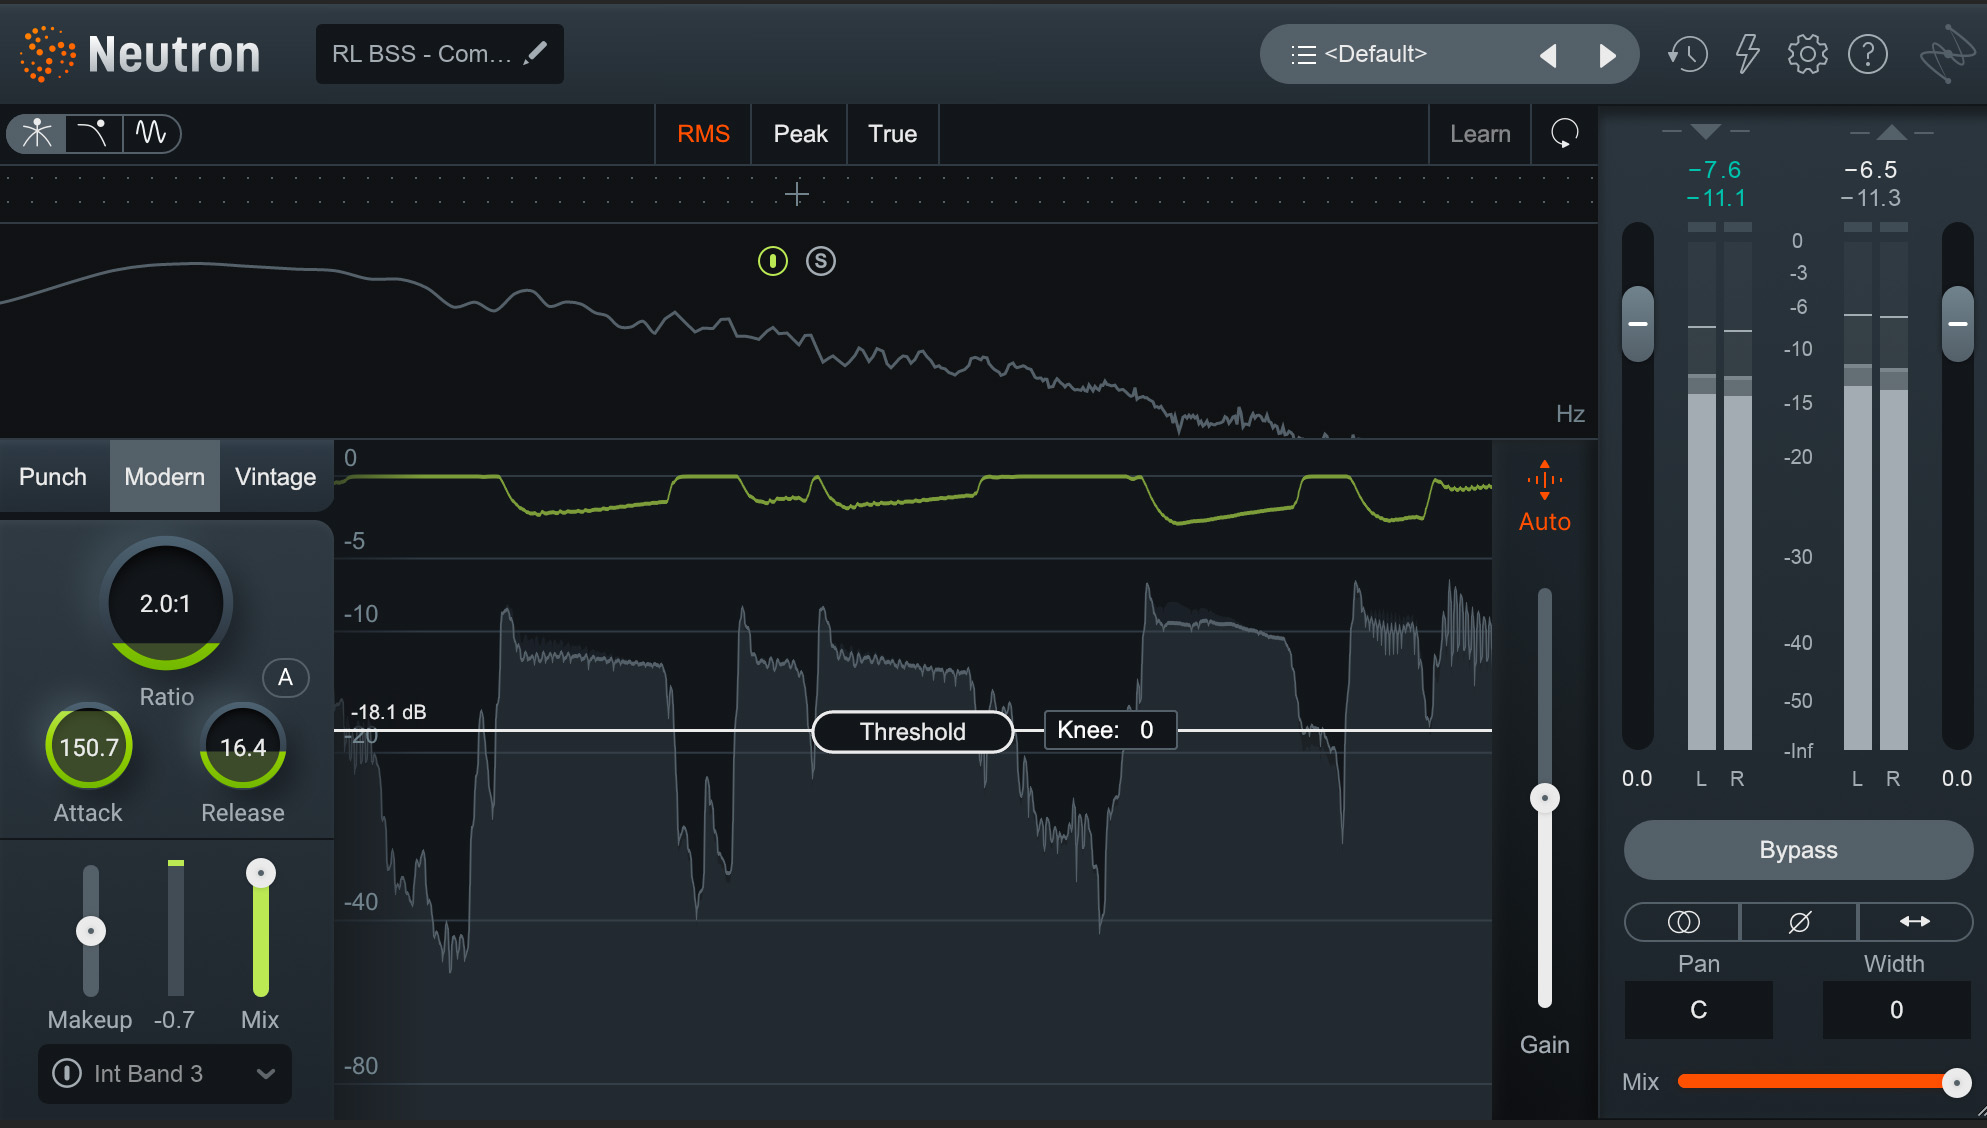
Punchy bass compression settings in iZotope Neutron
Listen with headphones to really hear the difference: in the second example, the front end of the transient is more exaggerated. There’s a point to the sound. To some degree, the phrases have been reshaped.
Yet we can do more: the knee control, available in Neutron’s modern compressor, will define how sharply the circuit goes into compression right around the vital threshold point. At higher knee values, the ratio will be lower around the threshold.
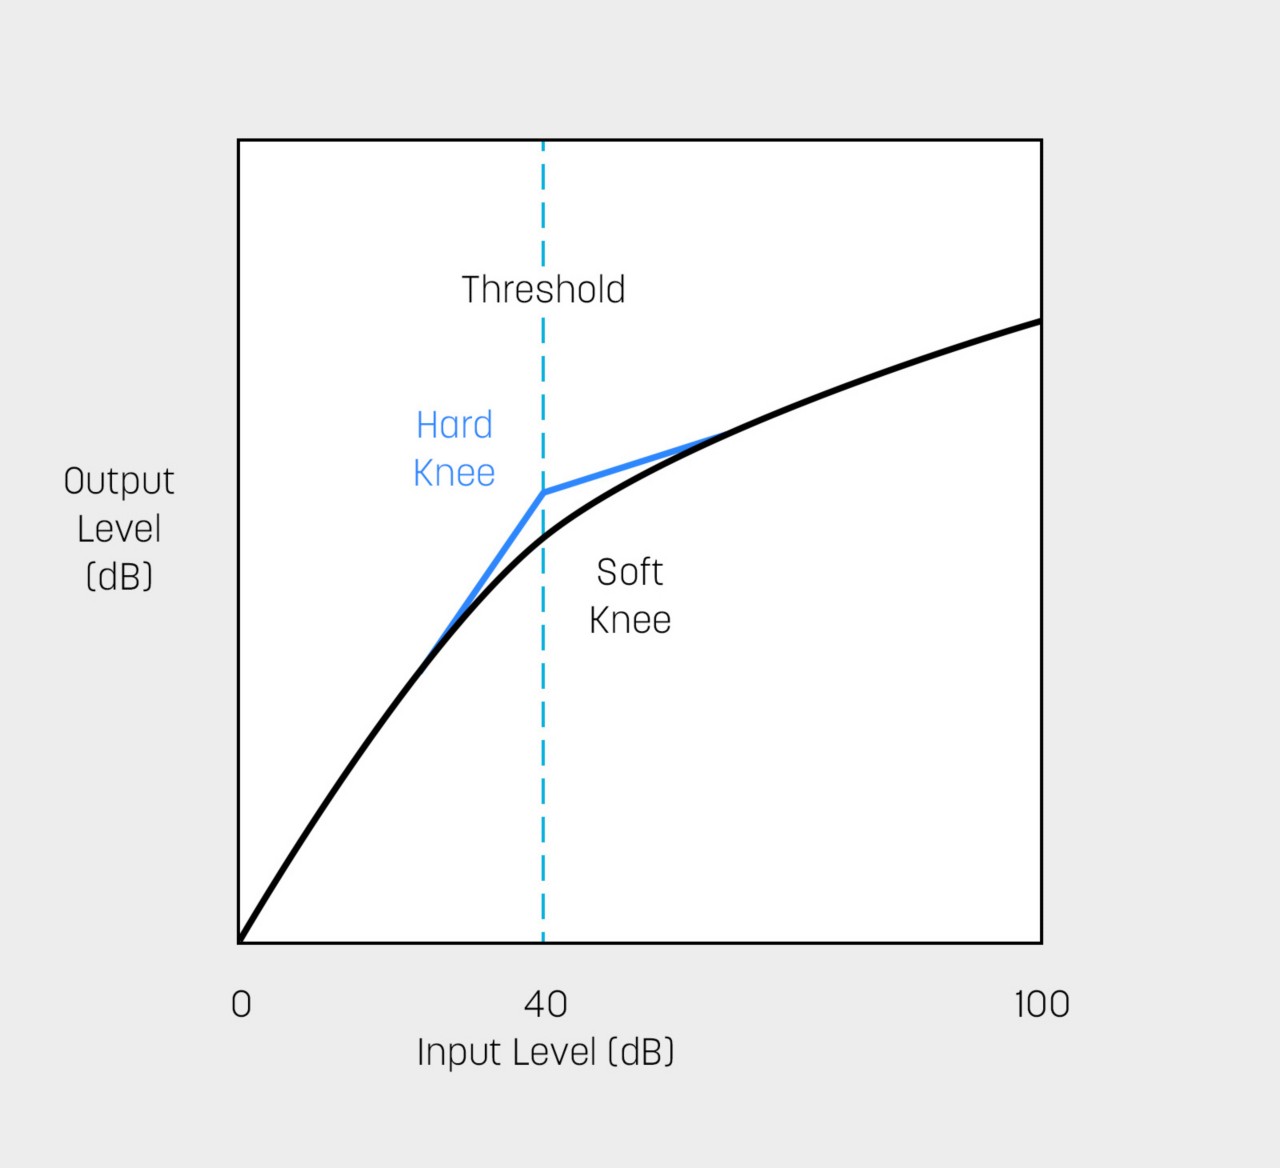
Hard knee vs. a soft knee
It’s a little confusing, so I tend to think of the knee as an attack parameter for my ratio control: a higher knee means the ratio will be lower for longer, before it raises—its envelope will be different.
The last compression parameter has to do with sidechain compression. The sidechain detector determines which frequencies can be excluded from triggering the compressor. If the low end of the bass is causing the compressor to act rather quickly, you can filter the lows from the sidechain signal, and the compressor will not respond to those bassy frequencies.

Sidechain detector in iZotope Neutron
In the actual signal path, you’ll still have the same amount of bass content. The compressor is just being told what to do from a filtered signal.
Finally, use the makeup gain control to compensate for any changes in level after the compression has taken effect. If you’re using an emulation, the makeup gain control might have some saturation elements built in, which you can use to your advantage in the gainstaging process.
Bass compression settings
With these controls in mind, we can apply bass compression settings in the following manner:
Start with a low to moderate ratio (2:1 to 4:1), and begin by exaggerating the threshold till the compressor is working heavily. The moderate ratios will help the compressor react less drastically to the instrument.
Next, fine-tune the attack and release until the behavior of the compressor is as smooth or as punchy as you’d like. After this has been calibrated, back off to the threshold till you are at a sensible level, and maybe tweak some more, depending on how it all sounds.
In this video, I’ll show you how to set a compressor on bass for various purposes.

How much compression should I use on the bass?
There’s no hard and fast rule for how much compression you should use on the bass. The amount of compression required depends on which goals you’re trying to accomplish, whether you’re trying to even out the dynamics of a performance, enhance the sense of groove, or add character to the tone of the bass.
But that’s only half the story: the original tone of the bass guitar and the genre you’re working within change how you’ll work. Remember the reasons we compress the bass in the first place.
A jazz tune, for instance, might not benefit at all from heavy compression, as we then destroy the bassist’s subtle phrasing. Likewise, in dealing with a metal bass’s aggressive picked sound, we might need so much compression that we’re well into limiting territory.
Learn more about Bass Compression in part 2 of this article.