7 Tips for Using Subtractive EQ When Mixing Audio
Subtractive EQ is the process of decreasing a frequency band's amplitude. Check out these seven tips for using subtractive EQ to remove unwanted frequencies with immediate results when mixing audio.
Subtractive EQ is a powerful technique in the engineer’s arsenal. With just a few moves, we can make sounds appear less nasal, less harsh, less muddy, and more clear.
There is a dark side, however: subtractive EQ can also destroy the lifeblood of your mix. One must use it wisely, or else a mix might become too thin, or sound too hollow.
To better understand subtractive EQ, check out these seven tips for using it effectivley, especially helpful for the beginner. Let’s start by defining subtractive EQ.
Jump to these tips:
- Boost first, then cut
- Know your Q
- A little bit of solo might help
- Try a transparent subtractive EQ
- Don’t overdo the amplitude of a cut
- Don’t overdo the number of cuts
- Try a dynamic EQ when static doesn’t work
Follow along in your DAW with a free demo of


Neutron
This article references a previous version of Neutron. Learn about 

Neutron 5
What is subtractive EQ?
Subtractive EQ is a decrease in a frequency band’s amplitude, also known as a cut. With an equalizer, you can either boost a frequency’s amplitude or cut it. Look at the screenshot below: in the low end, we’re boosting, but we’re cutting the amplitude of frequencies in the midrange.
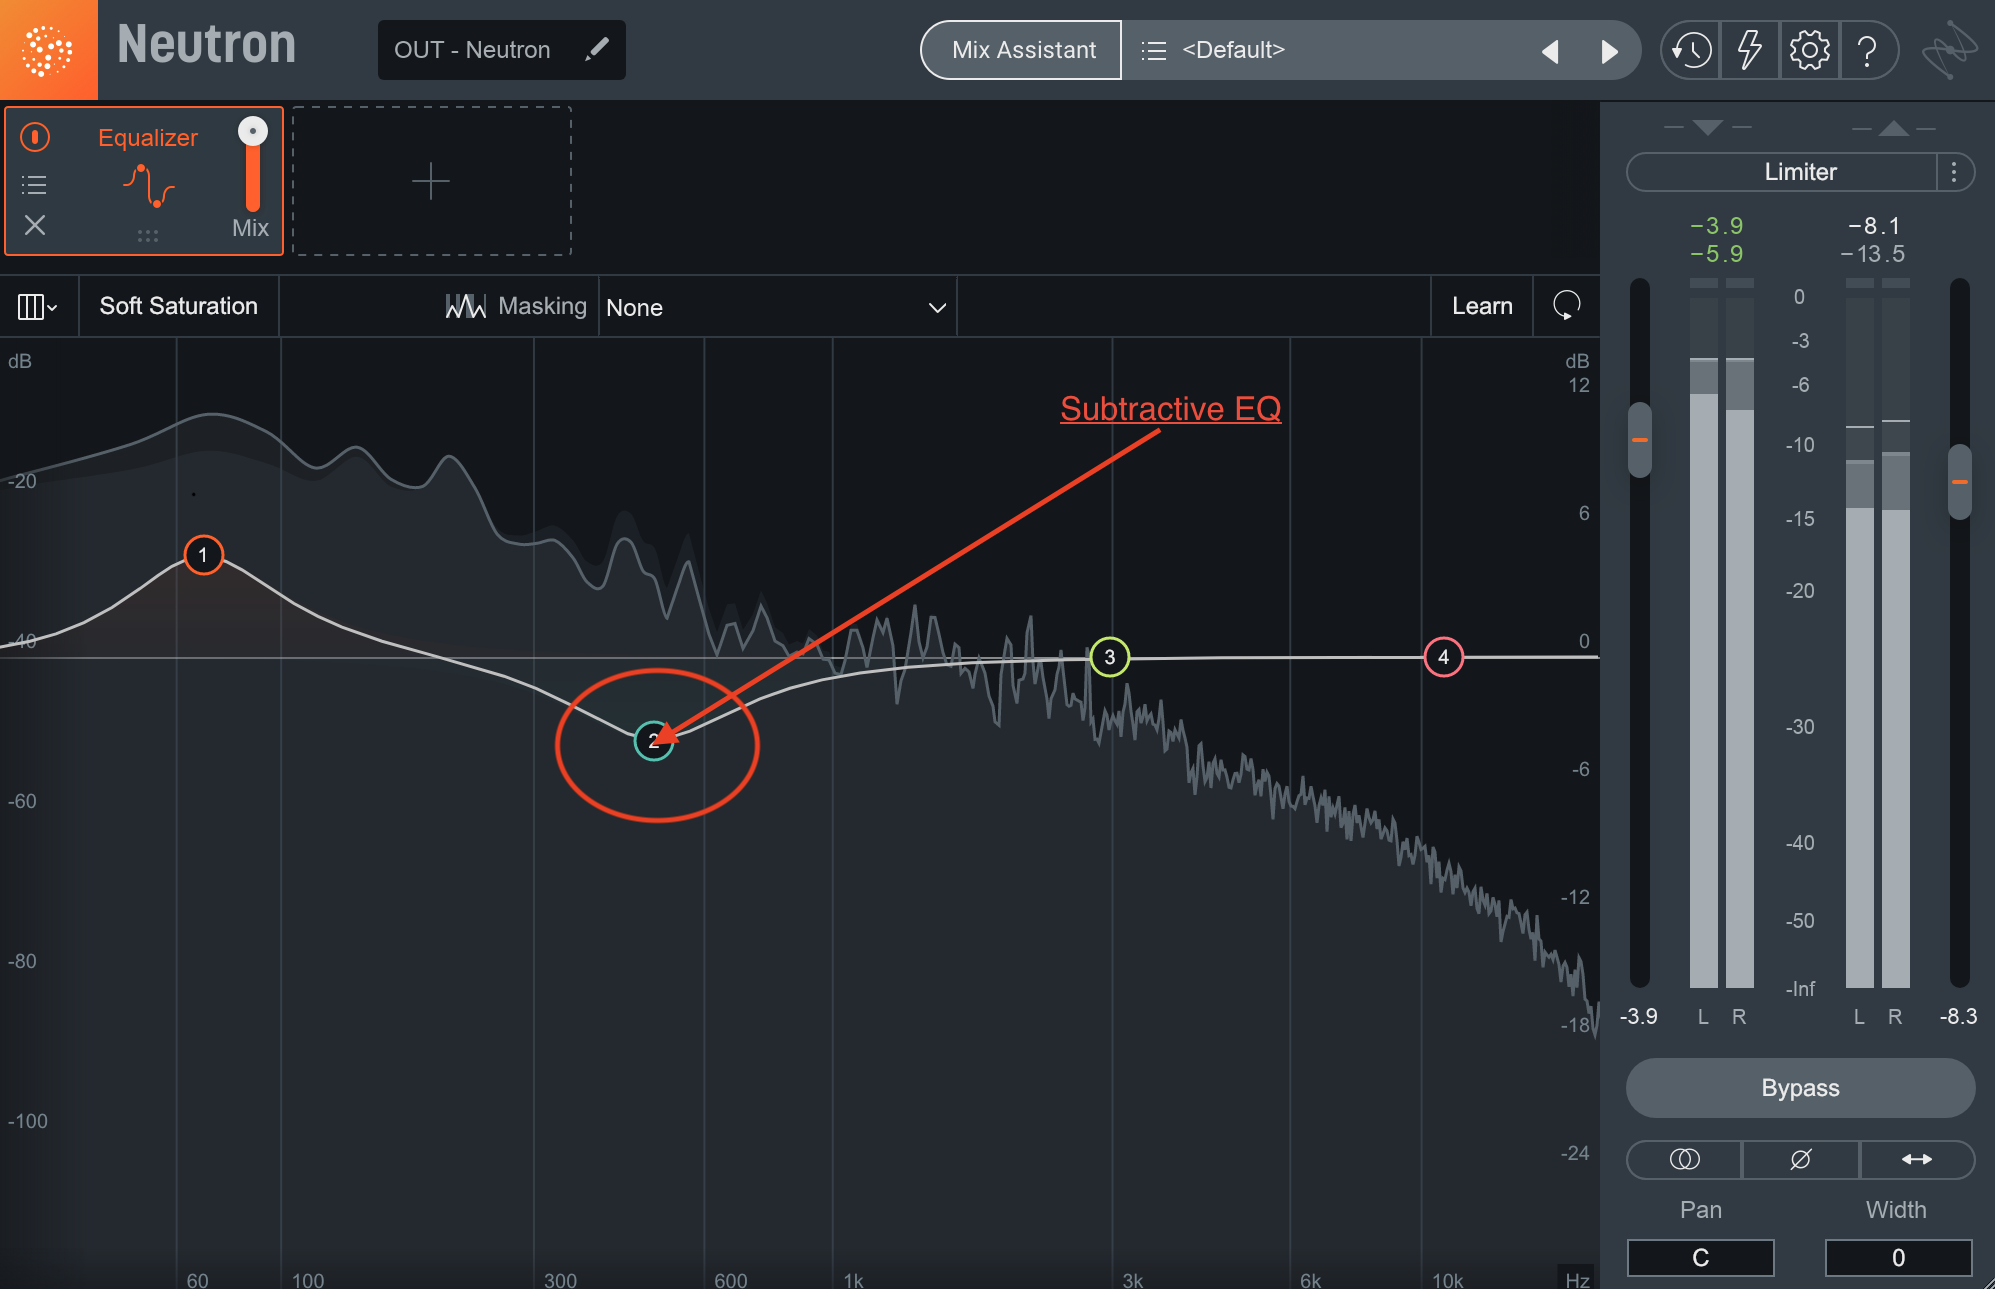
Example of subtractive EQ in Neutron
In subtractive EQ, we use the terms “cut,” “decrease,” and “attenuate” interchangeably. They all mean the same thing for our purposes.
On to some tips!
1. Boost first, then cut
If you’re not sure which nasty frequencies need curtailing, go ahead and look for them with a big boost. Bring them up and out of the woodwork.
Now, the jury’s out on whether or not you should sweep a boost to scout for frequencies (“sweeping” means to move the boosted frequencies around and see which ones you don’t like). The problem with boosting and sweeping is that with enough boost, any frequency can sound bad, but it can still be a handy technique to find problematic areas. Just be sure to listen without any boost once you’ve found a problem frequency to let your ears reset.
If you’re new to the practice, you can also use the handy spectrum analyzer to see a visual representation of what you’re doing. Many iZotope mixing plug-ins come with a frequency analyzer, including


Neutron


Nectar 3 Plus


Ozone Advanced
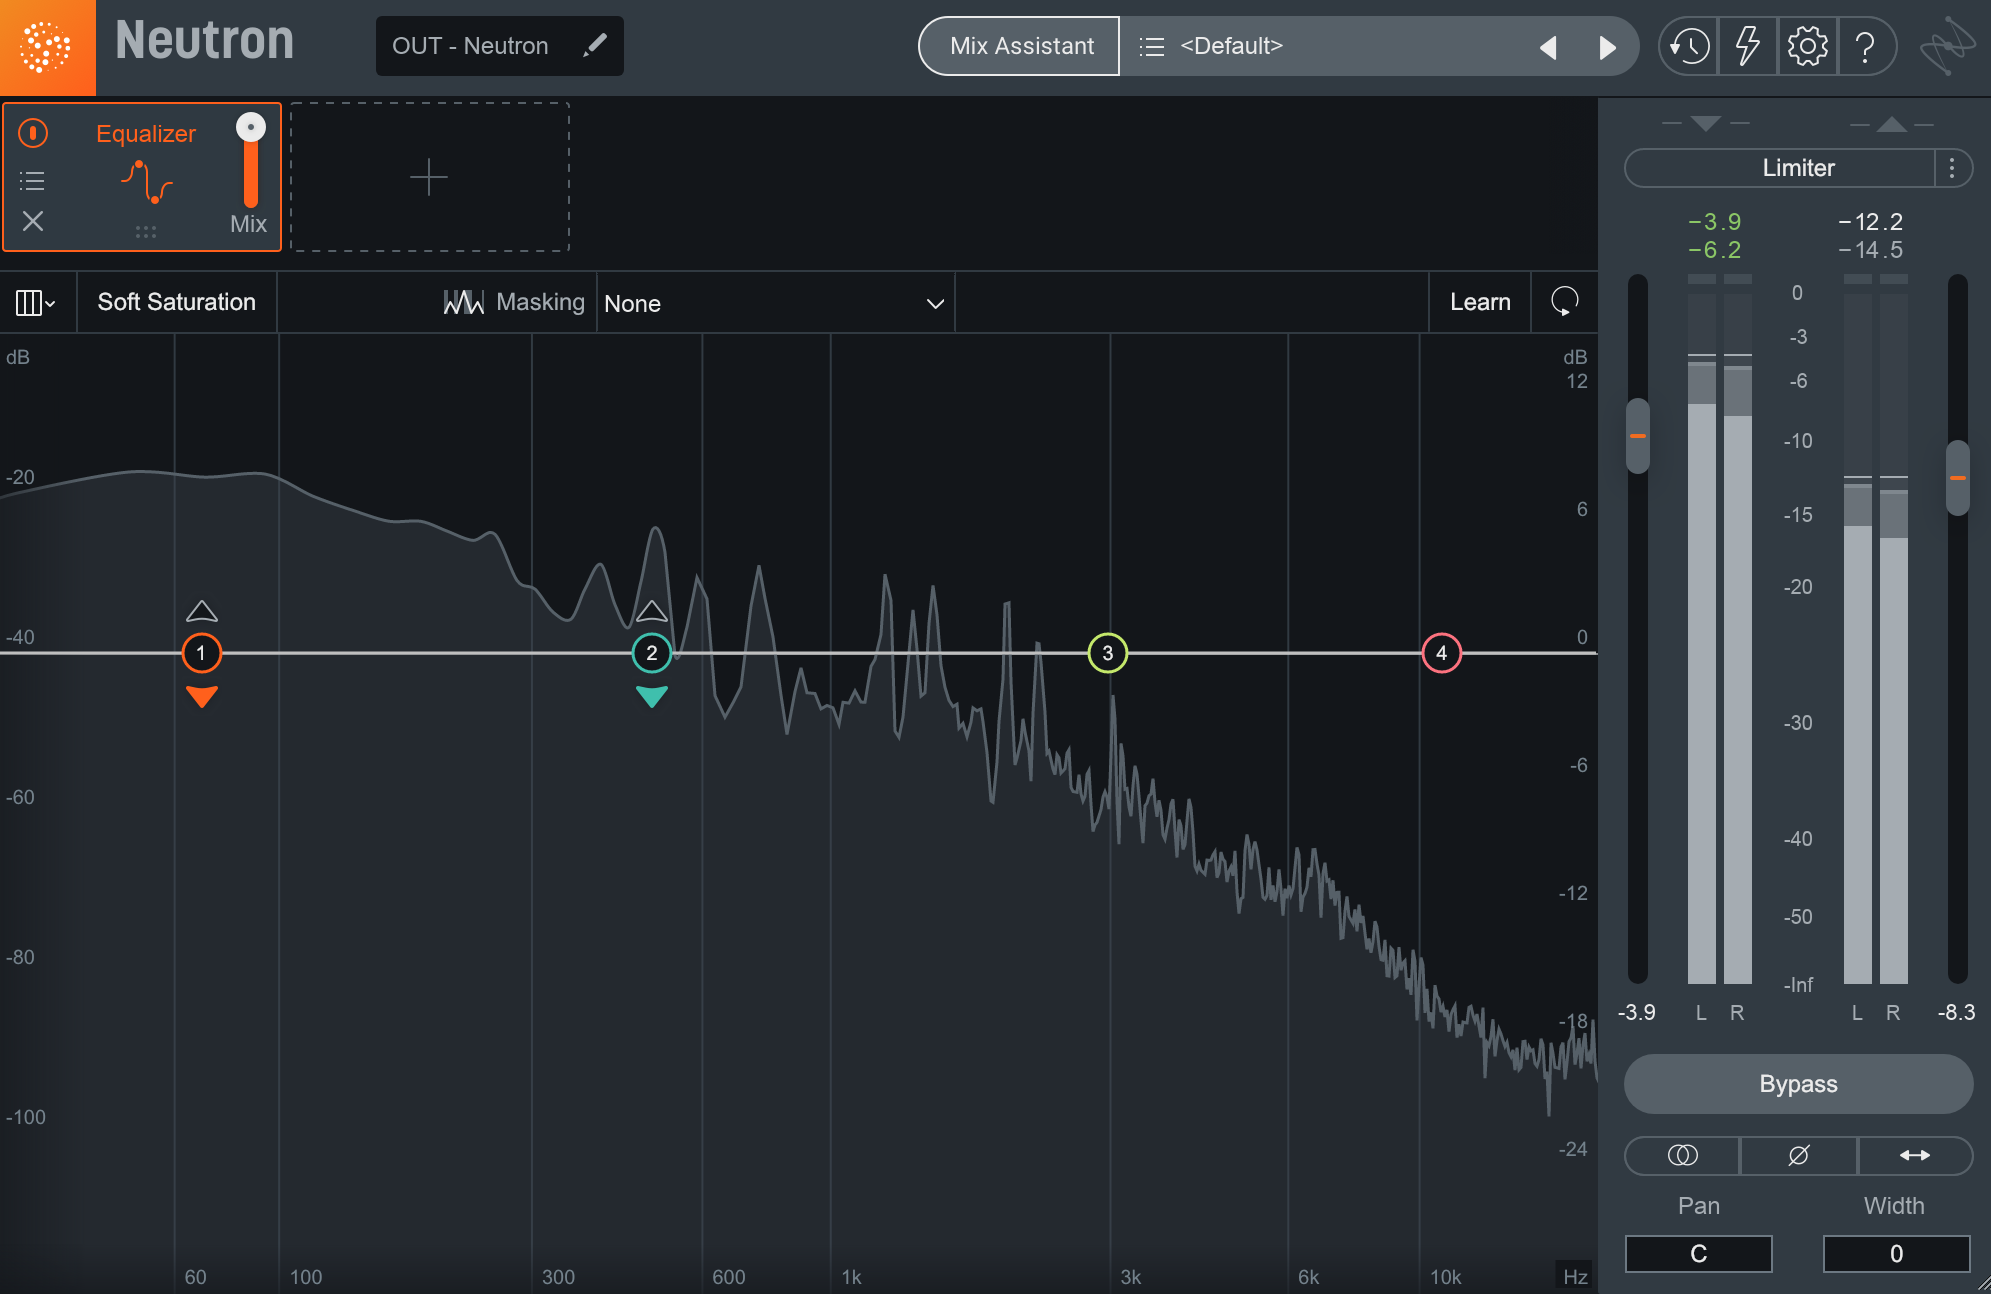
Neutron frequency analyzer
Over time, you’ll train your ears to identify which frequencies to attenuate automatically, drastically cutting down on guess work. Soon you won’t need the frequency analyzer—and in a few years, you probably won’t need to sweep!
2. Know Your Q when using subtractive EQ
“Q” is the width of a boost or cut—also known as its bandwidth—the number of frequencies you’re clutching in your basket at any one time. As a general rule of thumb, try to use narrower Qs when dealing with resonance issues, and broader Qs when dealing with tonal shaping.
Resonance is when you have an individual frequency that sticks out significantly more than other frequencies in the same region. It may sound like a whistling or hooting sound, depending on the frequency range. Tonal shaping, on the other hand, is when you want to adjust a broad range of frequencies—for example low-mids.

Ideally, you’re trying to subdue only the offending frequencies. You don’t want to inflict any collateral damage upon neighboring frequencies, whose characteristics you might like.
When it comes to Q values, the higher they go, the narrower they are, so 20 is very narrow, while 1 is broad.
A Q value of 1 might come in handy for unmasking issues—for getting the piano out of the way of the vocal for instance. A value of 12 might be better for taking out an annoying, nasal resonance from the vocal itself.
3. A little bit of solo might help when using subtractive EQ
We tell you not to judge things in solo, but in trying to find a troublesome resonance, soloing can be your friend from time to time.
A common problem: You’ve got a vocal or an instrument and something about it feels off. Some stray resonance is annoying the hell out of you, but you don’t quite know where it is.
Here you can solo the instrument for a brief amount of time—and then solo or “audition” the frequencies you’re listening to with the EQ as well.

Audition frequencies in Neutron
Neutron, Ozone, and Nectar all let you audition specific frequency ranges. Simply click the node while pressing “Option” on a Mac (“Alt” on Windows), and you’ll hear only the frequencies covered by that band. You can boost in solo mode too—it can help identify that really awful resonance, and then you can cut it with confidence.
Two words of advice: don’t do this for very long, and don’t do this loudly. Do it for too long and you lose what’s supposed to happen in the mix. Do this too loudly and you can damage your hearing. That said, it can be a great alternative to the “boost and sweep” method.
4. Try a transparent subtractive EQ
Color EQs—or EQs that add harmonic saturation—certainly have their place, and can add a pleasant thickness to the sound. For example, the Neutron or Ozone EQs with soft saturation turned on. However, for subtractive EQ moves they often make less sense.
The reasoning goes something like this. If you’re trying to clean up a sound by removing problematic frequencies, or frequency areas, why would you want to add additional harmonic content on top of that?
To try this, use something like the Neutron or Ozone EQs with soft saturation turned off. This will give you a pristine digital EQ with no added harmonics to make the surgical moves needed. Of course if you want to use another instance with soft saturation turned on after your subtractive EQ, you can get all the goodness of that color without the drawbacks of including what you were trying to clean up in the first place.
5. Don’t overdo the amplitude of a cut
It can make sense to cut out 3 to 4 dB (or more!) of an offending frequency. Even so, the more you cut a range of frequencies, the less natural it will sound. Overcutting leads to an over-processed, thin, bloodless sound, one often complicated by annoyances now introduced by the very cut itself.
Of course, to find out how far is too far, you should experiment. Let’s take a vocal as an example.
I detect too much 530 Hz, and too much 1 kHz:

Resonance issues in a vocal
So we cut these two frequency ranges at 2 dB, like so.

2 dB cut to help with resonance issues
Now, let’s hear a 4 dB cut.
Sounding less clouded. Let’s try a 6 dB cut.
In this latest round, we can start to hear the diminishing returns: the vocal feels more lifeless, less robust. I reckon that for this particular example, 4 dB is the sweet spot.
6. Don’t overdo the number of cuts
It can be tempting to hack the whole track to bits, till we wind up with something that looks like this:

Too many cuts can result in weird resonanances that sound empty
We start with one offending frequency, then we notice others, and eventually we’ve taken slim bites out of the whole track. This can result in weird resonances that seem devoid of life.
So here’s a good modus operandi: make a cut, and then sit with it a while before going to the next one. Maybe one is all you need!
7. Try a dynamic EQ when static doesn’t work
Sometimes a static cut is not the right choice. It can be too obvious. Often because the ear wants to hear some of the frequency at first—a hint that it exists—before the frequency swells into offensive territory.
With a dynamic EQ, you can give the ear exactly what it wants before battening down the hatches on the nasty, upcoming frequency storm. With a medium attack time and a release tailored to the timing of the track, you can let through a little bit of that undesirable sibilance, or some of that 3 kHz harshness, or just enough of the nasal noise.
Neutron has a great dynamic EQ:
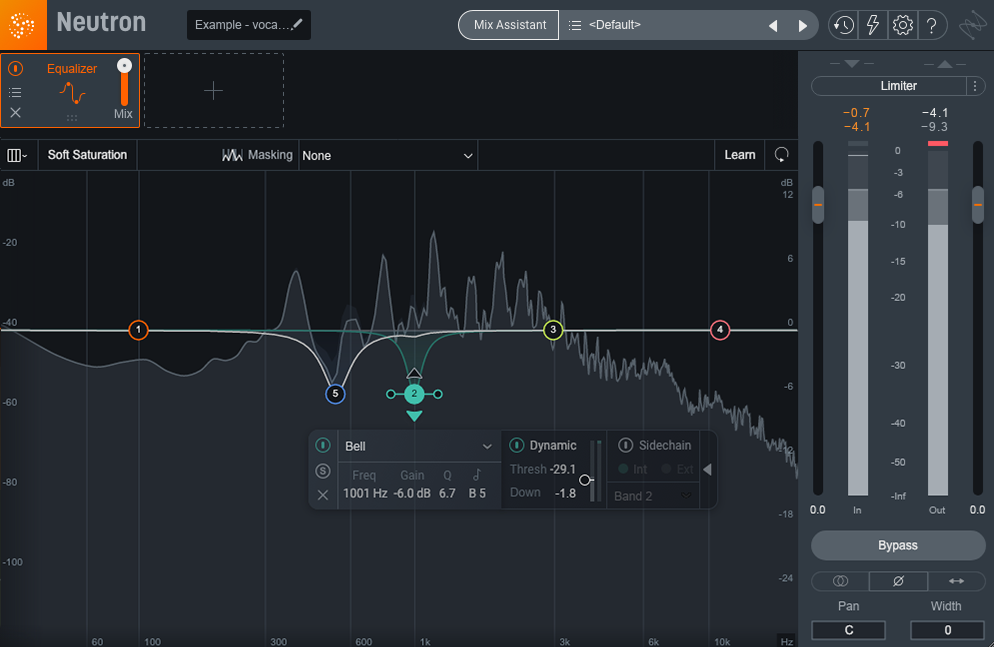
With Neutron, you can sidechain any frequency band to any other frequency band within the plug-in. This can come in handy for rebalancing instruments—like a guitar with too much pick attack and not enough meat. You can literally tell Neutron to boost the body of the guitar only while cutting the pick attack. Pretty cool!
Ozone also has a dynamic EQ, one that boasts a feature not present in many other dynamic EQs on the market:

Ozone Dynamic EQ
Ozone’s Dynamic EQ gives you attack and release parameters, which means more control over the sound. Just like the controls of the same name on a compressor, this lets you determine exactly how much of a frequency you get to hear before you start cutting it.
Start using subtractive EQ
In my nascent years, I spent a lot of time employing subtractive EQ with gusto. Too much gusto, I’d wager now. The truth, I’ve learned, is that a subtle hand can often get the job done, especially if transparency is my end goal. Like many other things in life, I was too zealous in my earlier years, and my maturation as a mixer has a lot to do with allowing myself to do more with less.
So of all the tips I’ve outlined above, I’d like to reiterate the one about taking a moment after enacting each cut to sit, and to listen. Patience goes a long way toward improvement, at least for me. You can try to rush forward with as many cuts as you can slice, but if you’re like me, you’ll find that is a truly subtractive process indeed—and not in the way that helps.
Now it’s your turn: try your hand at subtractive EQ with a free demo of


Neutron
