Resonant frequencies: what they are and how to fix them
Discover key mastering tips for managing resonant frequencies in your mixes – how to identify, control, and use resonance creatively for a balanced, polished sound.
You’ve probably been deep into a mix, and found something bugging you. Maybe the vocal sounds boxy, the snare rings in an oddly metallic way, or the room mics feel like they’re bouncing a single note back at you every time you hit play.
Nine times out of ten, you’re clocking a resonance issue – a stubborn, narrow build-up of energy at a specific frequency. Resonance issues can clutter up your mix faster than an overzealous reverb.
In this article, we’ll break down what resonant frequencies actually are, why resonant buildups happen, and why they’re so often a source of headaches.
More importantly, we’ll show you practical, step-by-step ways to hunt them down and keep them under control. We’ll touch on Neutron, Ozone, and RX – three indispensable tools in the iZotope ecosystem for taming unwanted resonance.
Before we get our hands dirty, let’s get clear about what resonances are.
Follow along with this tutorial using iZotope
![]()
![]()
Ozone 12 Advanced
What causes resonant frequencies in a mix?
A resonant frequency in a mix is a specific frequency that is unnaturally boosted or amplified, causing a ringing or buildup of energy. Resonant frequencies occur when a sound source – or, a particular environment – emphasizes a narrow band of the frequency spectrum.
Maybe it’s a vocal recorded in a small untreated room, where standing waves boost certain frequencies. Maybe it’s an acoustic guitar body that naturally “rings” at a certain note. Or maybe it’s an EQ gone wrong (yes, you can actually create unwanted resonance if you boost too tightly or too much).
Microphones, instruments, and rooms all have their own resonant properties. Many instruments and rooms have a resonant frequency, a note at which things ring out.
Resonance is part of what gives sounds their character, but when a resonance sticks out too much, it turns from musical to annoying. It can also eat up headroom in your mix.
How resonant frequencies differ from harshness
People often lump “harshness” and “resonance” together, but they’re not quite the same. Harshness is a broader phenomenon, usually referring to an excess of high-mid or high-frequency content that makes a track fatiguing.
A bright vocal can be harsh without having narrow, spiky resonances. Conversely, you can have a dull vocal that’s still plagued by resonant notes in the lower mids.
Think of resonance as a focused peak – a single frequency or a small cluster that rings out like a bell. Harshness is more like an unpleasant glare across a wider band.
The tools for handling both can overlap (EQ is your friend in both cases, as is dynamic suppression), but the strategies are different. Harshness might call for a gentle shelf or broad cut. Resonance often calls for surgical work.
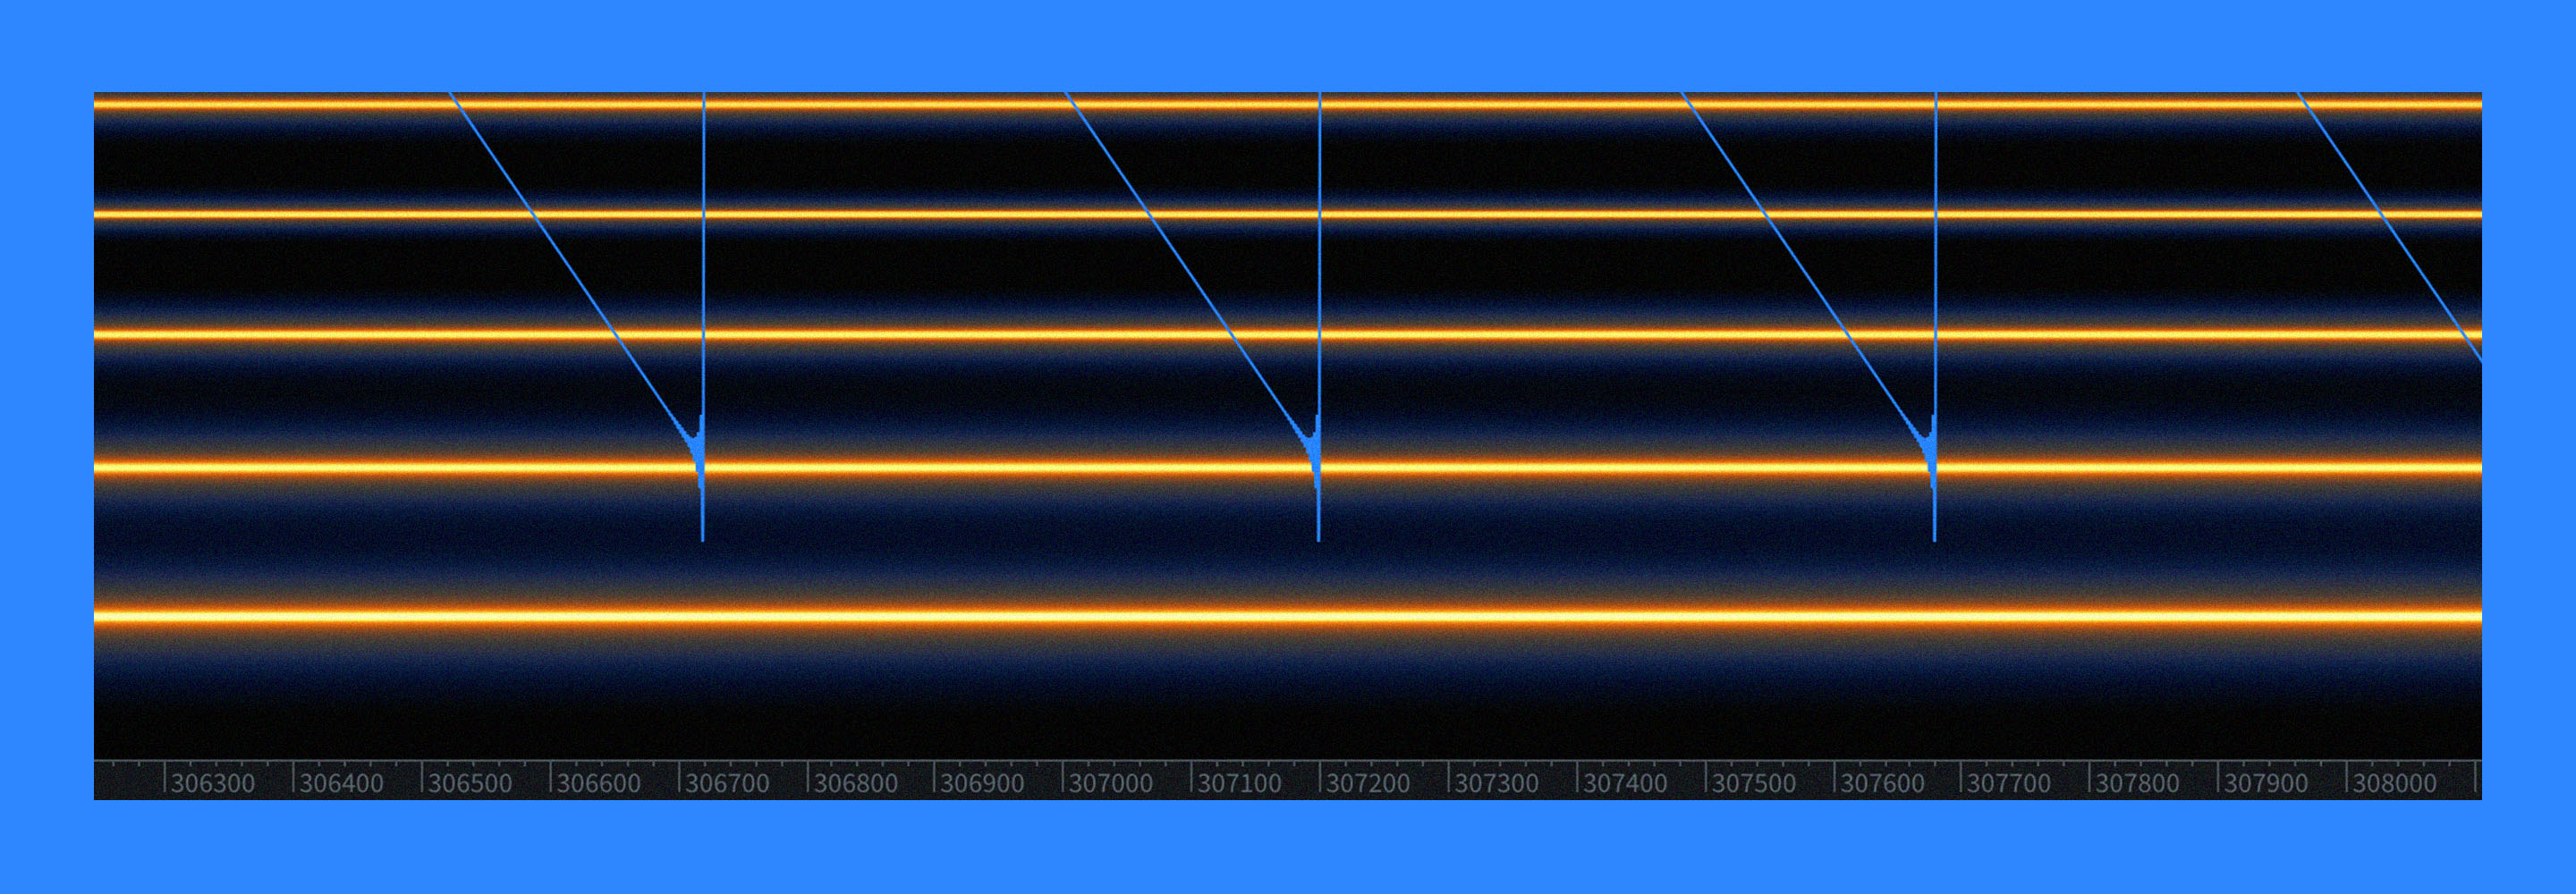
1. Pinpoint resonances by ear and sight
The first step is knowing what you’re listening for. A resonant frequency often sounds like a “whistle” or a ringing tone that doesn’t belong. If you’re struggling to find it by ear alone, here’s a simple trick.
Grab an EQ. In Neutron or Ozone, the built-in EQ modules are perfect. Insert the EQ on the offending track. Take a narrow bell band, boost it quite a bit (try 12 dB) and sweep it slowly across the frequency range while the problem section plays. When you hit the resonant frequency, it’ll jump out like an airhorn in a library.
Here’s a video of me sweeping a mix I got a few years ago to master, and you’ll see where the resonance is.
This is the classic “sweep and destroy” method. The boost exaggerates the resonance so you can’t miss it. Once you find it, flip the boost into a cut. Widen or narrow the Q until you’re only removing the problem without killing the good stuff around it. Trust your ears: solo if you must, but always check in context.
2. Whistle while you work
If you have any musical training at all – if the words “tonic,” “relative pitch,” or “matching pitch” mean anything to you – then you are well situated to go resonance hunting.
Here’s what I do.
When I suspect a horrible resonance, I try to match pitch with it, either by singing the note or whistling.
“Match pitch” is exactly what it sounds like: you sing the same pitch you’re hearing. This is a good skill to cultivate.
After I identify the pitch, I figure out the note’s frequency. You can use a frequency chart for this, and after a while, you won’t need one: you’ll have the general areas memorized.
3. Try dynamic EQ for musical control
Static cuts work well if the resonance is always there, but sometimes the culprit pops up at certain moments. Maybe a vocal only rings when the singer hits a certain note. Maybe a snare overtone jumps out when it’s hit harder. If you cut that frequency all the time, you risk dulling the overall tone.
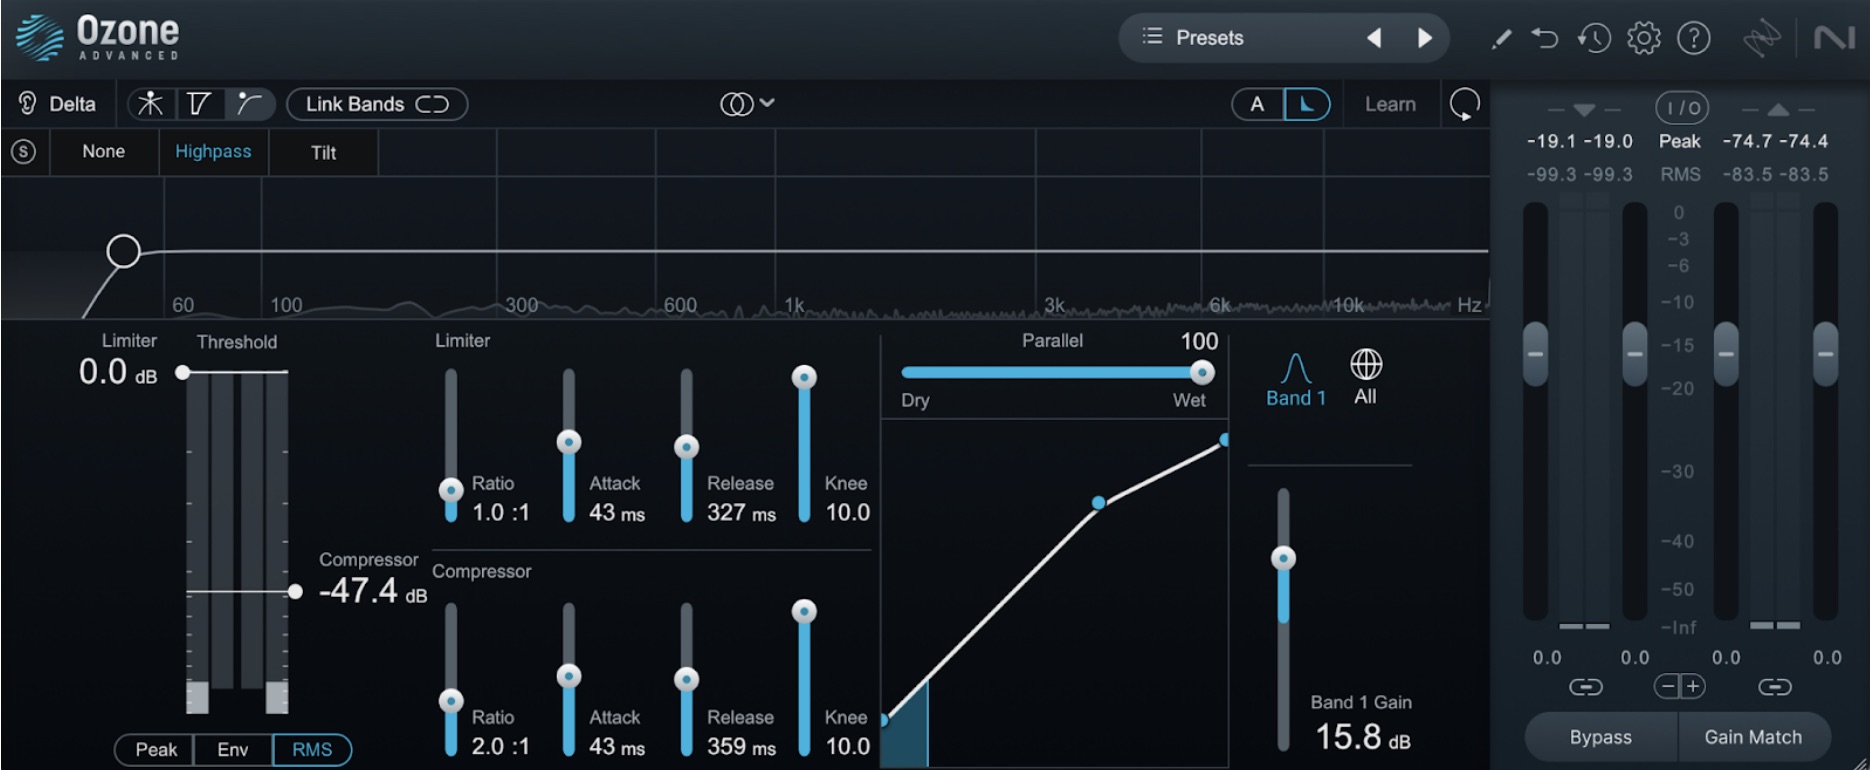
This is where dynamic EQ shines. Ozone’s Dynamic EQ bands let you set a cut that only kicks in when the resonance crosses a threshold. It also has attack and release controls, which are paramount to keeping resonances in check.
First, set up your bands at the frequencies you want to target. Here are the settings I’ve chosen.
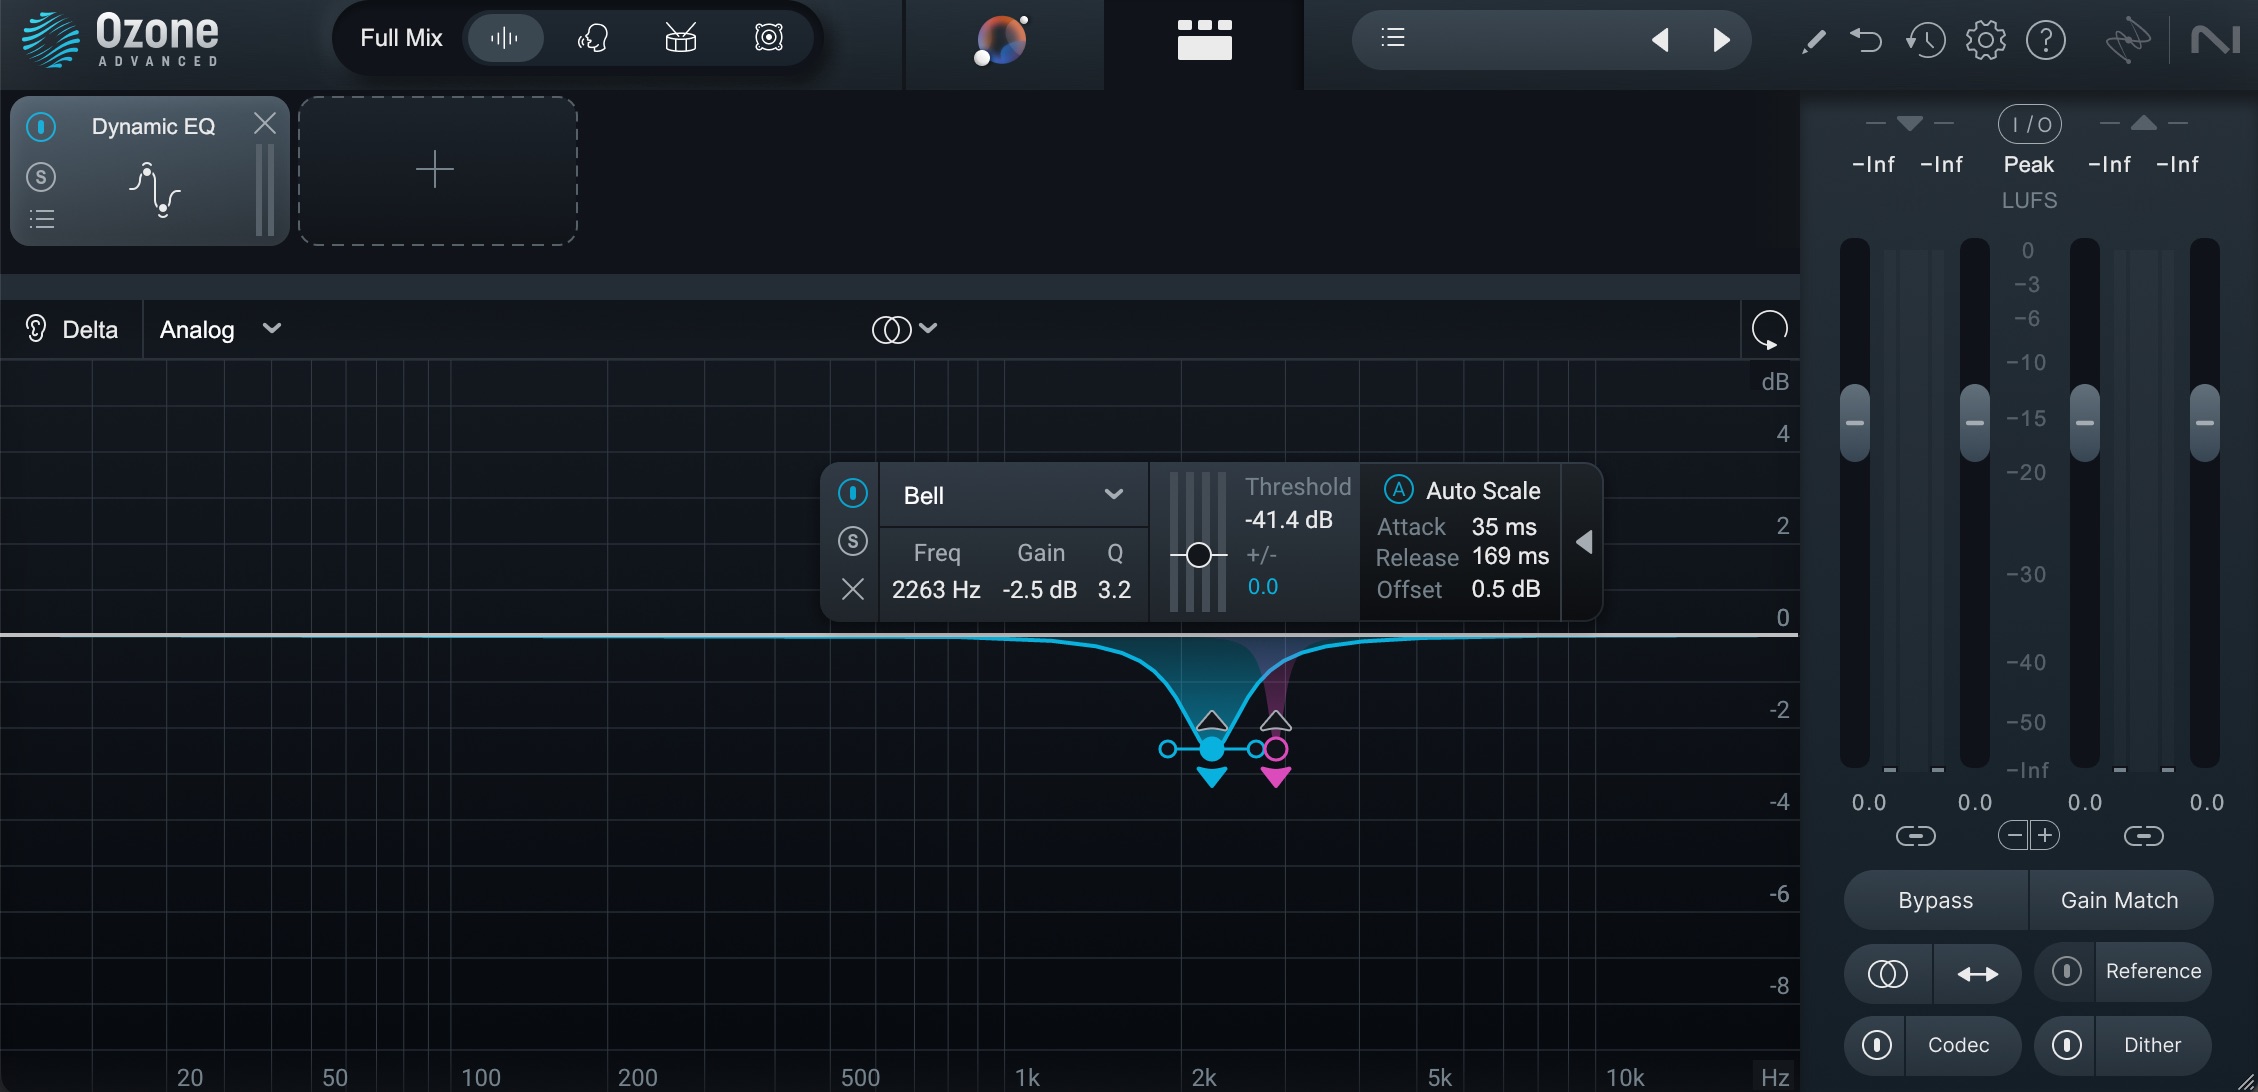
Using Dynamic EQ in Ozone to keep resonances in check
Note the attack settings, the release settings – and crucially, in this case, the offset setting.
The offset allows you to move the natural resting place of the band from 0 to a positive or negative value. In this case, I have it set to 0.5 dB. It’s a bit counter-intuitive, until I illustrate what’s happening.
As the delta in that example made clear, we are successfully keeping a vocal resonance at bay in a tasteful manner. Attack, release and offset are very much a part of that.
It took me ages to understand that dynamically targeting resonances usually requires slower attack/release times than you’d think, because the resonance is often a lingering phenomenon. We’re digging deeper with settings like this, but doing less damage thanks to the offset control:
Move the offset up from zero ever so slightly, and you can manage that lingering resonance without taking too much out of the initial impact of the signal.
Indeed, contrast this example with fast attack, fast release, and no offset, as shown here.
As the deltas make clear at the end of the video, the less subtle approach grabs more of the signal we’d want to leave alone, also creating distortion in the process.
4. tackle room resonance issues with RX or Neutron Transient Shaper
Sometimes you inherit audio that’s so baked-in with resonance you can’t fix it with an EQ alone. I’m talking about a vocal recorded in a heavily-windowed room, or a guitar cab miked in a basement. These problems call for surgical cleanup. iZotope has a few tools that can help with this issue.
Here’s a vocal with a resonance caused by the room:
The resonance is going to be tricky to minimize with static or dynamic EQ – not without significant trade offs. Before the age of forensic technology, our choices were to re-record the part, not use it, bury it in the mix, or live with an overly processed sound.
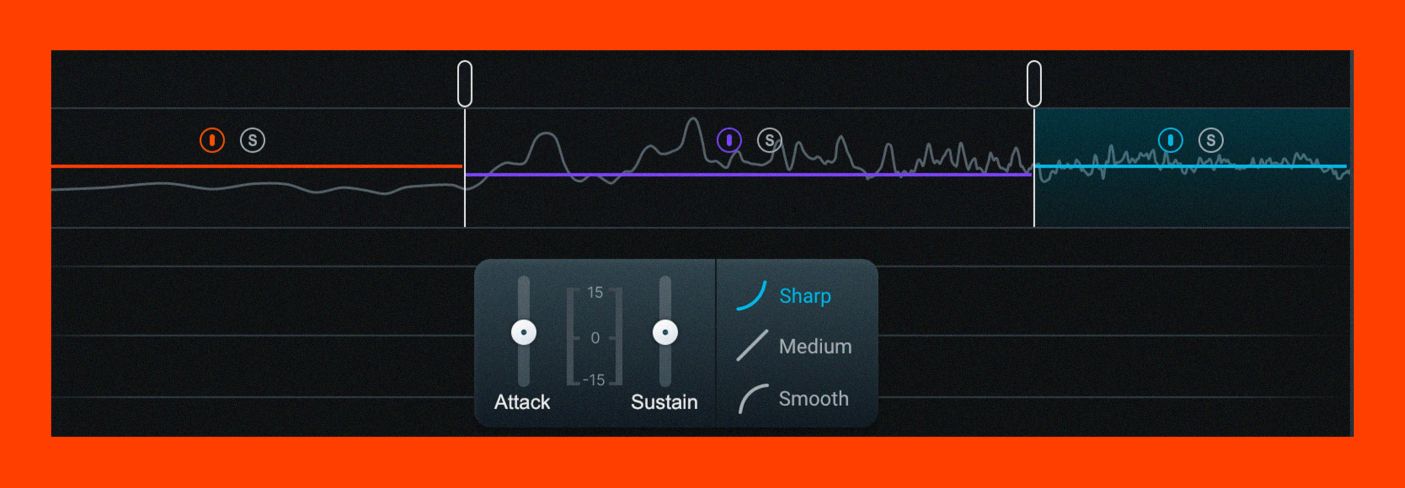
Now we can try other things, like applying a dynamic EQ to the sustain portion of a signal, leaving its transient portion alone.
Observe how I do this in Ozone in the video below.
Now the vocal is ready to be processed for things like warmth and harshness – but as you’ll see, handling the resonances first made quite a difference.
I enjoy using Ozone on vocals because I find it to be the subtler and gentler option in the iZotope toolkit. But it’s by no means the only option.
![]()
![]()
Neutron
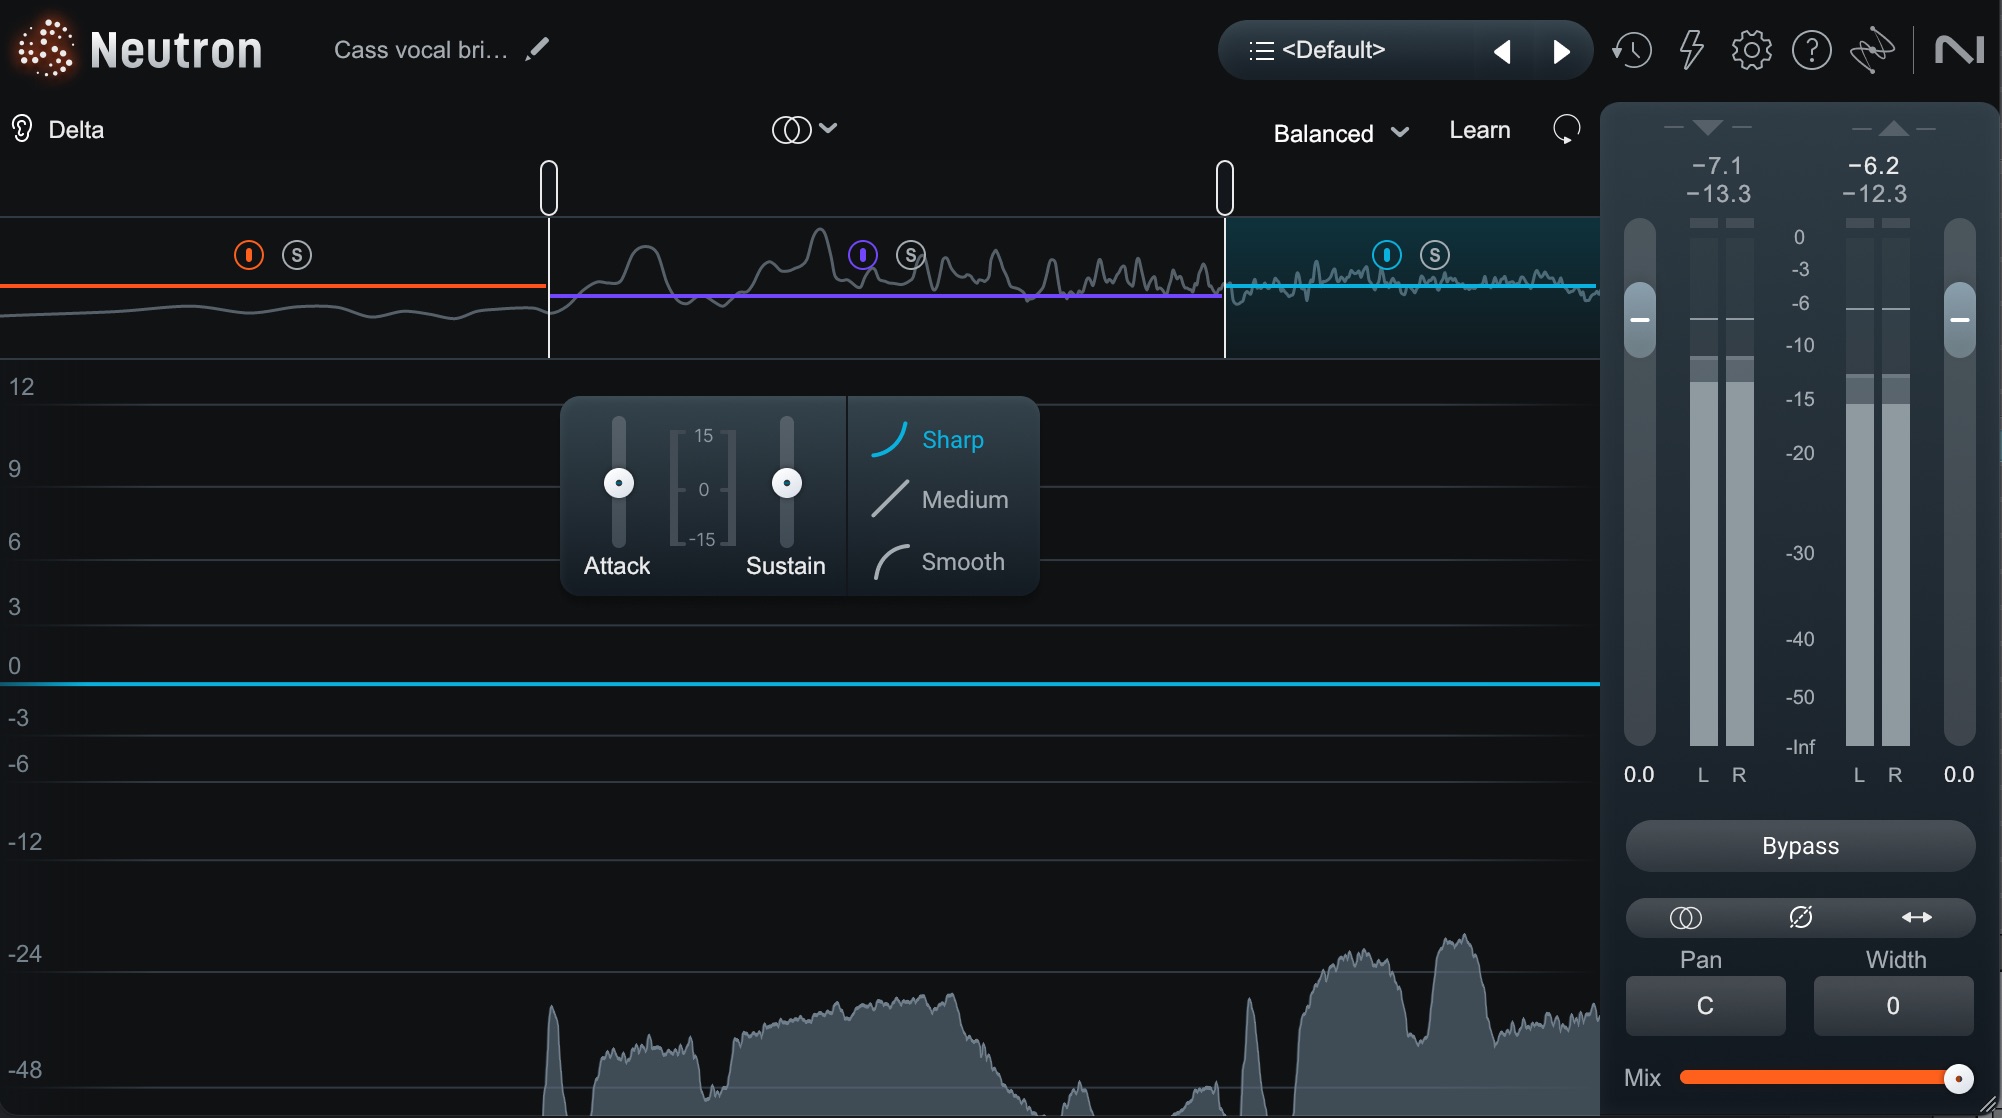
Using Neutron Transient Shaper to tame resonance issues
Since our resonance is occurring in the middle of the frequency spectrum, I’ve grabbed it in multiband mode, and I’m using the sustain slider to minimize things somewhat.
Indeed, put through our Ozone post-processing, using the transient shaper like this can get us good results.
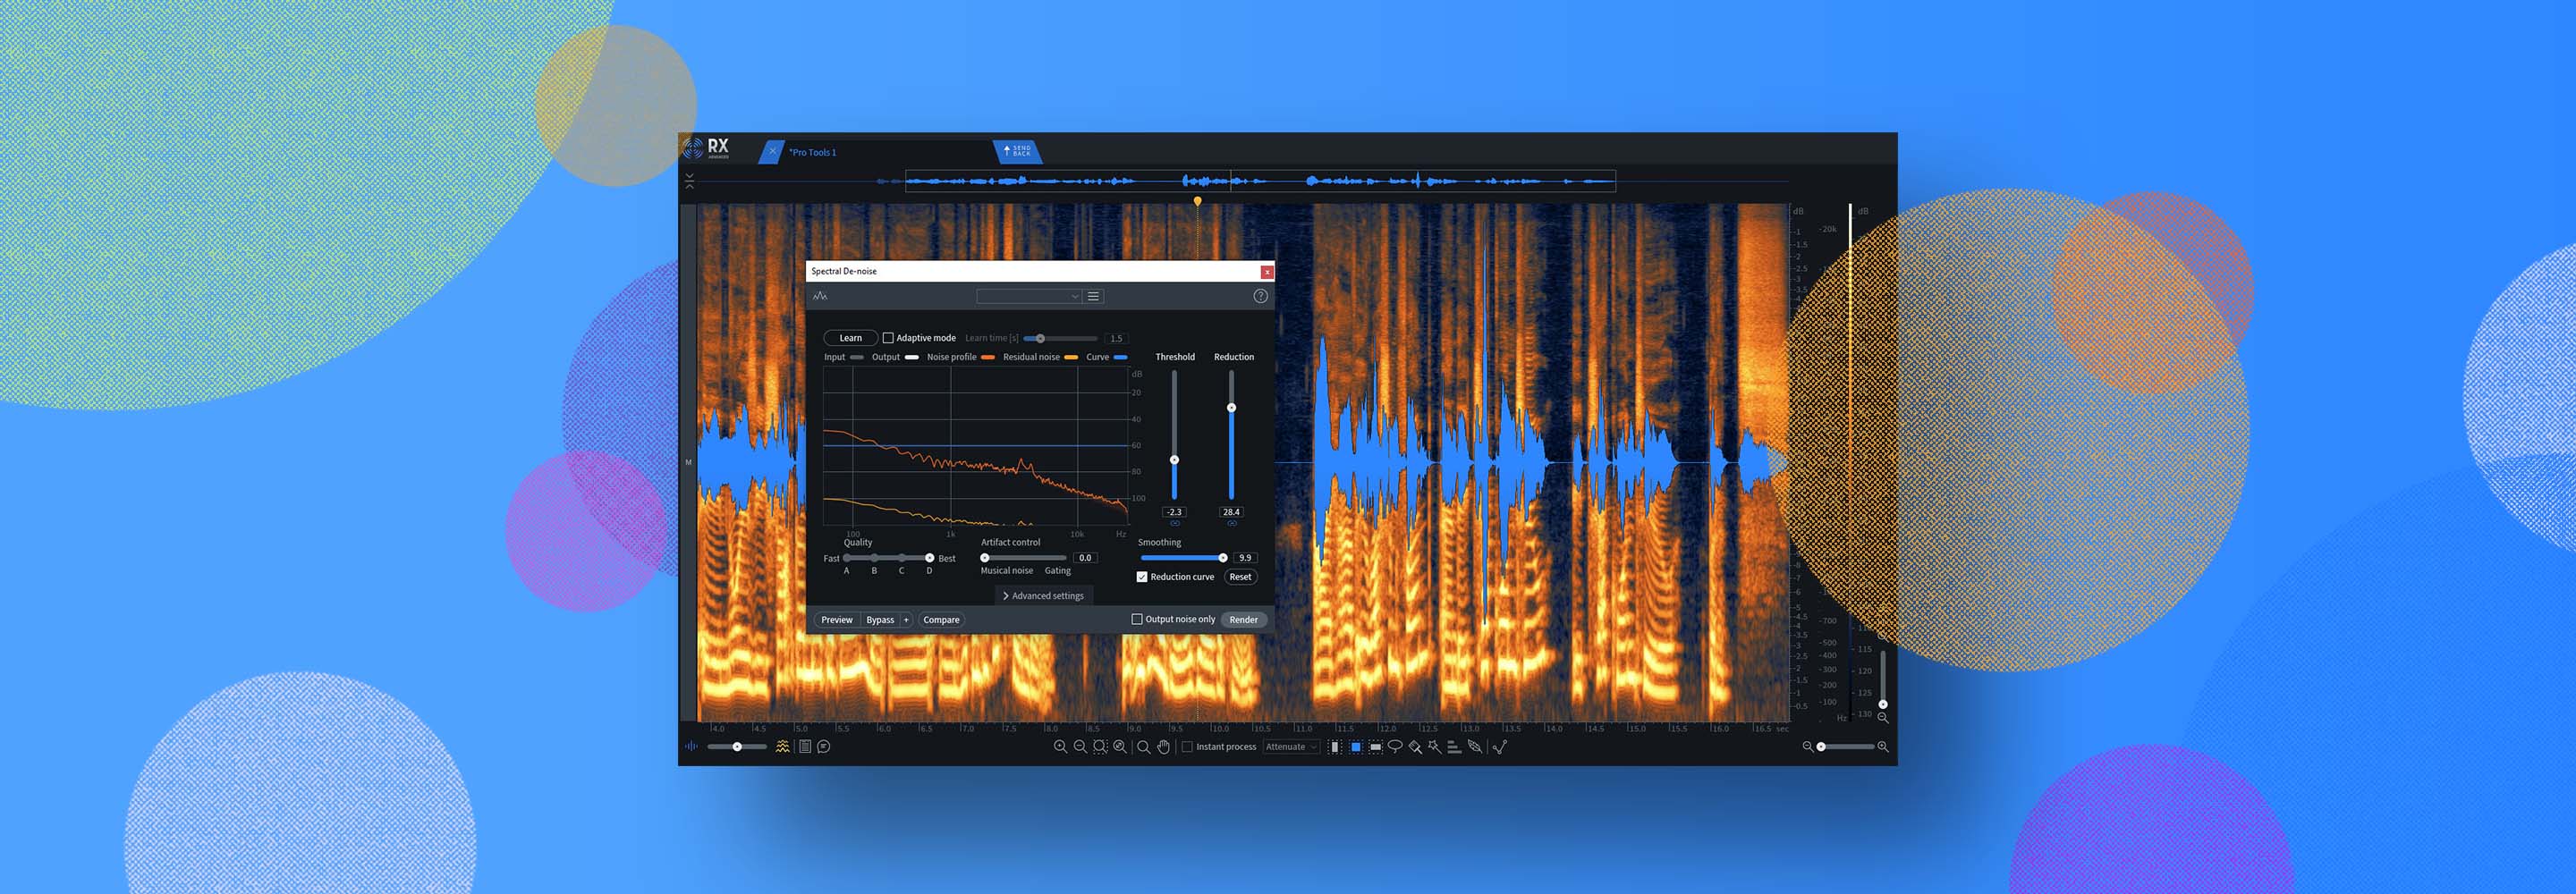
For more extreme problems, Spectral Repair in RX allows you to paint out problems visually in an audio’s spectrogram, sort of like photoshop. If you learn to recognize resonance by sight (tip: it’s often a more concentrated shade of color than its surroundings), you can adjust the resonance directly within RX. It takes more time, but it – indeed, it’s a last resort – but it’s saved countless projects from the trash bin.
If you’re curious, the RX Audio Repair Guide has some great examples of how far you can push it.
5. Watch for unintentional resonance
Sometimes we cause new resonances without realizing it. Let’s say you’re boosting a vocal at 5 kHz to add air. If your Q is too tight on the shelf, and your boost too big, you might turn a gentle lift into a piercing spike.
Another example is linear-phase EQ used in tight Qs. Often we use linear phase equalization when working on multi-miked instruments to avoid phase shifts, thus keeping transient timing intact. However, everything has a trade off – and the tradeoff of linear phase equalization is a phenomenon called pre-ringing, which I explain and demonstrate in this article about choosing the right EQ.
Pre-ringing tends to be most audible in the lower frequencies, so if you’re using linear phase EQs down below 100 Hz, pay attention to any added resonances you might have incurred.
Always listen critically when using EQ and compression. Broad strokes tend to sound more natural. If you need to get surgical, double-check that you’re not introducing a new problem.
6. Handle anything on the master bus with care
Once in a while, you’ll spot resonances poking through the whole mix. Maybe the kick drum room has a low-mid boom, or a vocal resonance still pokes through even after you cleaned it in the track. Ozone’s mastering EQ can help you tame these problems gently. In fact, one of the things the Master Assistant is really good at picking out is resonances; it’ll frequently use a dynamic EQ to take care of such nasty spikes.
But still, always remember you need a light touch on the master bus: any EQ move affects the entire mix. Keep your cuts as subtle as possible, and always A/B your changes. Sometimes dynamic EQ on the master can be the final polish that holds things together – and sometimes you ruin the whole mix by doing so!
Observe me taking out an annoying resonance across the whole mix in this song.
7. Use “bad speakers” to your advantage
Do you hate how a certain pair of headphones always make the low mids midrange feel more bloated? Does your car stereo make every podcast sound like it's spitting at you with the most sibilant esses ever?
Well guess what, you can use these speaker deficits to your advantage, provided you understand them ahead of time.
You see, every playback system has its own quirks – little peaks and dips that can exaggerate or hide certain frequencies. If you know your car has a bump around 1.4 kHz, use that during your car test phase. Play a trusted reference track, then your mix, and see if your mix is blowing that band out of the water compared to the reference. If it is, odds are you’ve got a resonance poking out. Fix it, check again, and you’ll be amazed how much more “glued” your mix feels everywhere else.
8. Stress test your mix with heavy compression
Here’s a trick that’s a little brutal but very revealing. At the end of your mix, slap on a compressor with an ultra-low threshold and a high ratio – enough to get 15 or 20 dB of gain reduction without turning the whole thing into a pumping mess. Then, before that compressor, add a narrow EQ band and sweep it slowly across the frequency range.
When you hit a resonant frequency, you’ll hear it jump out like a sore thumb because the compressor flattens the rest but can’t hide the peak. It’s like stress-testing your mix for hidden spikes. Tame them, then turn the stress test off and enjoy a smoother, more even result.
I have a preset for Ozone that you can use for this very purpose.
Preset in Ozone for stress testing your mix for resonances
Observe this mix for the upcoming song “Altered Kindness.” We’ll give it the old stress test.
I’ll put EQ before my stress test compressor to point out where some issues are. This will net me the following results.
9. Try spectral techniques for stubborn resonance
Sometimes neither static or dynamic EQ is quite enough – especially for resonances that sustain and ring out over time. This is where spectral processing can help. Tools in Ozone including the Spectral Shaper, Clarity Module, and Stabilizer Module come into play here.

Spectral Shaper in Ozone
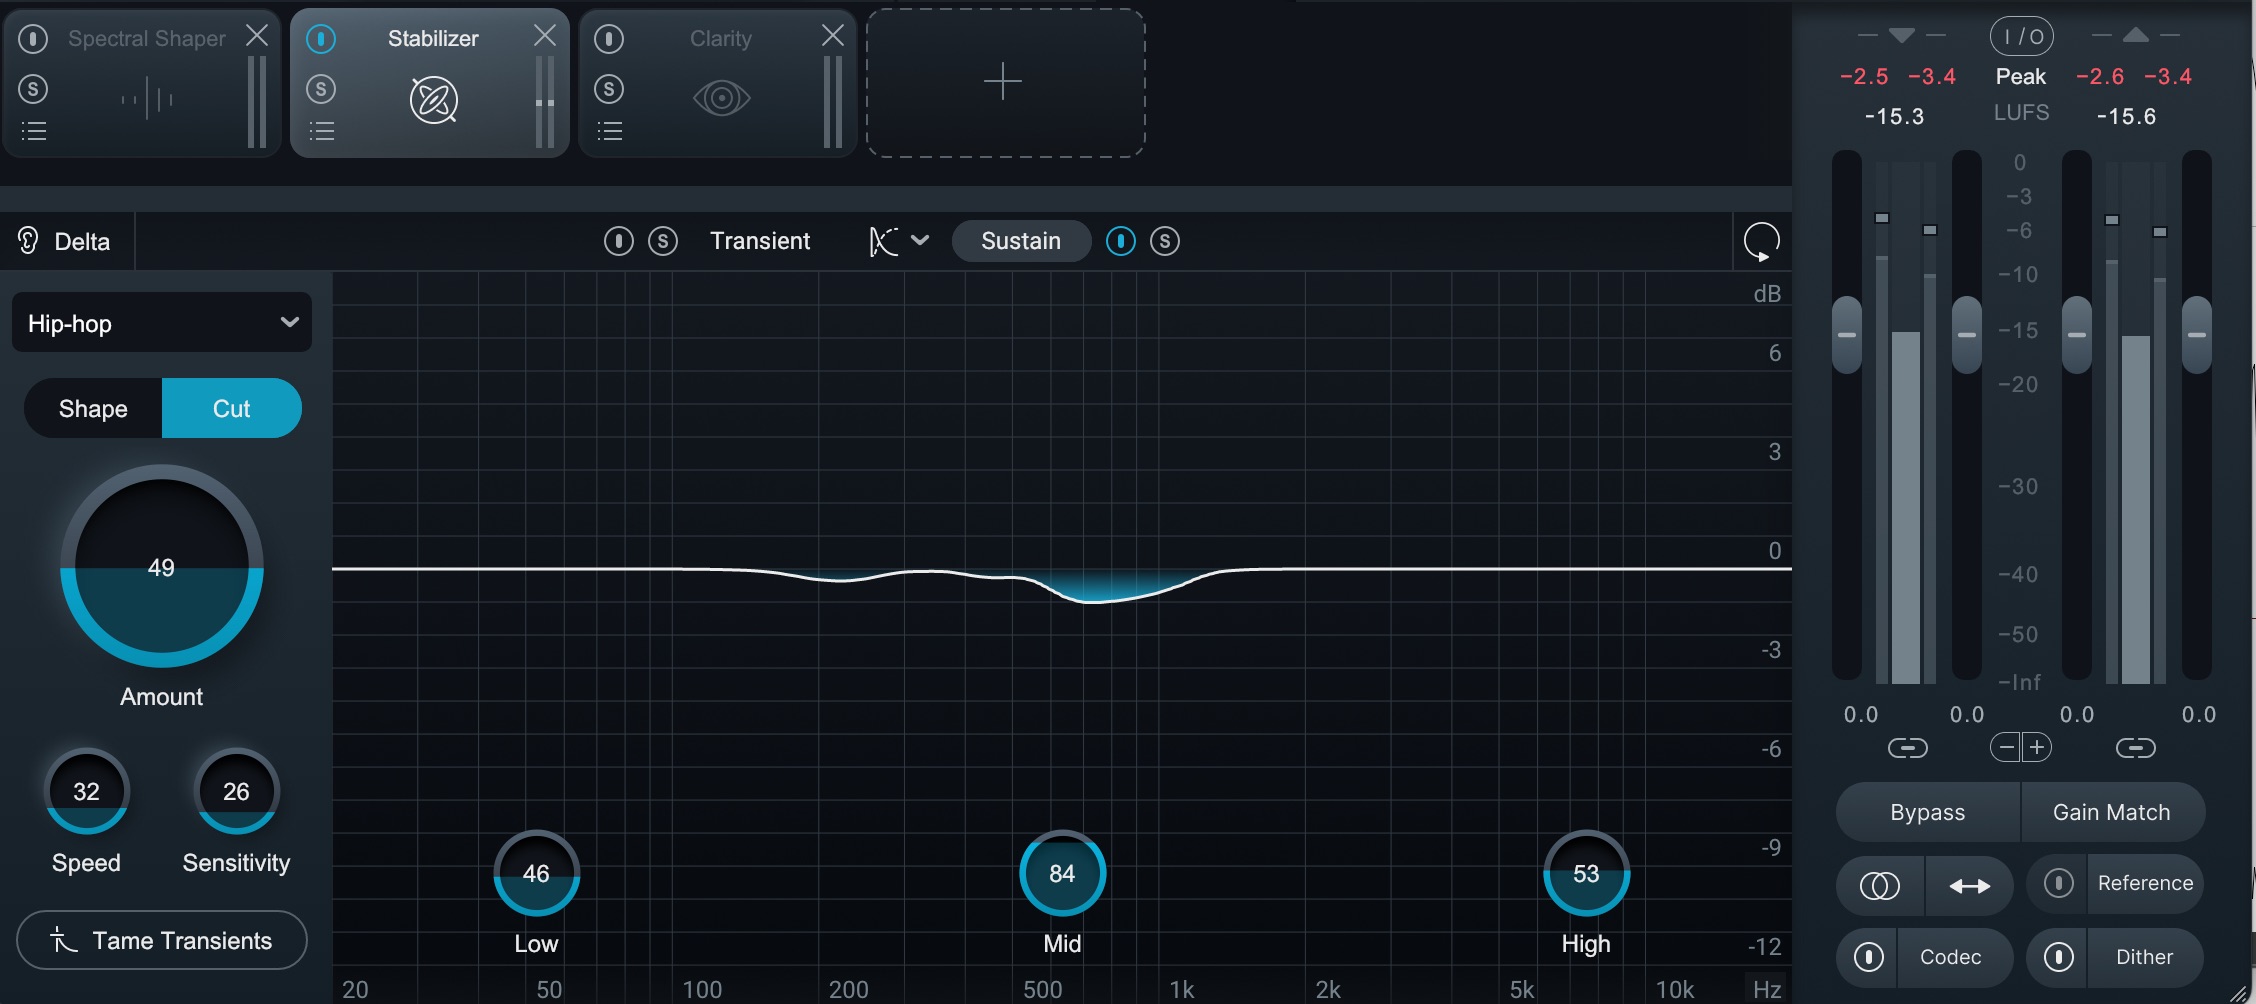
Stabilizer in Ozone
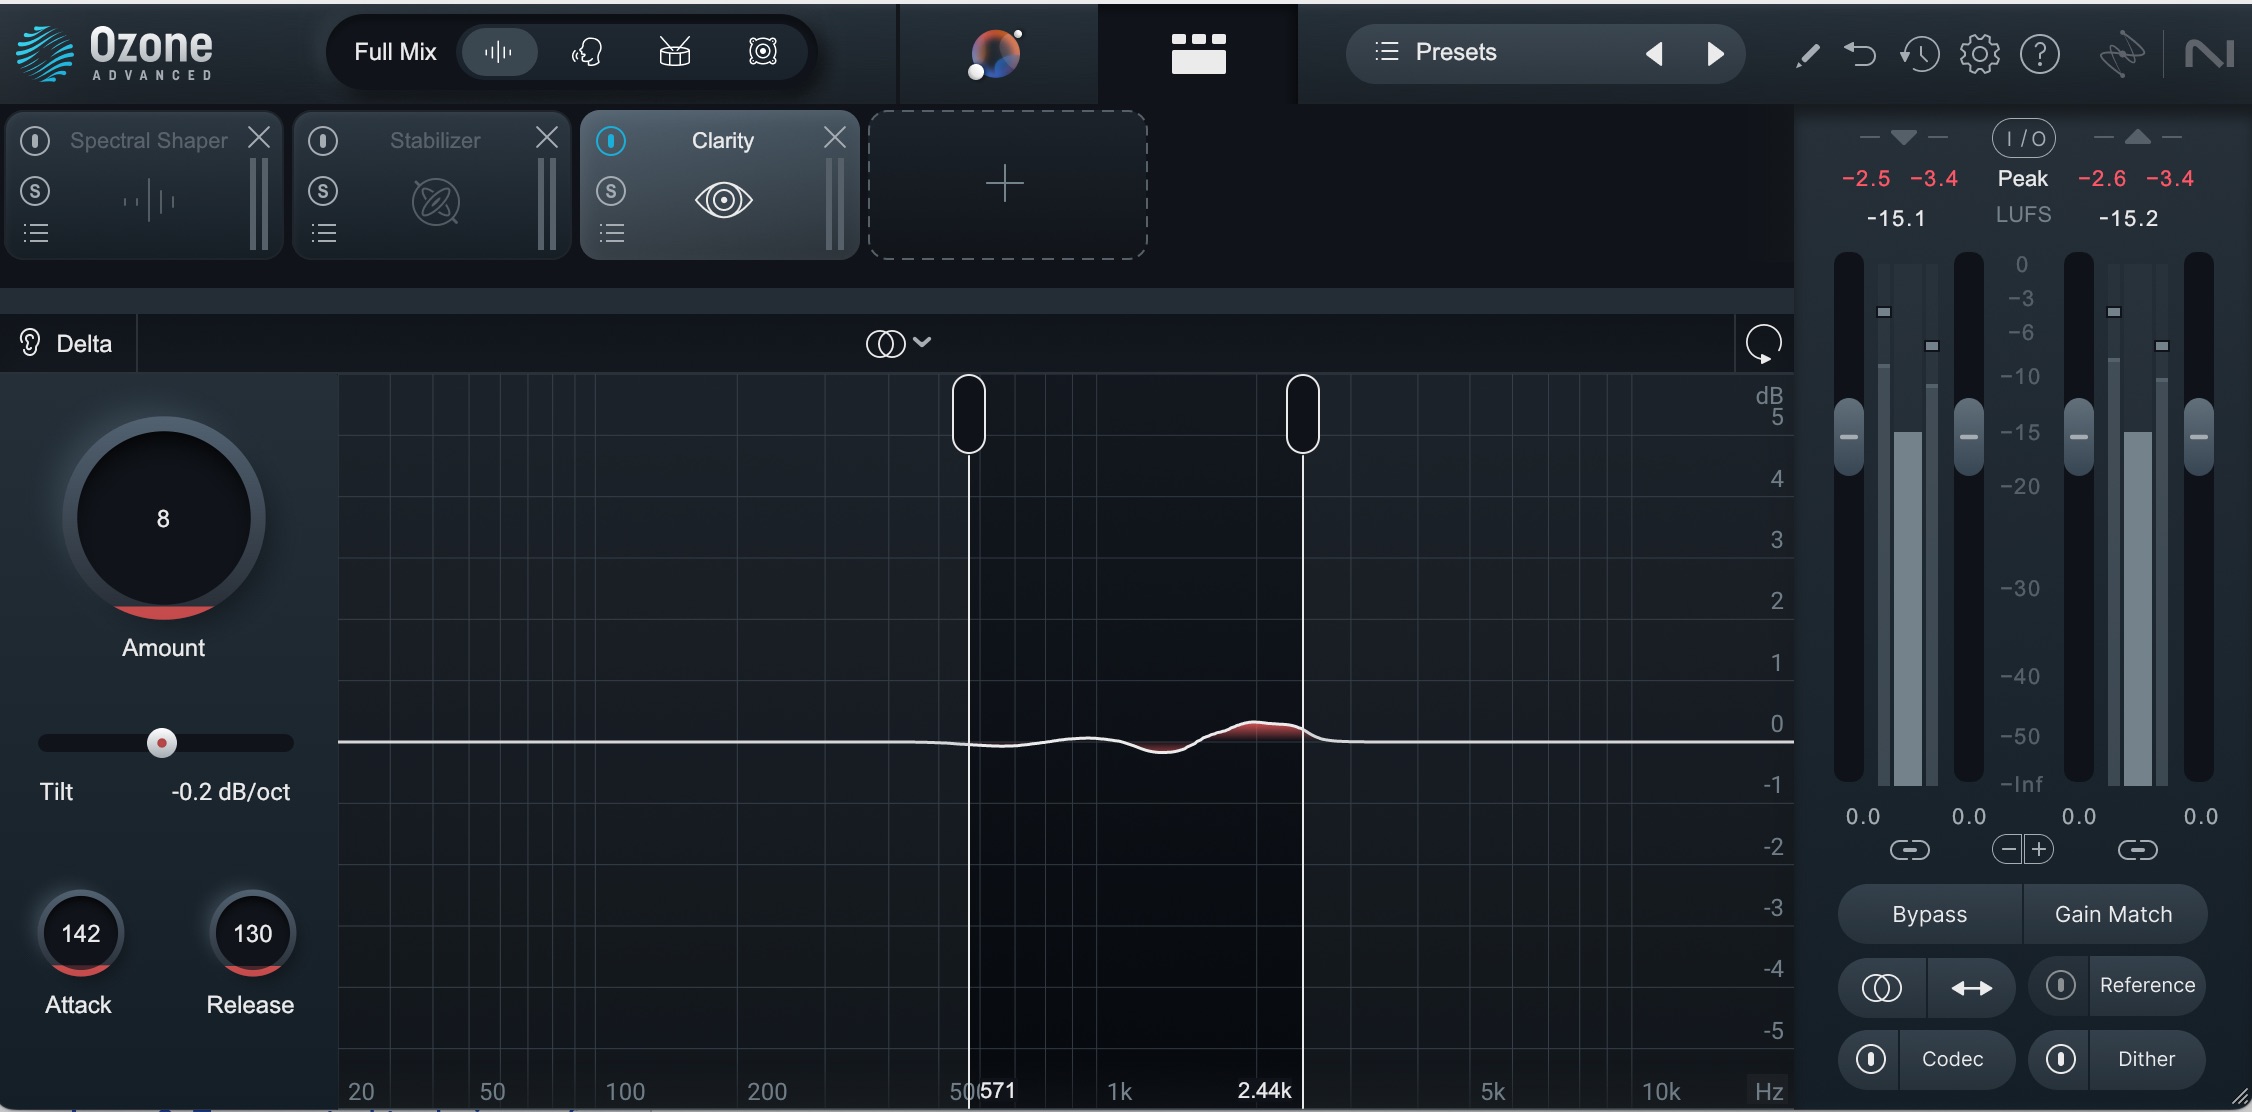
Clarity in Ozone
Spectral algorithms don’t rely on traditional filter slopes that can interact with transients, leading to unintended distortions. Instead, they “resynthesize” the signal by manipulating the frequency bins directly, so they’re great for cleaning up ringing or reverb tails that an EQ or compressor might struggle with.
Do remember though to use them conservatively. These tools, used with a heavy hand, wreak absolute havoc on your mix!
With great power comes great…something something
Resonances are one of those invisible enemies that can sabotage an otherwise solid mix – eating up headroom, adding fatigue, and distracting the listener from what really matters. But once you know what to listen for (and what to look for), you’re halfway there.
Just remember not to overdo it. As with all things, a light touch is best.