How to use Master Assistant in Ozone 12
Learn how to achieve the sound of chart-topping hits or your favorite references when mastering music with the groundbreaking technology in iZotope Ozone Master Assistant.
The new Master Assistant in Ozone 12 gives you the tools to get the sound of chart-topping hits or your favorite reference file using advanced matching technology for tone, dynamics, and width.
In this tutorial, we’ll show you how to use Ozone and the updated Master Assistant View to customize a starting point for your master faster than ever. With the new Master Assistant, you have a second set of ears that never gets fatigued.
Audio with Ozone Master Assistant
Follow along with this tutorial using
![]()
![]()
Ozone 12 Advanced
Getting started with Master Assistant
Add Ozone to your master track. You will see a new button at the top of the plug-in that is shaped like a circle. This is the button for the Master Assistant tab.
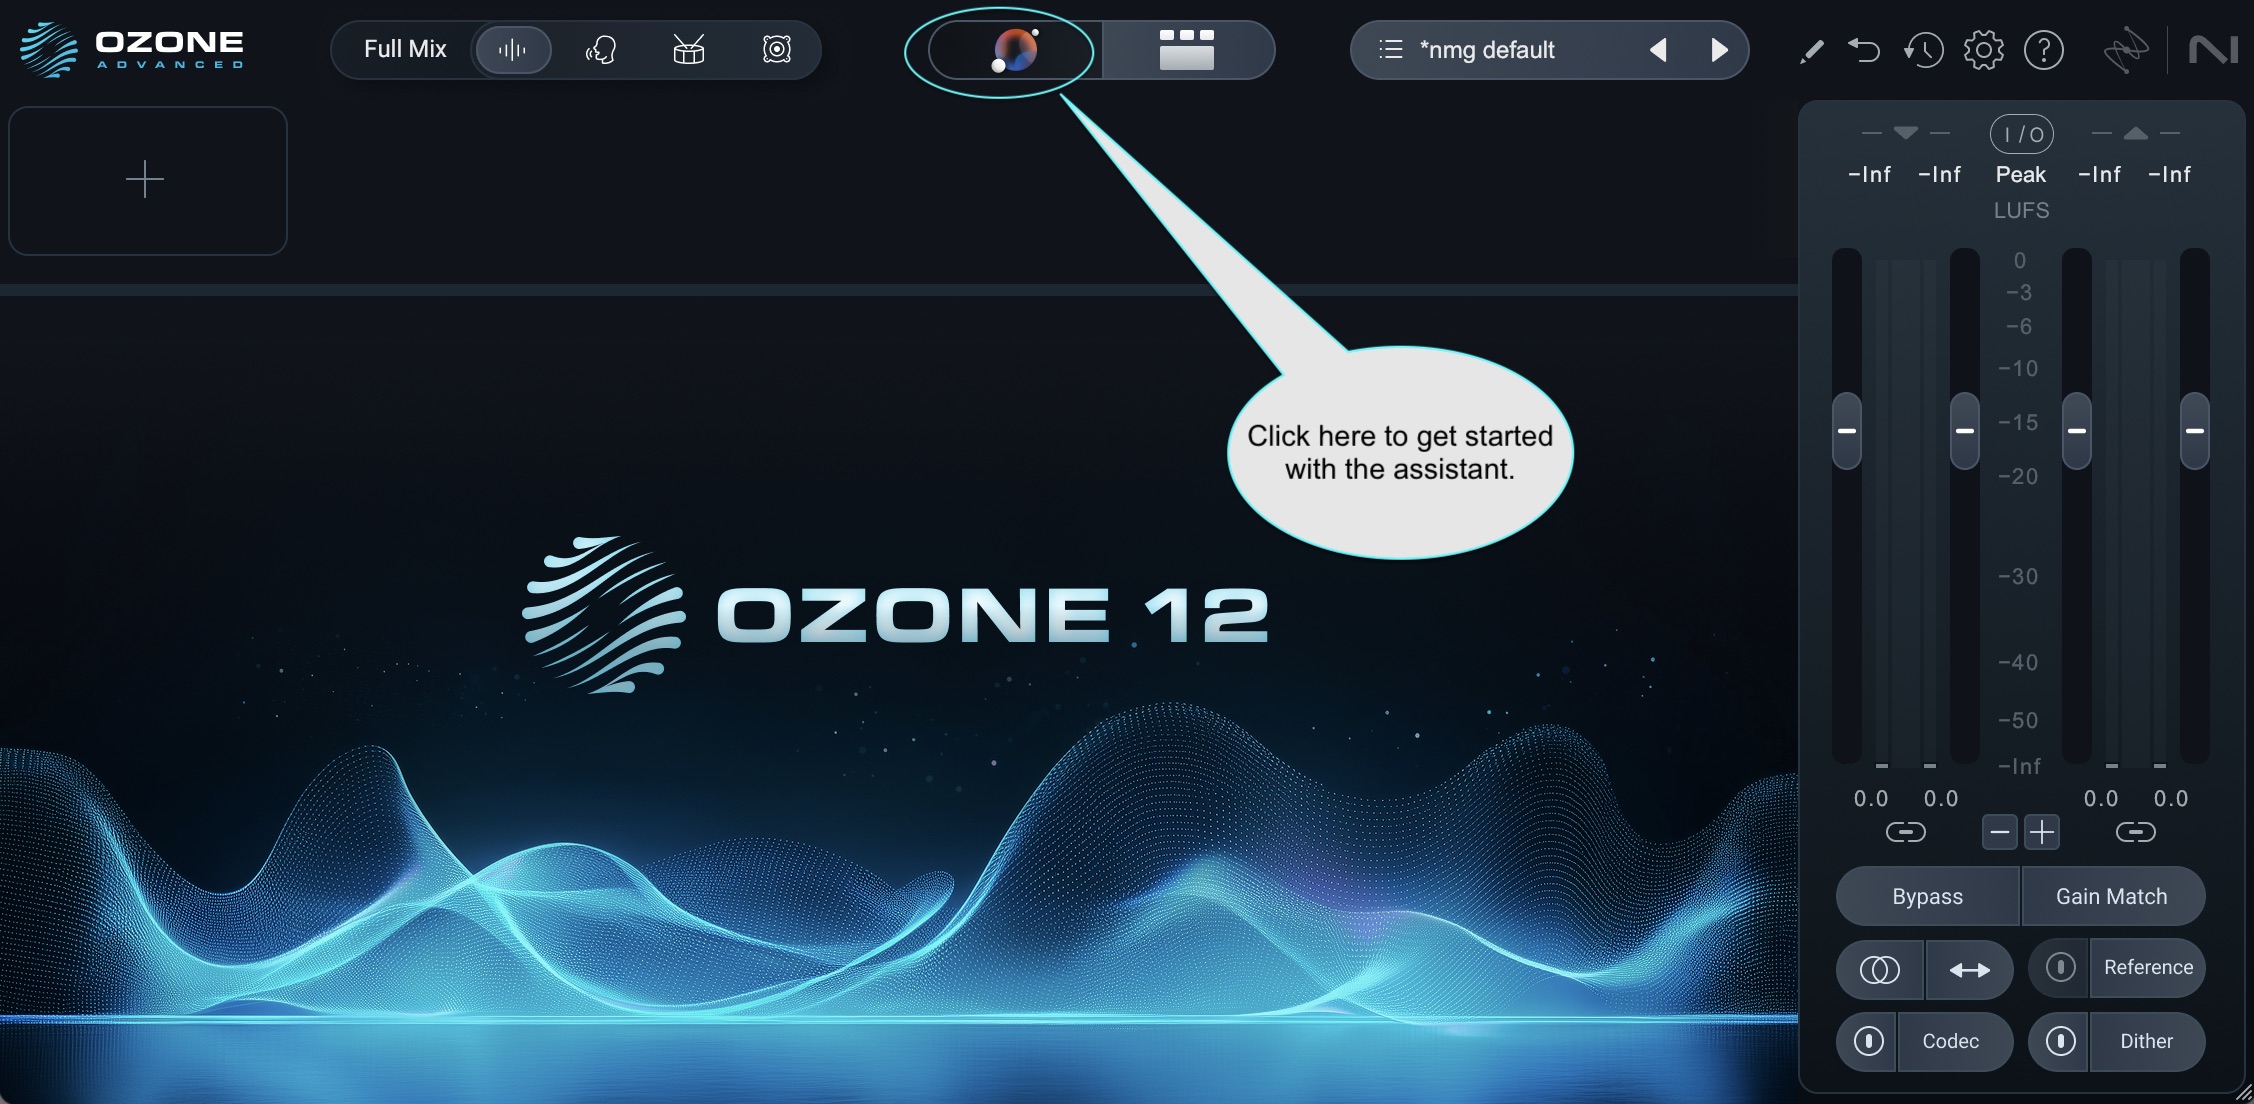
Master Assistant button in Ozone 12
Once the tab is selected, you’ll have a choice. Auto-Master is your “set it and forget it” option. It’s a great way to get quick track mastering for beginners.
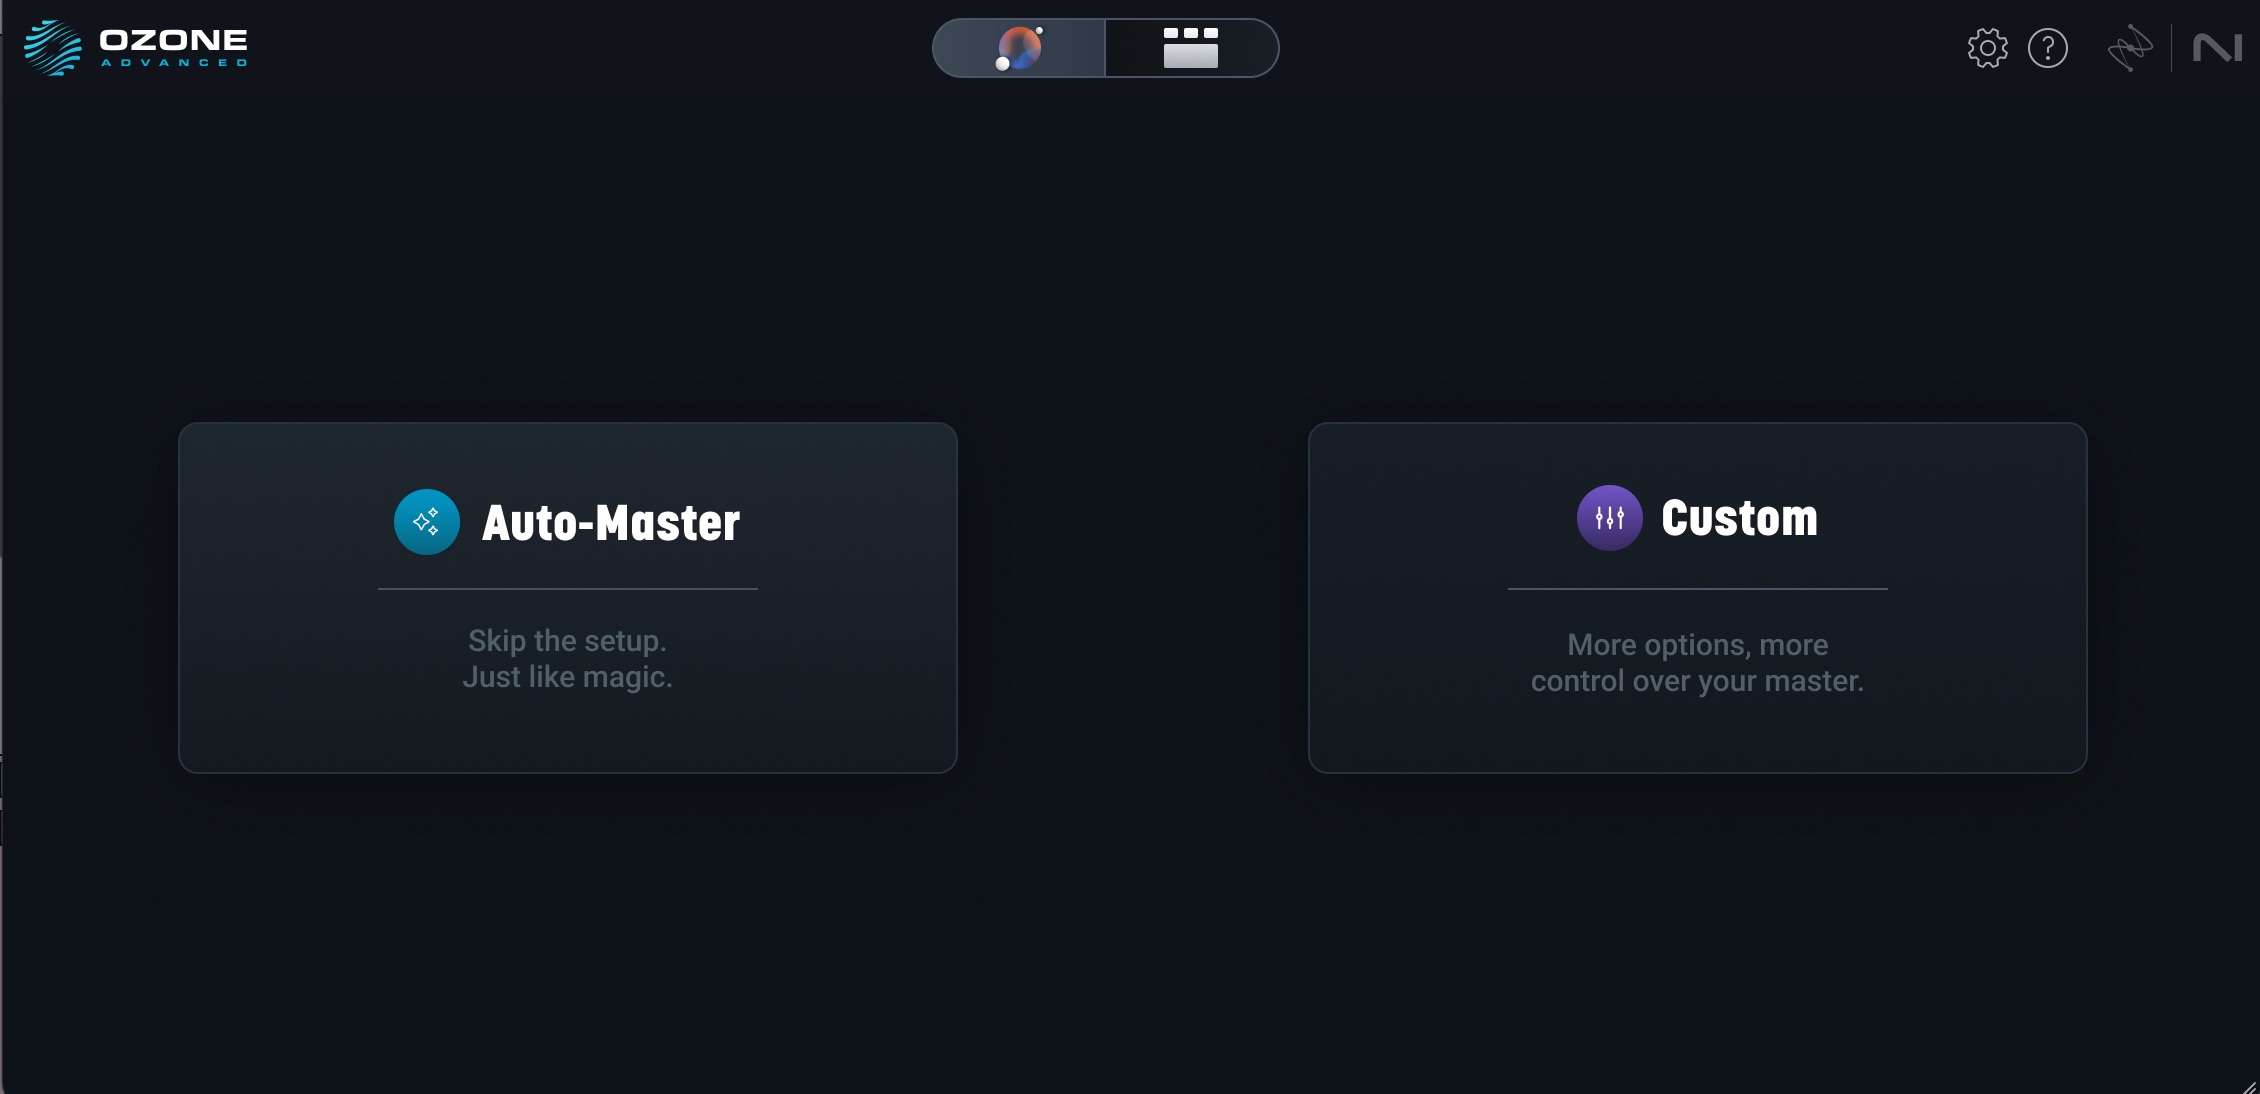
Choose between the Auto-Master and Custom options in Master Assistant
Custom offers you the ability to guide the assistant from the outset.
Custom Master Assistant flow in Ozone 12
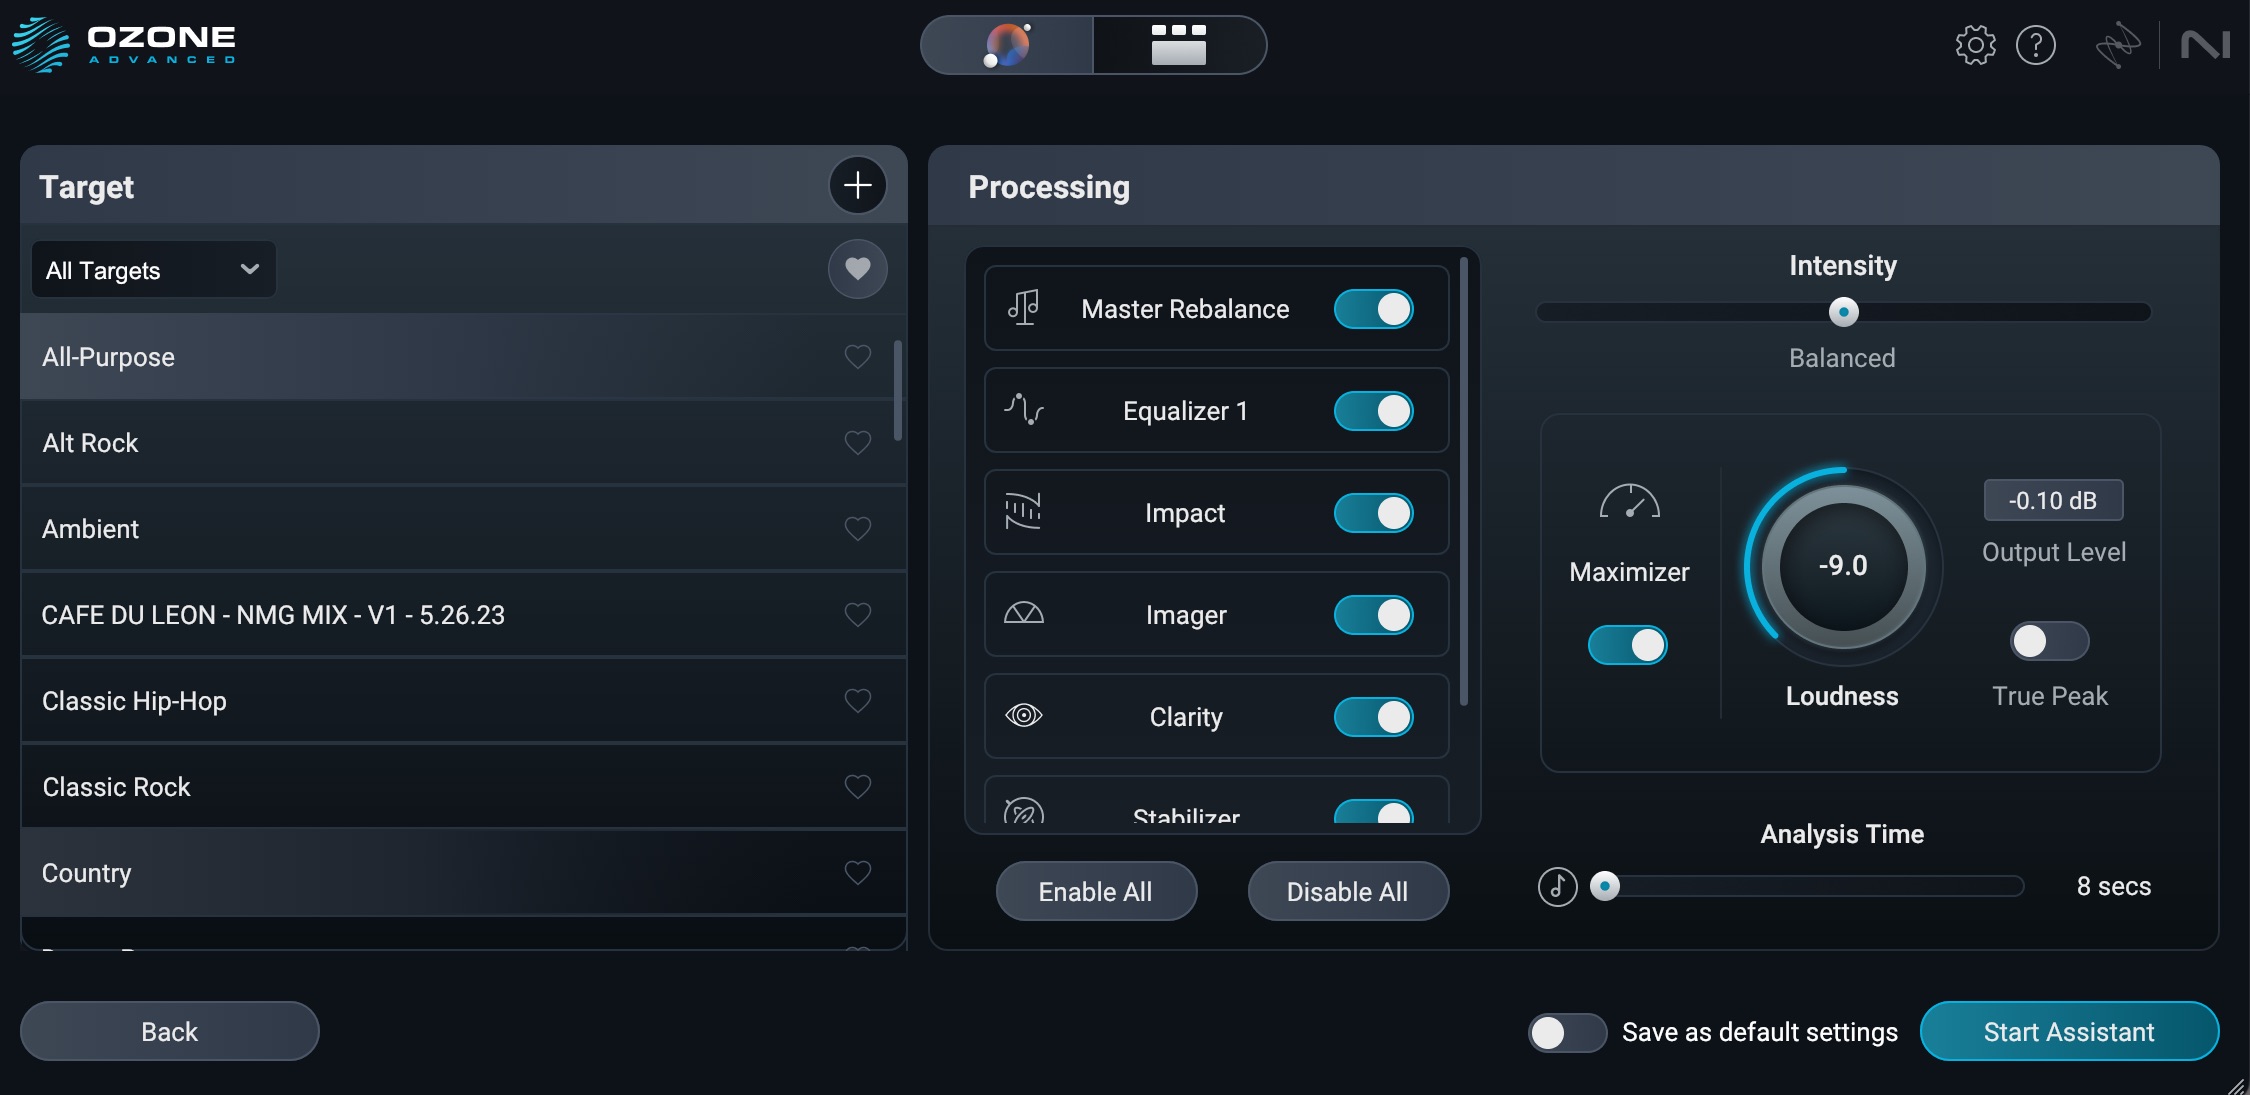
You can select your genre target – and Ozone 12 has many new ones, by the way – as well as your loudness target. You can bypass any of the modules listed in the center “processing” menu.
For example, if you know you like your stereo image the way it is, you can simply turn off the Imager.
In the lower left-hand corner, you’ll see a new “Analysis Time” section. This is a fantastic new feature: now you can tell Ozone how long it should spend analyzing your mix. You can set this to seconds or bars (measures).
iZotope recommends you analyze your loudest section – usually the chorus. Say I know the loudest chorus of my tune lasts 43 seconds, or 8 measures; I can just set this parameter accordingly and get tailored results.
Now, it’s time for Ozone to analyze your track. Hit play, and run the Master Assistant.
This is a middle ground between the Assistant View and the various in-depth modules Ozone offers. Think of it as your macro controls: The Tonal Balance knob is going to influence a couple of equalizers and other processors behind the scenes; the Loudness slider will likewise affect more than the limiter under the hood.
The sliders on the right of the GUI allow you to dive deeper into controlling other aspects of the mix on a macro level too. Dynamic Match helps you keep the overall dynamic range of your mix aligned to the genre target’s ranges. The same goes for Width Match.
“Clarity Amount” and “Stabilizer Amount” are global adjustments for Ozone’s spectral tools. Think of the Stabilizer slider as an “unwanted resonance” controller, while Clarity brings out sheen and presence in a dynamic way. You can tune these by ear.
On the left of the GUI, you’ll still see all the genre targets displayed. You can switch to a new one at any time.
Let’s cover the targets section more in-depth now.
Targets
After the analysis pass, Ozone will attempt to identify the genre of your song. It will then match your song's tone, width, and dynamics to targets that we've generated from the latest chart-topping hits in the following genres:
- All-purpose (a good and balanced default)
- Alt Rock
- Ambient
- Classic Hip-Hop
- Classic Rock
- Country
- Dance Pop
- Drum & Bass
- Dubstep
- EDM
- Electropop
- Folk
- Future Bass
- Hip-Hop
- House
- Hyperpop
- Indie Pop
- Indie Rock
- Jazz
- K-pop/J-pop
- Latin Pop
- LoFi
- Metal
- Orchestral
- Pop
- Pop Country
- Post Rock
- Punk Rock
- Reggae
- Reggaeton
- RnB/Soul
- Rock
- Techno
- Trap
- Vocal Jazz
That’s a big expansion of genre targets over the previous Ozone. You can also create your own targets from reference material that you own, or reference material generated by
![]()
![]()
Audiolens
Match from your own reference file
Can you customize Ozone? Absolutely.
If you’re looking for even more personalization, you can create your own custom target by uploading a reference file. Press the plus icon in the Targets section to upload your reference song, and Master Assistant will match your song to the tonal balance, width, dynamics, and loudness of the analyzed file.

Select your own target in Ozone Master Assistant
Target Meter
Once you have a Tonal Balance target curve selected for your track, the Target Meter view in the center of the plugin will display the spectral balance of your audio against the target.
The blue tunnel represents the spectral profile of the reference you selected, while the thinner, white line represents your audio. So at a glance, you can see how your audio compares to the target. You can use the EQ and Stabilizer sliders to push your audio closer to that target.
Other ways to customize Master Assistant
Before we move on to practical uses for the mastering assistant – and yes, there are more than the obvious ones – I want you to check out a couple of other features in the Assistant window.
Vocal Balance
This slider automatically corresponds to an instance of Master Rebalance tied to the lead vocal.
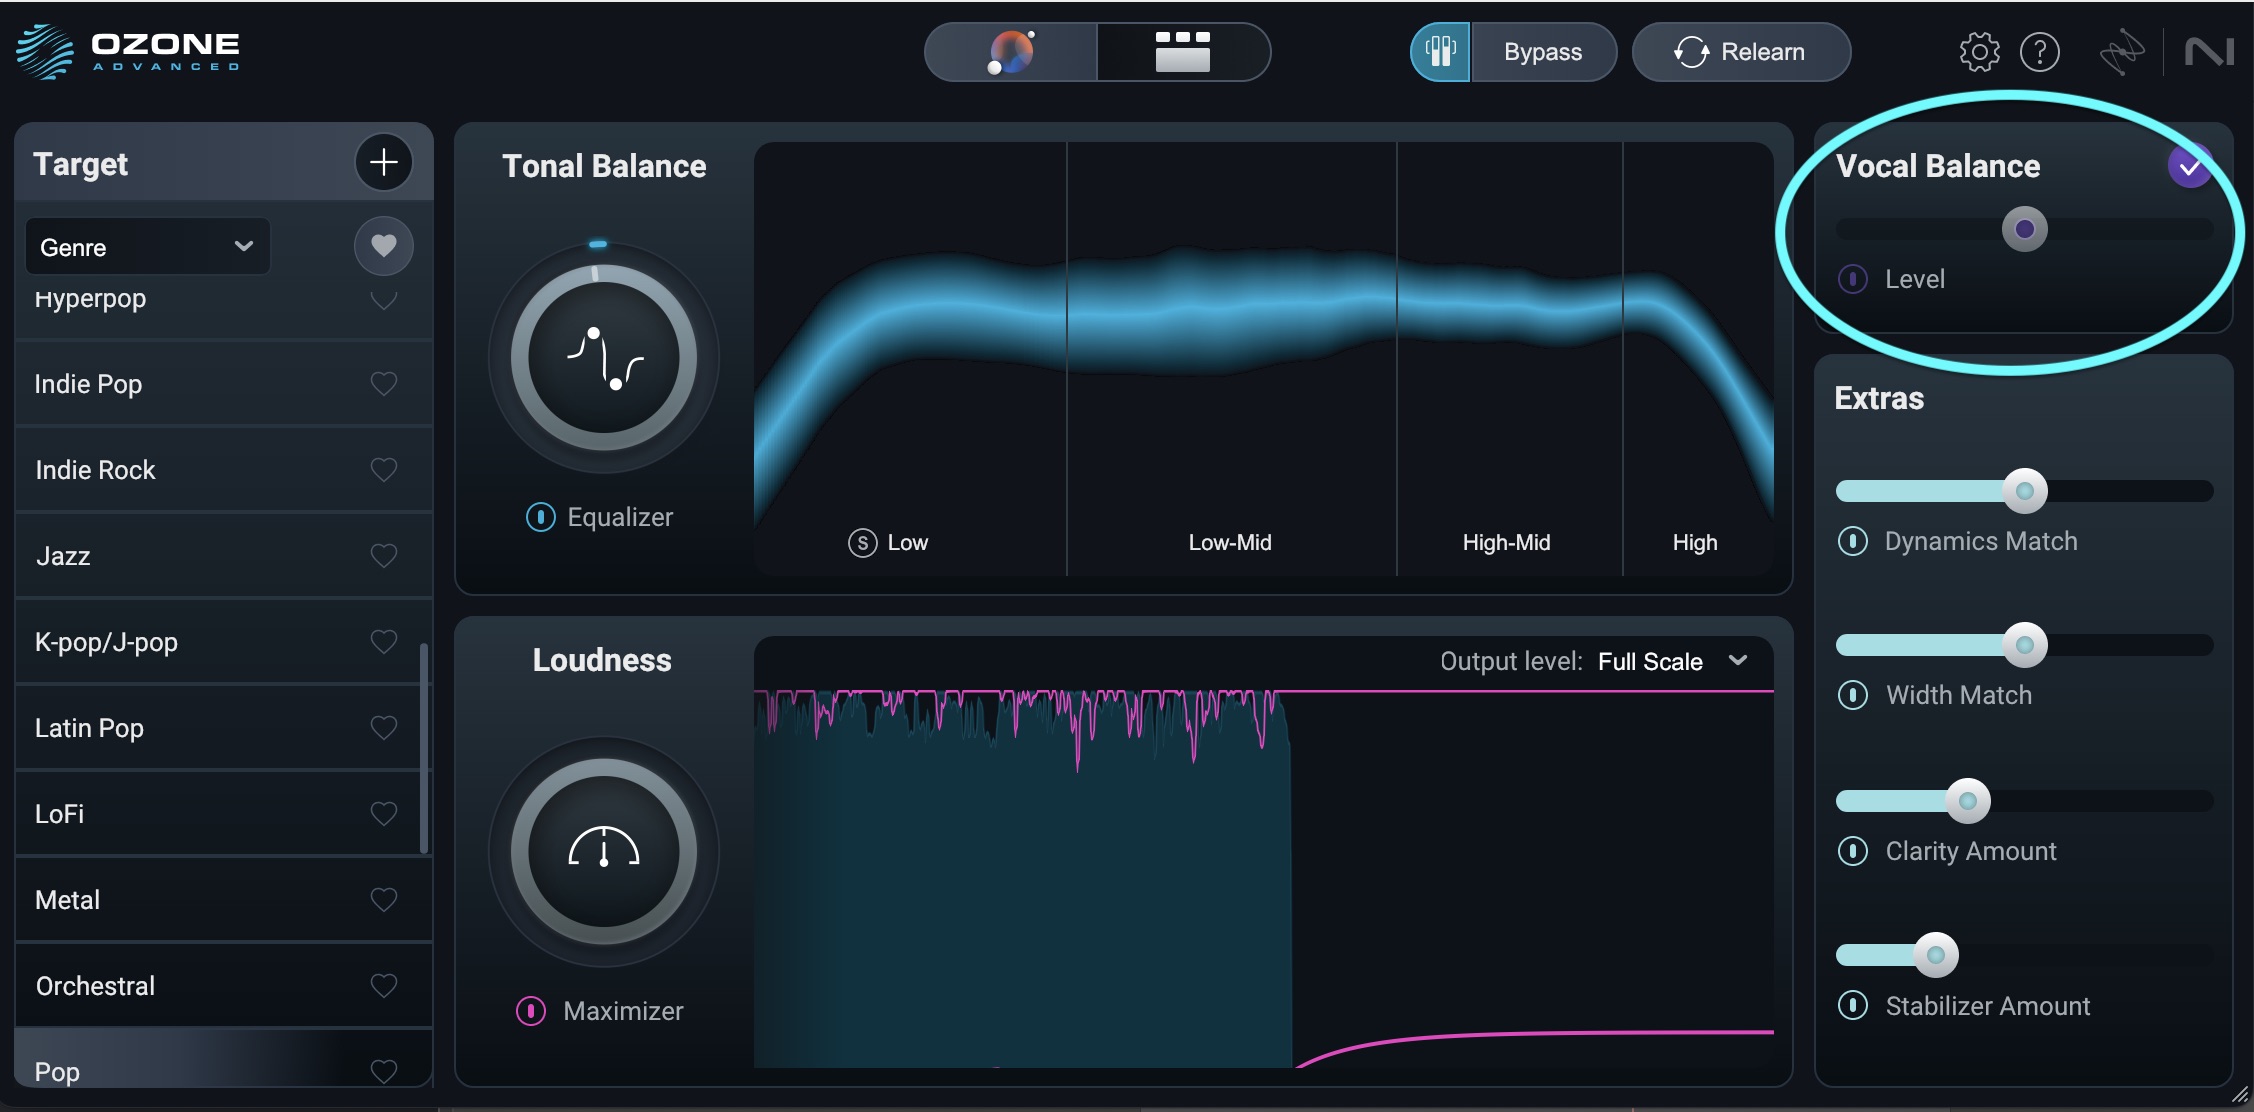
Vocal Balance in Ozone 12 Master Assistant
If the Assistant determines the vocals don’t need to be louder or softer, a purple check mark appears in the right-hand corner, and the module turns off.
Gain Match and Bypass
Don’t miss this small button at the top of the Master Assistant. It’s one of the most useful ones when you’re mastering.

Gain Match in Ozone 12 Master Assistant
Press this button and your master will now be level-compensated, so it won’t be louder than your original mix.
When something is louder than it used to be, our ears are fooled into thinking it sounds better. This button defeats that issue altogether: you can now judge how well the processing has shaped your mix.
Now we can be more accurate in evaluating exactly what the Mastering Assistant is doing. Remember to turn this button off before bouncing or exporting your song!
Relearn
Want to start the process over again from scratch? Just press the Relearn button, circled below.
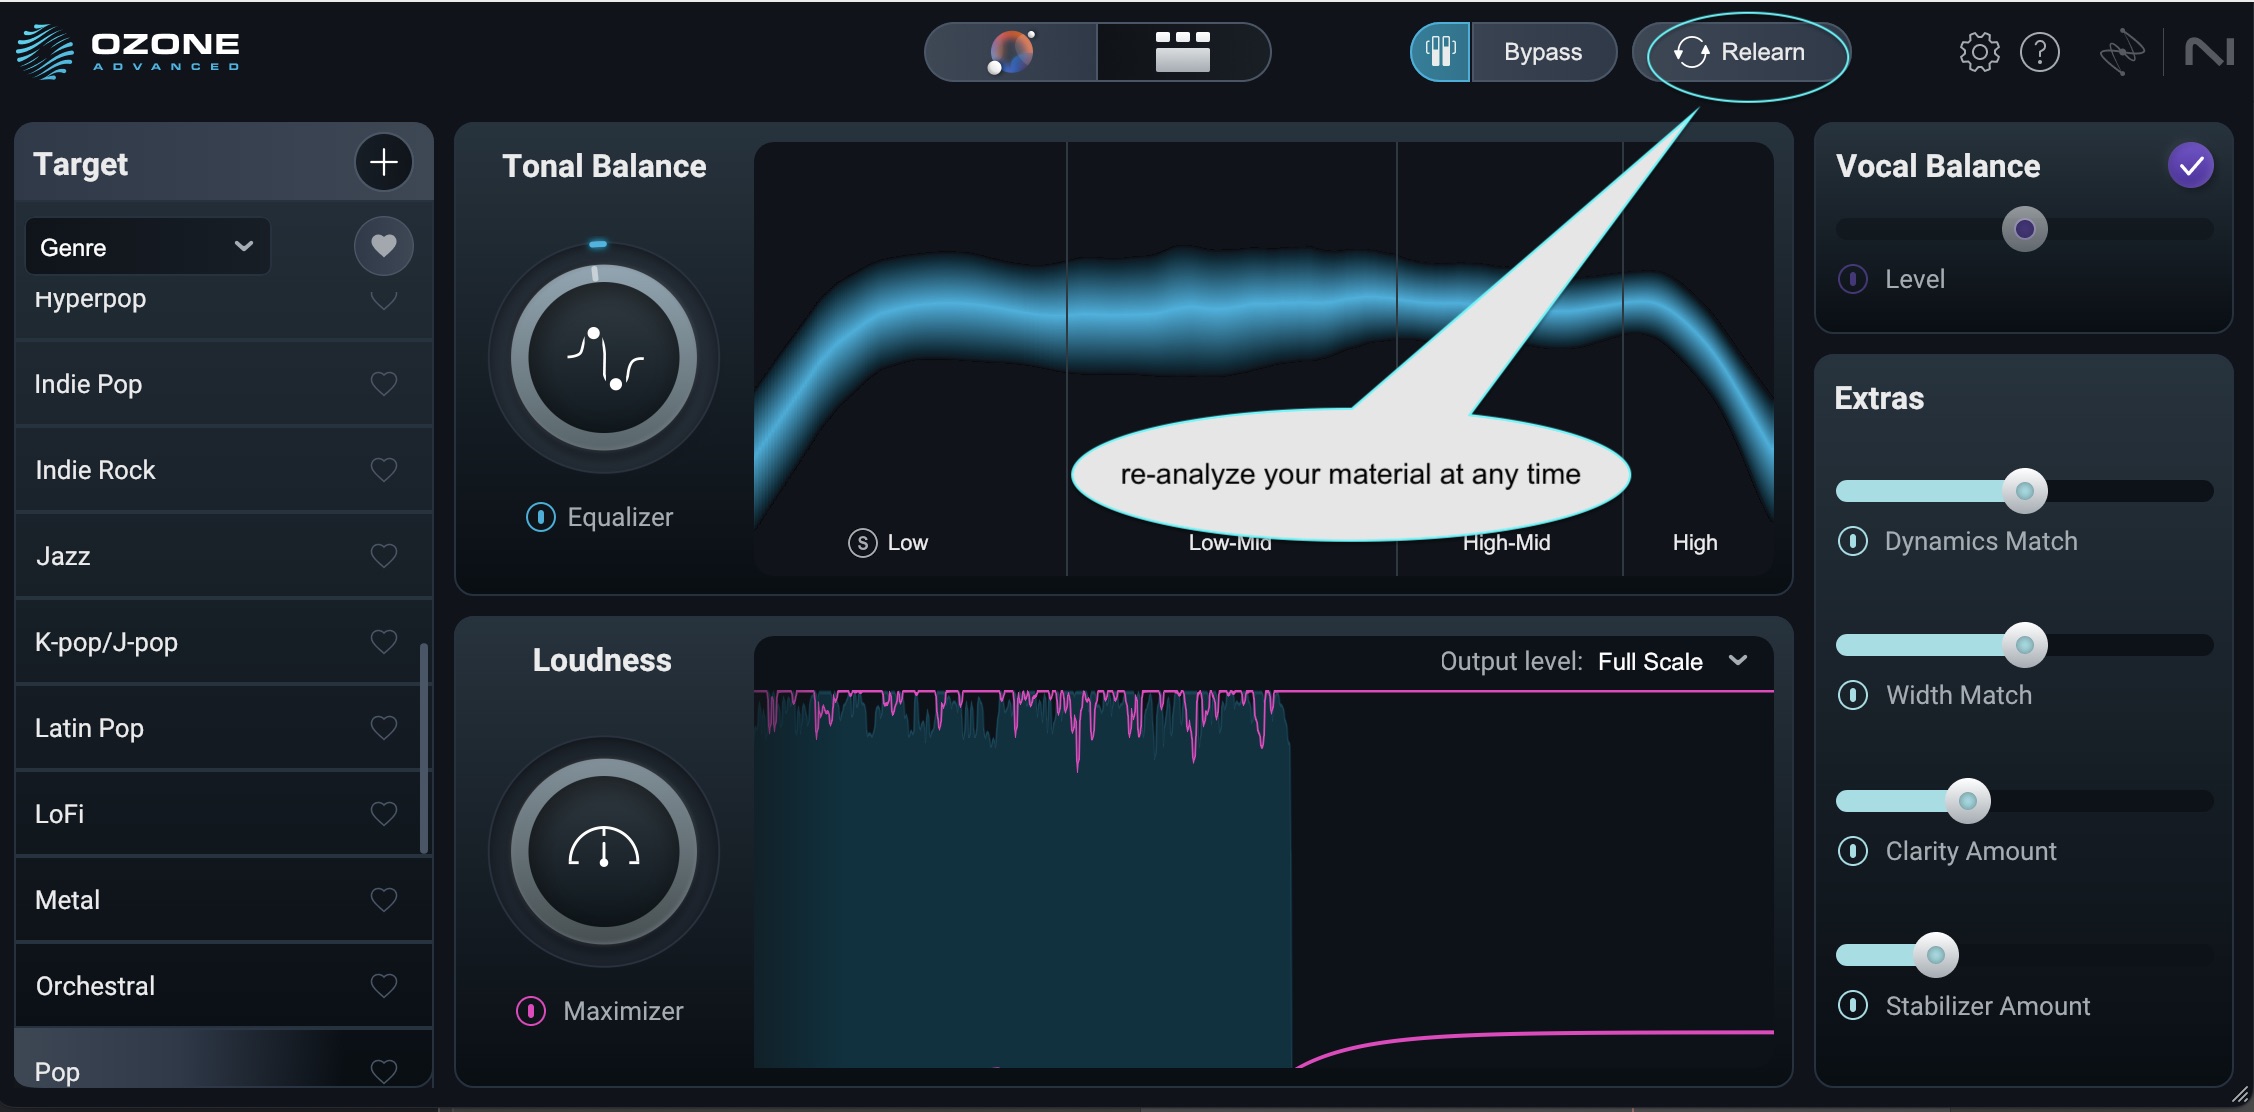
Relearn in Ozone 12 Master Assistant
Relearn launches the analysis phase and sets up new targeted processing for the newly-measured section.
Enter the Ozone
Of course, Ozone isn’t just a macro-processor for mastering (Ozone 12 Elements is, but that’s another story). Once you’ve got your settings dialed in, you can make fine adjustments inside the modules themselves to make a fully compelling master. Accessing them is as easy as clicking this button.
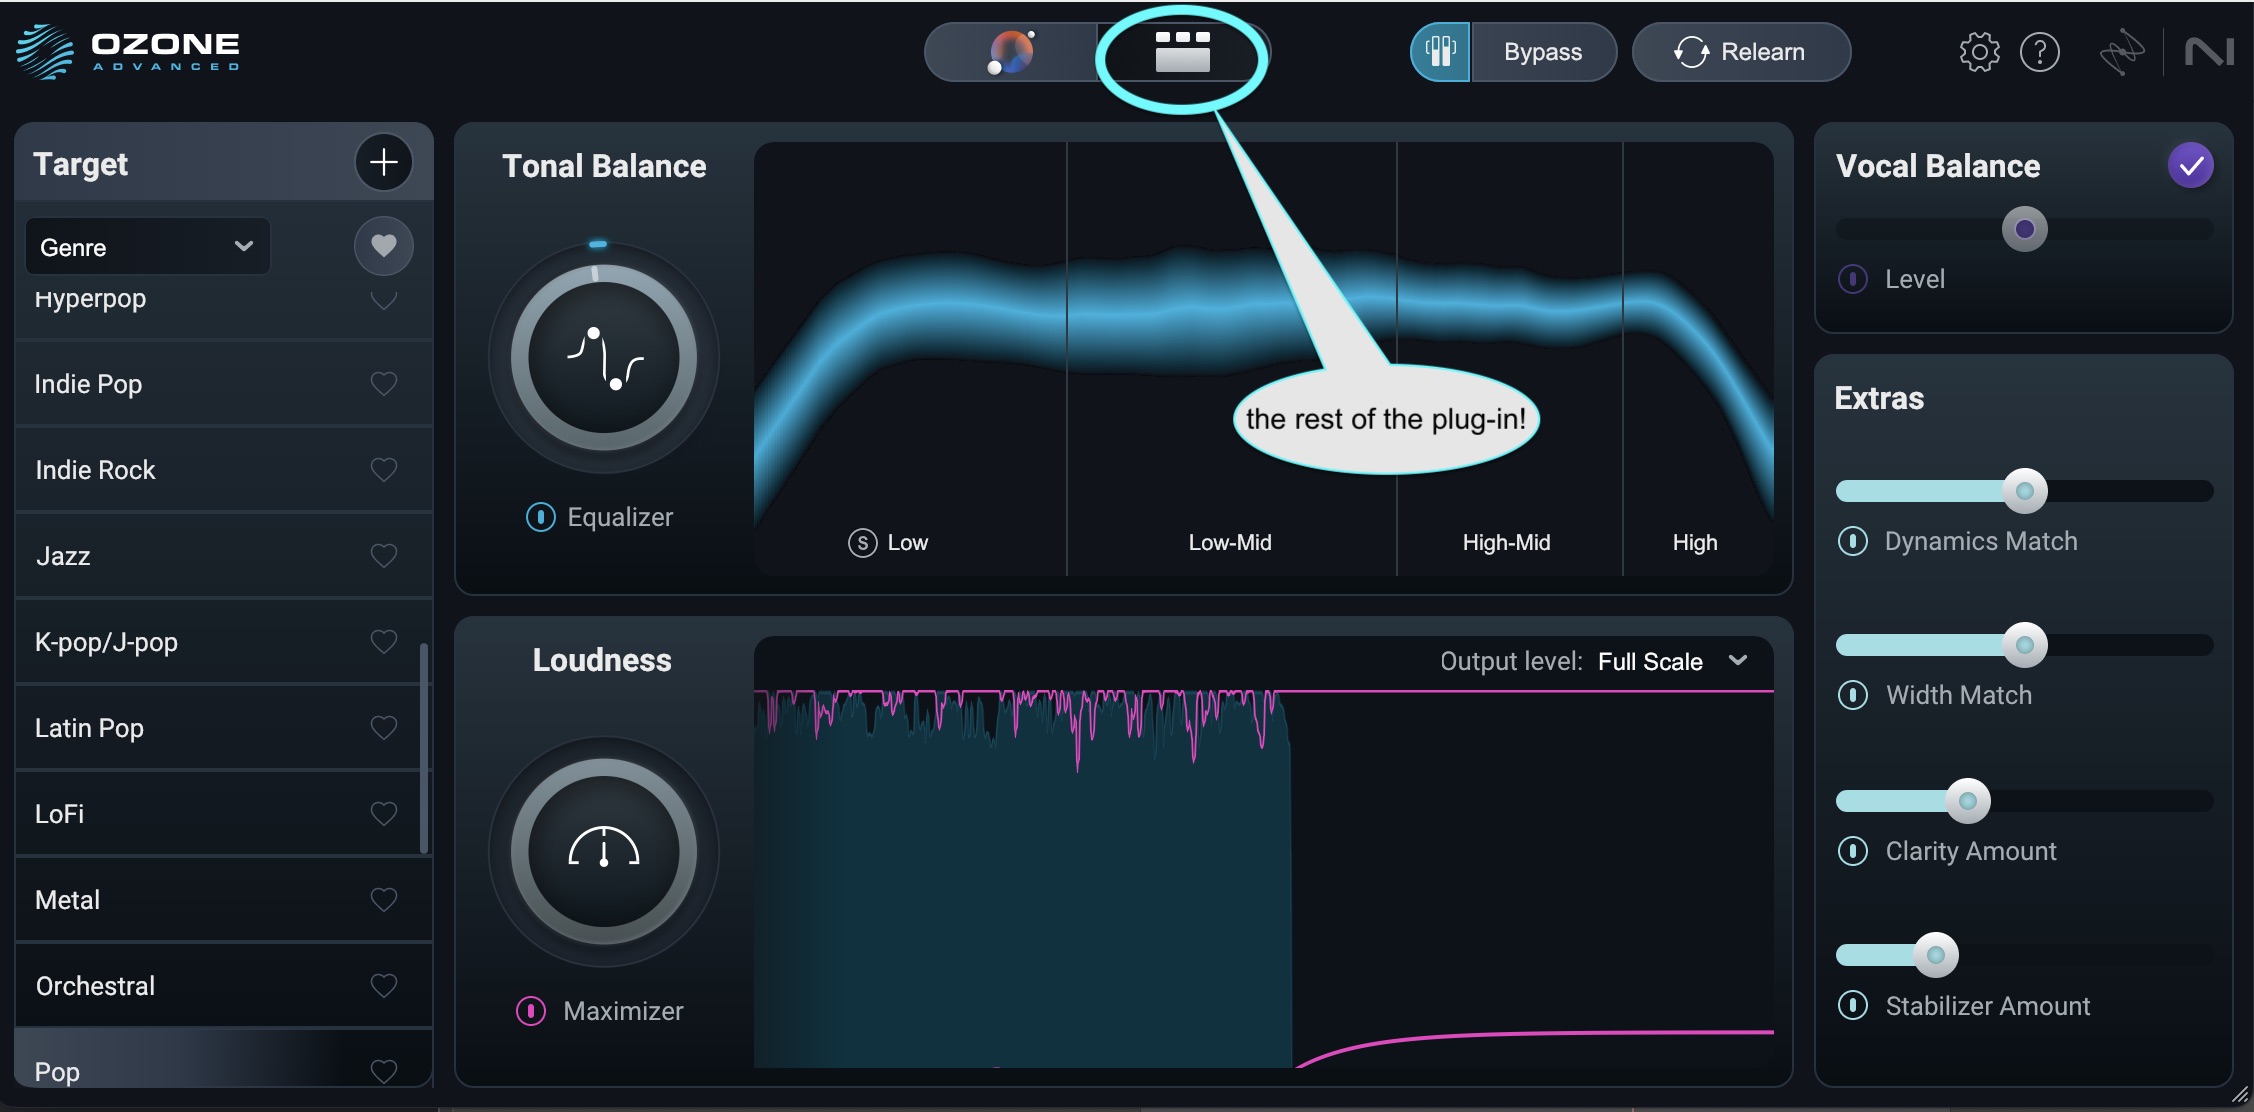
Access Ozone 12 modules through the Master Assistant
Practical ways to use Master Assistant in your session
Let’s get into the specifics of how you might actually use Ozone in practice.
Tonal Balance check
If Ozone’s EQ has to bend over backwards just to get you inside your genre target, that’s your warning sign: something’s off in the mix. Case in point: here’s a mix drowning in low mids and bass, and here’s how Ozone tries to rein it in.
Vocal balance check
Ozone can also tell you if your vocals sit where they should, given the Genre Target. When the balance is right, the Assistant doesn’t have to intervene – it’ll just step aside. When it isn’t, you’ll know, and the real fix is likely back in your mix session.
Width check
It’s the same deal with width. Genre matters here: punk records tend to live in a narrower stereo field than, say, post-rock epics. Ozone 12’s treatment of your stereo image can be a guide, but nine times out of ten, you’ll want to deal with width earlier rather than at the mastering stage.
Client master
Sometimes you need to hand the client something that feels like a finished record, even though it isn’t. Historically, that meant “slam a limiter and call it a day.” With Ozone’s Mastering Assistant, you can give them something closer to the real-world experience, without painting yourself into a corner.
Budget master
Let’s be clear: nothing replaces a dedicated mastering engineer. They do the heavy lifting – spec compliance, metadata, sequencing, the vital stuff that makes a record an actual record.
But not everyone has the budget, and if you’re dropping singles instead of albums, a lot of that workflow might not apply. In those cases, Ozone 12’s Master Assistant is your friend.
It won’t de-click your audio, it won’t check for errors, it won’t embed ISRC codes, and it won’t assemble your LP. It won’t have a conversation with you about what you can do to fix your mix. It won’t call to recommend a new technique or piece of gear that you haven’t thought of yet. It won’t call you up to say, “Hey, you’re a great mixing engineer, I’m gonna recommend people use you for mixing!”
It can, however, help you put a lot of polish on your stereo bus. It’s also a great way to learn mastering for beginners.
Start mastering your tracks with Master Assistant
Now that you understand all of the tools at your disposal, you’re ready to start mastering your tracks with the intuitive Master Assistant in Ozone powered by machine learning.