
Even the best mastering engineers can only work with what they’re given – and while a great mix makes mastering a joy, certain recurring mix problems can make that final stage of production much harder than it needs to be. To help you avoid those pitfalls and get the best possible results for your music, I reached out to a group of seasoned mastering engineers to ask:
“What are the most common issues you encounter in audio mastering that stem from the mix, and what do you wish mixers would do differently?”
Their insights reveal not only what tends to go wrong, but also how you – as a producer or mix engineer – can set yourself up for success.
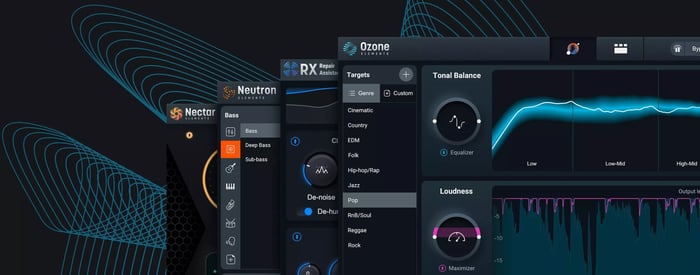
Follow the tips in this interview using RX , Ozone , Insight 2 , Velvet , and Nectar . Get them all in one place:
Our panelists
Before we get into the details, let me briefly introduce you to our virtual panelists today.
Steve Berson, Total Sonic Media

Steve Berson is the founder and mastering engineer at Total Sonic Media near Austin, TX. He is a graduate of Berklee College of Music and previously worked at Europadisk – the last commercial DMM-vinyl mastering facility in North America.
Steve brings over 30 years of experience and a wealth of knowledge, both technical and musical, to the conversation.
Rachel Field, Resonant Mastering

Rachel Field co-founded Resonant Mastering (Seattle, WA) – formerly RFI Mastering – in 2016, and has since worked mostly as Mastering Engineer and studio operator.
Her credits include a wide variety of local and international artists such as Pearl Jam, Eddie Vedder, Whitney Mongé, Brandi Carlile, Thunderpussy, and many more.
When Rachel is not behind a console or at a show, she is probably out enjoying the PNW hiking, riding her motorcycle (with earplugs!), or at home growing vegetables.
Mat Leffler-Schulman, Mat Leffler-Schulman Mastering
Mat Leffler-Schulman is a mastering engineer with over two decades of experience working on projects spanning genres and continents.
His credits include multiple Billboard #1 and Top 10 releases, GRAMMY Award-winning artists, and over 1.3 billion streams worldwide.
Formerly co-founder of the award-winning Mobtown Studios (Baltimore, MD), Mat built his dedicated mastering studio in 2018 and now focuses exclusively on mastering.
He also co-hosts the Speaks Volumes podcast and enjoys making egg creams and listening to Prince.
Steve Quadrini, Studio ADM Mastering

Steve Quadrini is a mastering engineer and the founder of Studio ADM Mastering (Toronto, ON).
Over the past decade, he has worked on projects involving Dave Abbruzzese (Pearl Jam), Scott Reeder (Kyuss), and Royston Langdon (Spacehog).
“Music is a blessing and has so much more to offer when it sounds great, don’t **** up your low end.”
Sam Torres, Polymouth Mastering

Sam Torres is the owner and operator of Polymouth Mastering (Troy, NY). He spent over a decade working as a live sound and location recording engineer across North America, engineering concerts and recordings for hundreds of artists, including over a dozen GRAMMY winners.
After also working as Recording Studio Director and Assistant Technical Director at Skidmore College, he now focuses on mastering full-time, and has mastered hundreds of projects from around the world.
Sam is also an active musician and improviser, making ambient electronic music using his saxophone, a Buchla synthesizer, and custom live electronics.
Mixing and mastering tips from our panel
With introductions out of the way, let’s look into the advice from our panelists. Some of these might seem more specifically like mixing tips, but this crucial pre-mastering stage will save you time and money down the line.
1. Listen to your final bounce
Mat Leffler-Schulman kicks us off with a great point:
“Pretty much every mix that comes in has pops or clicks somewhere. After years of hearing it, I’ve realized it’s almost always the same root cause: the mixing engineer hasn’t listened to their render. They’ve only listened in their DAW and assume the bounced file will be identical. Spoiler: it often isn’t.”
The fix is simple, but essential: listen to your export all the way through before sending it off. Artifacts like clicks, pops, thumps, dropouts, or automation glitches often appear only in the rendered file. Catching these before mastering saves time, money, and awkward conversations.
You can use a spectral editor like RX to repair any small pops or clicks that slip through. Even better, if those errant noises are in your source files, clean them up there. RX has become an indispensable tool for audio mastering engineers to resolve these issues – but it’s even better when they aren’t there in the first place.
2. Check your mix in mono
A little bonus one from yours truly, be sure to at least check your mix in mono. While mono compatibility might not be as big a deal as it was during the transition from mono to stereo in the 1960s and 70s, mono translation is still important to keep in mind.
From little, mono, Bluetooth speakers to distributed speaker systems in malls and stores, there are plenty of ways people may encounter your mix in mono the first time they hear it. Ensuring your core mix intent still translates to that experience is an important piece of the puzzle, and one that can be nearly impossible to remedy entirely in mastering without some major compromises.
You can use Ozone to check things in mono
To check for this potential problem, take a listen to your mix in mono. If important elements drop in level substantially – or worse, disappear entirely – reconsider the extent to which you’re using widening or imaging plugins, or even how far you’re panning those elements from the center.
The key here is “important elements.” Some balance shifts are inevitable when summing a stereo mix to mono – part of your job as the mixing engineer is to encode a good mono mix within the broader stereo picture.
3. Beware of muddy or undefined low end
Steve Berson, Rachel Field, and Steve Quadrini all point to another common mix issue: poor low end definition.
Few things have the potential to derail a mix faster than a muddled low end. Overlapping kick and bass energy, excessive sub-bass, or resonant buildups can all obscure clarity and punch.
“Poor low end definition – the absolute destruction of a mix,” says Quadrini. “It’s hard to fix without changing how the kick and bass interact.”
Steve Berson provides some additional detail:
“When the kick and bass are just a smushed together mudfield in a mix, it can definitely be a headache to get sorted. When this issue is truly bad is one of the few times I might ask for a remix or stems, although some selective equalization and low end transient shapers can help take care of it.”
Rachel Field also concurs and points to the typical culprit:
“Poorly managed low end – huge resonances, inconsistent levels, or odd balances between bass and drums – is the most common issue I see. Often it comes down to monitoring environments that don’t accurately represent the low end.”
Unfortunately, monitoring issues are not so easy to rectify as they’re often a result of how speakers are interacting with the room they’re in, or a byproduct of uneven frequency response in headphones. All is not lost, though.
First, if you are mixing on speakers, a good pair of headphones can provide a good alternative perspective. For about $200 to $500, you can pick up a very good set of headphones these days, and with something like SoundID Reference or Toneboosters Morphit, you can get a more balanced perspective of the low end than what the headphones might provide out of the box.
Side note: this does not mean that I think you should always use headphones. It just means that they can be helpful for dialing in the low end if you’re in a challenging room.
Second, while there’s no replacement for getting your sound selection and arrangement right at the writing and production stage, Ozone provides several excellent tools to help improve your low end.
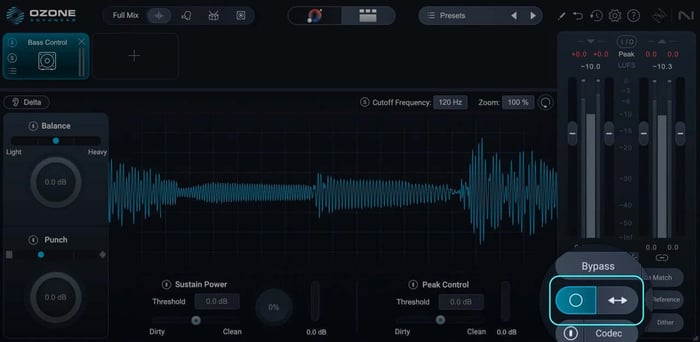
The Bass Control module provides not only useful bass processing tools, but also some simple ways to visualize what’s happening with your low end.
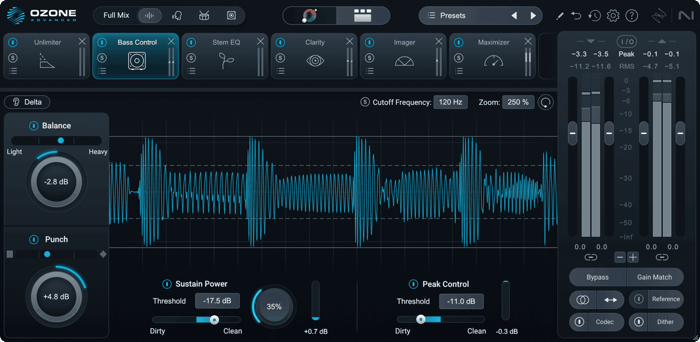
Visualize your low end with Bass control in Ozone
The Low End Focus module can also help refine contrast and manage resonances down low.
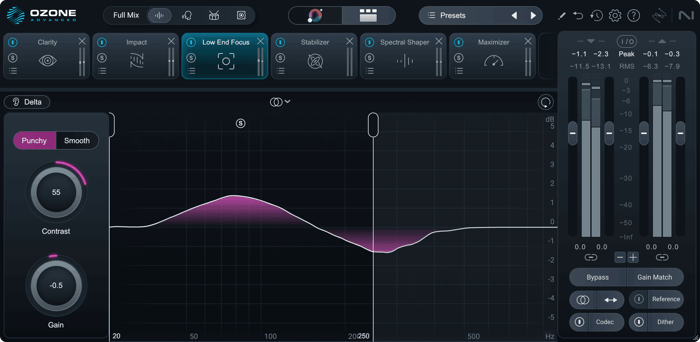
Low End Focus in Ozone
Put this all together, and you’ve got some powerful ways to get your low end closer to a place that a mastering engineer can really run with and refine.
4. Avoid harsh or sibilant vocals
Steven Berson and Mat Leffler-Schulman bring up another frequency-specific issue, this time in a different range:
“One common issue likely comes from recording engineers defaulting to condenser mics with pronounced presence peaks that don’t match the singer or room. The result: harsh bursts in the 3–4 kHz range and excessive sibilance.”
Regardless of the cause, Mat adds, “De-ess your vocals, please.”
These problems can make vocals feel disconnected from the mix – and once they’re baked into the stereo file along with other upper-midrange content, fixing them becomes tricky.
There are a few steps you can take to avoid this common problem.
First and foremost, spend some time choosing the right mic for the vocalist and the room. Condenser mics get a lot of love and can often seem sexier, but variants of dynamics like the Shure SM7B or Electro-Voice RE20 have been used by everyone from Michael Jackson to Stevie Wonder, so don’t write them off.
Next, de-ess before mastering – especially if you don’t have the luxury of choosing between different mics for your vocalist and room. Apply some gentle de-essing during mixing and don’t rely on mastering to fix excessive sibilance. By the same token, don’t overdo it and give your vocalist a lisp. As tricky as de-essing in a master can be, re-essing is even harder.
When needed, tools like Velvet, Nectar, Ozone’s Dynamic EQ, or RX De-ess can all help tame unpleasant harshness and sibilance.
5. Check vocal balance between songs
Sam Torres, my neighbor from Troy, NY, mentions another vocal-related challenge.
“Something else that comes up a lot is where the vocal is sitting relative to the rest of the mix, and how that relationship changes from one track to the next on an album.”
Certainly, vocal-to-instrumental balance can be part of the creative mix intent, and may be a highly effective way to communicate emotion and intensity. However, when vocals jump forward or recede dramatically between songs, it can make an otherwise solid album feel incohesive.
There are a few ways to help improve this balance at the mix stage. First, as you get
close to finishing each mix for an album project, bounce at least a temp version – even if it’s not the final mix – and import it into a reference track in your next mix. This gives you a quick way to make sure you’re keeping things balanced while still achieving your desired goals.
Second, if you’re looking for a slightly more objective measure, did you know you can use the Intelligibility panel in Insight to gauge your vocal to instrumental balance? Just add an instance of Relay to the last insert on your vocal bus, open the Intelligibility panel in Insight, and select Relay as the source, and you’re off to the races.
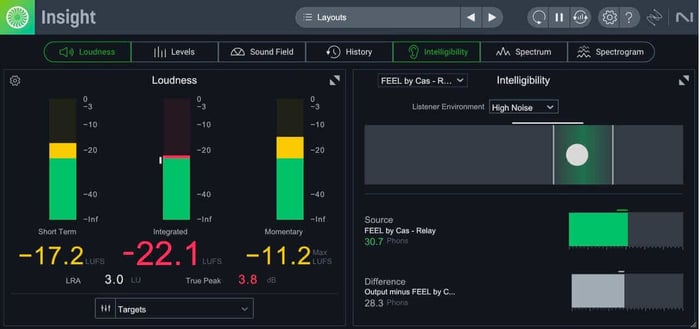
Using Insight’s Intelligibility meter
Even if keeping it right in the target area doesn’t feel right for your mix, it still provides a good, objective measure to work toward.
6. Don’t overuse saturation or clipping on the mix bus
Rachel Field voiced another recurring challenge.
“Overuse of saturation or clipping on the mix bus is another big one. A little goes a long way.”
Saturation has become very trendy in recent years, and mix engineers often push their limiting, clipping, or saturation plugins to achieve competitive loudness at the mix stage. Many times, it may not even be for the sake of loudness, but rather to achieve a vibe reminiscent of working with outboard analog hardware.
Rachel’s not alone, though. Many mastering engineers have noted that in recent years, mixes are coming in with much more saturation than they ever would have accumulated via analog hardware alone. Whether chasing vibe or level, going too far with saturation, clipping, and limiting can paint the mastering engineer into a corner, as those types of processing are very hard to undo.
Here are a few best practices you can use to get the best of both worlds.
First, working into some saturation, clipping, or limiting is not inherently a problem. It can often help you fine-tune the mix to make sure you can reach your desired final level. However, when you take this too far, it’s easy to get fooled by the “louder sounds better” phenomenon. Not only that, but it’s easy to get attached to that. Your mastering engineer may be able to get you a better tonal and dynamic result by backing off the level a dB or two, but that can be a hard sell when you’ve become accustomed to the “louder” version.
The solution here is not complicated, though. If you want a certain sound, communicate that. Send a “vibe reference” with your saturation, clipping, or limiting enabled so the mastering engineer understands your intent, and also send a mix without that final non-linear processing. Additionally, see if you can keep your limiter mix, or vibe reference mix, to around -12 to -10 LUFS or lower. Consider that mastering engineers are specialists at this final part of the processing chain and will be able to gauge exactly how far they can take your mix while achieving the vibe you’re after, without things falling apart.
7. Keep the lines of communication open
This leads us to our penultimate concern, voiced by both Rachel and Mat. It has become so easy to send off files back and forth without talking that sometimes intent can become obscured.
“When mixing engineers communicate directly with the mastering engineer, it helps us understand what’s intentional versus unintentional,” says Field.
“I’m so Gen X I’ll just pick up the phone,” adds Leffler-Schulman. “You can get to the crux of an issue in a quarter of the time it takes to email or text.”
Open dialogue saves time, money, and frustration. If you’re unsure about something in your mix – an unusual vocal choice, a creative limiter effect, or a strange stereo image – say so. Likewise, if there’s some unconventional choice you’ve worked hard to achieve, there’s no harm in stating that. Your mastering engineer’s goal isn’t to “fix” your art, but to make it translate, and the more they know about your intent, the better for all involved.
Bonus: mastering questions we hear a lot
How do I prepare my mix for mastering?
- Listen critically to your final bounce for clicks, pops, automation errors, cut-off reverb tails, accidentally muted parts, etc.
- Check your mix in mono to ensure you’re happy with how it translates.
- Check your low-end on a few different references – car, headphones, etc. – and keep an ear out for definition between your kick and bass.
- Check that vocals are not overly harsh or sibilant, and that the vocal-to-instrumental balance between songs doesn’t vary too wildly.
- If you’re using saturation, clipping, or limiting on your master bus, check that you haven’t gone too far, and bounce both versions with and without it.
- Communicate your goals, concerns, or reference tracks.
- Bounce to a high resolution format like .WAV at 24-bit or 32-bit floating point, at the sample rate you mixed at.
What should I not do before mastering?
- Leave the final level to mastering – don’t overdo limiting or clipping without checking that your mix still holds together without it.
- Don’t export to a lossy format like MP3.
- Don’t assume mastering can fix a poor mix or arrangement.
- Don’t skip the final quality-control listen of your bounce.
Prepare for mastering the right way, according to experts
As Rachel Field puts it:
“If you’re expecting a specific result from mastering, hopefully you worked toward that result from the start – arrangement, recording, mixing. Otherwise, expecting a huge change from the master is a big ask.”
Mastering is the time for final polish, sequencing, formatting, and quality control, not the fix-it stage. But by learning from these pros – and preparing your mix with intention – you’ll give your mastering engineer everything they need to make your music sound its absolute best.