
Table of Contents
EQ may be one of the first things we learn about as soon as we enter the world of music production and audio engineering. However, EQ takes on a more central role once we begin mastering a song. What may seem to be a deceptively simple and straightforward tool can now suddenly transform music into great-sounding masters.
Perhaps that is one of the reasons why mastering is considered the “dark arts of music production.” However, the transformative power of EQ in mastering doesn’t rely on magic. It all lies in intent, restraint, and critical listening.
In this "mastering EQ cheat sheet," we explore what EQ is in the context of mastering as we review a few key parameters and strategies that can help you improve its impact on your master signal chain. We also go through several “before & after” listening examples to help you gain a better perspective on how to EQ your master and the versatility of EQ as an audio mastering tool.
Jump to these sections:
Follow along with this tutorial using a free demo of Ozone , the industry’s most advanced audio mastering suite.
What is EQ in mastering?
EQ (short for equalization) is the process of attenuating or boosting a selected range of frequencies in order to achieve a particular tonal adjustment. When it comes to mastering, EQ is often used to restore clarity in a mix and to achieve an ideal tonal balance that allows your music to translate as effectively as possible across various commercial platforms, formats and playback systems.
Though EQ might seem ubiquitous across all stages of the music production process, it takes on a more crucial role in mastering because it has the ability to accomplish various mastering challenges without unnecessarily altering your mix. I like to think of EQ as the “swiss knife” of the mastering stage. We’ll go over a few listening examples shortly so you can better understand the impact of EQ to achieving a great-sounding master.
EQ in mixing versus mastering
Much like compression in mastering, the main difference in applying EQ in mixing versus mastering is scale. With mixing sessions where you have access to all the individual tracks, you’re able to hone in on a specific instrument and process it independently from the rest of the production. In those situations, EQ treatments tend to be more heavy-handed and larger in scale—think 3 dB boost in the mid-range of a lead vocal, a steep high pass filter at 80 Hz on a guitar track to remove hum, or a +5 dB high shelf EQ on the overheads for more air.
In the mastering world, however, because you’re typically working on a stereo mix which has already been approved production-wise, the EQ processing has to be much more subtle. Every adjustment is applied across the whole mix so the impact of your processing is magnified. With that in mind, EQ adjustments tend to be about 1 dB or less on a specific frequency range. It might seem challenging at first, but with constant mastering and ear-training practice, your ears will gradually become more accustomed to this level of critical listening.
How to EQ Your Master
1. Listen to the entire music and take notes as you go along
One common beginner mistake when mastering is jumping straight into EQ processing even before thoughtfully listening to the music. Not every song requires the same treatment. By taking the time to digest the music beforehand, you get a better grasp of the unique EQ challenges that lie ahead. It’s also good practice to listen to the music the whole way through because different sections in the song can present different EQ challenges.
2. Apply the necessary EQ treatments needed for the song
Once you’ve assessed the music, it’s time to apply the appropriate EQ treatment/s. It might seem like a simple task, but there’s more to EQ than just boosting or attenuating frequencies. Below are a few key parameters to keep in mind for a more impactful EQ processing.
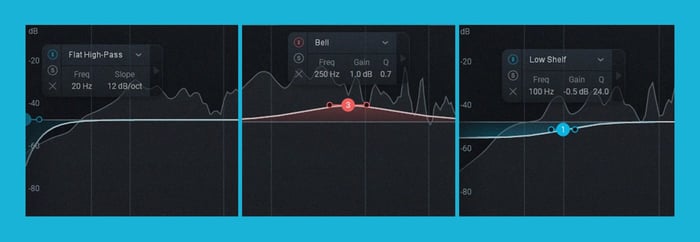
Filter shape determines how your EQ affects the frequency range surrounding your targeted frequency. Although the Ozone Equalizer module is packed with a wide array of filter shapes, let’s go over the three general filter shapes commonly seen among many equalizers
- The bell EQ shape lets you boost or attenuate an adjustable region around a specific center frequency. It’s a versatile filter shape that allows you to set your EQ processing across any point in the frequency spectrum.
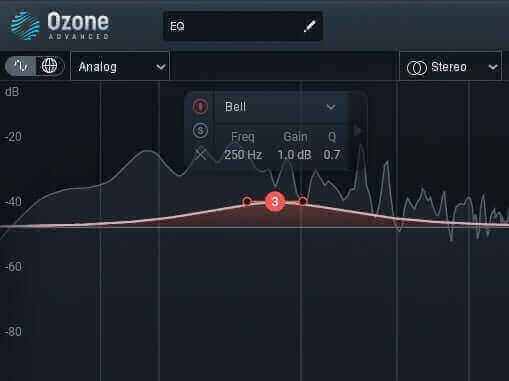
Bell EQ filter shape in Ozone
- The shelf EQ (low shelf / high shelf) shape lets you boost or attenuate the frequency range above or below a specified frequency. This filter shape is helpful for addressing any EQ treatment in the bottom-end or top-end of the spectrum.
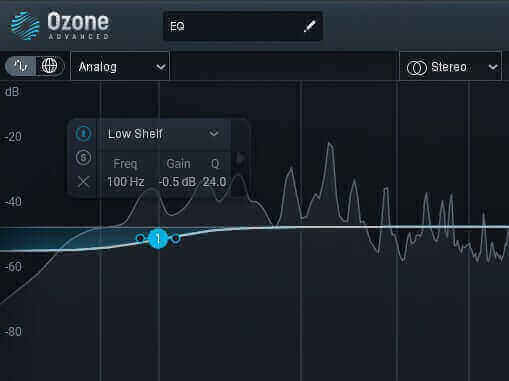
Low shelf EQ filter shape in Ozone
- The high pass / low pass EQ filter shape lets you cut a range of frequencies below (for high pass) or above (for low pass) a cutoff frequency. The highpass EQ is typically used for carving a build-up in the deeper, subharmonic range. However, it’s not as commonly used as the bell and shelf EQ due to the phase shift it introduces to your signal.
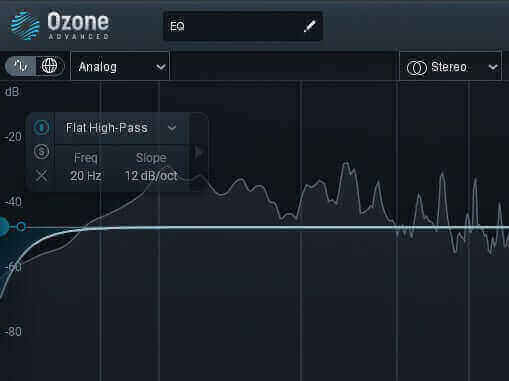
High pass EQ filter shape in Ozone
- Bandwidth (Q) refers to the width of your EQ’s frequency range. In the context of mastering, the main objective of your EQ treatment is to enhance the overall sound of the music, not to alter its individual elements. With a broad bandwidth, your EQ is much wider in scope that it generally affects the overall tonal balance rather than the individual instruments in the music. With a narrow bandwidth, your EQ is much more localized to a smaller range of frequencies, thus affecting individual elements rather than the overall sound. For a more impactful mastering EQ, best to keep your bandwidth set to broad.
- The gain parameter may seem pretty straightforward. In mastering, however, the decision to boost or attenuate with EQ makes an impactful difference. Additive EQboosts a range of frequencies to achieve a desired effect. In contrast, subtractive EQreduces a specified range of frequencies in order to manipulate the overall sound. We instinctively default to boosting frequencies when we want to achieve a certain sound (e.g. more present vocal, more weight in the kick drum, etc.) But subtractive EQ opens a lot more doors to processing EQ with more transparency, retaining more of the fidelity of the original mix. You can hear subtractive EQ in action in the article, “Subtractive EQ: a Mastering Engineer's Not-So-Secret Weapon.”
3. Consider additional factors that would improve your EQ
Here are several other key factors that can help you optimize the effect of EQ on your master.
- Order of your mastering signal chain. How you determine where to place your EQ in your signal chain influences not just the sound of your EQ but also the behavior of other processes along the chain. For example, a subtractive EQ before compression helps improve the performance of the compressor due to the restored headroom from the EQ treatment. You can read more about the impact of the mastering signal chain in the article, “What Is an Ideal Mastering Signal Chain?”
- Automation. For productions that have varying EQ challenges, you might also want to consider automating your EQ processing. This allows you to fine tune the EQ exactly to what is needed for every section of the music and reduce any unnecessary compromise to the overall tonal balance of your master. You can read up on various examples of this technique in the article, “Automation in the Audio Mastering World.”
Strategies to help you EQ your master more effectively
A/B gain-matched listening comparisons are your friend
With EQ adjustments typically being 1 dB or less in scale, it can be a challenge to listen critically for the differences. A/B listening comparisons can help your ears become more attuned to these nuanced adjustments. And by enabling “gain match," you’re also preventing loudness bias from influencing your decisions.
A/B listening comparisons can be executed using the Bypass function (for before & after EQ comparisons), or the Undo History window. The Undo History function allows you to save up to 4 history snapshots which you can use to compare 4 different EQ treatments and toggle between each for critical listening comparisons.
Take advantage of Ozone’s smart referencing features
You can also use the A/B listening technique for comparing your EQ processing against the tonal balance of various reference tracks. Ozone provides a variety of ways for you to effectively use track referencing. From the reference panel (see screenshot below), you can reference against a single song or a full album or use the region selector tool to conveniently reference against a looped section of a track. You can even take advantage of Master Assistant's Reference Matching feature which uses AI to set you up with a starting EQ based on a target reference track.
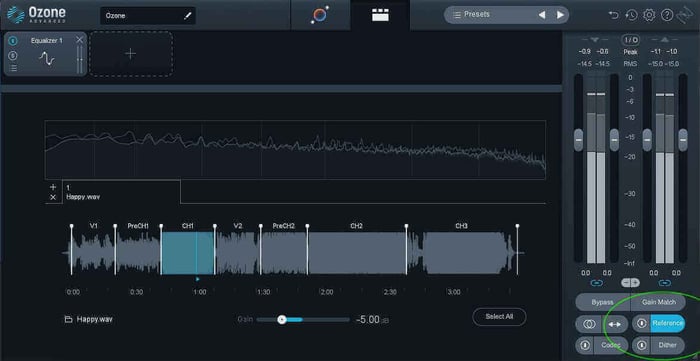
Reference panel where Ozone provides a variety of ways to effectively use track referencing with your EQ
If you're new to mastering, Ozone's new Master Assistant will match your song's Tone, Width, and Dynamics to targets that are generated from the latest chart topping hits in each genre: Country, EDM, Folk, Hip-hop/Rap, Jazz, Pop, RnB/Soul, Reggae, and Rock.
Or, you can import your own reference track to use.
You can then use the EQ slider to get your song closer to the target curve.
Use Tonal Balance Control as a visual reference
While we’re on the subject of using reference tracks for A/B listening comparisons, you can go further and use these references as a visual aid with Ozone’s Tonal Balance Control module. Tonal Balance Control provides a visual representation of your master’s tonal balance curve, along with a contextual visual of how this EQ curve compares against a reference track, album or even genre. You can read more about it from our tutorial on how to use Tonal Balance Control in mastering.
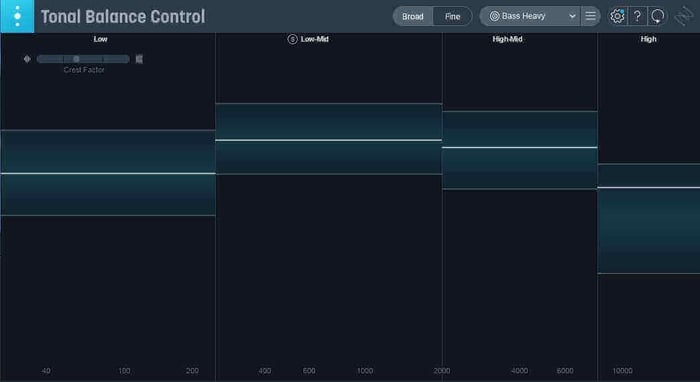
Tonal Balance Control provides a visual representation of your master’s tonal balance curve, along with a contextual visual of how this EQ curve compares against a reference track, album or even genre
Examples of when to use EQ in mastering
The main objective of EQ in mastering is to restore clarity in a mix and to achieve a tonal balance that best serves the music. But this objective can be achieved in various ways. Let’s go over a few listening examples of how EQ is typically used in mastering sessions. You can practice your mastering EQ chops using these same examples by taking this mastering course, available to Music Production Suite Pro members.
Listen to these audio examples with headphones so you can hear the subtle differences!
Carve low end build-up with EQ
Low end build-up is one of the most common challenges that mastering engineers encounter on a regular basis. The most transparent and effective way to address this is through the use of EQ. With the thoughtful application of low-shelf EQ or highpass filter, low end build-up can be controlled without compromising and drastically altering the sound of the music.
In our A/B listening example below, we have a track that’s prominently driven by the bass guitar and the cajon. There’s a tendency for bass-driven productions to encounter low end build-up, and it’s the job of the mastering engineer to carve out this boomy quality without compromising mix’s fullness in the low end.
Now let’s listen to the same music BEFORE & AFTER the EQ treatment. Listen to how the low end build-up has been sculpted to let the production breathe and come alive, while keeping the articulation in the low end punchy and energetic.
Johnnie Lee "Happy"
Add air/presence with EQ
Another common practice is to add air and presence in a master using EQ. This usually means a sense of openness and clarity that’s derived from a transparent top end. Although this is also common practice in the mixing world, the approach is significantly more subtle in mastering because you’re applying the EQ across the whole music. A boost in the high frequency range would mean affecting a wide range of elements that live in that side of the spectrum—e.g. cymbals, sibilance, synths, to name a few. So restraint is key.
Let’s listen to an example below where EQ is used to add a subtle amount of air and presence to the master. Take note that this will require several listens as the change is quite subtle. You’ll hear how the clarity now balances better with the fullness of the music’s low end. There’s also better articulation in the shakers and mids.
Patrick Simard "River"
Add warmth/body with EQ
Improving the tonal balance of your master doesn't solely depend on achieving better clarity using EQ. A lot of creative EQ choices also take place at the mastering stage, insofar as it doesn’t take away from the musical intent of the song. One common example of EQing for tonal balance is the improvement of the mix’s warmth and body. This is typically achieved using a subtle gain using a bell EQ or low shelf EQ.
Our listening example below features an R&B soul record. Music in this genre tends to feature a lush, rich, full-bodied sound, and both the artist and producer wanted this quality to be enhanced further in the mastering process. As you’ll hear from our A/B comparison below, there’s more warmth and fullness in the bottom end after the EQ treatment. It’s most noticeable every time the toms come in.
Rolynne "Sweet Love"
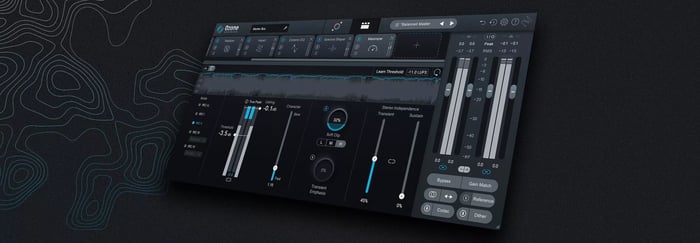
Ozone Stabilizer module: An adaptive, AI-powered approach to EQ
Using EQ in mastering can pose a challenge to many creators who are still bridging the gap between technical chops and artistry. There’s undoubtedly great power in learning how each parameter in your equalizer can impact your music. However, it shouldn’t deter any creator from bringing their productions to life. The Stabilizer module empowers creators to effectively EQ their master with the help of intelligent tools that allow them to dynamically shape their music’s tonal balance in a language and interface that’s more intuitive and goal-oriented.
Unlike traditional EQ, the Stabilizer module is able to adapt and react real-time to the incoming audio signal which allows it to apply frequency corrections (e.g. transient / resonant control) that best serve the music. In addition, its built-in Delta mode allows you to preview only the frequencies that are being cut or boosted, therefore giving you more precision with your mastering EQ.
Start using EQ in your mastering chain today
No one can deny how ubiquitous EQ is in the world of audio and music production. But it’s especially important in the context of mastering because of its ability to make impactful tonal balance adjustments without drastically compromising transparency and sonic fidelity. A lot of it relies on the thoughtful, intentional use of various EQ parameters, along with additional mastering strategies that can further enhance your EQ techniques. You can also take advantage of intelligent mastering tools built into Ozone, such as the new Stabilize module, to efficiently get to a balanced sound with the help of adaptive EQ tools.