Audio mixing is both an art and a skill – one that requires precision, creativity, and, above all, efficiency. Whether you're working under tight deadlines or simply want to streamline your workflow, speeding up your mixing process can make a huge difference in your output and wallet.
But how do you mix faster without cutting corners? That’s what this article is about. We’ve got ten fresh tips for you. Whether you're a seasoned engineer or just starting out, these tips will help you work smarter, stay inspired, and keep your mixes sounding great.
It's worth noting that all of these tips can be used with powerful plugins included in iZotope Music Production Suite .
Let’s dive in!
1. Make time to practice, and stay instinctual while on the job
Mixing is just like anything else: you have to practice it to get good. And, like many other arts, overthinking at the time of performance can lead to bad work.
So this is what I do: I practice in my off time, and I treat my work like a performance: I don’t overthink it.
When you're on the clock – whether for a client or your own release – it’s not the time to be figuring out how a new technique works or second-guessing your every move. That’s what dedicated practice sessions are for. Block off time in your week to load up multitracks, experiment with new plugins, or recreate the sound of your favorite records. We even wrote a whole article about how to practice mixing.
But when you’re actually working, try to move on. instinct. Try to trust your instincts! They’re often correct, and they’re usually the most emotional decisions you'll make.
2. Get a static mix up fast
Getting a static mix up quickly is one of the simplest ways to build momentum and clarity in a session. If you’re working off a client’s session with some basic balance already dialed in, you’ve got a head start – lean into that.
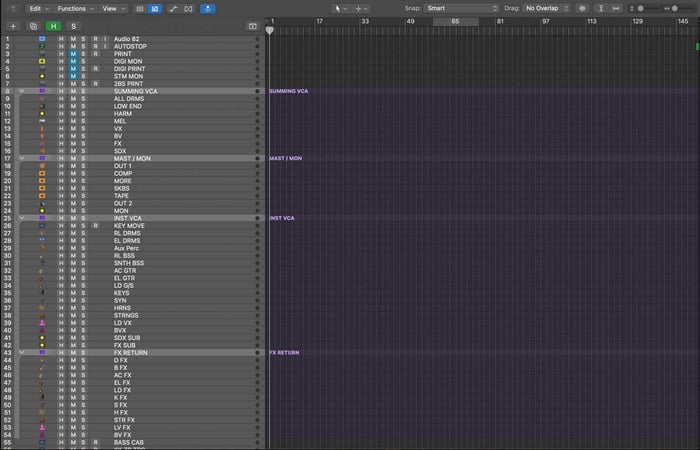
Right now, for instance, I’m working with the artist Micah E. Wood. Like many clients, he’s given me his original sessions to work with. His sessions happen to be in Logic.

Micah Session, "Altered Kindness"
In a situation like this, I will load my bus template into the session and route everything into my preferred submix routing scheme.
I am doing this for speed, but also for client preference: Micah spent a long time on his productions and rough mix. He likes what he has – he wants me to take it to another level.
In a case like this, why recreate his mix when I can build on it? Better to let his rough become my static mix.
If you’re not working on a static mix from a client, don’t waste time overthinking. Pull up all your faders, make broad level adjustments, pan elements using your instincts, check phase relationships where needed, and move on. These simple, instinctive moves are often enough to get the song feeling musical and cohesive before you even think about EQ or compression.
3. Use mix templates
Not everyone uses templates, and that’s fine. I didn’t for a long time. But these days, I rely on them heavily – they let me move fast and stay focused on the creative aspects of mixing.
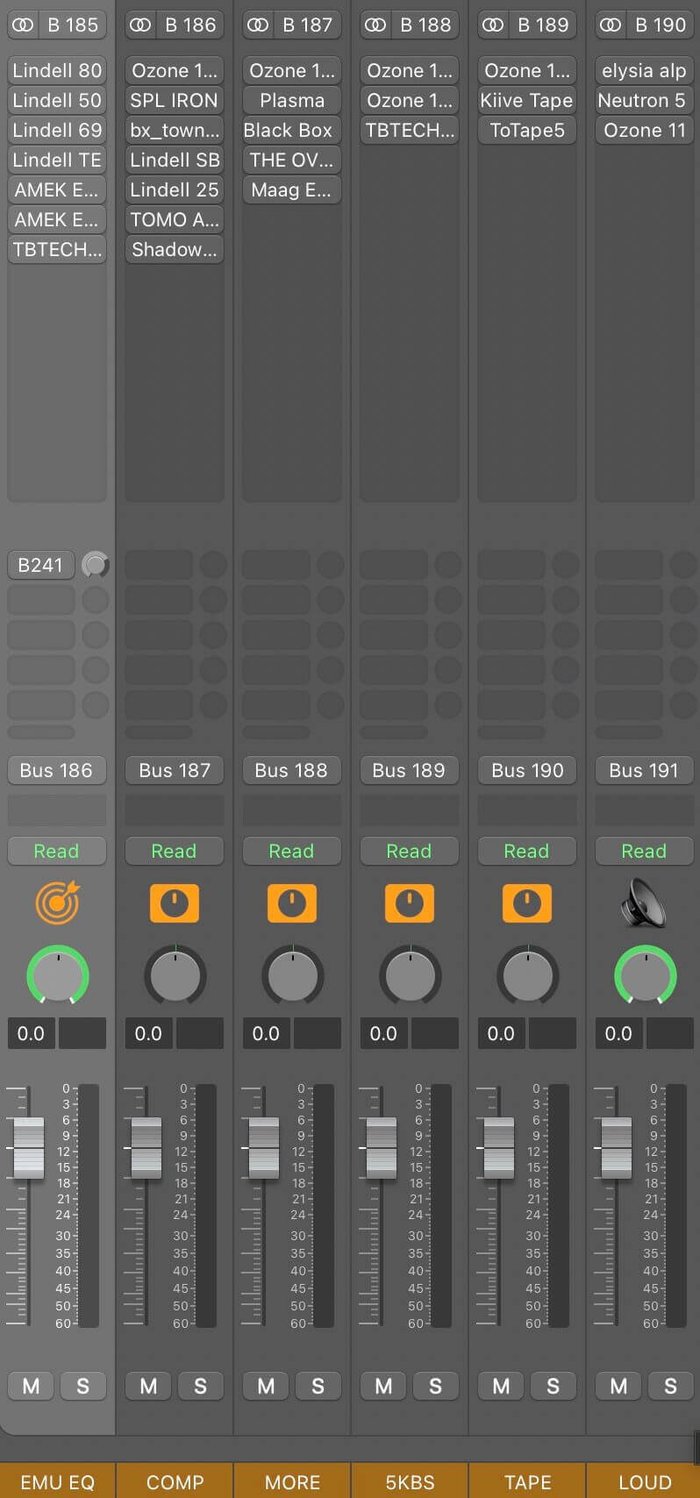
My templates aren’t about preloading individual track settings; they’re structured around bus architecture.
Mix bus template architecture
Whether I’m in Logic, Reaper, or Pro Tools, I’ve got buses pre-routed and loaded with plugins set to my own presets. Corrective tools are pre-loaded to fix common problems, like bass bloat, unwanted kick drum sustain, vocal harness, and so on. Vibe processors are set up for specific vibes.
I think of these presets as broad strokes of color I can quickly access with the click of a mouse.
For example, my drum bus includes a handful of processors in bypass, like an 1176 in a specific mid/side variation:

Purple audio MC77 in mid/side
I have a “crush” version of the 1176 as well, to blend in with the original:
I have diode bridge comps, Fairchild-style mus, Modern-style mus, saturators, and passive EQs, all loaded to go.
With a static mix feeding into these buses, I can shape the overall character quickly at the bus level – which leads us right into the next section.
4. Use submixes
If you're not using submixes, I’d say you’re missing out on one of the most efficient and fun ways to streamline your mixing process. Submixes let you control entire groups of tracks at once. You can apply processing globally, set up sidechain routing quickly, and do all sorts of fun stuff that keeps you moving quickly.
5. Use top-down mixing techniques
Top-down mixing might seem backwards at first glance, but when you break it down, it's really just about making smart decisions in the right order. I've written extensively about this approach before, but let me walk you through current practice now.
It all starts with a decent static mix. If your faders aren't in roughly the right places to begin with, no amount of processing will save you. But assuming you've got that foundation, here's how the processing flow goes.
The magic happens in a series of serial buses that each serve a specific purpose. I’m recreating that template for you here with iZotope and Plugin Alliance modules that do a great job:
Bus architecture
My mixing process follows a clear chain:
- Console emulation & EQ: I start by gelling everything together with console emulations and EQ.
- Compression & saturation: Next, I feed into a bank of compressors, then saturators. This is where I often find the track's unique vibe through specific compression movements.
- Harshness taming: A "5KBS" bus is dedicated to taming any harshness.
- Tape emulation: If needed, I then add tape emulation.
- Loud bus: Finally, a dedicated "LOUD" bus handles gentle clipping and limiting to achieve competitive levels without sacrificing dynamics. This bus acts as a submix, making it easy to print mixes and masters simultaneously.
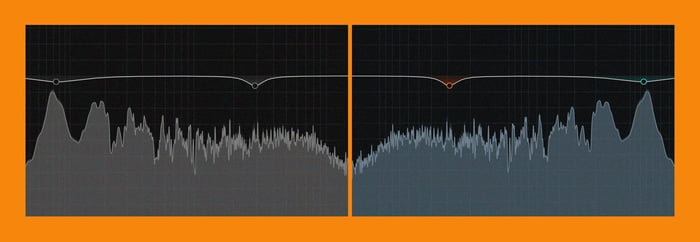
In practice, I begin with the tape bus to find the right character, then move to console emulations and EQs to establish the overall "box tone." Next, I apply compressors (hardware emulations) for specific character and glue. With the master bus set, I focus on submixes, starting with drums and bass, then refining other instruments and vocals to ensure everything sits well in the mix.
This process takes a mix from the before to the after below:
At this point, I usually take a break – but it’s an excellent way to start a session.
6. Structure your mix time
Keeping your time structured will keep you moving quicker. It’s as simple as that.
After years of tracking my workflow, I've landed on this reliable mixing rhythm for myself:
- Organization: Pure session prep. Labeling, color-coding, grouping tracks, setting up my template. No mixing allowed. Just building the sandbox.
- Static/top down: My golden hours: Faders up, broad strokes only – balance, panning, and those master bus processors we discussed. The first mix always has some magic.
- The walk: Print the mix, give my ears a break, get some fresh air, and give the mix a listen. Maybe hit up the car if I feel like it. Google doc is filling up with brutal honesty.
- Tweaking: This is the danger zone. Suddenly every knob feels important. The mix often gets overcooked. I've learned this intermediate phase causes more issues than it fixes – but the issues it fixes are also valid.
- Refinement: Clarity returns. I discard the bad ideas and keep the good ones.
The key insight? That terrible middle phase is normal. Knowing it's coming – and that i always come out the other side – keeps me from second-guessing the entire process. Your timeline might differ, but tracking your own patterns is what turns mixing from alchemy into craft.
Please note: this is my particular flow. Yours will be different. The important thing is to keep track of it and know where you are in the loop!
7. Use translation checks
Many people think translation checks are for people with deceiving room acoustics, and that treating the room or building it right will get you out of that particular rut.
But what if it’s not your room that needs treating. What if it’s…your brain?
My brain is a trickster brain. It often tells me my mix sounds worse than it is, or better than it actually does. So I have to trick the trickster – and a most effective tool, in that regard, is the translation check.
That’s why I take mixes on walks. A quick bounce, some fresh air, and suddenly I hear what’s actually there – not what my fatigued mind was filling in. A reset of context shifts my perspective faster than any plugin.
On a rainy day, perhaps I’ll just take the mix to a laptop speaker and walk around my living room, or put it up on the old hi-fi. That also works. The context change is what shocks me into reality, and this is the reason for the translation check.
8. Mix for the client you have
When you're working with a new client, pull out all the stops – send multiple versions, over-deliver, do whatever it takes to establish trust. But once you've done a few tracks together and built that working relationship? Don’t waste time getting things perfect for them.
For one, they already know you and like you, so you have nothing to prove.
But more importantly: it wouldn’t matter if you were the Shakespeare of Mixing Engineers: the client always has notes. People like to put their stamp on things. So invite longtime clients into the lair, I say.
Often I'll just screen capture my DAW and talk through my thinking:
"Here's where we started,” I’ll say, playing their rough mix. “And here's where I've taken it.” Then I’ll flip to wherever I’m at, usually in the chorus.
If I have multiple directions available to me, I’ll show the client. “I'm digging this approach,” I’ll say, “but we could also try this." Maybe I’ll tweak the master bus EQ, or show off a different panning arrangement for the guitars.
A two minute video like this can keep you from sinking hours into walking the wrong path.
But again, only do this after you've established rapport; new clients might misinterpret early previews as unfinished work, but trusted collaborators appreciate the invitation.
Start mixing faster
Mixing faster isn’t about rushing – it’s about working smarter and maintaining momentum. Of course, we’ve only scratched the surface here. Critical aspects like using reference mixes, getting the most out of your meters, and making use of automation all play huge roles in a fast, effective workflow.
But with these strategies as your foundation, you’ll spend less time tweaking and more time delivering great mixes. Now, go put them into practice!