Start mastering with Ozone Elements
Polish your tracks and get them ready for release with this guide to Ozone 12 Elements. Learn how to use Master Assistant, Tonal Balance, and other essential tools to achieve a professional sound.
If you’re a producer looking to get your latest song out on streaming services, Ozone Elements has intelligent assistive technology to get up and running quickly.
Ozone Elements is the essential tool to finalize your mix in one affordable package. Learn more about its easy, step-by-step workflow that will help you add the final polish to your tracks and release them with confidence.
Hear how Ozone Elements can give your master a professional sound:
Get your copy of Ozone Elements, the easy all-in-one mastering tool.
Getting started with Ozone Elements
1. Use the Master Assistant
Add Ozone to your master track. You will see a prominent button saying “Start Assistant."

Start Assistant button in Ozone 12 Elements
Once the tab is selected, you can choose between "Auto-Master" and "Custom."

The new Master Assistant now offers you a choice between "Auto-Master" and "Custom"
Auto-Master is your “set it and forget it” option – it works similar to previous versions of Ozone Elements: it will listen to your audio for a while and provide its own interpretation.
Custom, on the other hand, offers you the ability to guide the assistant from the outset.
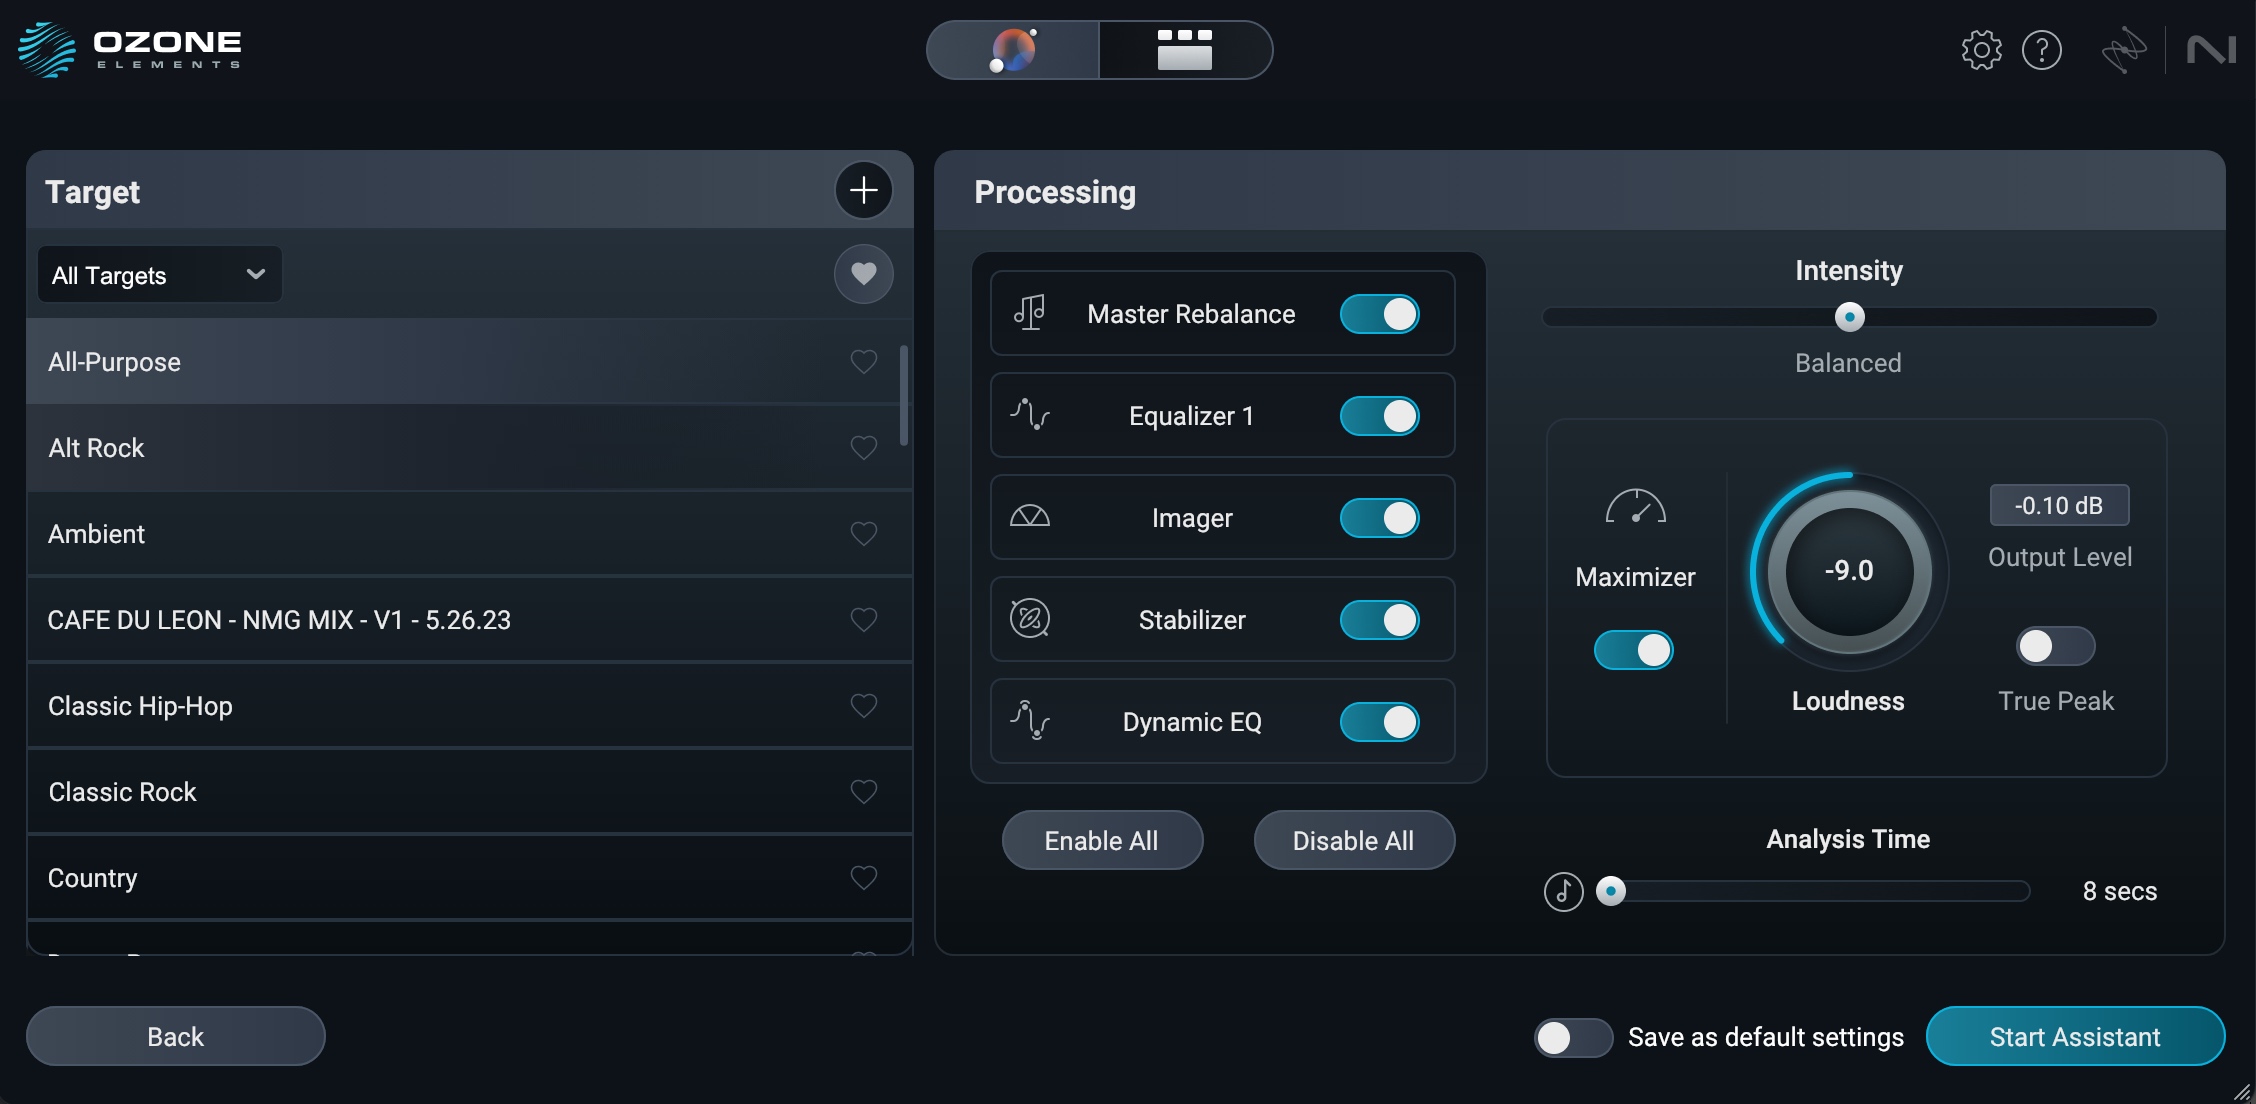
Custom mastering interface in Ozone 12 Elements
You can select your Genre Target – and Ozone 12 has many new ones, by the way – as well as your Loudness Target. You can bypass any of the modules listed in the center Processing Menu; if you know you like your stereo image the way it is, you can simply turn off the Imager.
Moving on to the right, you’ll see an Intensity Slider that guides how subtle/transformative the processing will be. You’ll also be able to set your loudness target here, set whether or not you want true-peak protection (usually better for streaming) and the output level control.
In the lower right hand corner, you’ll see a new Analysis Time section. This is a fantastic new feature: now you can tell Ozone how long it should spend analyzing your mix. You can set this to seconds or bars (measures).
If you're looking for more details about the Custom controls, you can check out the Ozone 12 Elements help guide.
iZotope recommends you analyze your loudest section – usually the chorus. Say I know the loudness chorus of my tune lasts 43 seconds, or 8 measures; no problem, I can just set this parameter accordingly and get tailored results.
Now, it’s time for Ozone to analyze your track. Hit play, and let her rip:
After the analysis, you’re going to get this window.
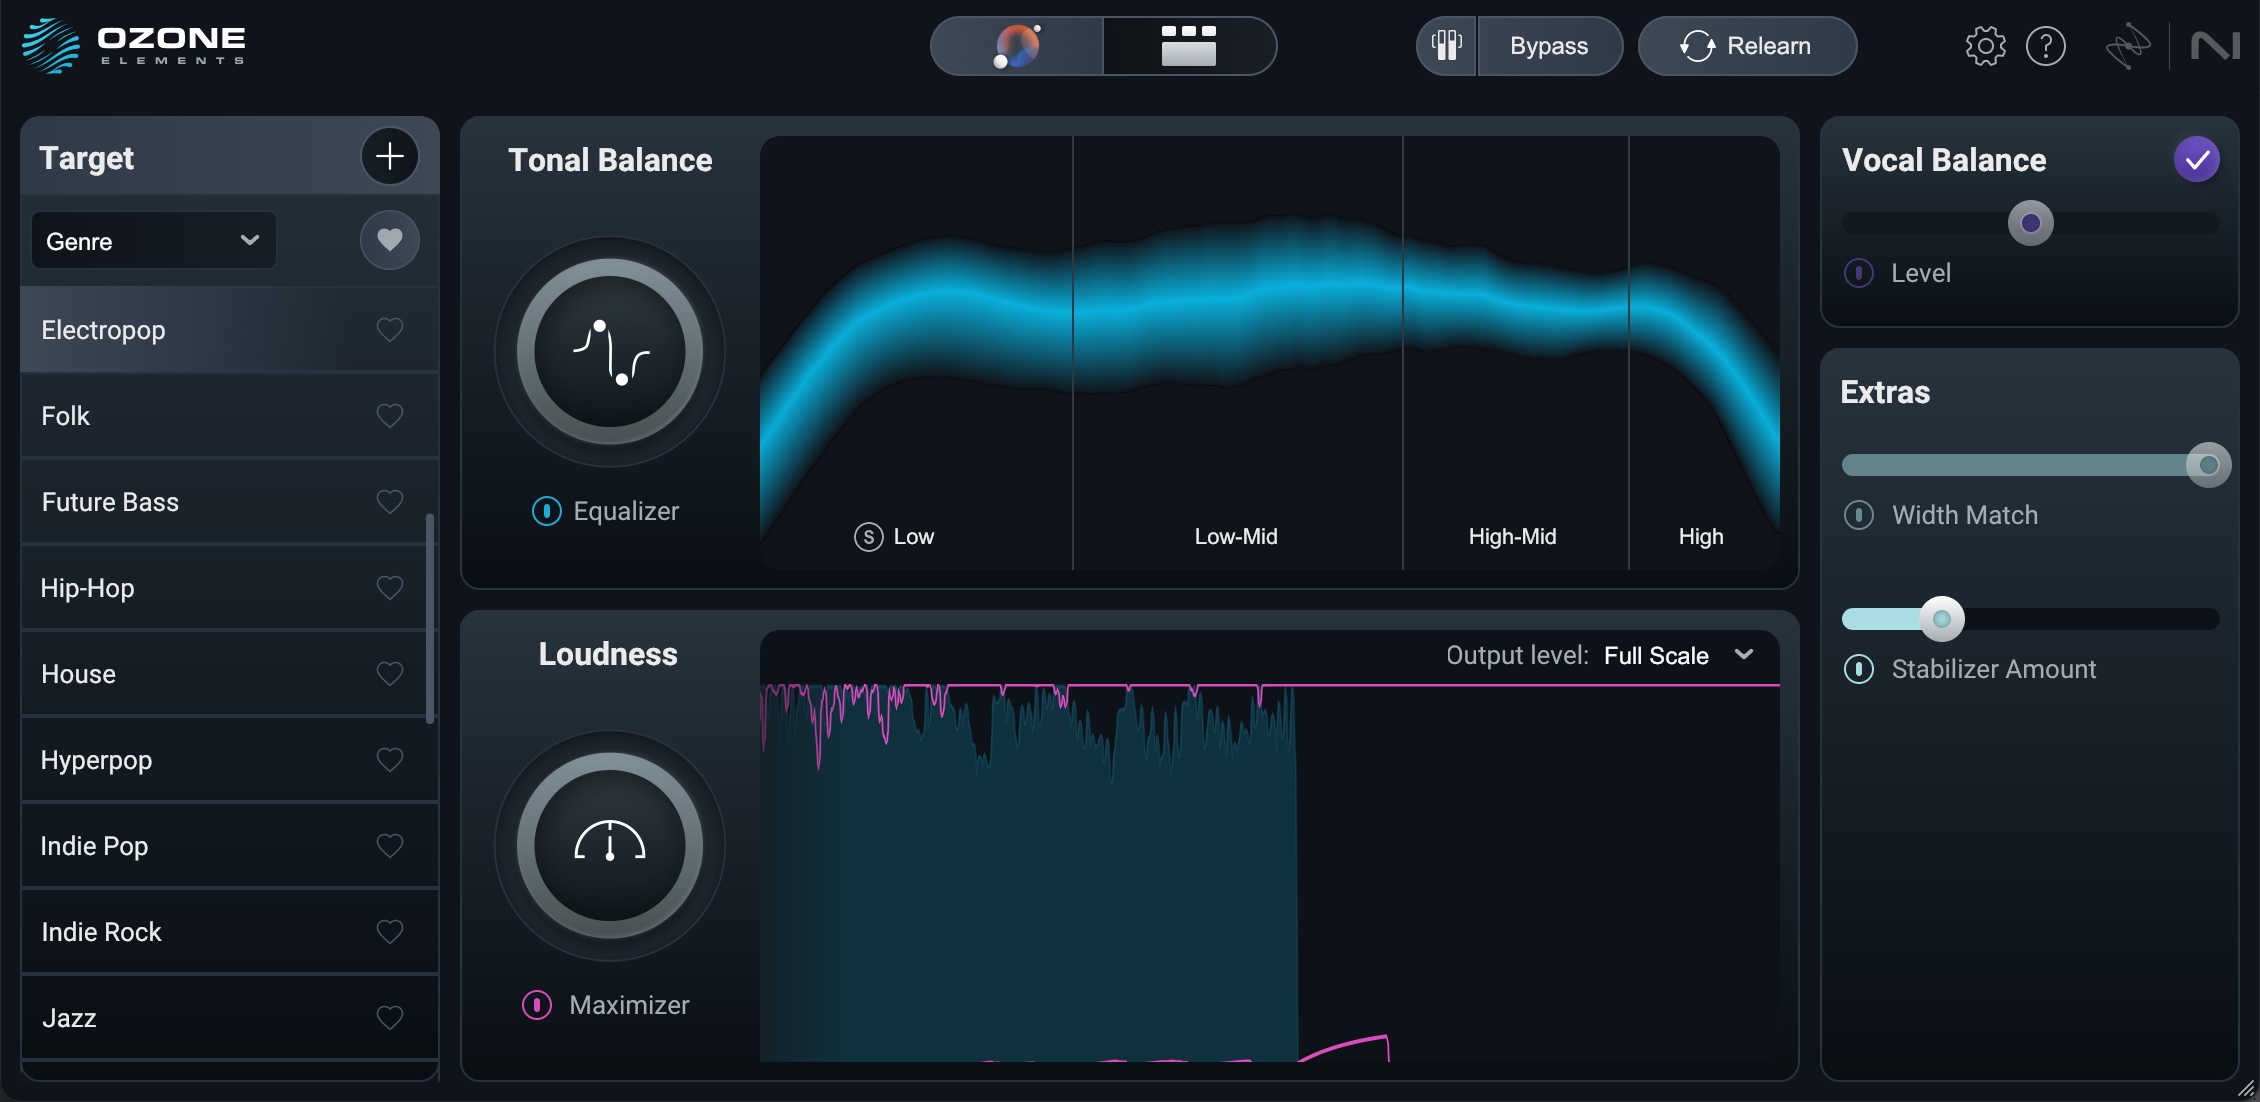
Master Assistant View
Now you'll see your macro controls: the Tonal Balance knob is going to influence a couple of EQs and other processors behind the scenes; the Loudness Slider will likewise affect more than the limiter under the hood.
The sliders on the right of the GUI allow you to dive deeper into controlling other aspects of the mix on a macro level too. Width Match helps you match the usual stereo image profile of the target you’ve selected. Stabilizer Amount is a control for a spectral process in Ozone that can control unwanted resonances.
On the left of the GUI, you’ll still see all the Genre Targets displayed. You can switch to a new one at any time.
Let’s cover the targets more in depth now.
2. Choose your target sound
On the left hand side you’ll see the Targets section After the analysis pass, Ozone will attempt to identify the genre of your song. It will then match your song's Tone, Width, and Dynamics to targets that we've generated from the latest chart topping hits in each genre:
- All-purpose (a good and balanced default)
- Alt Rock
- Ambient
- Classic Hip-Hop
- Classic Rock
- Country
- Dance Pop
- Drum & Bass
- Dubstep
- EDM
- Electropop
- Folk
- Future Bass
- Hip-Hop
- House
- Hyperpop
- Indie Pop
- Indie Rock
- Jazz
- K-pop/J-pop
- Latin Pop
- LoFi
- Metal
- Orchestral
- Pop
- Pop Country
- Post Rock
- Punk Rock
- Reggae
- Reggaeton
- RnB/Soul
- Rock
- Techno
- Trap
- Vocal Jazz
That’s a big expansion of genre targets over the previous Ozone.
You can access all these targets before analysis or after – and you can switch at any time.
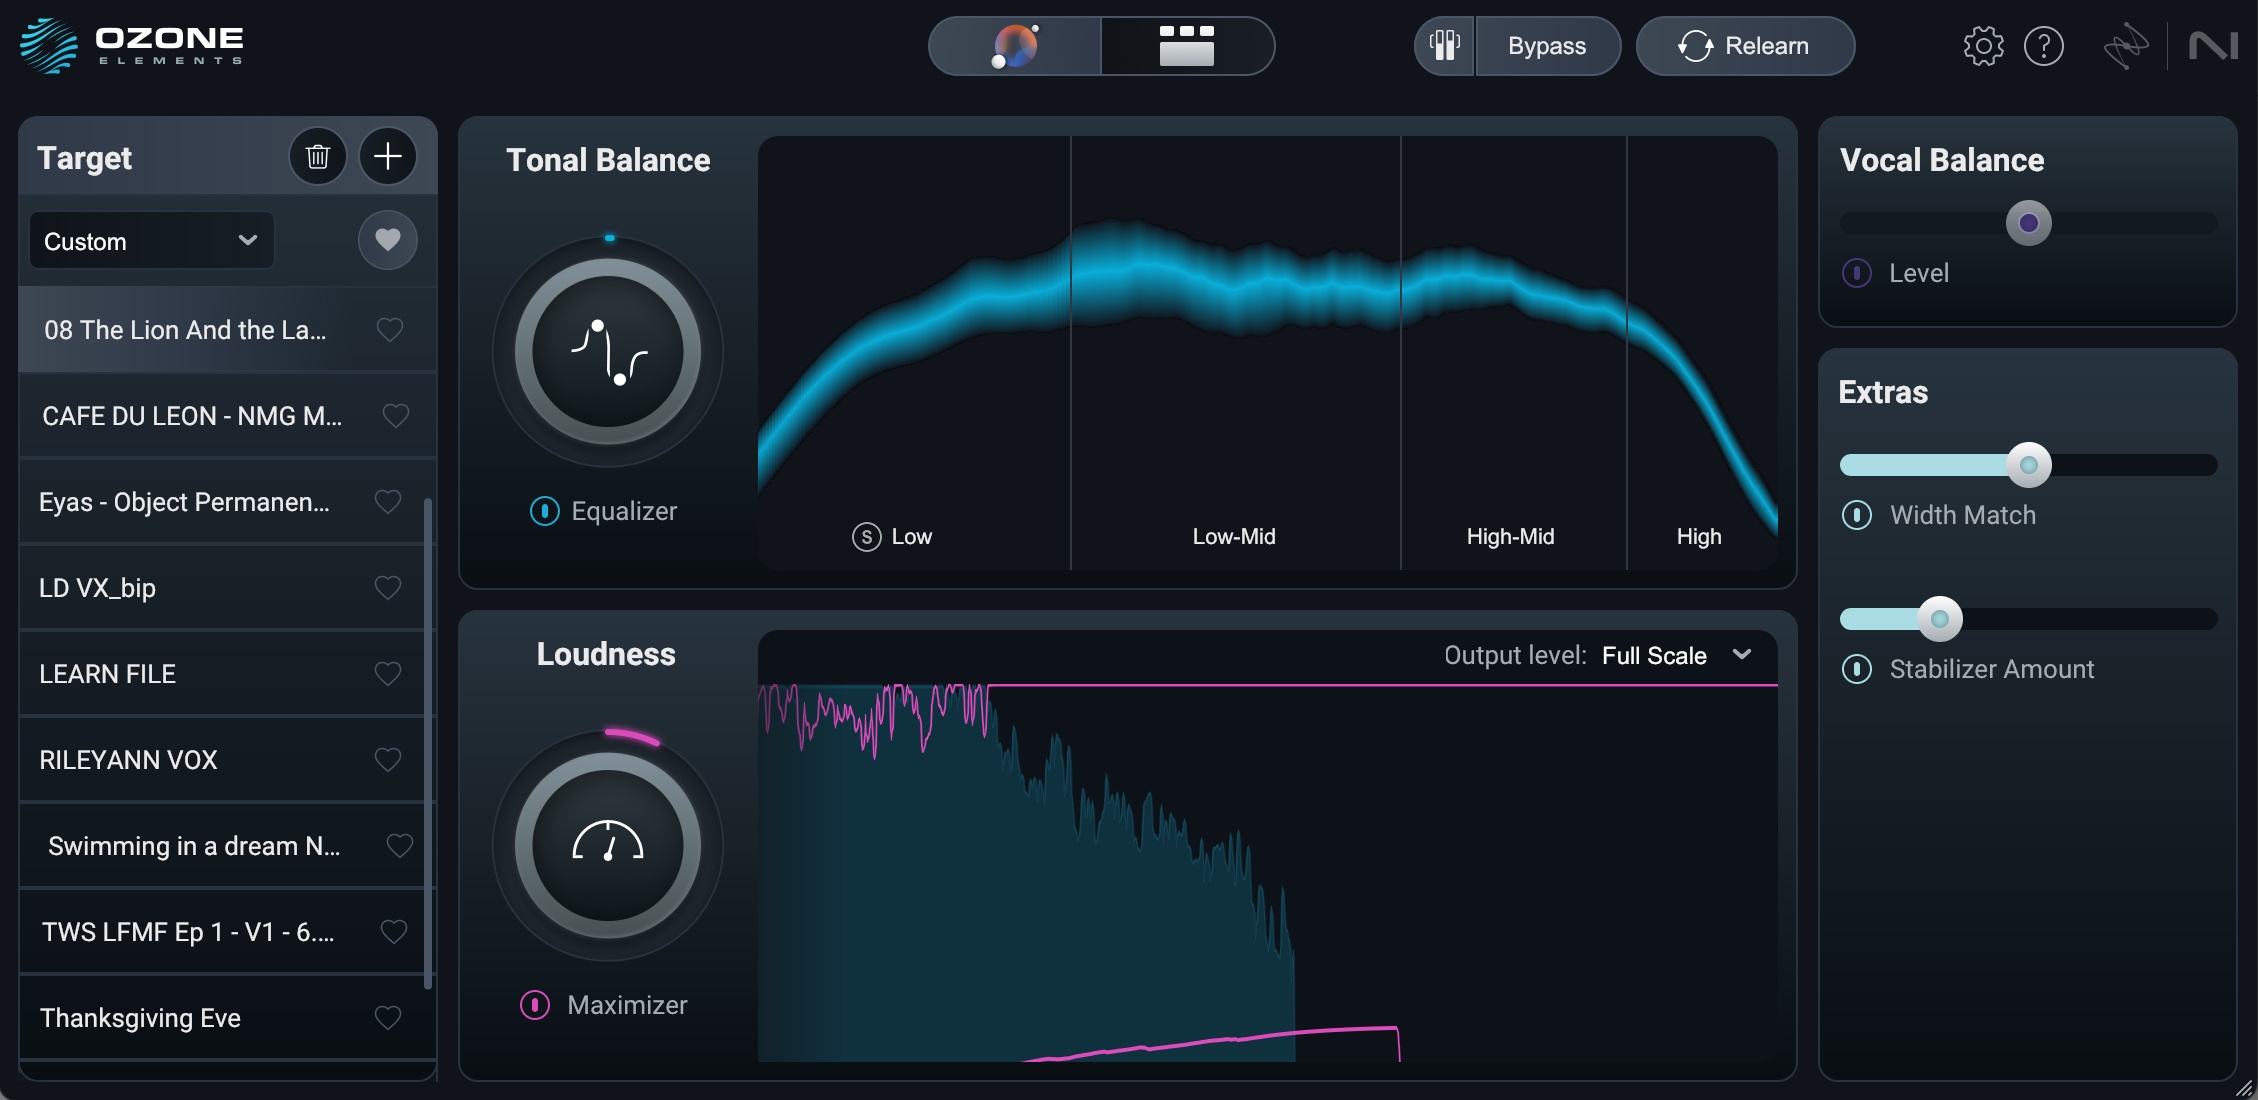
Match from your own reference file
If you’re looking for even more personalization, you can create your own custom target by uploading a reference file. Press the plus icon in the Targets section to upload your reference song, and Master Assistant will match your song to the tonal balance, width, dynamics, and loudness of the analyzed file.
For this tone, I’ll grab the actual mastered version of this song, hit relearn, and see what happens:
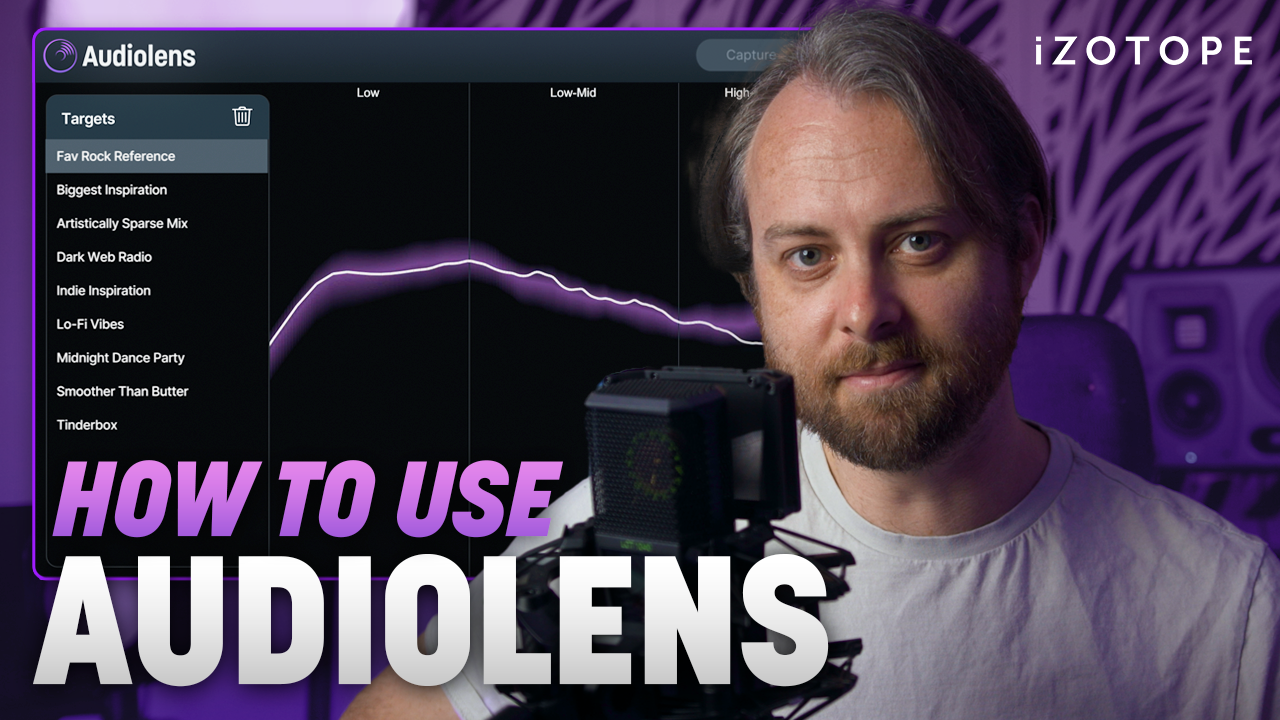
You can also automatically import references captured with iZotope
![]()
![]()
Audiolens
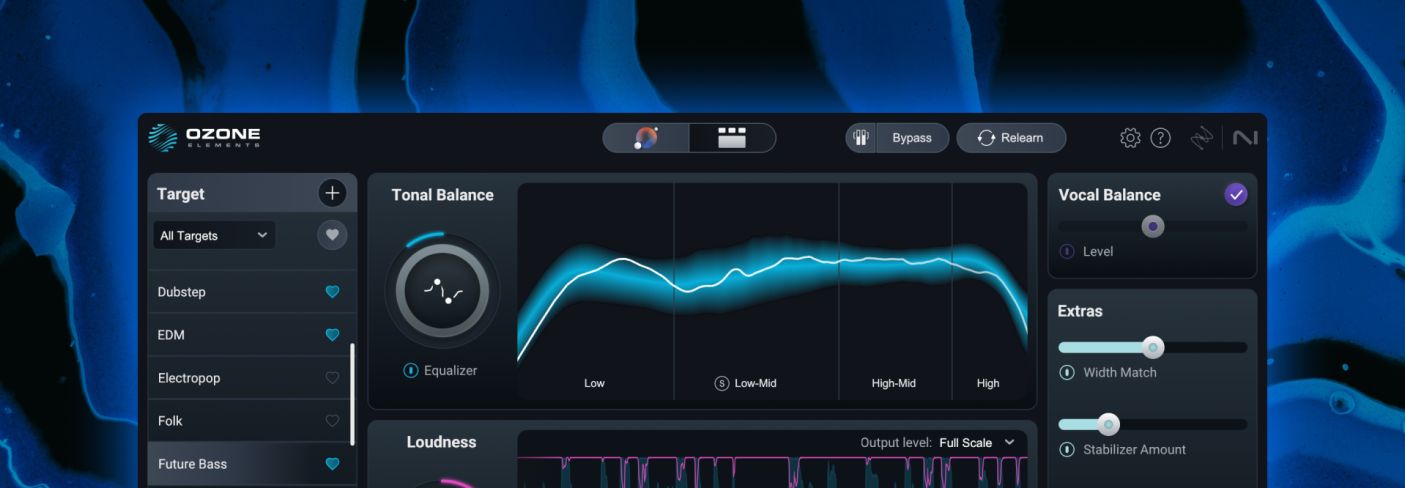
3. Dial-in your sound with Tonal Balance
Once you have a tonal balance target curve selected for your track, the Tonal Balance view in the center of the plugin will display the spectral balance of your audio against the target.
The blue tunnel represents the spectral profile of the reference you selected, while the thinner, white line represents your audio. So at a glance, you can see how your audio compares to the target and you can use the new EQ slider to push your audio closer to that target.
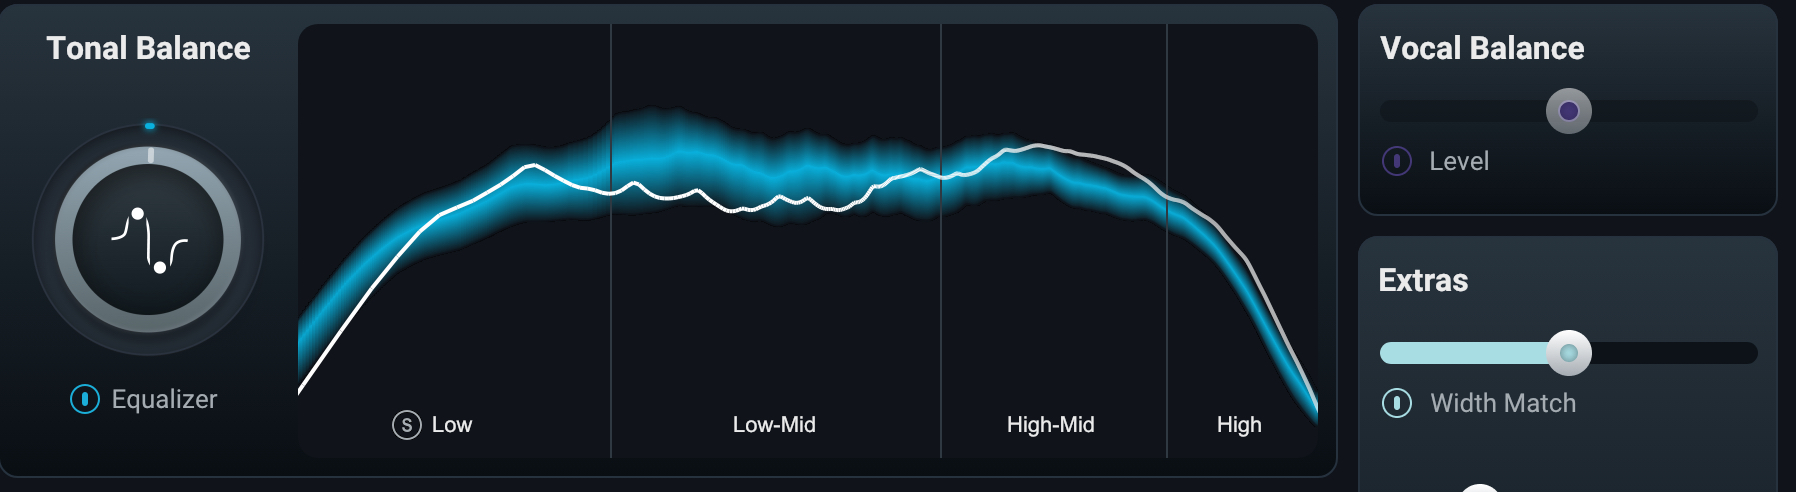
Tonal Balance curve in Ozone 12 Elements
4. Control your stereo image and improve dynamics
What’s special about Ozone Elements is that it doesn’t just give you a custom preset – it gives you the ability to tweak the sound easily and quickly, thanks to a few additional controls.
Ozone Elements controls include Stabilizer, Width Match, Loudness, and more
Extras: Width Match
Width Match measures the ratio of the power of the mid and side signals in four bands, and then uses powerful matching technology to match your audio width to the selected target.
Extras: Stabilizer
Stabilizer is an intelligent and adaptive mastering EQ that dynamically shapes your mix, carves away harshness, and smooths transients for better translation across listening environments.
Loudness
Deliver full, clear mixes with an intuitive, streamlined limiter built on the legendary Ozone Maximizer. With both Full Scale and Streaming output targets, Ozone Elements ensures that your audio is optimized to sound its best no matter where it’s heard.
5. Additional Ozone Elements controls
Gain Match and Bypass controls
When Gain Match is enabled, the effective gain of the signal will be compensated when bypassing Ozone Elements globally. This enables you to hear the change that the Master Assistant has made without "louder is better" bias.
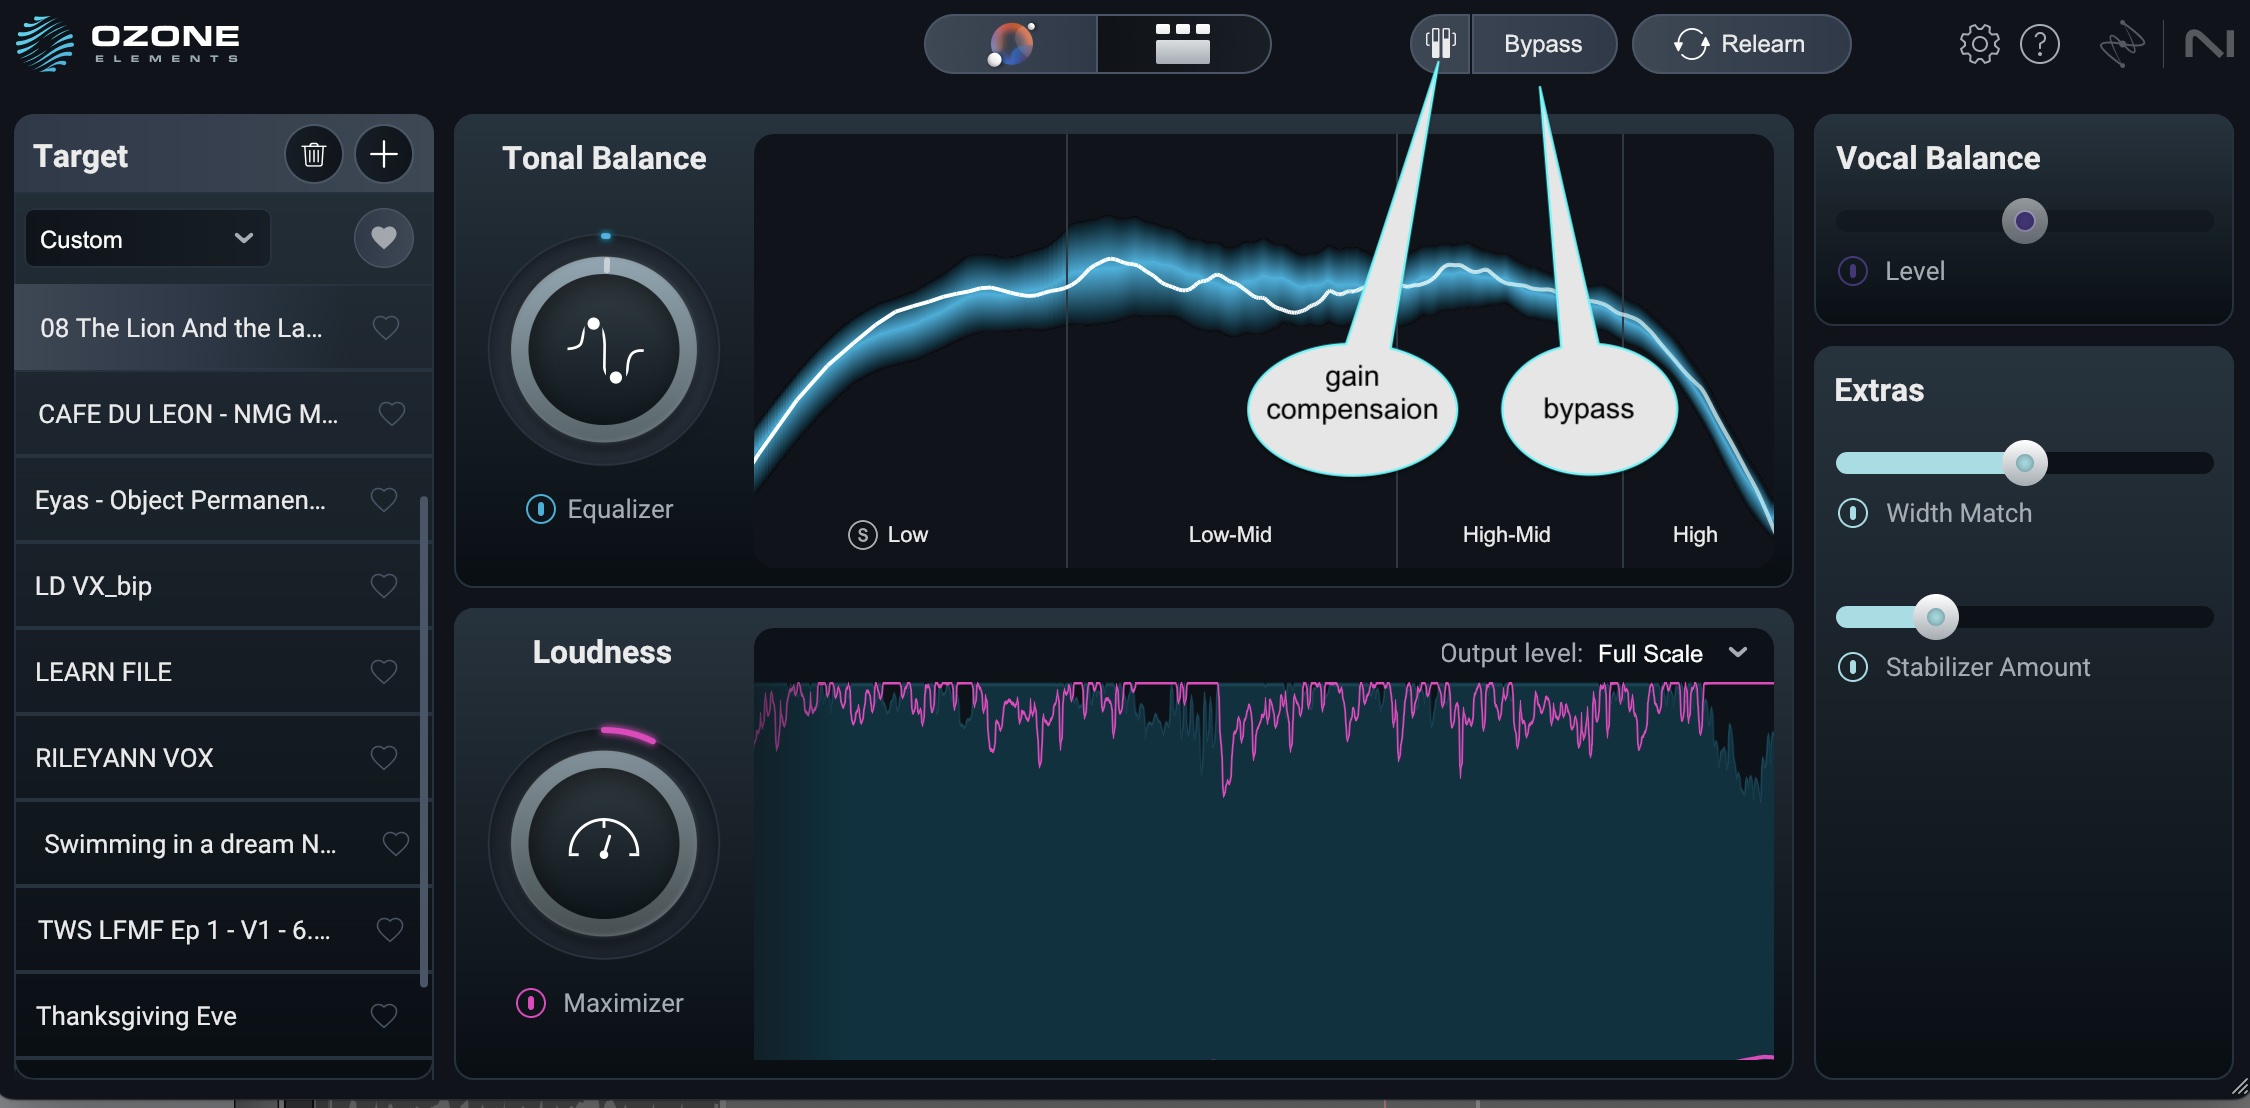
Gain compensation and Bypass controls
Vocal Balance
This slider automatically corresponds to an instance of Master Rebalance tied to the lead vocal.
If the AI determines the vocals don’t need to be louder or softer, a purple check-mark appears in the right-hand corner, and the module turns off.
6. Relearn your audio
Would you like to analyze a different section of your track? Select Relearn to do another AI-powered listening pass of your audio selection.
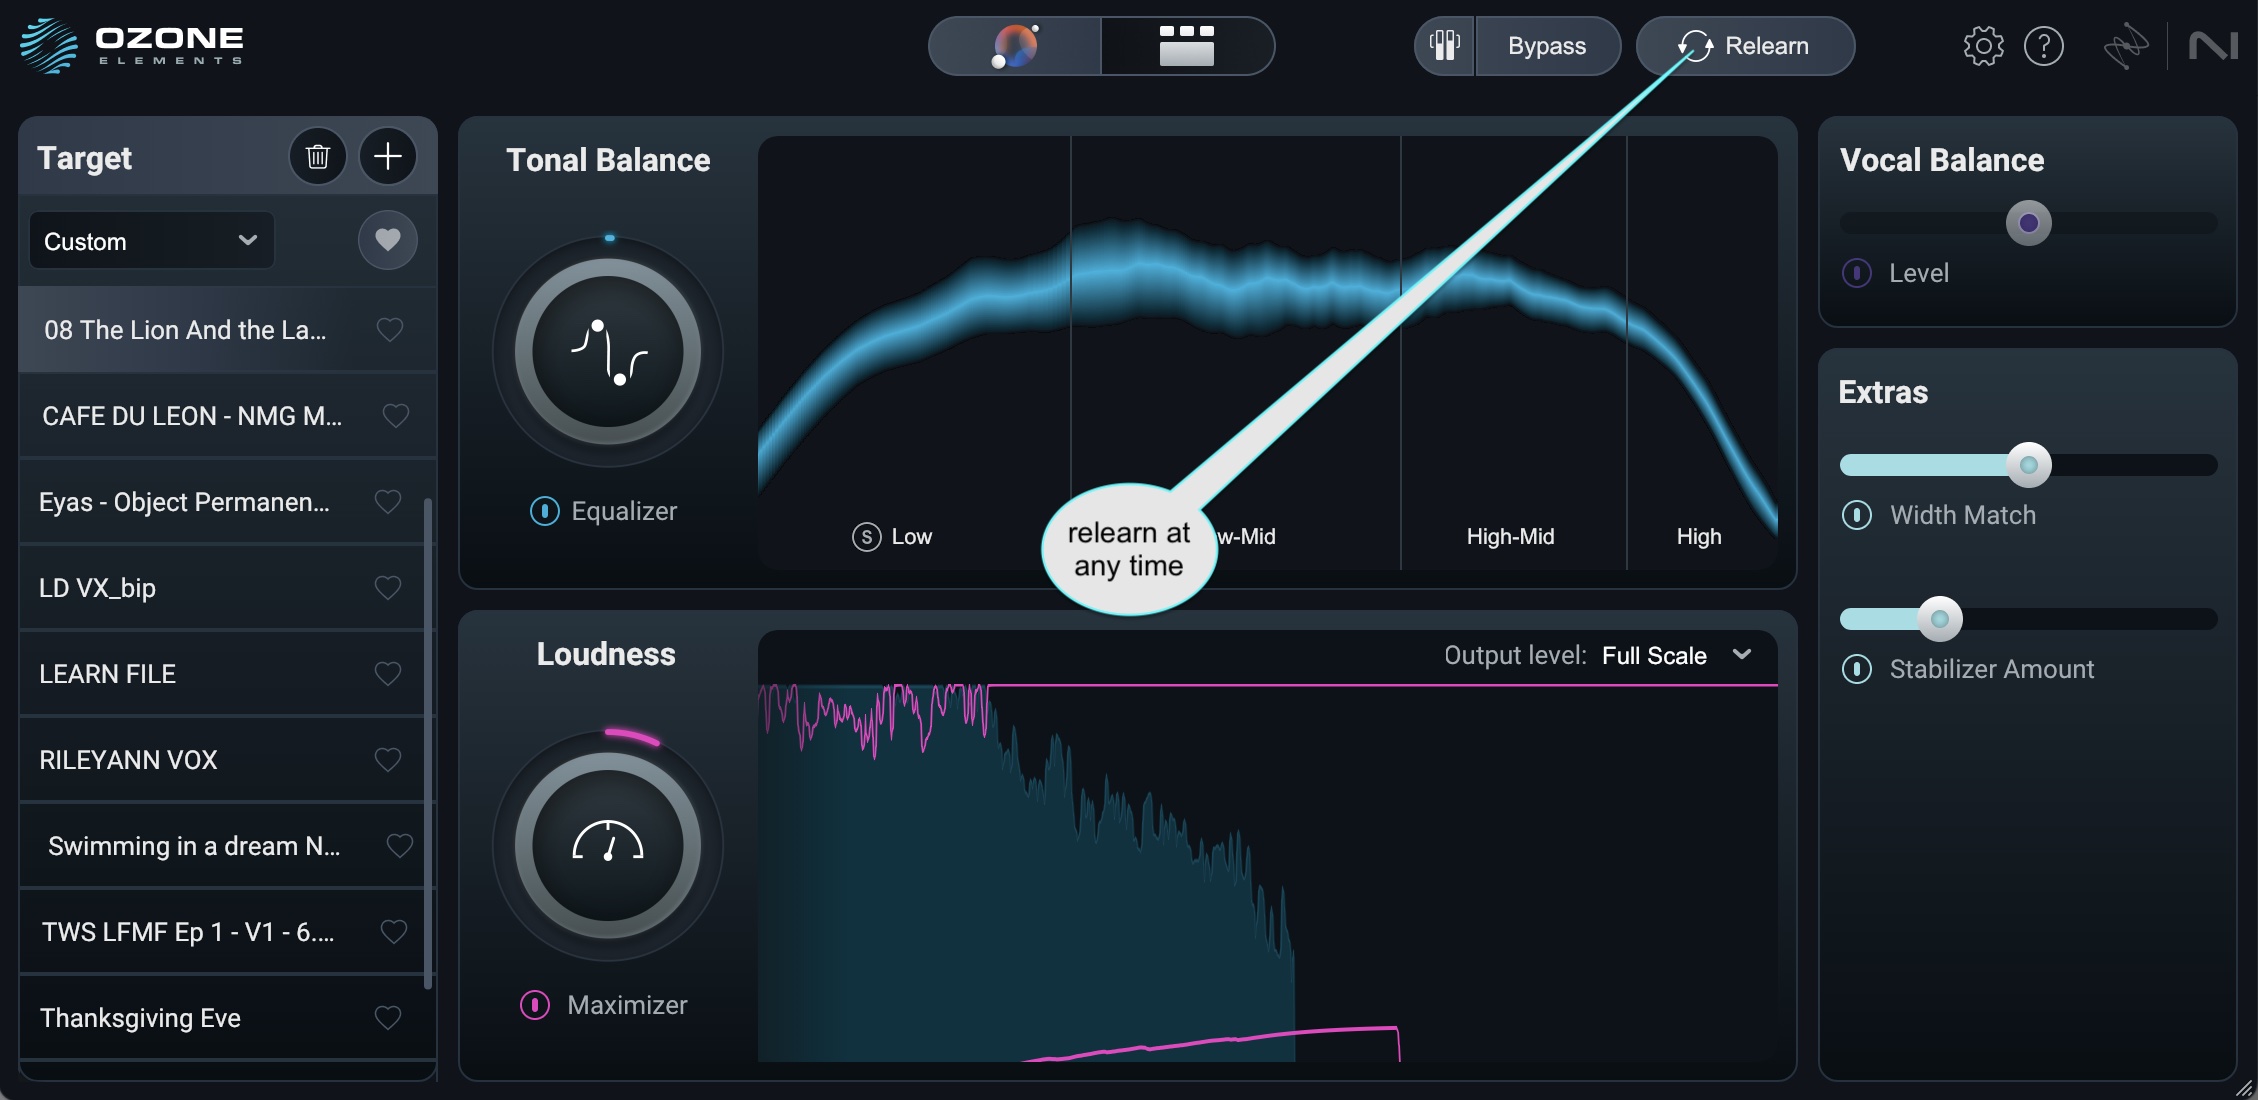
Relearn your audio at any point in your session
Start mastering your tracks with Ozone Elements
And there you have it! The new Ozone Elements makes it cost-effective and easy to start mastering your mixes quickly. Start working on getting professional-sounding masters in your DAW today.