Equalizer Cheat Sheet: the Guide for Sculpting Your Sound
Struggling with how to EQ specific instruments? Explore our EQ cheat sheet to quickly find out how you can make space for the instruments in your mix and get a clean, defined sound.
Are you struggling to achieve the perfect EQ balance in your mixes? Do you find yourself unsure about which frequencies to elevate or tamp down for different instruments? If so, you're not alone.
Equalization—commonly called EQ—is a powerful tool in audio production, one that allows you to shape the tonal balance of individual tracks and create a cohesive mix. In this article, we will provide you with a handy EQ cheat sheet that serves as a starting point for each instrument, offering basic suggestions to help you get on the right track. Whether you're a beginner or looking to refine your EQ skills, this guide will provide you with valuable insights and techniques to enhance your mixes.
Follow along with this tutorial using
![]()
![]()
Neutron 5
What is EQ?
Equalization is an essential principle, tool, and process in audio production. We use equalizers (also called EQs), to manipulate the frequency balance of sounds.

An EQ lets you boost or cut specific frequencies to shape the tonal characteristics of individual tracks, submixes, or even the entire mix. By adjusting an EQ’s parameters, you can control the brightness, warmth, clarity, depth, and overall tone of any audio source, bringing out desired characteristics and ensuring each instrument occupies its rightful place in the mix.
EQ works by dividing the audible frequency spectrum into different bands, typically comprising the sub, low-end, midrange, and high-end frequencies.

An EQ band's range highlighted in Neutron
Each band can be adjusted independently to alter the level of frequencies within that range. Boosting a specific band will emphasize that part of the sound, making it more prominent and impactful. Cutting frequencies does the opposite, and can reduce unwanted issues.
With EQ suitably explained, we can almost move on to our main event: the equalizer cheat sheet. But first we need to get something out of the way.
A disclaimer about the cheat sheet
When it comes to making EQ decisions, there is no panacea, no one-size-fits-all solution. The EQ moves you make depend on the individual elements within your mix, the genre of music, and your desired sonic outcome.
Treat this cheat sheet as training wheels, using it to teach yourself to ride the bicycle of sound.
Commonalities among instruments
Having said that, instruments do have generalized sweet spots and problem areas.
Many kicks will sound like a beach ball if you don’t handle that 300–500 Hz region, and many snares will have a sustained ring that may not serve the song in their midrange.
The same generalities also apply to mixes as a whole: cutting out excessive low-end can help tighten up the mix and reduce muddiness. Trimming frequencies in the treble register can curtail harshness or sibilance issues.
So how do you go from someone who needs a cheat sheet to someone who doesn’t?
Practice, of course. But that’s not all—you also need good reference sounds, and tools that help you achieve your goals.
Plug-ins like
![]()
![]()
Neutron 5
![]()
![]()
Ozone 11 Advanced
Other tools, such as ADPTR Audio’s Metric A/B and iZotope’s
![]()
![]()
Audiolens
By leveraging such resources, you'll gain valuable insights and knowledge, enhancing your ability to make informed EQ moves, and achieving a good tonal balance in your mix.
The EQ cheat sheet
Okay, now onto the EQ cheat sheet. Before I provide instrument-by-instrument examples, you really need to understand that these are only guidelines. There are already a glut of garbage-information cheat-sheets out there on the internet. we don’t want tips from this article to add to the din.
The other thing I need to tell you comes from years of experience: When it comes to EQ, less is always more. The less you can do to achieve a proper EQ balance, the more natural everything is going to sound when it’s all tied together.
This cheat sheet should be used when you’re presented with a sound and you have absolutely no idea where to begin. It should teach you where the problematic and virtuous areas are in a given instrument—and more importantly, how to hear them in the context of the mix. Use it only as a starting point for your own decisions.
Here’s another useful tip: if you find yourself working with the same musicians across a selection of songs, come up with a cheat sheet for that particular musician. Like I said, one singer will sound drastically different to another; there’s no shame in having a starting place as a preset for a specific individual—it helps you get to the creative stuff faster.
1. Kick drum (acoustic)
Low-end punch: 60–80 Hz
Added knock: 100–200 Hz
Boxiness: 200–500 Hz
Attack and click: 1–5 kHz
To bring out the low-end punch and definition of a kick drum, start by boosting the frequencies in the range of 60–80 Hz. This will enhance the fundamental low-frequency impact. For added weight and warmth, a gentle boost around 100–200 Hz can be applied. To tighten up the sound and reduce boxiness, a cut around 200–500 Hz can be useful. If you want more attack and click, a boost around 1–5 kHz can bring out the beater sound. Experiment with these ranges to achieve the desired balance between power, clarity, and attack in your kick drum.

Kick drum EQ in Neutron
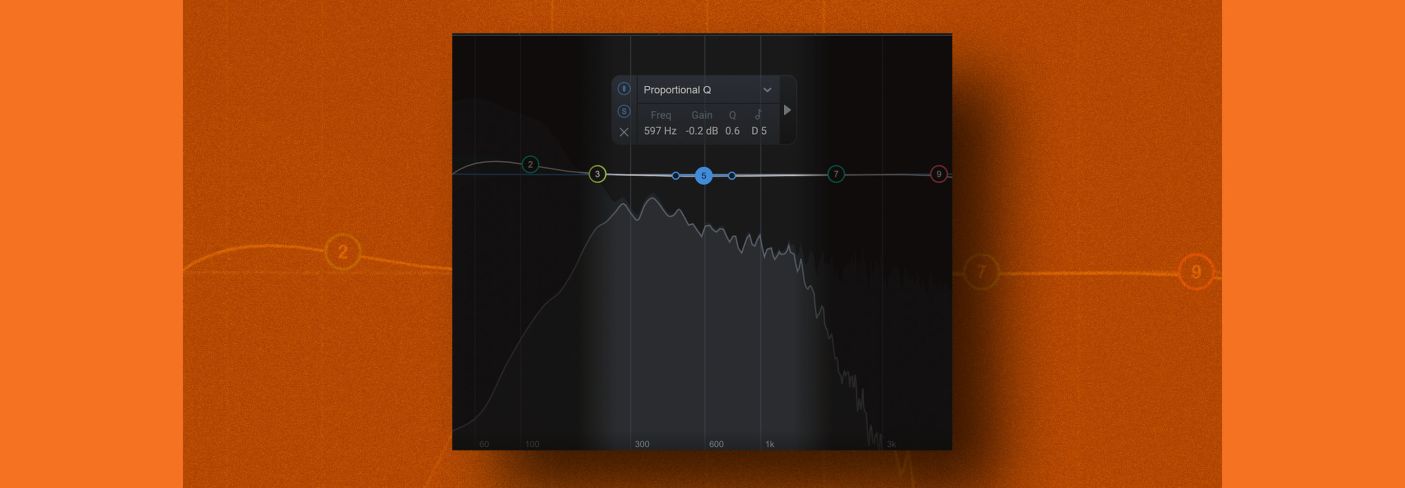
2. Snare drum
Below 80 Hz: rumble that might not be needed
Body: 150–250 Hz
Boxiness: 300–500 Hz
Ring: A narrow frequency somewhere between 400 and 700 Hz
That weak papery sound: 900 Hz–1.5 kHz
Attack and cut: 2–3.5 kHz
Snares and air: 8 kHz and above
To shape the sound of a snare drum, start by boosting the fundamental around 150–250 Hz. This can add weight and thickness to the sound, though it can also conflict with the vocal. For a brighter and more cutting snare, a boost in the range of 2–3.5 kHz can enhance the snap and attack. Sometimes snares have a weak, papery sound—like hitting a cardboard box with a paint brush.that’s usually in the 900 Hz–1.5 kHz range, and you can cut that if you don’t want it, or emphasize it if you do. Remember you might find ringing in the midrange, between 400 and 600 Hz. Additionally, a high-pass filter can be applied to remove unwanted low-frequency rumble.
Snare drum EQ in Neutron
3. Hi-hats
Potential harshness: 3–7 kHz
Often we leave hi-hats alone. Why? Because excessive filtering of a hat can have a drastic impact on your snare. Sometimes the area between 3–7 kHz can become a harsh problem, and should be tamped down with minimal harm to the snare sound. But a big high-pass filter to clean up the lows can wreak havoc on a carefully constructed phase response among multi-miked pieces of the drum kit. So, be gentle: oftentimes pan, fader, polarity, and compression (sidechained to another instrument) will get you farther with a hi-hat than EQ.

Hi-hat EQ in Neutron
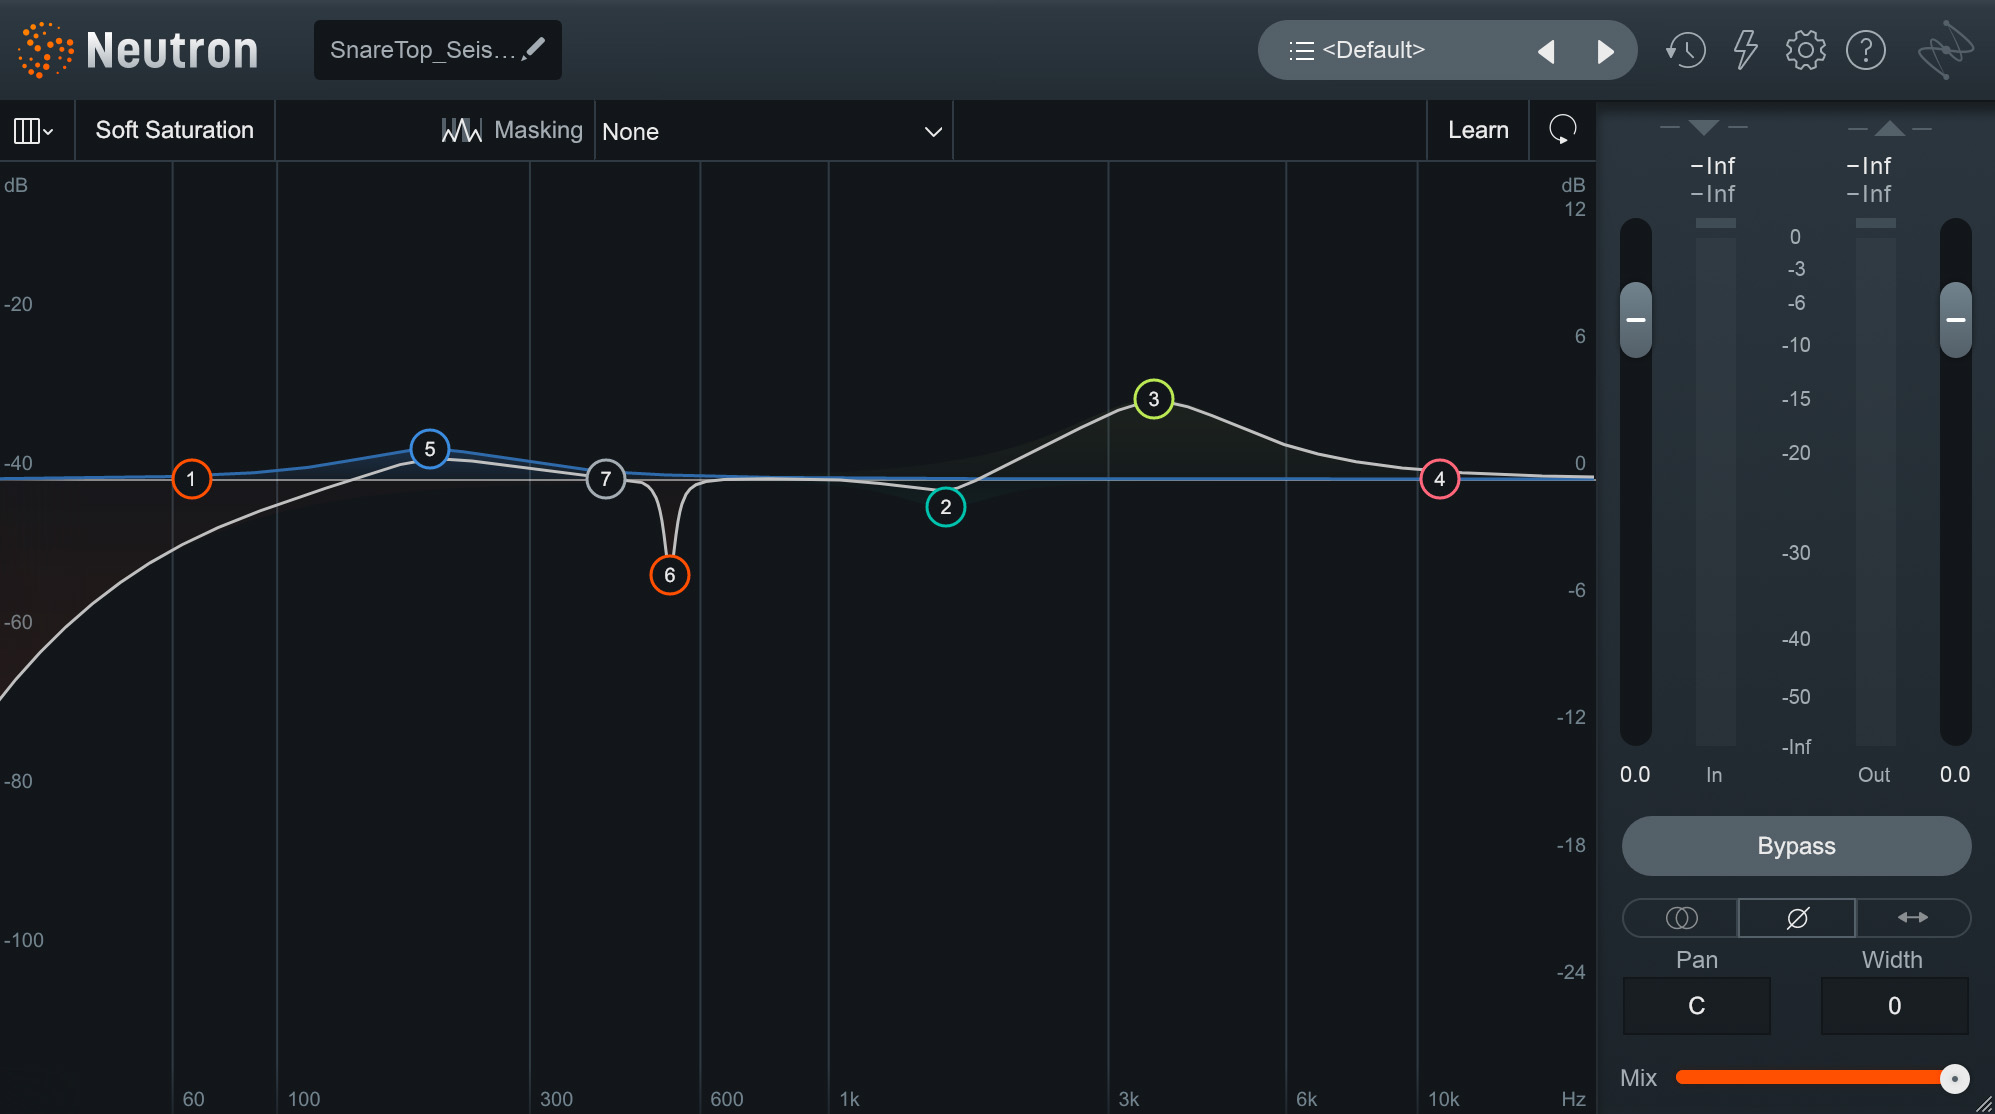
4. Toms
Fundamental bottom-end: 60 Hz–120 Hz, roughly
Muddiness: 250–600 Hz, roughly
Attack and presence: 800 Hz–1.5 kHz
Toms can benefit from similar EQ techniques as the kick and snare drums, although the specific frequencies may vary depending on the size and tuning of the toms. To enhance the body and depth of the toms, boost the lower frequencies around 60–120 Hz. Be careful not to boost too much, or else you’ll cause these low frequencies to ring out for longer than they would otherwise—and you don’t want a tom sticking around longer than it has to For added attack and presence, a boost in the range of 800 Hz–1.5 kHz can bring out that stick sound. To avoid any muddiness, consider cutting frequencies around 250 Hz, give or take. Experiment with these ranges to achieve a balanced and impactful tom sound.
Toms EQ in Neutron
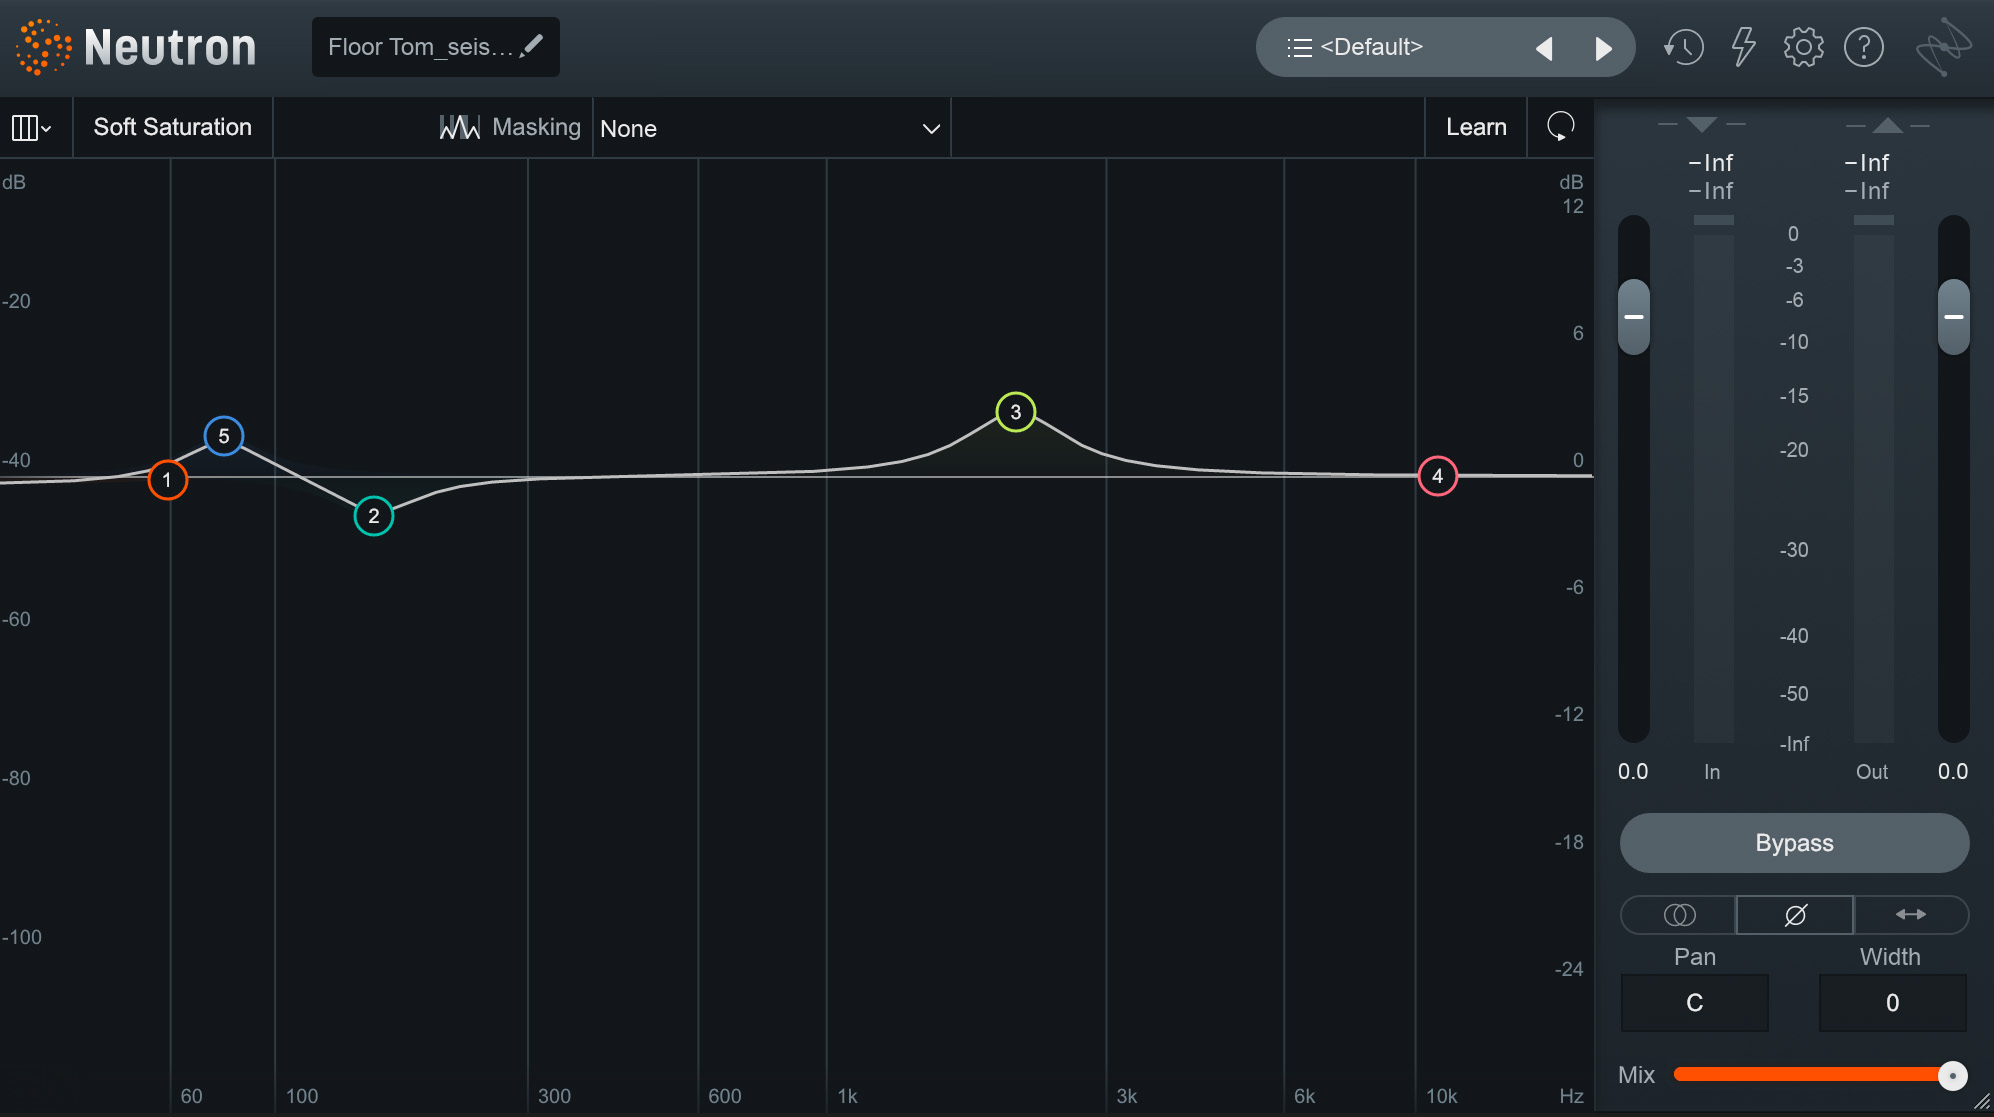
5. Cymbals and overhead mics
Conflicting low end: possible below 150 Hz
Harshness: around 4 kHz
Air: 8–12 kHz
Overhead mics don’t just capture cymbals, but the overall sound of the drum kit. They provide a sense of space and give the kit its stereo image. To preserve the natural tonal balance of the drums, minimal EQ adjustments are recommended for overheads. However, if there are any frequency build-ups or resonances, gentle cuts in problematic areas can help. Often 4 kHz can be a slight problem, and a little nip there can do you some good. Additionally, if more cymbal definition is desired, a subtle boost around 8–12 kHz can enhance the shimmer and presence.
Some engineers also like to high-pass the low end from the overheads to let the kick handle that area more. In general, use EQ on overheads sparingly to maintain the integrity of the overall drum sound.
Room mics EQ settings in Neutron
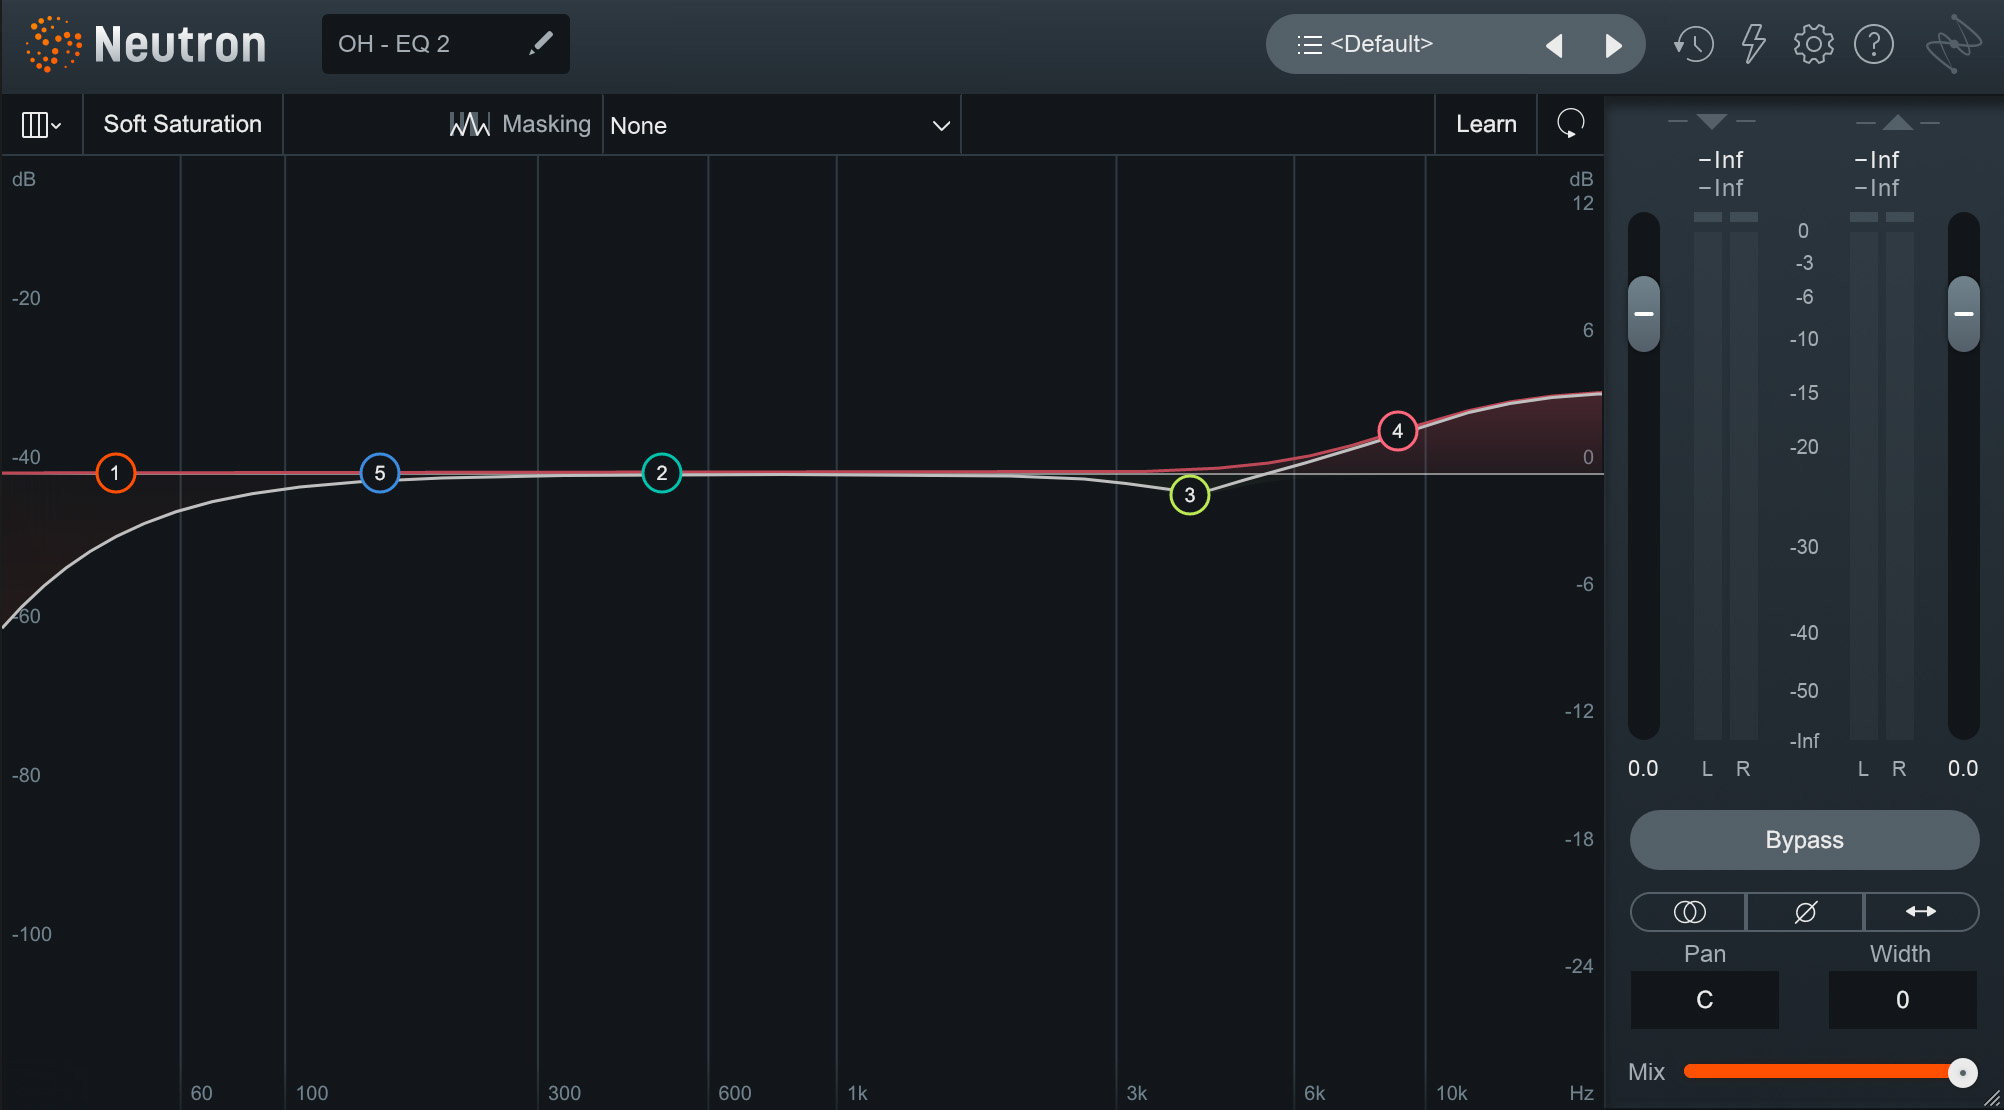
6. Room mics
Rumble: 40 Hz
Body: 40–120 Hz
Warmth: 120–400 Hz
Boxiness: 400–500 Hz
Presence or harshness: 1–4 kHz
Aggression: 4–8 kHz
Air: 8–12 kHz
Room mics capture the ambience and depth of the drum kit, and often sound quite different depending on the mics used, the room, and the recording engineer.
You can, if you want, get creative with room mics: If the room sound lacks warmth, a boost around 400 Hz can add depth and body. On the wrong kit though, this could be the exact wrong choice. Use EQ on room mics boldly—but sparingly—to shape the overall drum sound and create the desired sense of space.
Room mics EQ settings in Neutron
Drums, a summation:
You’ll note I provided no audio examples above, just screenshots. That’s because it’s senseless to play bits of the kit in solo. It tells absolutely no story whatsoever.
Instead, I will play you a drum kit completely unprocessed, and you can contrast that to a kit which has all of the EQ moves you’ve seen above applied: