Spend any time whatsoever investigating the art of mixing and you’ll likely hear the words “mix bus processing.” First, you’ll be confused: what is a mix bus, and why should you process it?
Then, when you learn the language, you’ll be even more confused: “hang on, isn’t this what the mastering engineer is supposed to do?”
Fear not: you’ll learn all about the mix bus in this article, as well as some tips for how to process your mix bus and how to holistically think about the mix bus processing chain.
Follow along with iZotope Ozone and plugins from Plugin Alliance.
What is a mix bus?
Even when you’re mixing a 200 track arrangement, you’re only listening to one stereo track – the funnel through which all the others are heard. This single solitary track is called the mix bus, though it does have other names:
Some call it the stereo bus. Others call it the 2bus or the master bus. Some spell the word like the vehicle, while others prefer the double ess.
However you call it, the mix bus is the end of the line – the final frontier of your mix. Beyond the mix bus, there is nothing: all your instruments, effects, and submixes arrive at this main left/right stereo output.
In most DAWs, you can apply processing right onto this output, adding color, saturation, and compression, tailoring the song to your needs in the process.
Many engineers love to do this. They use their favorite compressors to glue the mix together, or their favorite equalizers to give everything a little openness in the top end.
In this article, we’ll provide concrete tips for processing your mix bus.
What should go on my mix bus?
Anything can go on your mix bus. But in practice, engineers tend to favor the following:
EQs, compressors, and saturators – all used subtly.
Some engineers may use a limiter, but it’s not good practice to rely on it when you’re starting out, because you want to manage your peaks within the mix itself.
You almost never see modulation tools like flangers and phasers on the mix bus, unless the engineer is automating one in for a brief moment. The flanged end of “Life in the Fast Lane” would be one such example.
Many novice engineers throw stereo-width enhancement on their own mix bus willy nilly, but this is quite dangerous. You run the risk of creating a blurry, ill-defined mix. Try widening out things like pads, background vocals, and non-percussive synths in the mix itself, so that you don’t mess up the impact of your drums and lead instruments.
Every once in a while, an engineer may use a touch of reverb on the mix bus. However, this is so rare that almost no engineer would ever admit to it (cowards).
Wait a minute, how is this different from mastering?
Mastering is the final step before a song is released into the world. If you’re at all familiar with this dark, secretive art, you might wonder how mix bus processing differs from the definitions of mastering.
Don’t mastering engineers apply EQ, compression, and limiting to your songs to make them competitive in the marketplace of content?
Not quite. Remember this: a square is a kind of rectangle, but a rectangle is not a kind of square.
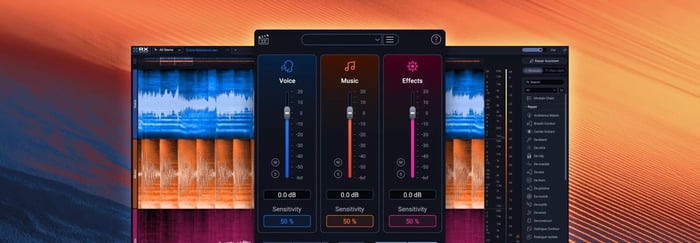
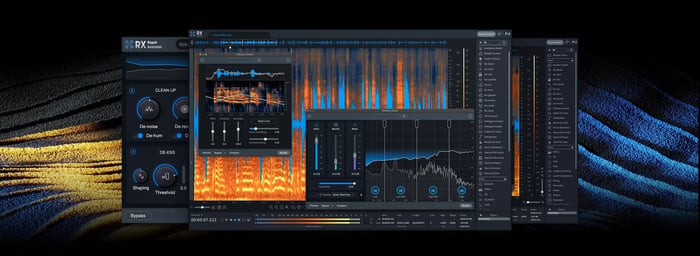
Mastering may include similar processes, but that’s hardly the totality of it. Mastering involves sequencing all the songs, correcting any inharmonic errors in the recording with tools like RX, embedding metadata, exercising extensive quality control, and exporting the record into various file formats.
To the extent that “mix bus processing” is employed in both, the spirit of the processing is totally different:
Mastering engineers make their decisions to ensure the song works across every conceivable playback system, in a variety of formats, at various playback levels, and in many different contexts. To that end, mastering engineers tend to keep their processing as transparent as they can. Vibe is only implemented when needed, and as subtly as possible.
Mixing engineers, on the other hand, are not worried about maintaining a transparent hand if they see an opportunity to get the vibe exactly right. They’ll pump their whole mix through a flanger if they have to (again, “Life In The Fast Lane.”)
A mixing engineer wants their EDM song to have more of a snap to it; that’s how they choose their compressor.
The mastering engineer knows the drop needs to playback at -6 LUFS short term or higher to compete in the genre, and uses the compressor to make sure they get there transparently.
5 tips for mix bus processing
1. Know the plugins you are using intimately
As a mix engineer, it's essential to understand the tools at your disposal. Before applying any processing to your mix bus, take the time to familiarize yourself with the plugins you plan to use. Experiment with different settings, understand the controls, and make your own associations as to what each tool accomplishes.
I’ll give you an idea of my own thought patterns. Maybe they’ll help you, maybe they won’t, but it’ll illustrate what I mean.
We’ll use this mix from the artist PANTLER as an example, and after each entry, I’ll play the example again, running it through the processor I’m talking about.
We’ll start with compressors, as they arguably have the most pronounced effect on your mix bus.
Compressors
Vintage style mu compressors
Vintage vari-mus can bring a fun, bouncy feel to the mix, one that feels round and musically timed to the song. They have a way of anchoring the kicks and snares in the center of the image while letting everything else bounce around a bit – especially when used (judiciously!) in m/s mode. An example of a vintage-style mu compressor is the NEOLD WUNDERLICH.
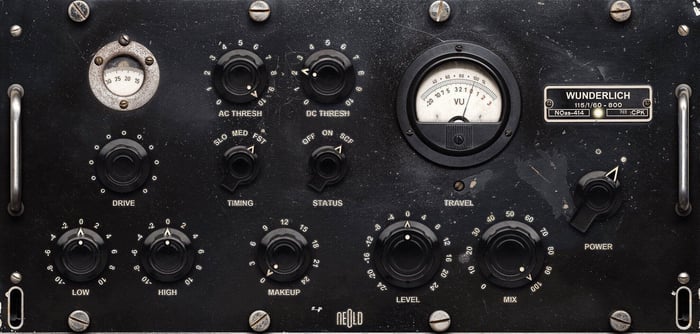
NEOLD WUNDERLICH, vintage mu style compression
Vintage style mu compressor
Modern mu compressors
I like to think of modern mus as offering a smooth and glassy effect. The ones I like tend to curtail the low midrange a little while preserving the subs. When used properly, you can keep a mix anchored in place with a fair amount of gain-reduction, yet it’ll still sound fairly natural. Try them in dual-mono for enhancing the stereo spread. Again, be judicious with this!
Here’s an example of a modern mu compressor sound with SPL Iron.
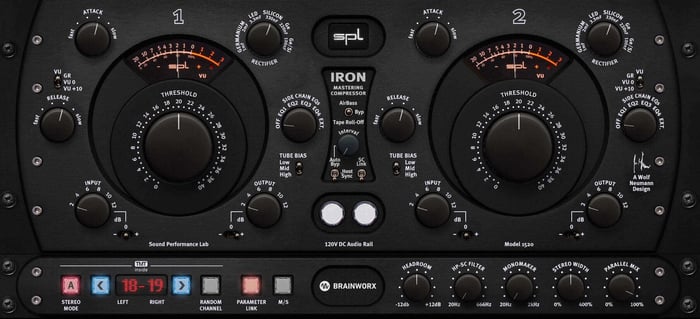
SPL Iron, modern mu style compression
Modern mu compressor
Opto compressors
Depending on the circuit, I like to think of an opto as giving me the bouncy feel of a vintage mu with the smooth glassy color of a modern one. Let’s listen to an example with the NEOLD U2A.

NEOLD U2A, opto style compression
Opto style compressor
Please note, engineers do not generally use things LA-2A emulations on the stereo bus, but the U2A’s recovery control and R37 parameter allow you to tune the attack and release times, while drive parameters and a mix knob let you dial in a suitable – and subtle – amount of saturation.
API style VCAs
API VCA compressors have a way of bringing the center image to the front while spreading out the stereo field (at least, I tend to think so). In terms of compression, they have a recognizable style: grabby, yet warm, with an “on-top-of-the-beat” pump when used to enhance transients. Here’s the Lindell SBC demonstrating an API VCA compressor sound.
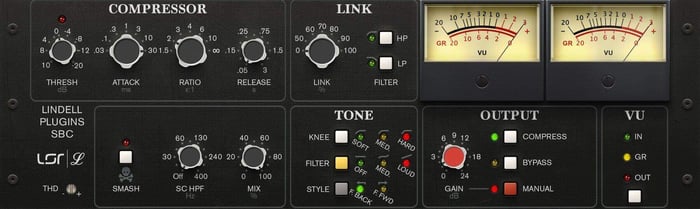
Lindell SBC, API VCA compressor sound
API VCA compressor
SSL style VCAs
These are also great for adding snap to transients. But they can also add a density engineers like to call “glue.” As a rule, SSL style comps don’t give you the same depth/stereo presentation as the API style VCAs. Here’s an example with Solid Bus Comp.
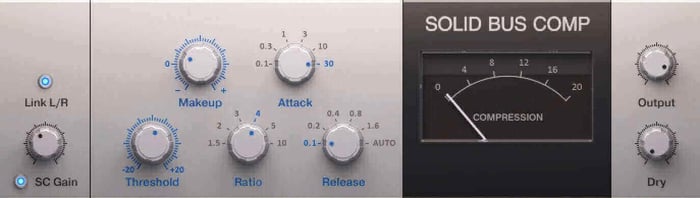
Solid Bus Comp, SSL style compression
SSL style compressor
Diode bridge compressors
In addition to taming transients, diode-bridge comps have their own grainy color. I think of them as shooting on grainy 35mm film stock. Diode bridge comps can be very aggressive, so they require the right material, and usually backing off the mix knob is a good idea. This example includes the Lindell 254E.

Lindell 254E, diode bridge compression
Diode bridge compressor
Saturation
We can think of saturators as coming in a few flavors:
Tape style saturators
These tend to thicken the lows and soften high-end in a non-linear way, giving you a warmer sound. Don’t forget to play with bias controls to alter the tone of your mix somewhat. Here is an example from Ozone, the Vintage Tape module.
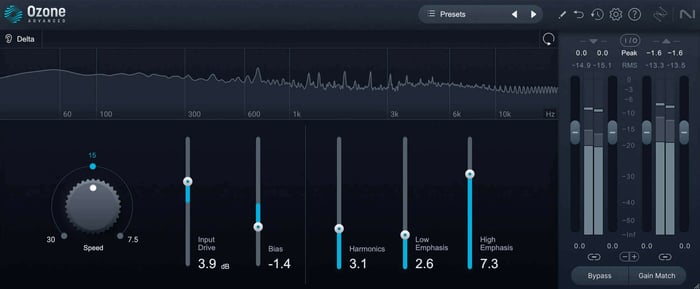
Ozone Vintage Tape saturation
Tape saturation
Tube style saturators
I like to use tube saturators for a couple of reasons. They can give the music a lively, holographic effect – an “opening up” of the depth of field. Also, they have a pleasant way of increasing the RMS value while decreasing peak energy. Translation: you can make things sound louder without measuring louder against digital zero. This is an example from Black Box Analog Design HG-2.
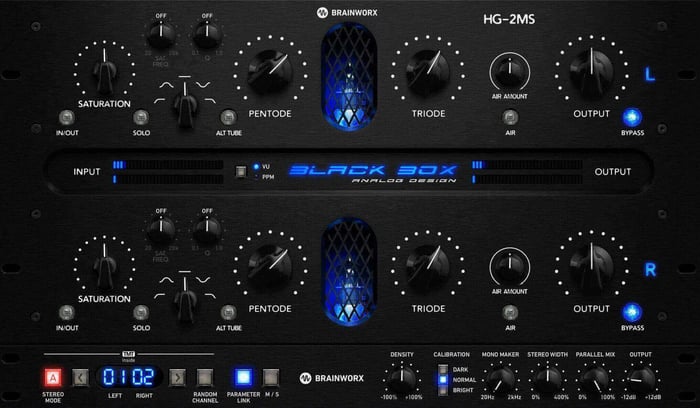
Tube saturation, Black Box Analog Design HG-2
Tube saturation
Multiband saturators
In the digital world, we have all sorts of tools that use multiband tech under the hood to apply saturation in a manner that is similar to EQ. You can boost or cut various ranges, doing so in a non-linear manner that reacts to your material. These kinds of processors demand rigorous study before use.
Ozone’s exciter has many different types of saturators on board that you can blend in a multiband manner, doing so in a variety of modes (stereo, mid/side, etc).
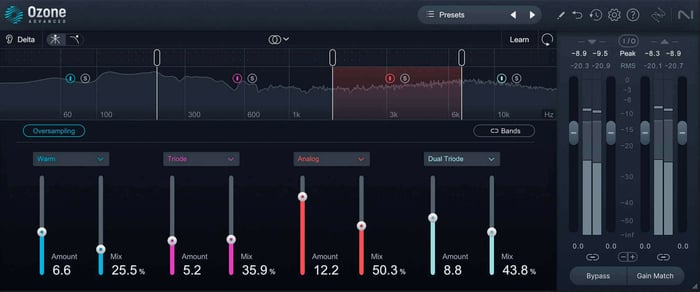
Ozone Exciter, multiband saturation
Clippers
Yes, it is okay to use a clipper on your mix bus – provided you know what you’re doing and why you’re doing it.
Hard clippers abruptly cut all peaks above a certain adjustable ceiling. This effect, on an already distorted genre such as EDM or metal, can help achieve a louder RMS value while decreasing peak energy, again allowing for a louder overall mix.
Soft clippers, on the other hand, have a knee going into the cut off, distorting things gradually as you approach the signal. You’re going to catch more than transients with a soft clipper, so make sure it benefits your material.
Either way, the trick is to be ever so careful – and to not fool yourself with jumps in level. This is best achieved by bringing the ceiling down against your input level, rather than pushing the input into a ceiling of 0 dBTP.
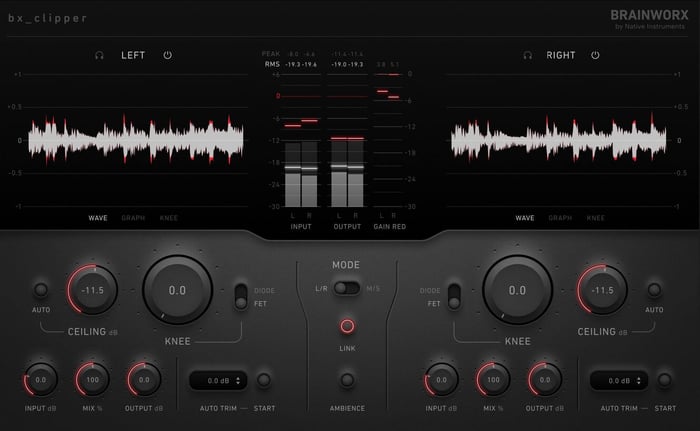
Soft clipping with Brainworx bx_clipper
This doesn’t sound too obviously different from the original mix, and the peaks are 5 full dBs lower – meaning you could do a lot more to this mix before it hits -0 dBFS than the original one.
I can think of at least two well-known mastering engineers (with the same first name) who would urge me to think twice before sharing this information. Nevertheless, it should make its way to your curious mind: it is not uncommon to use clippers on certain EDM as the first insert on the mix bus, just to get to the conventional loudness targets. For me not to tell you this would be irresponsible to you as someone working in the marketplace of an already distorted genre.
Still, do this with extreme caution.
EQs
Obviously you will EQ individual tracks in the mix, but it’s not wrong to apply a little mix bus EQ to help things cohere. You just need to know what you’re doing and why. Here are two common tricks seen on the mix bus, followed by something a little less cautious.
EQs with Pultec curves
You may have heard of the “Pultec trick,” where you boost and cut the same frequency at the same time. This can work well on your master bus, alongside a gentle high end boost to open things up. Indeed, putting a slight, gentle boost on the highs and lows at the outset can help you avoid overemphasizing these elements on the track level.
One such EQ includes Ozone’s Vintage EQ.
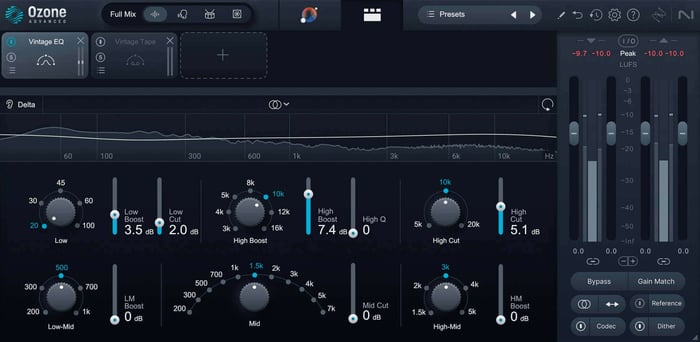
Ozone Vintage EQ module
“Mastering style” parametric EQs
In the late 1960s, two titans pioneered parametric EQ design and wound up giving us mastering EQs still in use today. Burgess McNeal’s take on parametric EQ resulted in the Sontec, and George Massenburg’s work resulted in the GML.
Both are fantastic – and fantastically expensive – EQs often used on the mix bus, not only for their curves, but for the euphonic quality they lend to material upon insertion. plugin Alliance has modeled both of these EQs, and here are some settings that can be quite nice on the master bus for the AMEK 250 EQ.
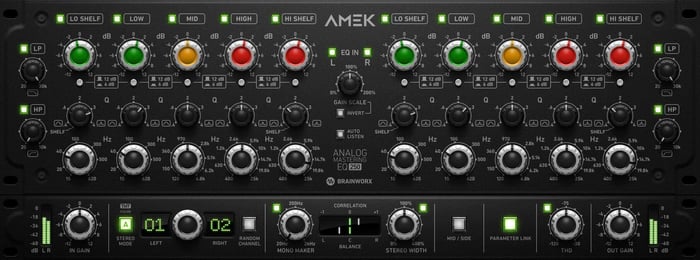
AMEK 250 EQ
The cut around 30 and the boost around 40 can help shape the lows, and the opening of the high end AMEK EQs is sweet. Both the lows and highs exhibit a different character from a Pultec-style curve. Use these subtly, but see if they keep you from overemphasizing things on the track level.
Esoteric EQs
We live in a golden age of digital, one where all sorts of new tech is coming out all the time. It can pay to practice with new EQs and see if they work nicely for your mix bus needs. One that comes to mind is the Harry Doyle Natalus DSCEQ, which can add subtle saturation as well as curve shaping:
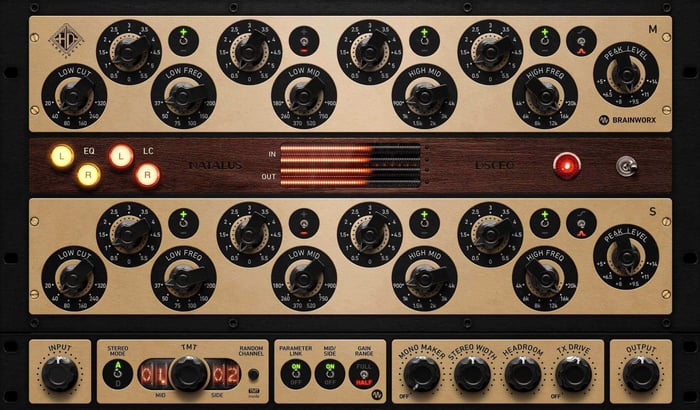
Harris Doyle Nautilus DSCEQ
Whatever you use, you must learn the gear: knowing how each parameter affects the sound is vital to achieving your desired results efficiently.
So how do you practice such a thing?
I have around twenty mixes lying around that I routinely use as source material for practicing new tools.
If you need mixes or multitracks to practice on from a variety of genres, you can get them from Cambridge Music Technology.
When a new plugin comes my way – one that can handle mix bus duties – I load an empty session, import some of my practice mixes, and start playing around with the plugin.
I keep a notepad and I write down all my thoughts and findings; this helps my particular brain to remember what I like and what I do not.
I might also make my own presets if I find certain settings work across a wide variety of material.
I’ll do this about fifteen minutes a day for a few days a row when testing a new plugin. If something immediately leaps out at me as being a winner, it makes its way onto my mixing template, which I update from month to month.
2. Start dialing in your processing when the static mix is done
When is the proper time to set up your stereo bus processing? I like to do it once the static mix is in place. When each track is balanced relative to the others, I like to start seeing what various compressors, saturators, and EQs do in my mix.
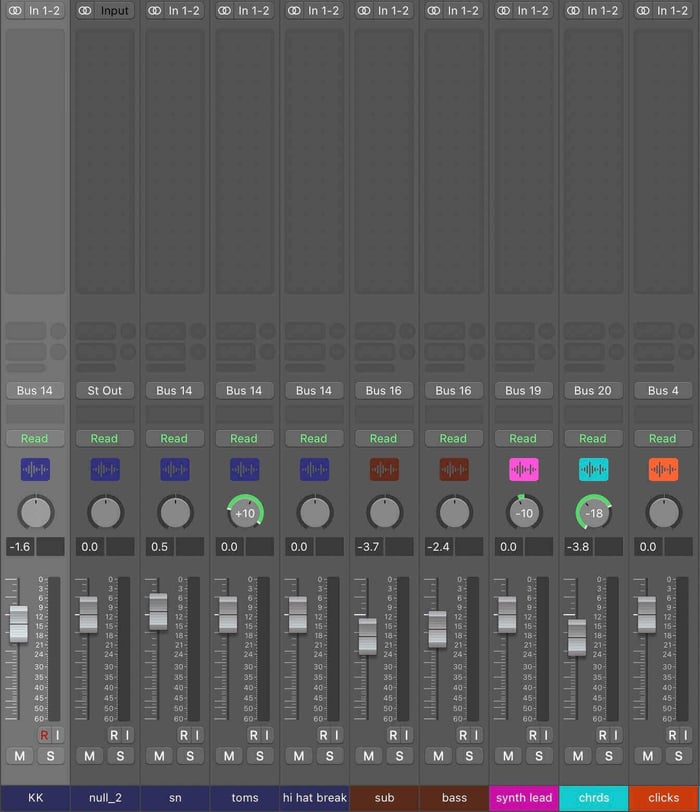
An 8 track static mix
3. Think “vibe” over “surgery”
When setting up your mix bus processing, prioritize enhancing the overall vibe and character of the mix rather than correcting specific issues. Focus on shaping the sound in a way that complements the genre, style, and mood of the music. Subtlety is your friend. Remember, it's about enhancing the emotional impact of the music rather than fixing every little imperfection.
4. Use your mix bus to inform some track-level decisions
With a good mix bus in place, you should find that the tune comes together much quicker. Indeed, mix bus processing might reveal where your attention needs to go first.
Say you add the Bettermaker plugin as I did in the previous example. Maybe it’ll wind up revealing your bass to be too hot, or too bassy. That is useful information, and you can use it to your advantage:
5. Tweak mix bus processing as you go
With your static mix in place, you may find you have less to do as you process individual tracks. For example, you may not need to emphasize the kicks with EQ, because the Pultec trick on the mix bus is taking care of that low end.
You may also find, after going with a little mix bus processing, that a top-down approach works better, where you start working on submixes after the mix-bus, and then you move on to the track level. That is also acceptable.
But one thing’s for certain:
As you progress through the mixing process, things will change: your time-based effects will add depth and excitement; automation will bring certain things to the forefront and others into the background.
Each move you make may impact the overall mix differently, so it's essential to readjust your mix bus processing as needed. Your ears will tell you when things need readjustment, but meters can help too.
Lots of people like to use a PLR meter, found in ADPTR Metric AB and SPL HawkEye.
Simply put, a PLR meter gives you an accounting of your dynamic range. Higher values mean your mix is less crushed. Lower values tell you your dynamic range is rather restricted. If things feel really harsh and closed in after a while, the PLR meter can tell you if compression is the culprit.
However, I like to use an oscilloscope. Oscilloscopes help my math-hating, visual brain see compression in action.
Get busy on the mix bus
These tips should get you very far, but do remember this: when it comes to mix bus processing, less is more. While it can be tempting to pile on multiple plugins and processing chains in an attempt to achieve a polished sound, excessive processing can result in a loss of clarity, dynamics, and musicality. Instead of overloading your mix bus with unnecessary processing, focus on using a few carefully selected plugins to enhance the mix subtly.
Speaking of the word “mix,” don’t be afraid to use that mix knob on saturators and compressors! Dialing back the mix knob can be an excellent way of achieving subtly. Here’s a little exercise for you in practice routines: find a setting you like on a compressor or saturator, and then bounce the session. Now, dial the mix knob back by ten percent, and bounce again. Take a break, come back, and listen to both examples. Match their loudnesses if need be. See how many times you find yourself preferring the subtler option.
Remember: embrace simplicity, trust your ears, and let the music speak for itself.