
Table of Contents
Have you ever been mixing a great track that sounded fantastic – except for one glaring problem: a moment of unprofessional distortion? Audio distortion can be any change in the natural shape of a waveform between two points in a signal path, but there are types of distortion that can make audio sound unpleasant, including the type that’s usually caused by an overdriven preamp or interface.
You might think the whole track is unusable when dealing with overloaded audio, but fear not: RX has many tools to fix the issue.
How to fix distorted audio with RX De-clip
Here is an example of a vocal I recently received from an actor for ADR looping.
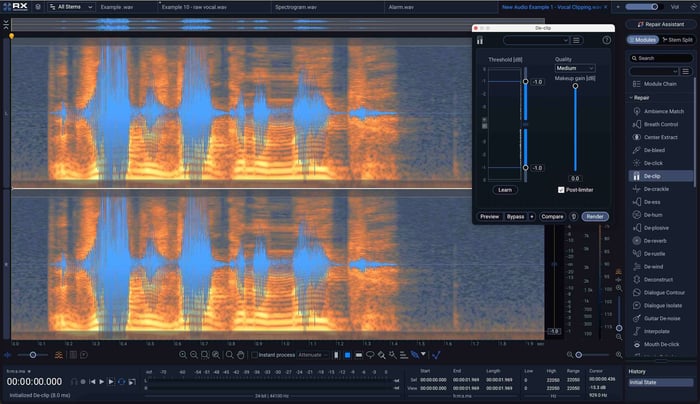 Distorted vocal
He’s clipping on the words “driver” and “not”, and this is something RX can easily fix. I opened the De-clip module, clicked the “Suggest” button, and hit Render, and the audio cleaned up nicely – but now note the true peak value:
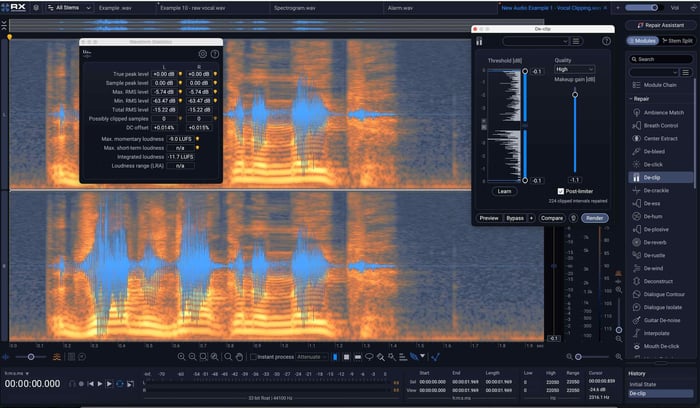
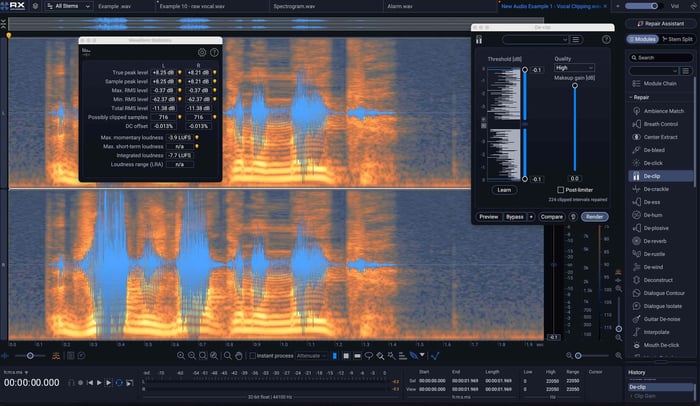 True Peak Value in RX
 Reconstituting the peaks has pushed the signal up past zero. In most real-world scenarios of 32-bit floating point files, this wouldn’t be a problem – if you’re controlling the audio to the very point the listener hears it, and if you know what you’re doing.
Just to be safe, I’m going to lower the gain of everything by 10 dB after the de-clipping.
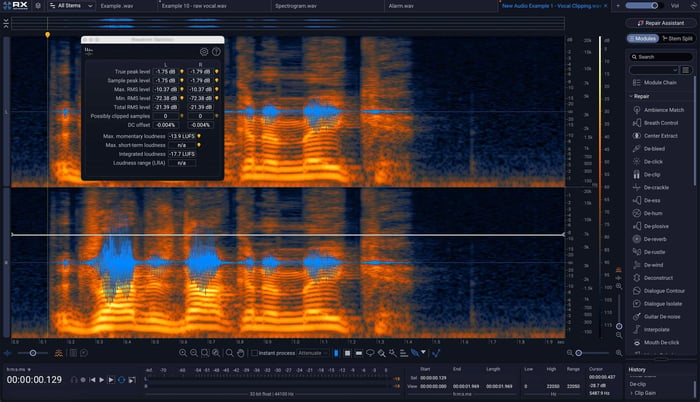 Lowered gain in RX De-clip
The audio, as you can hear, sounds fine – but it’s also a good deal quieter. Another thing we can do is work with de-clip’s built-in limiter, and set the output level at -1.
 Working with De-clip's built-in limiter
Not bad at all – but what happens if we normalize both of them to the same level? Turns out, they will sound slightly different:
The point of this exercise? Know your tools – and know why you want to use them: there could be a scenario where the baked in limiting serves the material better. But I wouldn’t know that if I didn’t know the de-clip module quite well.
This is a relatively clean clip. With some audio, treating the distortion gets trickier, requiring more complicated techniques. I’ll show you how to get more advanced a little while later, but first let me highlight a few different things about RX.
How to use RX De-clip as a plug-in
- Select the distorted portions of the audio and open RX De-clip as an offline plug-in. This is possible in Pro Tools (AudioSuite processing), Logic Pro X (selection-based processing), Reaper (item-based rendering), and in many other DAWs.
- Set the Threshold to identify where the De-clip algorithm should begin to apply processing—or use the Suggest button to have De-clip handle that for you.
- Click Preview to hear the results.
- Adjust the threshold and quality settings as necessary.
- Once you’ve found the desired settings, process the audio, and you’re done.
How to use RX De-clip in a standalone workflow
- Open an audio file in the RX Audio Editor, or in the external editor of DAWs like Logic or Pro Tools – or, in Pro Tools, send your audio to the standalone RX Audio Editor using RX Connect (AudioSuite menu in Pro Tools).
- Select the distorted portions of the audio and open the De-clip module.
- Repeat the steps above.
- In Pro Tools, hit “Send Back”, and then hit the Render button in the RX Connect AudioSuite; for Logic, you can overwrite the existing file (command+option/alt+S), and it will update accordingly when you switch back to the DAW.
Other De-clip tips
- Adjusting the quality. There are three quality modes in RX's De-clip module: Low, Medium, and High. The Low setting processes very quickly, and was designed for use as a real-time insert on an entire track in your DAW. Low quality mode processes very quickly, while high quality mode processes slowly but is capable of achieving better results. In many cases you will find that Low quality mode gives you great results. To save time, always start by previewing the Low quality modes first. You can also use the Compare feature to try multiple modes and preview the results.
- Zoom on the Histogram. Clipping can still occur on tracks with a low amplitude, and it can be hard to set the threshold and visualize the clipping on the Histogram with these tracks. The small + and – buttons to the left of the Histogram are designed to help with this.
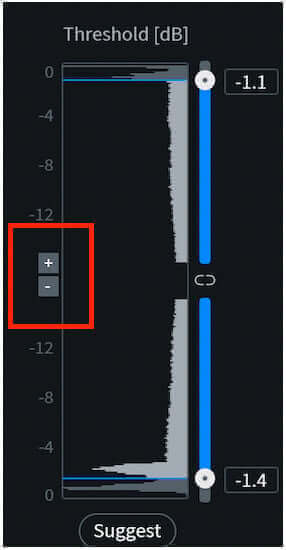 Zoom on the RX Histogram
- De-clip is not intended for brickwall-limited audio. It’s for audio that’s been captured too hot at the recording stage, or processed to hot by analog gear/analog-emulations. If you’re looking to repair the damage caused by brickwall limiters, the tool you want is in Ozone 12, specifically, the Unlimiter module. You can usually identify brickwall limiting visually; it does not display as a perfectly squared off waveform in the same way as clipping, and it doesn't contain the same noisy harmonic content.
- If you’re still having trouble, try using the RX Deconstruct module to extract the noise components of the distortion. This module can help remove additional artifacts beyond the clipped peaks in a waveform.
- Still hearing distortion? Check out the following advanced tips.
Advanced uses of De-clip to repair distorted audio
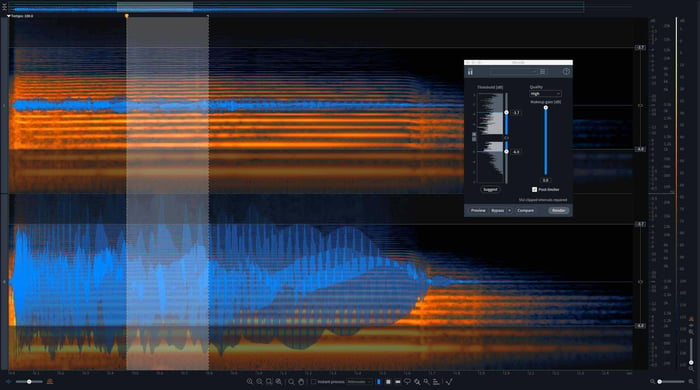
De-clip can actually be used in other ways as well. Take this electric guitar note, for example:
 Guitar note with complex distortion in RX
You’d think this would require De-crackle, and Spectral Repair. Nope—just De-clip! Observe these settings:
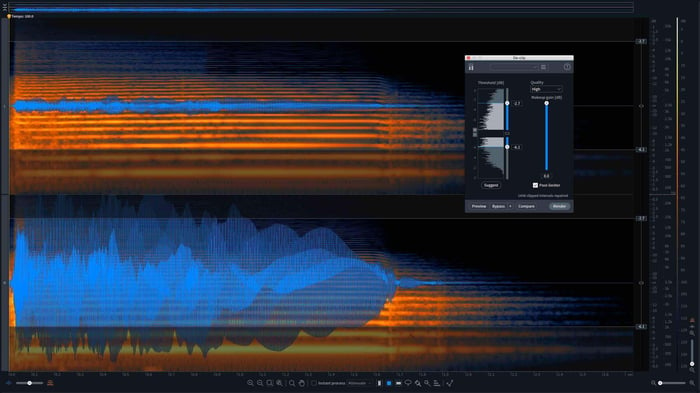 Guitar note with De-clip settings
And of course, the results:
 RX De-clip results on guitar
Don’t like the little burr halfway through? Select it with De-clip, hit learn, and run it again.
 Second selection for De-clip
Still hearing distortion on your audio? Let’s move on to some more advanced tools.
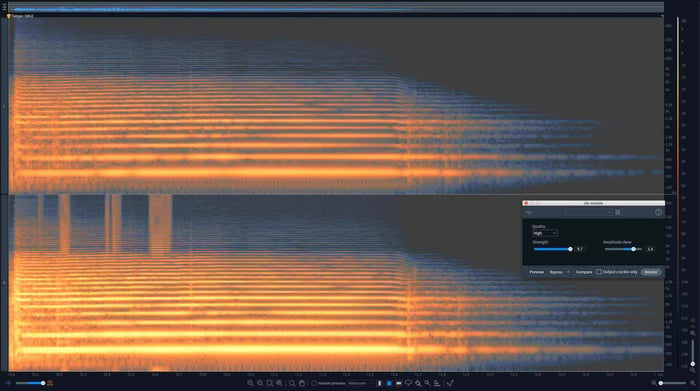
Use deconstruct for simple frequency-based distortions
RX Deconstruct is a module that separates tonal material from “noisy” signal, and lets you control the signal of both. I find it works quite well when used in frequency-selective modes. Let’s take our “The driver’s not gonna make it” clip and see what deconstruct gets us.
Use Spectral Repair for advanced audio editing
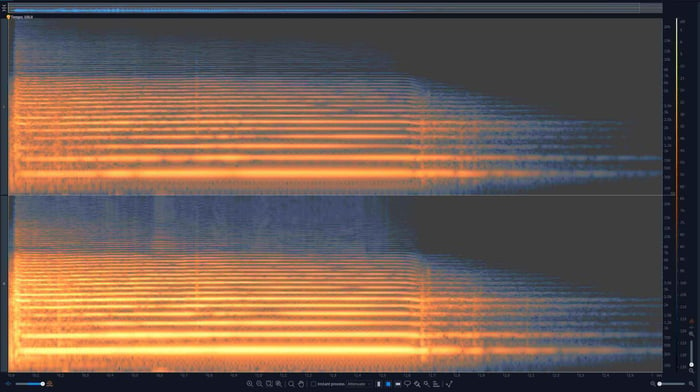
In this example, De-clip won’t fix the burr on the word “stop” because of the nature of the distortion:
Have a look for yourself at the problem:
 Vocal problems in RX Histogram
See the long unbroken line stretching horizontally past the selection points? That is the fundamental of the vocal. The lines lasting the same duration above it are the harmonics.
But within the selection boundaries, however, we can see another note has reared its ugly head—and with it, an entirely separate series of overtones. This is burr in the voice that I’d like to remove.
How? I’ll use the Spectral Replace module to remove these lowest overtones, interpolating a result that’s dictated by the audio on either side of the circled issue:
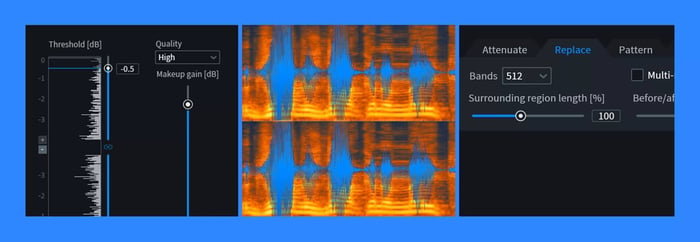
The offending issue lies in the high mids and highs, selected here:
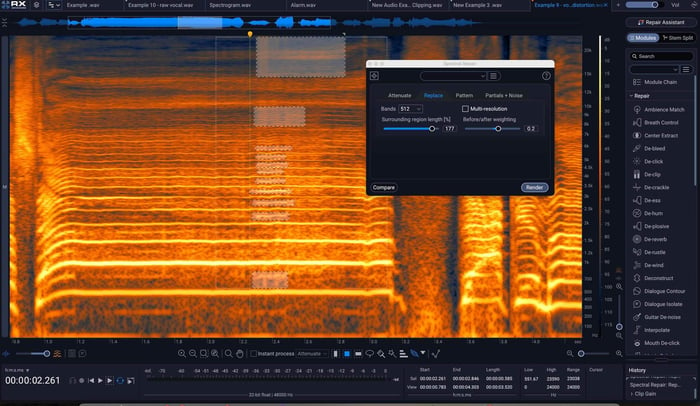 Vocal high-mid to high issues
Start fixing distortion in your tracks
We have only begun to scratch the surface of what’s possible in fixing distortion with RX. The tools are so versatile that the sky’s the limit when it comes to ameliorating audio issues. If you want to read more, be sure to let us know, and try out these tips in RX with a free demo.