
We all know mixing can be tricky. You might wrestle with muddy frequencies where instruments clash, struggle to balance the dynamics so your song hits hard but stays controlled, or wish your track had more width and clarity in the stereo field.
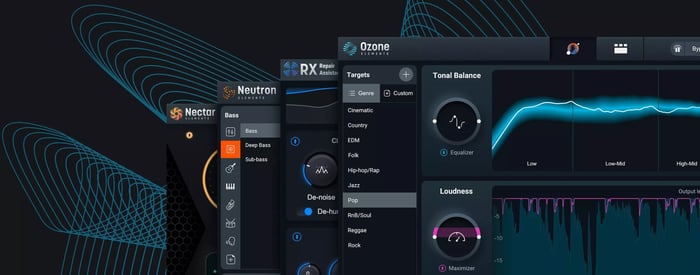
The great news is that Music Production Suite is here to be your ultimate co-pilot. This collection of tools is packed with smart solutions designed to tackle those exact issues – from Neutron's Mix Assistant giving you a perfect head start on levels, to the surgical precision of Ozone for mastering the final polish, and specialized modules in Nectar for vocals that sit well in the mix.
In this article, I'll walk you through how I used only the plugins in Music Production Suite 8 to mix a full song in just about three hours, transforming the initial raw track below to a finished, polished sound.
Mixing a song with Music Production Suite
We will be using iZotope’s ecosystem of inter-communicative plugins, as well as tools from Native Instruments and Plugin Alliance that are included in Music Production Suite.
This tutorial is meant to be viewed in small, bite-sized steps and actionable tips so it’s easy to follow along.
Before we begin: a note on the overall mixing approach
This is a speed run by one engineer working on one particular song (“Golden Hour” by Pete Mancini). It’s a song I’ve mixed before, albeit not for many years, so there is a bit of a leg up in that regard.
Just know this: what you’ll find here represents one approach to the craft of mixing, and one approach to using these plugins. I encourage you to take what you like and leave the rest.
I’m taking a top-down approach. I rely heavily on submix processing and try to do as little as I can in order to preserve the organic quality of the material I was given.
This is a 90s-style indie rock/Americana tune. A do-no-harm approach is essential to the artist’s intention. Having said that, a great deal of time was spent on individual instruments to get them all to gel and sit right – maybe just not exactly as you’d expect.
And now, let’s start this mixing guide with iZotope Music Production Suite.
How to mix a song with Music Production Suite
Starting your mix
1. Import and organize your stems
First, the stems go into a modified version of my template to preserve my routing scheme. They were organized by color and function, and routed into submixes before I even started listening.
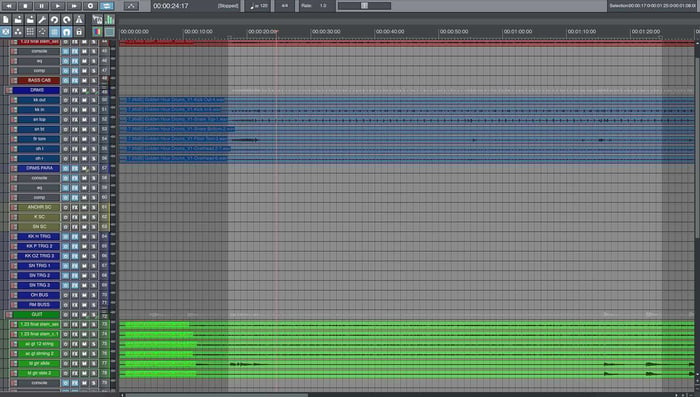
My organized mixing template
I recommend staying organized in your mix session, no matter your approach. It makes mixing so much easier.
2. Set the levels for good gain staging
It’s essential to secure proper levels and a good balance among instruments with gain staging. You can do this with tools like the Visual Mixer, if you like, but since I’ve been doing this a while, I find it’s fastest to go with ear and meter, using clip gain to get my tracks roughly balanced and sitting at a healthy level.
With everything in mono, I clip gain my way into a good starting place, making sure I’m mixing at roughly -16 LUFS integrated to start with, and peaking around -3 dB to stay clear of digital zero.
3. Load your tools for success
Load the tools you know you’re going to need now, at the beginning. In this case, I load Neutron on every instrument track and Nectar on my vocals. These will be my channel strip plugins for the mix.
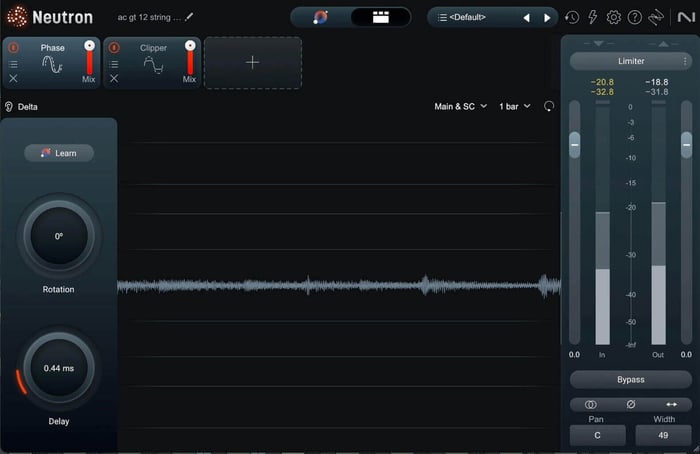
My user default of Neutron places the Phase module first in line, and that’s essential for a mix like this.
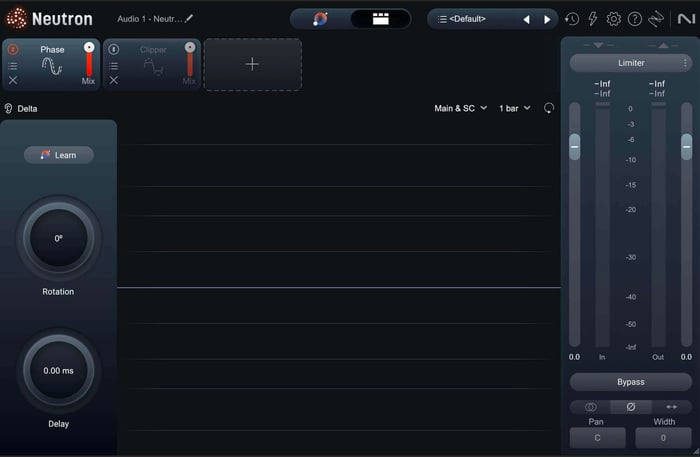
Neutron’s default opening puts Phase first
4. Get everything in its right phase
This is a song where many things are played live, multi-mic’d, in home studio environments, by musicians with a lot of heart – and not a lot of cash.
Phase rotation and time-alignment are going to be essential to getting the most natural and full sound I can.
- The drums are multi-mic’d in a home studio, so they’re going to need a nudge here and there.
- The bass is DI (direct input), but I’m going to add different amp simulations – one for growl, and one for an overall room sound. These simulations will rotate the phase by the very nature of how they are modeling analog amps.
- The acoustic guitar and the vocals were recorded at the same time, multi-mic’d as well. I may need to phase align here.
- The electric guitars are doubled, but are played so tightly that, at times, they cancel each other out.
I’m going to spend a lot of time with the Phase module, starting with the drums, in order to get things to sit how I want.
Mixing drums
Since drums are the rhythmic foundation of most songs, they need a solid balance of tone and phase. We’ll begin by meticulously addressing phase relationships on the overheads and toms, and use gating judiciously with a mix control to reduce unwanted bleed without sacrificing natural transients.
Then, we’ll move into creative sound design by creating a chunky drum "crush" mic and fabricating a custom fake room ambiance to add crucial depth and width.
We’ll finish with deliberate equalization moves on the kick and bus processing on the snare to finalize the drum sound.
5. Work on the phase relationships of live drums
I am going to get the stereo image I want out of these drums by using the Phase module in key places. I start with my overheads, which are a picture of the whole kit. Left to their own devices, they sound like this:
I don’t mind the stereo image they present. When I try to set them in “correct” phase with each other, I actually dislike the results.
So instead, what I do is slap the Phase module across the entire overhead bus, so that I can move them in better alignment with the snare mic.
I’ll also be using the overheads as a sidechain for the floor tom to get a better phase lock between these elements.
“Kick in” mic sounds fine, but “kick out” requires a push of the polarity switch – and nothing more for now.
In a mix with multi-mic’d instruments, the settings definitely change from mix to mix – but the approach I’m using doesn’t: I hunt around for the right phase relationships.
6. Gate drums for spill – when needed
I’m judicious about gating. By this, I mean I only gate drums when I don’t like what their spill contributes, either in terms of phase or tone.
For instance, I don’t like the snare spill coming from the “kick in” mic, so I’m fairly aggressive with gating there, settling on a multiband approach.
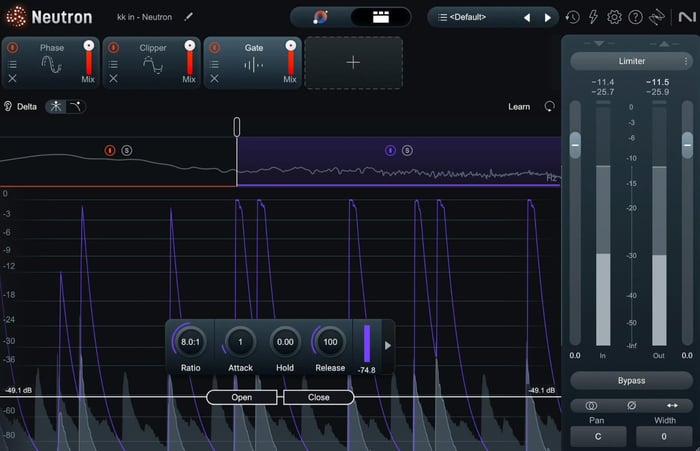
Adjusting the snare spill with multiband gating
I’m also gating the snare top to get rid of hi-hat bleed, because I want my hats coming from the left, not the center.
But here’s the thing: I’m using the mix control with both gates. Keeping it natural is key, and the mix control helps me keep things natural.
The floor tom gets aggressive gating, so it doesn’t contribute much besides the toms.
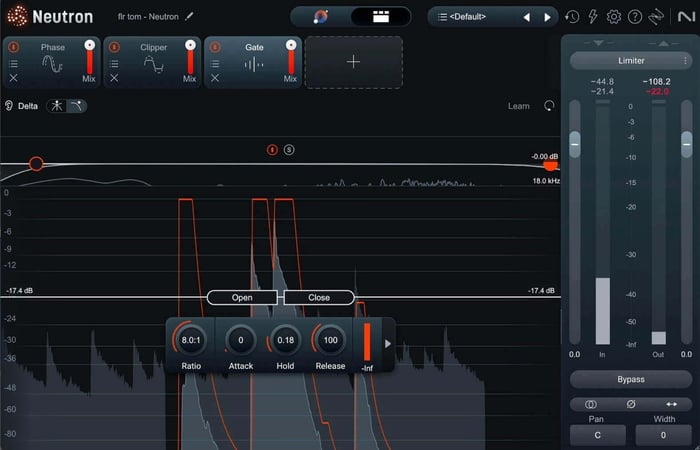
Gating on the floor tom
But now I start to notice things that I can do on a more creative level with the drums.
7. Create a drum “crush” mic with whatever you have on hand
Here’s our first foray into the creative. I’ve noticed that I generally like the tonality of the floor tom mic, so I’m going to turn it into a “crush mic” – a distorted, compressed sound, designed to add body to the drums.
I’ll copy the whole track, lower the tom hits and volume, and use the following settings in Guitar Rig 7 Pro.
Guitar Rig can be used on just about any audio source, not just guitar
Here’s what it will sound like as I edge the results into the overall drum balance.
This will be a nice way to get some character into the drum sound.
8. Create a fake room if necessary
These drums were recorded in a home studio, in tight conditions, with no room mic offered. I do want to add a room mic sound for the ambiance, so I’m going to create one.
Within the framework of iZotope Music Production Suite mixing, I’m going to use Neoverb for a tunable, tight reflection, and Dirt for some edgy distortion beforehand.
I am going to feed the overheads, alone, to a bus with these plugins on. I am also feeding the overheads as mono tracks – I want to create an entirely new perspective and stereo image from these drums using the reverbs at hand.
The trick will be in keeping them within the right phase relationship to the overall kit. That’s why I’ll spend a little time tweaking each of the algorithms in Neoverb.
I don’t want the effect to be obviously wet with reverb – that’s not what we’re going for – so we’re leaning into reflections, room, and chamber, carefully filtering things out with equalization for a more compact sound.
9. Equalize the drums with deliberate choices
We’re nine steps in, and I’m finally thinking about equalizing the drums. I told you it would be a different approach than what you might be used to.
First, the kick drum, which needs the standard equalization moves:
Next, the floor tom, which could use some shaping. I arrive at using dynamic expansion to beef up each of the hits.
Next, I notice a papery snare frequency that’s really bugging me.
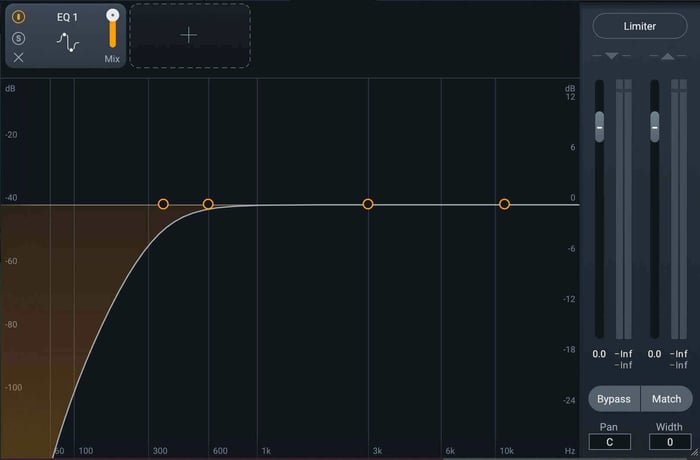
I hunt through all my drum mics to see if I can localize the problem, but it’s everywhere, so we turn to bus processing. I slap Neutron’s Equalizer right across the bus, making the band dynamic.
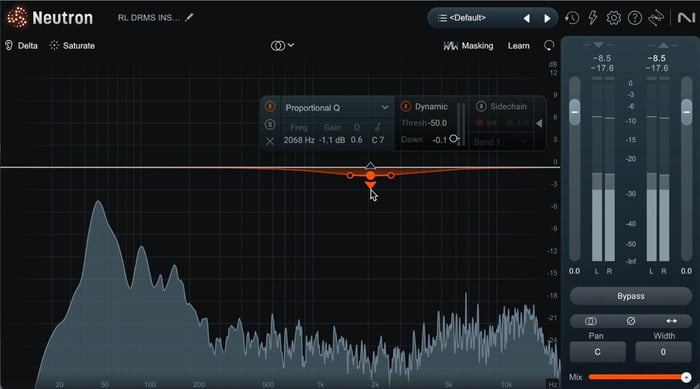
Using Neutron EQ to remove unwanted snare frequency across drum bus
Mixing bass
Now we shift our focus to the bass, which needs to be powerful, clear, and integrated with the kick drum. We'll start by crafting a rich and textured bass tone by blending the direct input (DI) signal with two distinct amp emulations – one for growl and one for an "amp in a room" sound – while utilizing a Phase module to align the phase between the signals and maintain a solid low end.
Once the tone is set, the key is ensuring the bass and kick drum don't clash; we'll use the masking meter and inter-plugin communication between the kick and bass tracks to visually identify and address these clashes.
10. Get a solid bass tone with Guitar Rig
I’m a big fan of adding amp emulations to DI bass. These help me get more meat into the sound. I wind up using a blend of three signals: the DI and two different amp emulations in Guitar Rig.
This setting gets me growl:
Our first bass amp emulation setup on Guitar Rig
And this one is my “amp in a room” sound.
This bass amp emulation gives us the sound of a real amp in a real room
Note the low-frequency shelf. I don’t want the feeling of stereo, chorusing bass in the lows here.
Because the amps naturally change the polarity of the signal, I’m going to use Neutron’s Phase module to delay my “growl” sound to preserve the low end I want.
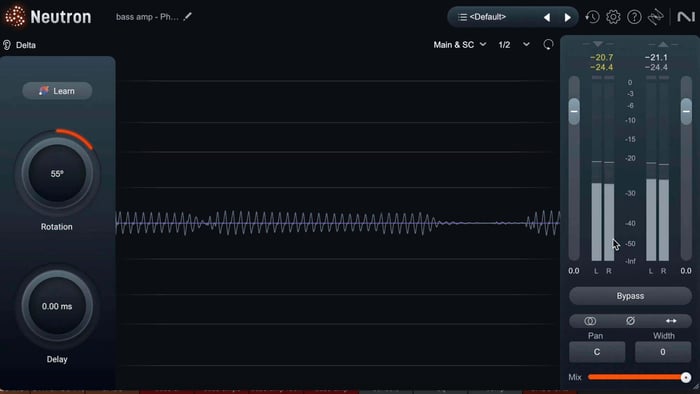
Adding the Phase module onto our bass
That’s my bass sound, handled, and here it is right now:
11. Use Neutron’s masking meter for bass and kick drum clashes
Unmasking in mixing is an essential step to make each element of the mix shine through.
I’m noticing that there’s a clash between the kick and the bass, so I’ll use the masking meter and inter-plugin communication between the kick and the bass to help iron things out.
I also decide to sidechain the bass to the kick in order to keep the kick drum relatively clear.
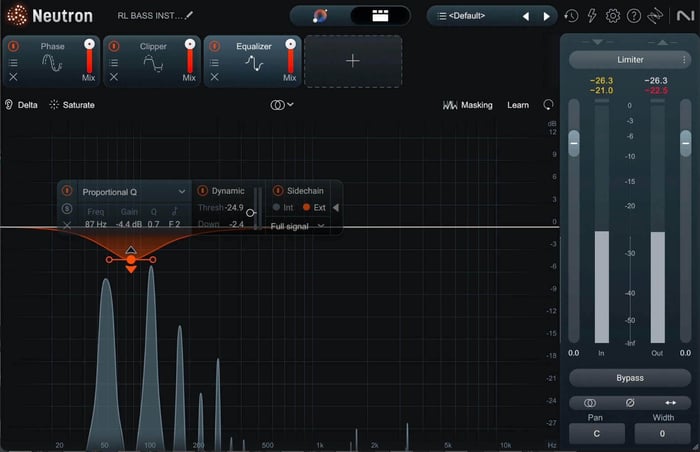
Sidechaining the bass to the kick
A word on frequency clashing and interplugin communication
The ability to see frequency clashes and deal with them in one instance of Neutron is extremely powerful. There’s a reason many plugin companies copied this technology, which iZotope pioneered in the earliest incarnations of Neutron.
However, I feel it’s necessary to issue a statement in favor of responsibility when it comes to frequency clashes:
Many people ask, “How do I fix frequency clashes between instruments?” without wondering if there is something to be gained by letting things clash. Spoiler alert: there is. Sometimes the rub is exactly what gives the song its spice.
If you are aggressive in carving every instrument out of the way of every other instrument, you will end up with a lifeless mix. It will be filled with strange resonances, and it’s not going to sound as polished as people who are, instead, judicious with frequency clashes.
Mixing instruments and vocals
With the rhythmic foundation set, we move to integrating the instruments and vocals, often keeping the bass active as a bridge between the drums and the rest of the mix.
12. Keep working on phase relationships with Neutron Phase
It’s time for mixing the guitars, and in this song, they pretty much mix themselves. A little panning is all that’s needed at first – as well as help from an unexpected tool: Phase in Neutron.
As you’ll see, rotating the phase is getting me more of a congruent and full mix out of these guitars, doing so in a more natural way than an equalizer, simply by controlling which frequencies cancel out in these tightly-chorusing guitar parts.
Rotating the phase on acoustic guitars
The same holds true for the electric guitars, which are made fuller by the subtle rotation of the Phase module.
13. Use Nectar for de-essing and compression on lead vocals
Now I start working on the lead vocal. I notice the esses are a bit much in the lower end of the sibilance register, so I flip in Nectar’s De-esser, followed by two compressors, in serial, for the classic 1176 into an LA-2A trick.
The first compressor will tame peaks, the second will average the levels, and my vocal will stay present without being overly squashed.
I also play with reverb and delay right in the Nectar plugin to get a jump on atmosphere.
I’m not afraid to use reverbs and delays on my channel inserts if these processes work – and I find they’re working here.
14. De-ess background vocals very aggressively
Your vocals are the star of the show – the highs need to be carefully managed: present, bright, but never harsh.
In this tune, I'm doing a lot of small things to nip and tuck the treble of the vocals as we move through towards completion (it’s a problem that needs constant tweaking as the mix moves on).
Background vocals, on the other hand, need to stay out of the way of the leads. The lead sibilance can often handle all of your sibilance. So, I’m aggressively de-essing each background part, from the chorus double to each vocal in the big backing stack.
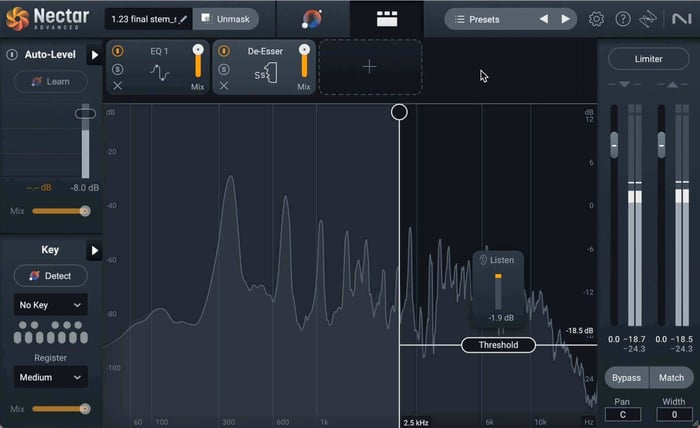
Adding Nectar’s De-esser to the background vocals
15. Use Ozone Stem EQ for noise reduction in the vocal
This vocal has a very special issue: it’s recorded at the same time as the guitars, and it’s also overly sibilant in the 2 kHz range.
If I de-ess the vocals in this range, I will ruin what the guitars are giving me.
Luckily Ozone can come to the rescue here: using Ozone’s Stem EQ, I can separate these vocals into two tracks – one with the vocals in solo:
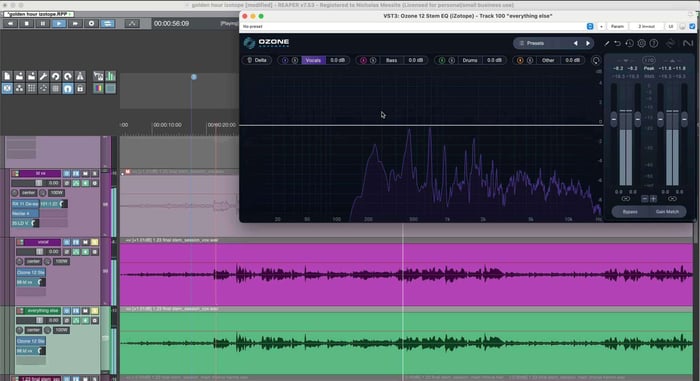
Using Ozone’s Stem EQ to separate the vocal
And the other with everything else in solo.
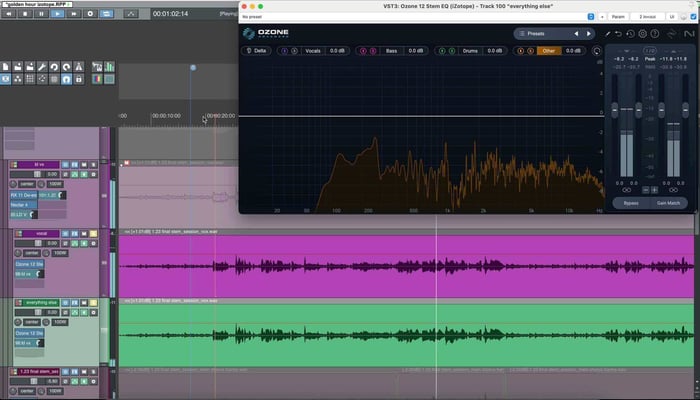
The other half of our separated vocal stem
I have now split my vocals and my other instruments sufficiently into two tracks. I can move ahead and de-ess only the vocal stem.
16. Layer background vocal stacks with Nectar
We’ve got a call-and-response pattern in the chorus, with the lead singing its declarative statement and the background replying.
Basic filtering and equalizing with Nectar on each vocal helps tamp down resonances I don’t like – nothing fancy, simple moves.
A high-pass filter in Nectar on vocals
Panned hard left and right, the four background stems go to their own bus, which gets some compression, saturation, and chorusing in Nectar. What I want to do is create a dreamy pad of vocals here, essentially out of two doubled vocal parts.
I send these vocals, in mono, to a parallel bus, and run some saturation, unison doubling with the Voice module, reverb, and band-pass filtering – all in Nectar.
There are only four background vocals, but I can make it sound like many more with Nectar.
Here’s how I do it.
I use basic equalization moves for cutting out certain frequencies in the vocal tracks, and on their bus, I use compression and reverb to get things to sit well.
I then route the vocal tracks to another bus, sending each vocal in mono here. Nectar goes on this second bus, and I slide in a bit of Backer, Saturation, and Voices for a micro-pitch unison spread effect.
These then get a little FXEQ for parallel processing to beef them up more.
17. Select lead vocal effects – carefully
I want some more effects on the lead vocals – namely, a tasteful reverb, a tube parallel compressor, and tape slap that I can automate into the chorus.
The tube parallel compressor will add beef and weight to the vocals, but I need to aggressively de-ess this compressor so that it won’t add undue sibilance. I set up Guitar Rig’s Tube Compressor, and use Nectar’s De-esser both feeding the compressor, and right after the compressor.
Next, a plate reverb on the lead vocal, one that’s clean and can stay out of the way. Aurora is the tool I choose, thanks to its automatic spectral suppression.
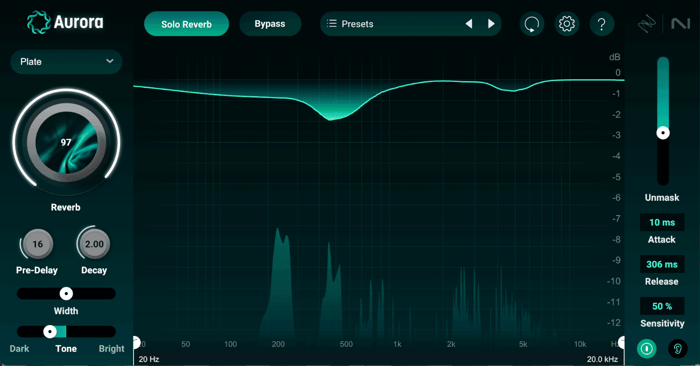
Plate reverb on the lead vocal
Finally, our tape slap, for which I’ll be using Guitar Rig’s Tape Echo – a particular favorite of mine. I’ll juice it up with Skreamer, and you’ll hear it going into context over all.
Further mix adjustments
Now it's time to think more about the relationships between whole categories of instruments. So, I begin a round of tweaking everything in context.
18. Guitar bus work with Ozone and effects equalization
I want some attitude in my acoustic guitars, so I use mid/side compression to accomplish this, as well as some Vintage Tape in Ozone. Then, FXEQ for frequency-dependent delay.
Turning to my electric guitars, I feel they’d benefit from the unique qualities of tape, as well as compression, and basic balancing equalization. Ozone comes in handy for all of this.
19. Think about the instruments in space
I now consider how I want these acoustic guitars to feel in terms of space. I opt to use a little stereo delay across the acoustic guitar bus, and I go for the bx_2500, followed by a little Flair for chorusing. This modulation effect will diffuse the delay without taking us into the realm of reverb.
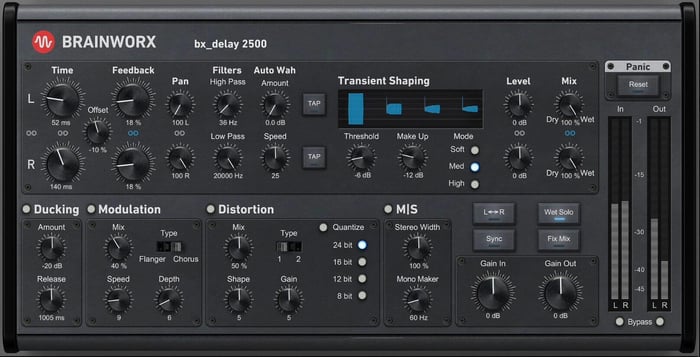
Adding stereo delay to the guitar bus with bx_delay 2500
20. Pay attention to your melodic instruments
I’ve got slide lead guitars that do subtle “scene setting” between verses. I want them to have space, but not too much, as well as aggression – but again, not too much.
Here I turn to Guitar Rig on the main lead bus.
Processing with Guitar Rig to give lead guitars space
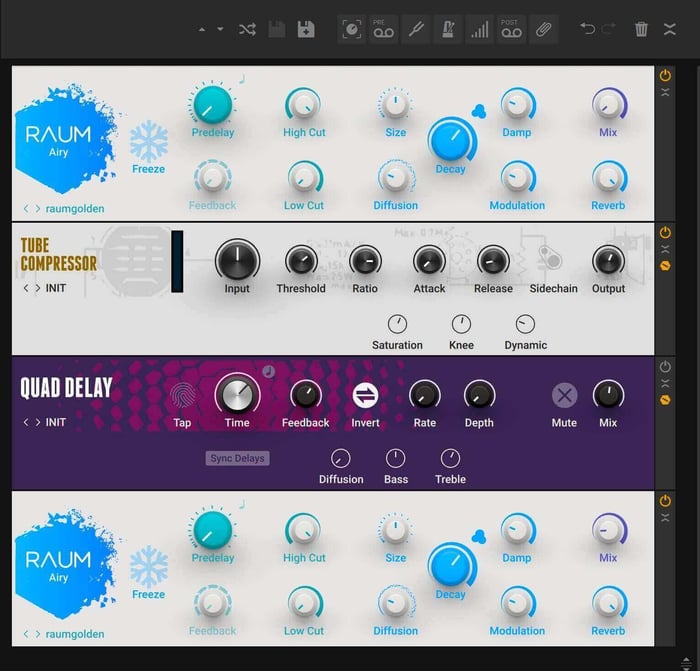
And then some reverb and Cascadia delay in parallel.
21. Help the drums pop with equalization and sample augmentation
Now my attention goes back to the drums. I realize my snare is boxy, not popping enough. I try an equalizer, but because of the way the drums have been recorded, affecting the equalizer of the snare throws my whole drum balance out of whack.
This is a perfect time to introduce sample augmentation, which I do in two ways. I use a fuzzy, short sample I took myself from a jazz record and edge that in. I also select a more roomy, ringy Ludwig snare I have from a sample pack and put that in as well.
Note: I am not using Music Production Suite tools for sample augmentation – but that shouldn’t matter to you: most DAWs have a way to trigger MIDI from audio these days. That, and a good sample, is all you need to do what I’m doing.
First, I look for a snare reverb that’ll fit. I’m thinking in terms of records I like, and I’m using my instincts. Something about the drum sound makes me think of my favorite Alan Parsons Project records from the mid-80s, so I’m chasing a reverb that sounds like “Prime Time” or “Since The Last Goodbye.”
I find it quickly with Equinox – and I like it so much, I save it as a preset for other songs.
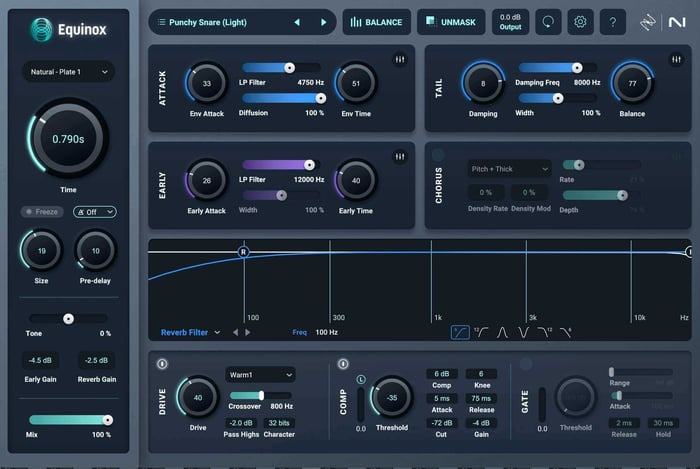
A fantastic old-school snare reverb with Equinox
I send my samples and some of my original snare to this reverb. I also use a technique called the bottom tape slap, where I delay the bottom snare mic and send it to the verb. This adds a more complex spatial element to the verb’s hit, without extending its decay time.
Now that I have the crack and heft I need from my samples, I filter my original snare a bit to get rid of its mid-range boxiness.
I wonder if the kick, too, needs some help to pop solidly. I don’t want anything too flashy or clicky or pointy or modern. I want a plain and simple thump. I chose a sample my friend Jon made off one of his synthesizers that fits for this purpose and blend it in.
Stereo bus and final touches
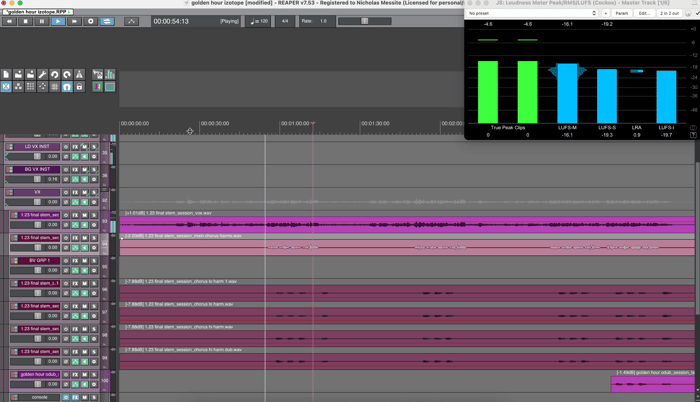
I’m now at a place where I want to play around with my stereo bus and see what needs doing across the mix level. Since I’m using iZotope Music Production Suite 8 mixing tools to get to where I need to go, I am going to use this tried-and-true method to judge where I’m at.
22. Use Ozone’s Master Assistant as a mix judge
I’m now going to run the chorus of my mix through Ozone’s Master Assistant in custom mode, setting an Indie Rock profile and a loudness target of -8 LUFS.
I have been working continuously for 2 hours now without a break or a reference check. To a certain extent, my ears are now too accustomed to whatever issues might actually exist in this mix.
A word on AI assistants: AI is a sticky topic these days, but it doesn’t have to be if you know how to use AI-enabled tools as helpers rather than crutches. Running this tune through the Master Assistant isn’t going to get me the product I want to release to the world, as you can hear below.
What I am getting from this test, however, is a second perspective, and the perspective is useful for realizing two things:
- These moves are what Ozone feels are required to get the mix to -8 LUFS with as little compromise as possible. Even if I don’t like the result, I can look at these equalization curves and dynamic choices to see what is being done to get to this commercial loudness target.
- I like what Ozone is doing to the low mids and the overall width. If I take Ozone out, the mix now feels chunky and weirdly not commercial. This is an equalization decision – specifically, the low-mid scoop. Likewise, there is a roominess and fun width signature to the mix, thanks to the Imager. I like its expansive feeling.
The problem is it’s too much for the whole mix – I need to implement these moves at the track or bus level.
23. Take a break at the right time
I’ve worked for two hours, so it’s time to take a break. Taking a break is very important, and this is a great time to do it.
24. Allow yourself to make mistakes
When I come back to the mix after a very long break, I find that I chase my tail for 30 minutes. I make mistakes regarding the vocal’s sibilance and the drums that break the whole mix, making everything sound worse.
After 30 minutes of this, I discard changes and revert to a previous mix. I recognize I have been chasing my tail – but it’s not wasted time. In seeing what doesn’t work, I have a better idea of what will.
I walk away from the computer for a shorter reset, and when I come back to the project, I start from the same place I had before – from the previous mix’s starting point, discarding everything I’ve done in this session as though it doesn’t exist.
25. Adjust your submixes
I’m liking the mix, so I’m going to do some small things to get close to the finish line. I'm not going to show you all of the processing here, but rather share a list of small tweaks that you could consider making when you're nearing the end of your session.
Drum submix:
- Apply mid/side compression to add dimensionality and punch without overly collapsing the stereo width.
- Use mid/side excitation to subtly emphasize the kick, snare, and cymbal sizzle.
Bass submix:
- Utilize excitation to specifically emphasize the detail of the finger noise and texture.
Harmonic instruments submix (Guitars, etc.):
- Apply compression to glue the elements together and provide dynamic consistency.
Lead vocal bus:
- Perform EQ sculpting to reduce low-mid buildup.
- Use excitation to add controlled low-mid warmth back into the signal.
- Apply excitation for a shimmering high-end boost.
- Use a mid/side processing trick to control harshness: reducing brightness in the center channel (mid) while adding brightness to the side channels (side).
Background vocal bus:
- Apply parallel compression to help the background vocals sit better and feel more anchored in the mix.
28. Adjust your master bus (if you’re the final say in loudness)
I’m treating this mix like I’ll be the one who gets it to commercial level. So, it’s time for overall stereo bus processing.
I decide to keep the final Imager, Clarity, and Stabilizer processes, but uses them in very small, subtle amounts to enhance the mix without sounding over-processed.
I also use a Vintage Compressor for color, opting for stereo operation over mid/side, as the latter pulled the mix apart. The compressor is effectively used in parallel by blending the wet/dry signal for a gentler effect.
For loudness, I use a Maximizer initially as a clipper to catch peaks.
A Vintage Limiter is added for soft-clipping saturation, followed by a second Maximizer to reach the target loudness.
And here are the final steps I implement in Ozone:
- After A/B testing reveals the initial loudness chain introduced unwanted distortion and flatness, I compromise by clipping less, reducing the amount of Vintage Compressor, and adjusting its sidechain to prevent the vocals from over-triggering it.
- I decide to use a different IRC algorithm for the Maximizer to find the least intrusive sonic artifacts. The overall loudness target is lowered from 7 LUFS to 8.8 LUFS to preserve the mix quality.
- I use the Bass Control module to refine the low end, making the kicks punchier and tightening up the sustained bass notes to prevent "blooming," which ensures the mix translates better on systems with subwoofers (like car stereos).
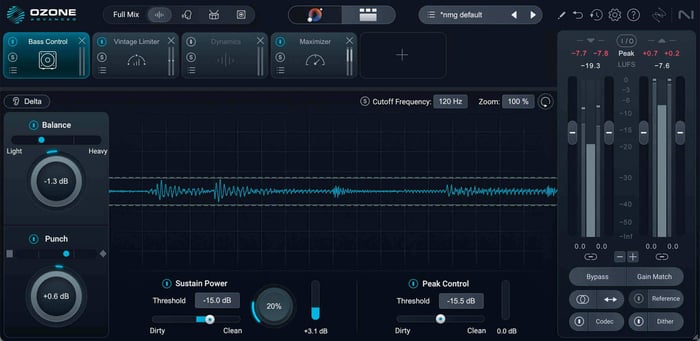
Adding a bit of Bass Control
29. Make yourself a simple punch list for final tweaks
After I take another break, I listen to the mix all the way through and I make myself a simple punch list. A punch list is a construction term meaning “the last list of lingering small items that you need to address before completion.”
I write myself the following punch list:
- Take out the low frequency in the sides of the parallel drum width bus
- Take out low mids in the snare reverb
- Take some low frequency and the overall level in the bass instrument
- Take out some level in kick drums
- Do some more high-frequency taming in the vocals for those spitty esses (I’ll use Ozone Dynamics and Ozone Impact for this on the vocal bus)
- Narrow the width of electric guitar frequencies around 900 to 2k for mono compatibility (I’ll do this with the Imager, narrowing sides and restoring sides in these ranges)
- Take down all reverbs
- Automate reverbs up one dB for the chorus
- Take down all background vocals
I execute these notes. In fact, when I bring the bass and kick drum down, I notice I can push harder into the limiter with less gain reduction (funny how that works). I’m back up at a more commercial loudness target, and I’m good to print the mix.
Try Music Production Suite today
This mix took three and a half hours, and it sounds pretty good. Part of that is experience, and part of that is using these tools effectively.
There was no endless plugin hunting. No second-guessing whether you have the right tools for the job. Everything one needs to mix and master a professional song was right here in this bundle – and now you know it all works together.
If you've been on the fence about Music Production Suite, or if you already own it but haven't fully explored what it can do, let this be a signal to dive in. Load up a project, set a timer, and see how far you can get. You might surprise yourself with how quickly you can work when all your tools are designed to communicate with each other.
Now it's your turn – pick a song and start mixing!